Marty McGuire

Posts Tagged makerbot

2011
Thu Feb 24

Thing-a-Day 2011 #24 - Hershey Fonts in JS, now sized for Unicorn Plotting!

This post used to be on Posterous. I rescued my posts before Posterous shut down and am now sharing them here.

I tweaked my little Hershey Fonts in JavaScript toy a bit. Now, the SVG data that it produces is at the right size and scale to plot on a sticky note on a MakerBot Unicorn.  Save the SVG content, load it in Inkscape, and save it as .gcode using my Inkscape extension for Unicorn.

At long last, after a bunch of little thing-a-days, I can write out a sticky-note:

Belaird
Save the SVG data and open it in Inkscape:
Belaird-inkscape

And save it as G-Code for plotting on the Unicorn!

Belaird-gcode

Matt Griffin was kind enough to plot it for me on one of the Thing-O-Matics at the BotCave:

Belairicorn

... sorry for the Bel-Air... :)

You can play with it here: http://schmarty.net/hershey_js_demo/

Sat Feb 19

Thing-a-Day #19 - Cube Gears!!

This post used to be on Posterous. I rescued my posts before Posterous shut down and am now sharing them here.

Today I finished and assembled the awesome Cube Gears by Emmett from Thingiverse!

They are so much fun to turn. Printable working gears for the win!

http://www.thingiverse.com/thing:6073

Photo
Mon Feb 14

Thing-a-Day 2011 #14 - Sticky Note Tweet template for Unicorn

This post used to be on Posterous. I rescued my posts before Posterous shut down and am now sharing them here.

I've been toying with the idea of cool automatically generated plots for the Unicorn pen plotter. This one is an experiment in laying out a tweet for plotting on a sticky note.

It should be possible, layer, to use this as a template for creating new plots! Could be kind of fun.

Feel free to grab the file on Thingiverse.

http://www.thingiverse.com/thing:6425

Tweet
Wed Feb 9

Thing-a-Day 2011 #9 - Plots of the 2-color Baltimore Node logo!

This post used to be on Posterous. I rescued my posts before Posterous shut down and am now sharing them here.

I made this version of the Baltimore Node logo the other day in Inkscape, but wasn't at home to test it. Here are the resulting plots on both EggBot and Unicorn!

The Unicorn version came out a little messed up due to my sizing the file wrong - the pen went off the edge of my sticky note pad and mussed everything up. I resized the plot to fit the sticky note fine, but had some pen registration issues with the now-crumpled sticky note pad. I'll probably try this again later with some nicer stock.

New files and more detailed description over on Thingiverse.

Node-2-color-eggbot
Node-2-color-unicorn
Wed Feb 2

Thing-a-Day 2011 #2 - New features for inkscape-unicorn: pen registration and homing support

This post used to be on Posterous. I rescued my posts before Posterous shut down and am now sharing them here.

Today I made some improvements to the inkscape-unicorn plotter extension that I released yesterday.

Inkscape-unicorn-reg-and-homing

Specifically, I've added two things:

  • The option to do a pen-registration check at the beginning of each plot, taken from mifga's original.
  • The option to set where "home" is, for people who like to start their plots with the platform anywhere other than in the center.

This should help make some nice plots!

Tue Feb 1

Thing-a-Day 2011 #1 - Unicorn Pen Plotter extension for Inkscape!

This post used to be on Posterous. I rescued my posts before Posterous shut down and am now sharing them here.

I spent some time this weekend making this plugin and today went through the process of releasing it via GitHub and posting it to Thingiverse: http://www.thingiverse.com/thing:5986

Inkscape-unicorn

One problem that has often plagued users of the MakerBot Unicorn is the long and confusing chain of tools required to go from a nice vector drawing to a G-Code file that can be plotted from ReplicatorG.

mifga did an awesome tutorial that made it possible to understand the steps needed to work all of these tools, but it was obvious that something better was needed.

So, I made a mashup of scribbles.py and the Egg-Bot Driver for Inkscape to bring you the inkscape-unicorn extension for Inkscape!

Once installed, this extension allows you to save files in “MakerBot Unicorn G-Code (*.gcode)” format!

Learn more, download, and contribute at the GitHub page for this project:

https://github.com/martymcguire/inkscape-unicorn

If you’re desperate, you can also download the zip file attached to this thing, but please consider getting the latest version from GitHub. :)

Thanks to langfordw for the original Unicorn Logo used as an example on this Thing.

2010
Fri Oct 29

File cabinet replacement bracket

Files

file_stand_clip.stl
26284 bytes. Updated
file_stand_clip.scad
817 bytes. Updated

This work is licensed Public Domain.

Description

Time to get organized!

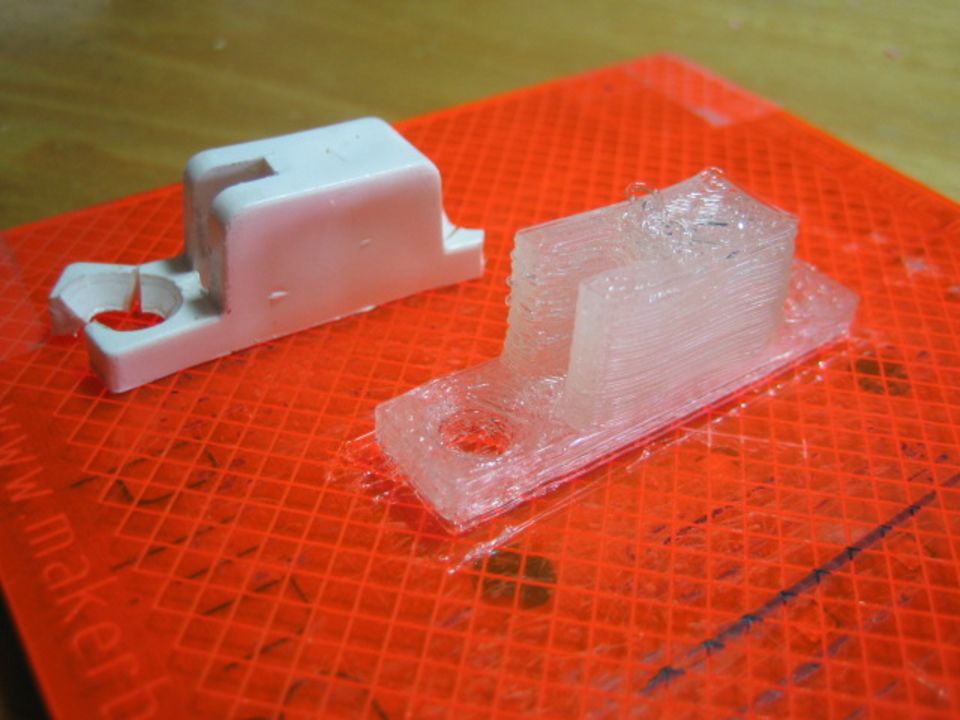
For years I’ve had a pair of metal interlocking file stands in a set of wood drawers for holding files. For almost as many years, the plastic brackets that secure them in place have been broken and useless, letting files flop around at will.

Today, my partner offered a trade: if I fixed the file cabinet, she would do all of the house cleaning. Needless to say: OFFER ACCEPTED. :)

You can tell from the pictures that I’ve got a long way to go as far as quality settings with the PLA 4043D and MK5. The MK5 puts out plastic FAST and the PLA stays hot for quite a while, allowing it to sag. I’m sure I could improve this with some cool settings, a faster feedrate, lower temp, maybe a fan blowing on the work piece, etc. Instead, I padded out the values for the holes and hollow areas with some multipliers in the .scad file and everything works great!

Instructions

  1. Measure out the clip that you’re replacing.
  2. Update the .scad file (be sure to curse me for the sloppy code) and export STL.
  3. Use Pleasant3D or ReplicatorG to center the object in the STL.
  4. Slice.
  5. Print (x 2).
  6. Screw into place.
  7. File!
Sun Oct 24

Experiments with PLA 4043D

Bottle Opener made from PLA 4043D

As I said in my last update, I finally upgrade MakerBot #131 with a MK5 extruder because it reportedly works great with the new PLA 4043D.

I’ve been having fun printing with the various colors of ABS that MakerBot offers, but have always been somewhat envious of folks that have been printing successfully with PLA. I bought 5lb roll of the original 4032D that MakerBot sold, but ended up putting it on the shelf after reports from other operators that it was destroying their MK4 extruders.

Getting the new PLA printing was surprisingly easy, given the challenge of using a new extruder (which needed temperature, PID, and flow rate calibration) and it’s the first non-ABS plastic I’ve printed, so it will have different optimal printing temperatures and more.

I haven’t carefully calibrated the thermistor on my MK5, and I wasn’t sure of the right temperature to extrude PLA, so I started by setting the temperature to 180ºC and attempting to push some filament through by hand.  I raised the temperature slowly until it became easy to push through by hand, around 195ºC.  I had not yet locked down my PID settings, so I was getting some wild temperature swings.  To be safe, I set the temp to 200ºC and started printing my favorite bottle opener from Thingiverse.

It turns out the flow rate for the MK5 is a lot higher than it was for the MK4.  After putting down the raft, I was having trouble with the filament stripping inside the MK5 due to backpressure.  Still, by paying attention to the print and tightening the thumbwheel whenever the filament slipped, I was able to get a completed bottle opener.

It was then that I noticed two things:

  • The top two layers of the object sagged deep into the honeycomb fill layers below, giving a terrible finish on top.
  • PLA has no give, so there was no way that a penny would fit into the slot.  I have some nice bruises from trying to make it fit. :)
To fix the stripping and sagging problems, I figured that I should increase my Feedrate - the speed at which the platform moves to catch the extruded plastic.  I figured that a too-low Feedrate would cause some back pressure when printing the raft (leading to stripping), and would contribute to sagging overhangs.  I also guessed that the sagging is due in part to the high thermal mass of liquid PLA allowing it to sag before it cooled, so a lower extrusion temperature would let it solidify sooner, leading to less sagging.  I still use skeinforge-0006, so these settings are in "raft.csv" (various temperatures) and "speed.csv" (Feedrate), respectively.

So, some calibration prints:

Bottle opener calibration prints with PLA

Starting with my first successful print in the upper-lefthand corner, with the temp of 200ºC and a feedrate of 26.5mm/s (which was working for my MK4), I slowly lowered my temp and increased feedrate.  At 180ºC I had a failed print due to the PLA freezing up, so I am going to stick with 185ºC going forward.  Increasing the feedrate by 25% immediately solved my filament stripping problem, but still left a pretty nasty top layer.  Increasing beyond that smoothed out the top pretty well, and left clean enough slots that I could actually insert some coins, albeit dimes rather than pennies.

I may try increasing my feedrate further, but I found an odd result when going from 36.4375mm/s (slower, should have thicker walls) to 38.26mm/s (faster, should have thinner walls). Namely, they both seem like very solid objects, but the dime slid nicely into the slower-printed version using the edge of a desk, while I had to take a hammer to the faster-printed version, and actually ended up bending the dime rather than driving it into the plastic (PLA is tough stuff!).  I would have expected the opposite.

Anyway, I hope these results are useful for some folks.  I hope to improve my calibration a bit more, and trying out the MK5 with my old roll of PLA 4032D.

MakerBot #131 Gets a MK5 Plastruder!

MakerBot 131 w/ MK5 extruder and PLA 4043D

Actually, all sorts of new and exciting nonsense has happened to MakerBot #131.

I was excited to order get my MK5 Plastruder kit and join all of the cool people who have left the pinch-wheel and nichrome behind.  Unfortunately, I ran into some problems early on, and after buying some cool thermocouple parts to try calibrating everything, finally determined that I had a bad thermistor.

So, I decided to put the MK5 aside and moved on to some entirely unrelated projects.  I assembled a Cyclops 3D scanner (I need more practice, but it’s promising!), and printed a pink, printable version of the Unicorn pen plotter (with some better-than-expected results - hence the Post-It Notes all over the ‘bot).  I had generally decided that the MK4 was Good Enough, and would come back to the MK5 when it died.

That was all, of course, before the new MakerBot PLA 4043D came out.  Once I got my hands on it, I had to go for the upgrade.  So, MakerBot #131 is now running the MK5, with the new relay board mounted with the official mounting kit, and the extruder controller mounted with donutman_2000’s awesome printable mount.

Stay tuned for details about my experience with the new PLA!  I am excited.

Sat Sep 18

Tripod Mount for PS3 Eye

Files

CamHolderTripodMount.stl
137284 bytes. Updated
CameraHolder.stl
236284 bytes. Updated
CamHolderTripodMount.scad
1368 bytes. Updated
⮩🛠 This is a derivative of MakerScanner v0.3 by abarry.

This work is licensed GNU - GPL.

Description

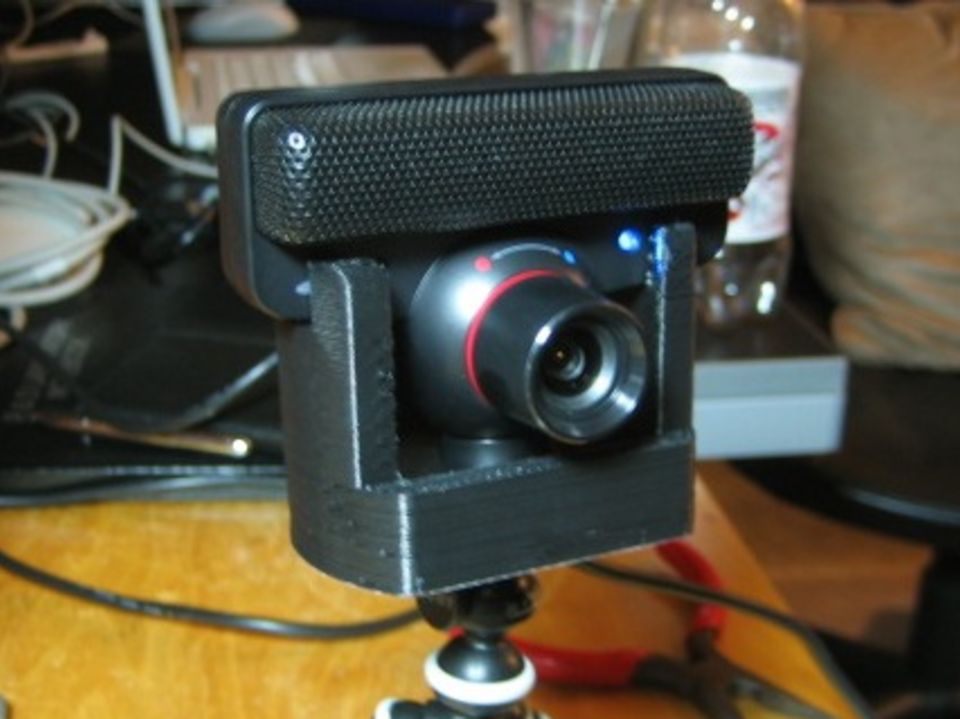
Put your PS3 Eye on a tripod! Why not?

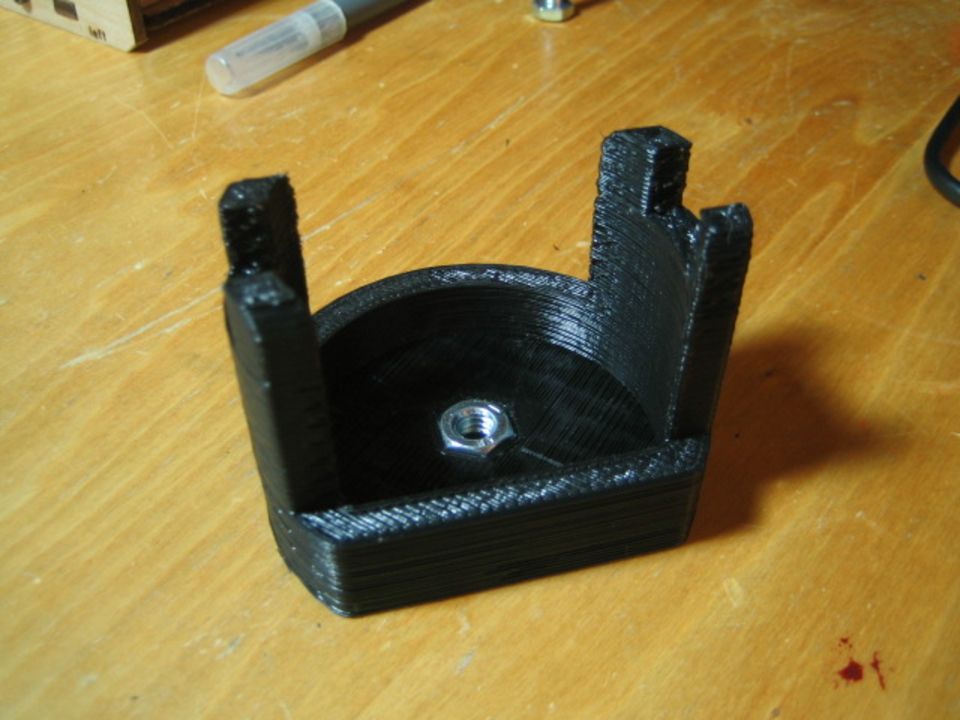
Starting with the CameraHolder.stl from abarry’s MakerScanner 0.3 (thing:3946), I wrote a goofy little OpenSCAD script to chop off some of the scanner-specific parts, thicken the base, and cut out space for a standard tripod 1/4"-20 hex nut and bolt.

License is GPL based on abarry’s MakerScanner license and use of Catarina Mota’s shapes.scad (http://www.thingiverse.com/download:11183).

Instructions

  • Print!
  • Insert 1/4"-20 hex nut!
  • Insert PS3 Eye!
  • Attach to tripod!
  • ???
  • Profit!

If you want to make changes, grab all relevant files:

Open CamHolderTripodMount.scad in OpenSCAD and do your thing!