Marty McGuire

Posts Tagged 3dp

2025
Fri Sep 12

Machine knitting: taking a stand

In my apartment we are lucky enough to have a big countertop, open on three sides, creating a nice flat project surface for even sprawling projects.

However, we also have a lot of projects that compete for this space! Producer Amy is often working on increasingly complex sewing projects that require the entire surface. Likewise, the knitting machine occupies an entire edge of the space. Both of these are time consuming, with potentially complex setup and teardown procedures. How can we accommodate both fiber arts hobbies?

You may not be surprised to find that I found inspiration from Carson (@KnitFactoryImpl) on YouTube. In her videos I noticed a low-profile metal stand that basically amounts to a single horizontal bar and four splayed legs, clamped together by a couple of big screws. She mentioned briefly that they aren't manufactured anymore, but you can find them on eBay "from time to time".

With the fear of scarcity in my heart, I jumped when I found a similar one on eBay a few days later.
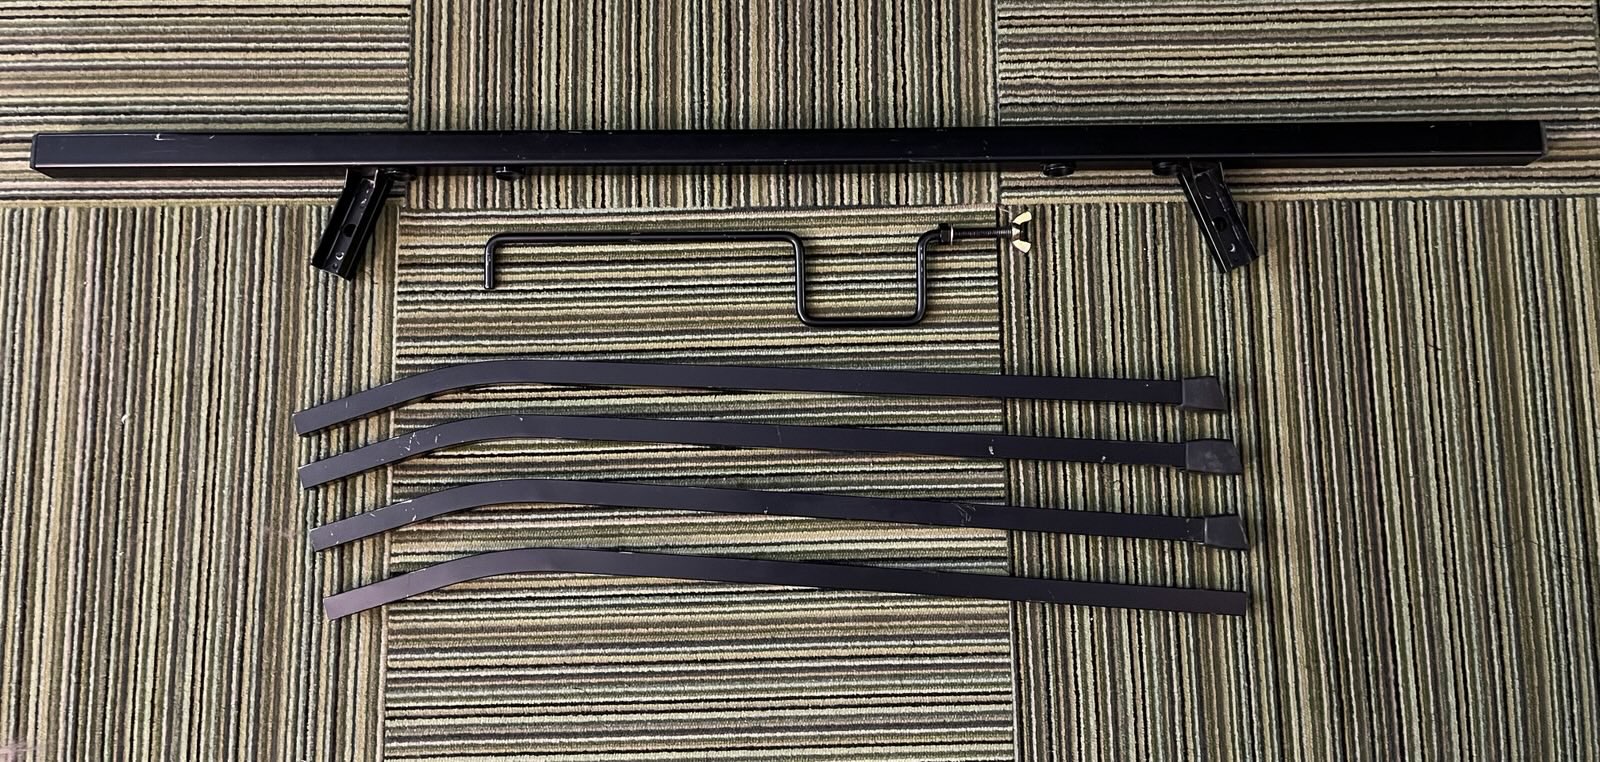
Black metal stand parts organized on a background of green carpet tiles.

As you can see in the photo, the stand can break down quite small! Pictured here are 5 of the 6 parts required for it to work. The long body bar has circular recesses where the knitting machine can be securely clamped, as well as slots for the legs. Each leg splays out at an angle to withstand the force of moving the machine back and forth. The body bar and legs are held together with a pair of screws and wingnuts, and the screws are at the end of long bent metal bars which do double-duty to provide some stability for the mounted knitting machine, as well as providing a place to rest the top of the knitting machine.

You may note that I said "5 of the 6" in the previous paragraph. One of the screw/bar pieces was missing. Thankfully the seller had simply misplaced it and, after contacting them, they found it and mailed it to me.

Meanwhile... If you have a keen eye you may have noticed another missing part. Because each leg splays out at an angle, each also has a rubber foot with a special shape to let it rest flat and provide traction. One of the legs was missing this foot.

In this house we 3D print, so I dusted off my calipers, OpenSCAD, and trigonometry skills to make a replacement. I'll attach the OpenSCAD and final STL files to this post for posterity, but I definitely hit a point where the math looked right but the piece looked wrong, so I did some eyeball-based adjustments when tweaking the foot's resting face angle and a fudge factor to help the foot slip onto the machine leg.
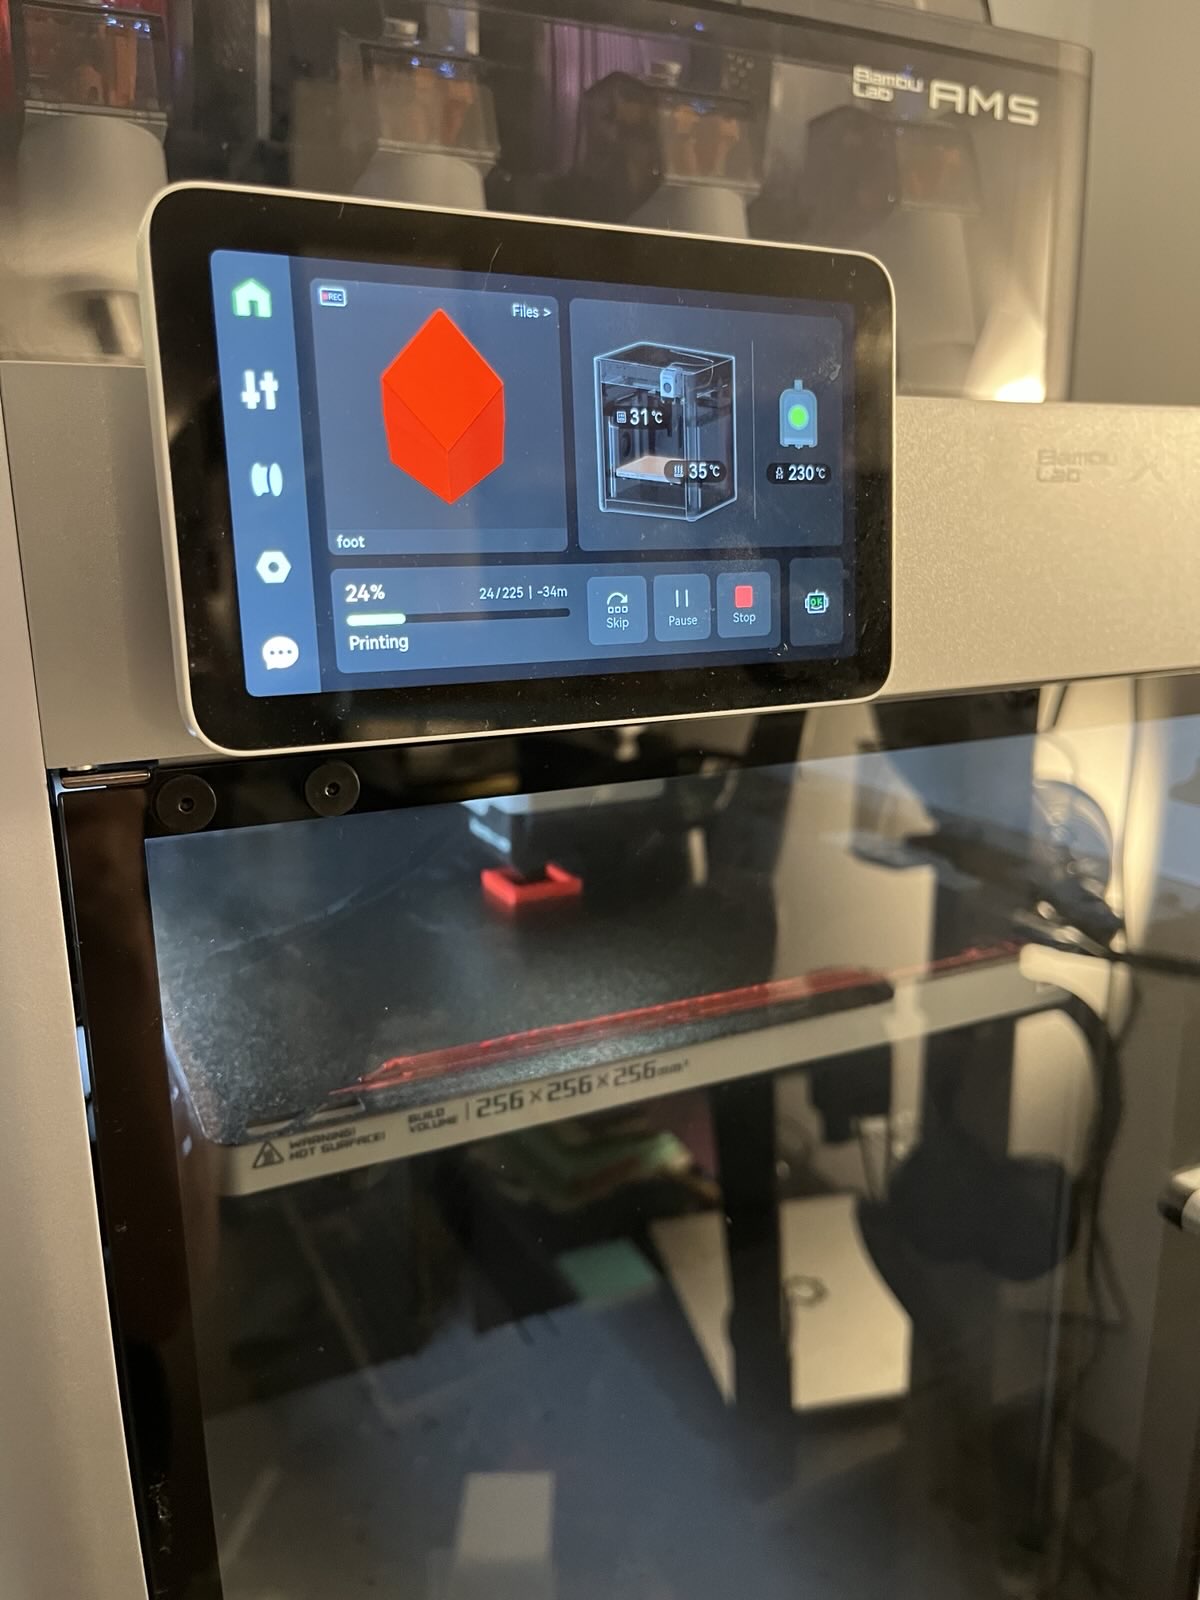
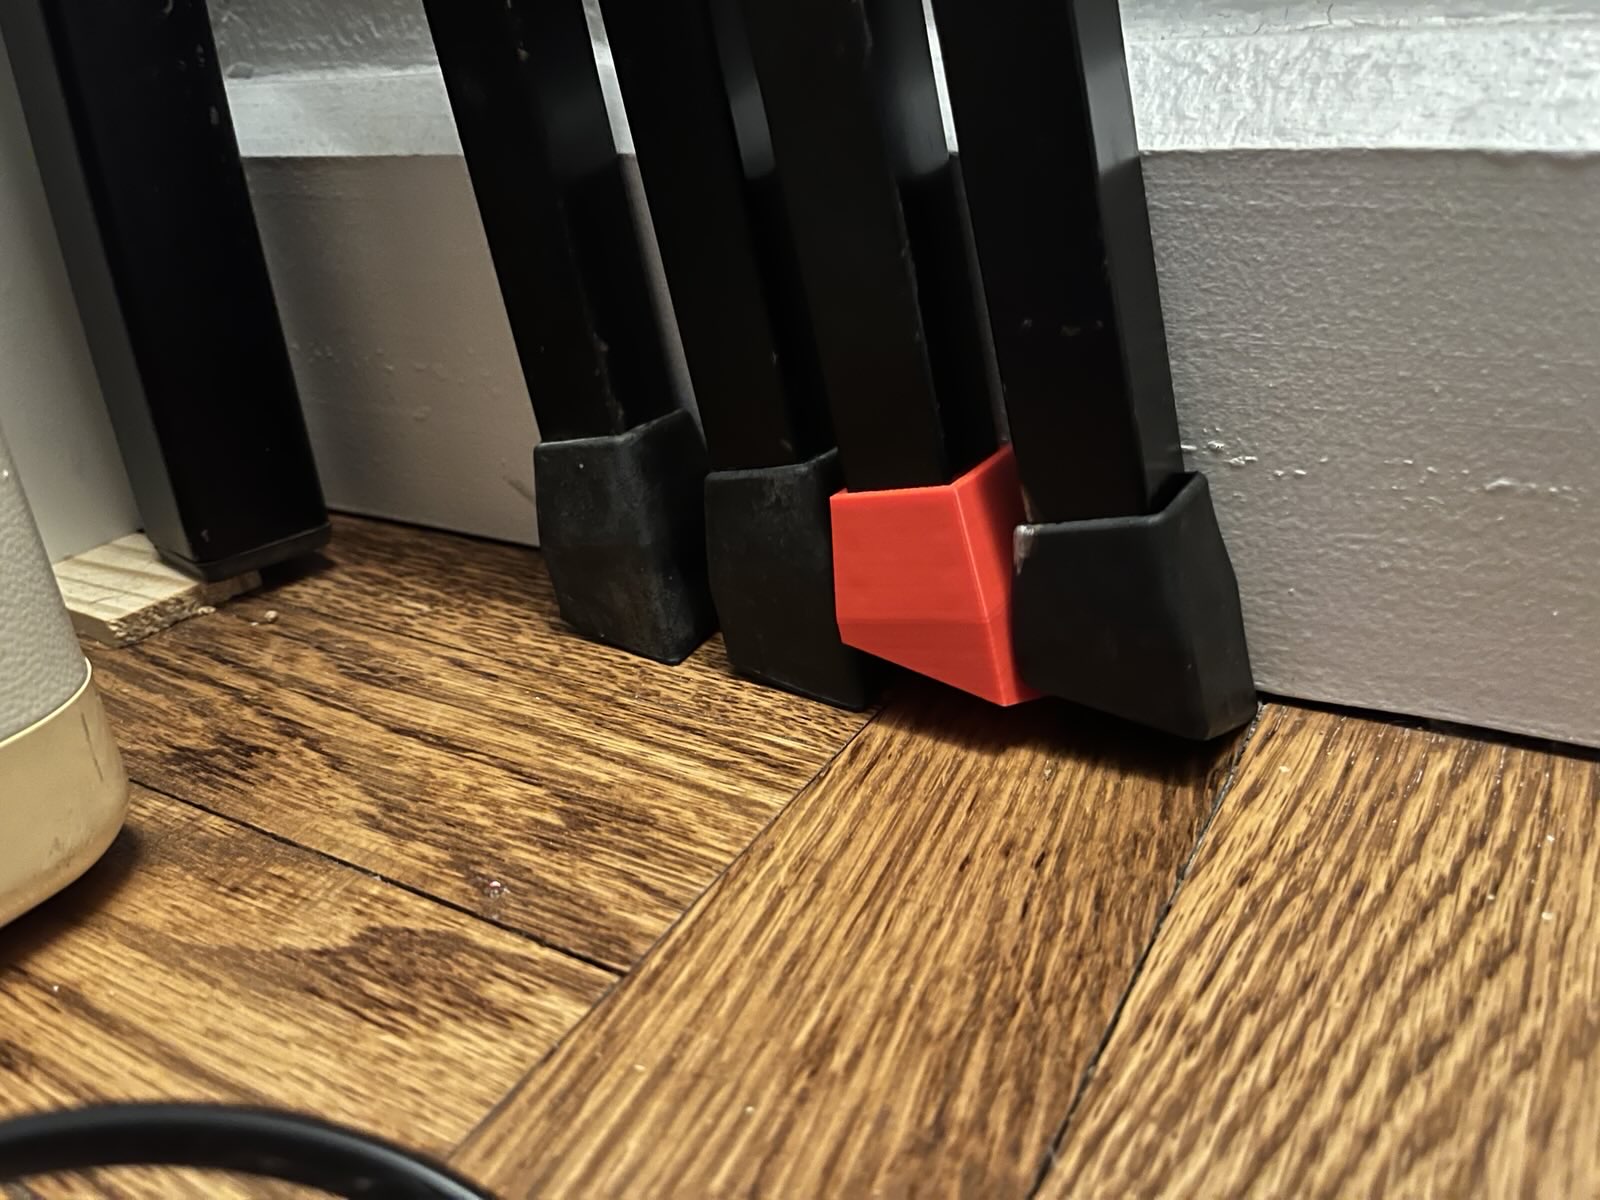
Now I can machine knit without taking up the countertop space. This reduces my anxiety about having the machine "out" for long periods of time as I practice skills or work on more time-consuming project.
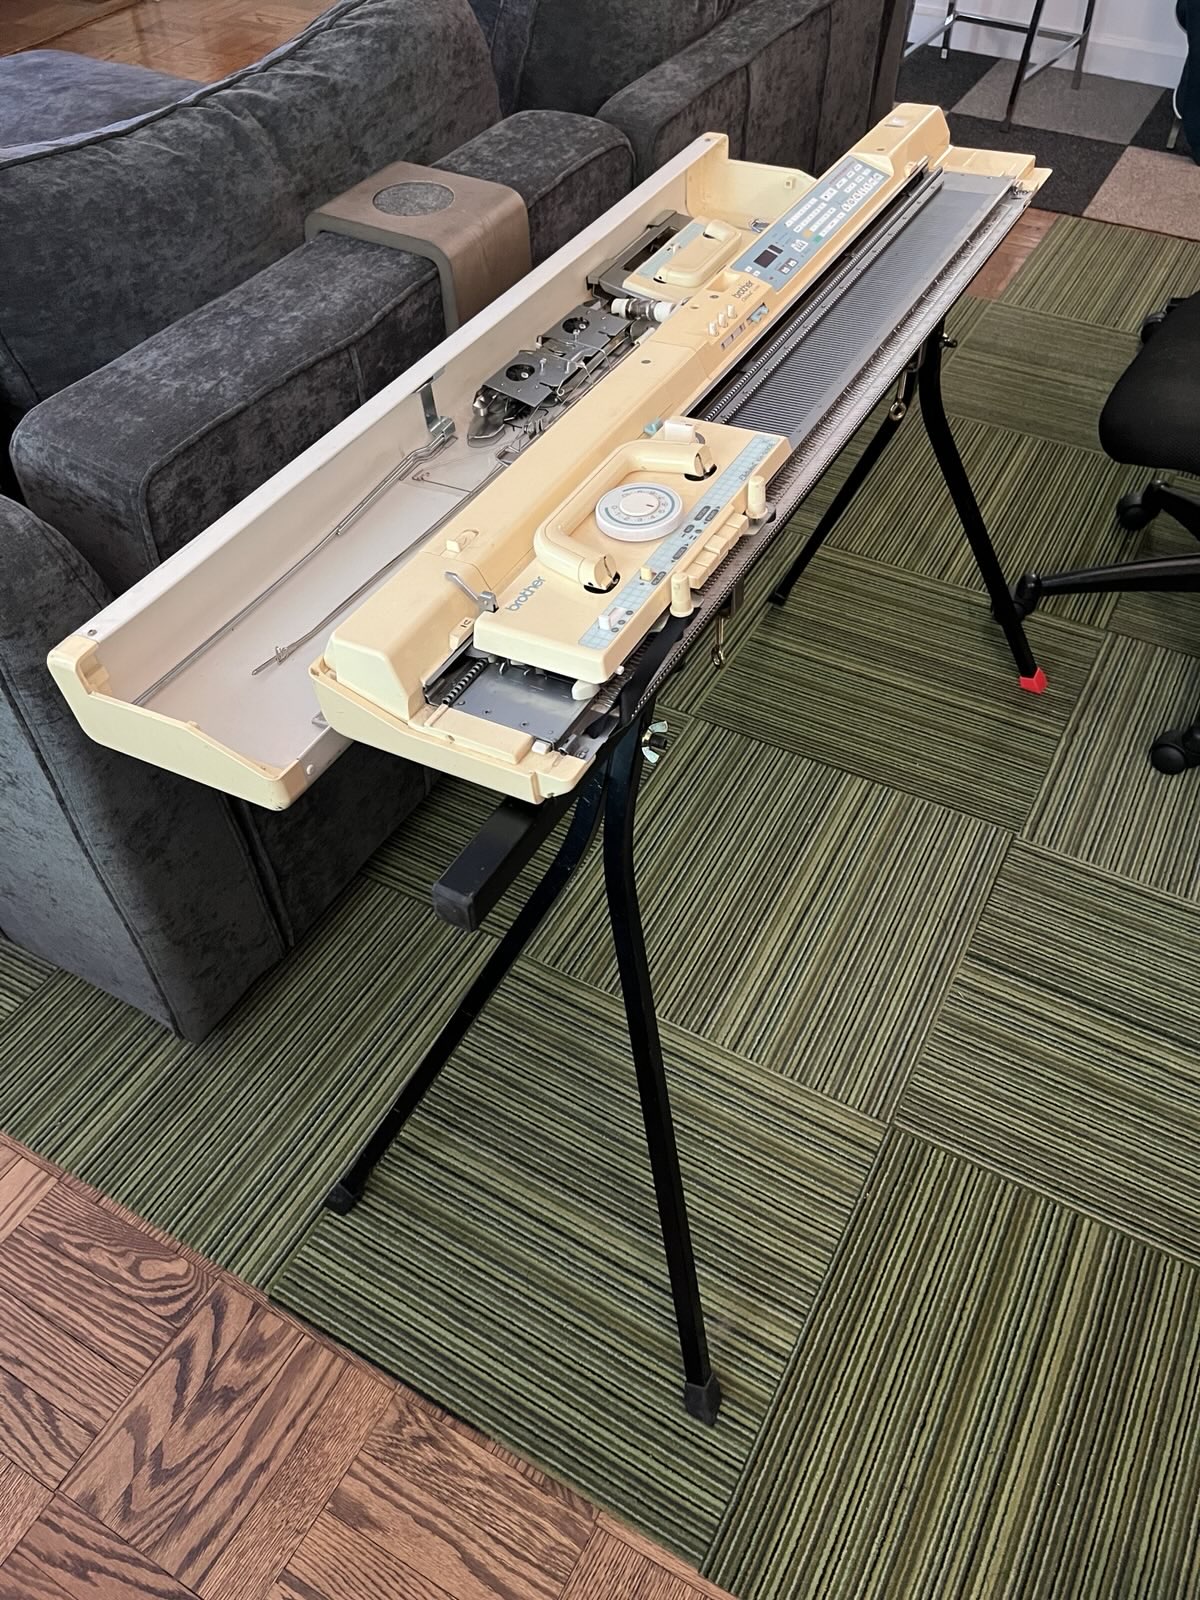
Black metal stand with Brother knitting machine mounted on top ready to knit. The whole setup is up against the back of a sofa. The red 3D-printed TPU foot is visible on one leg of the stand.

Of course, there is floor space to talk about, but that is slightly easier to negotiate at this point.

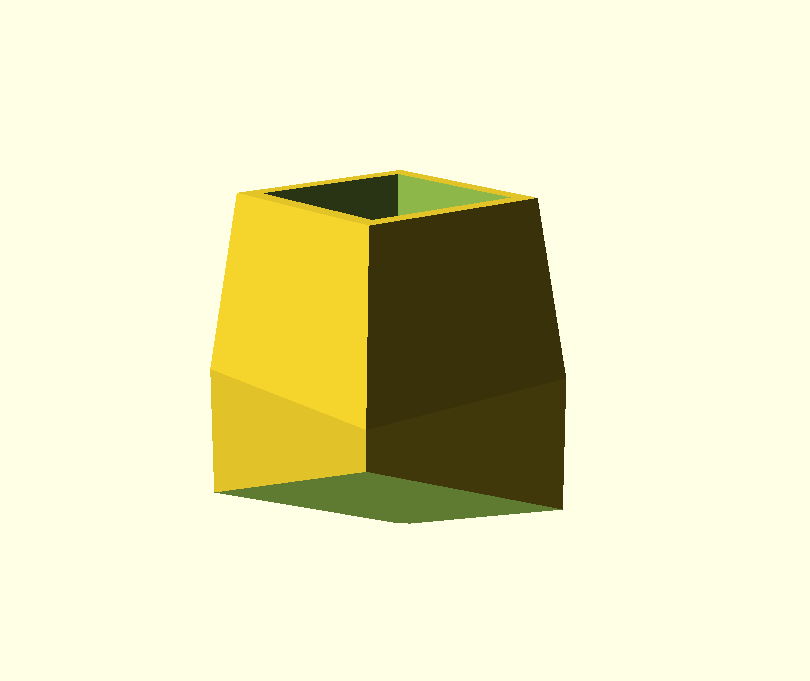
Files

machine-stand-foot.scad
1145 bytes. Updated
machine-stand-foot.stl
2084 bytes. Updated
2024
Thu Dec 12

I’ve been procrastinating about posting which means tabs have been accumulating. 🙁

We got a new, overpowered-for-home-use 3D printer, the Bambu Labs X1C. With the fancy Automated Material Switcher (AMS) that must be powered by forbidden magics.

After setting it up and letting it run through its literal shake-out calibration, I printed these things and was really impressed with the results!

  • The classic benchy boat. This was actually included in the memory of the machine, but I’m linking to what looks like the version on Bambu’s MakerWorld.
  • These print-in-place fold-flat phone/tablet stands which I believe was suggested by the Bambu mobile app that I used to set up the printer. I started my 3D printing journey with a MakerBot Cupcake CNC kit back in ~2009 so print-in-place mechanical stuff still feels magical to me when it works. These came out nice and sturdy!
  • Craving more print-in-place, this articulated axolotl is pretty cute and moved well straight off the printer, despite what I would describe as “flimsy-looking” joints between the parts.
  • For a first “useful” print, I selected this one-piece Aeropress wall mount. It’s in the same lineage as my sliced-in-half Aeropress wall mount that I cut into two parts to fit on my printer of the day.

Photos would only get in the way of finishing this post, so I’m afraid you’ll have to use your imagination.

The new printer meant I was well set up to contribute to the latest We the Builder’s project - Charon’s Boat, which is rapidly being finished by builders all over the world. If you have clear plastic filament and a large-ish 3D printer, you may still have time to grab a part and contribute to this underworldly sculpture!

Mon Apr 1

Sliced a little extra off the bottom in FlashPrint. Nice and quick and the result feels sturdy with both a GameBoy Advance and a GameBoy Color!

Two handheld game consoles rest on display stands 3D printed from black filament. Each stand consists of a rounded rectangular base with two arms to hold up the console. On the left is a GameBoy Advance with a clear plastic shell, appearing in profile. On the right is a GameBoy Color in a translucent purple shell with hot pink buttons.
2020
Wed Dec 30
🛠 Made a copy of Cable Holder by jobsmolders.

I stream stuff multiple nights a week and find that the wi-fi on my streaming machine drops out or otherwise causes problems. The router is in a closet across the room from my machine, so I’ve been running a cable by hand before - and putting it away after - every show.

That’s annoying, so I printed up some of these, snipped off the bits for screw holes, and used 3M command strips to make and ad hoc cable run up and over the room with a 50 ft. ethernet cable.

So far, so good, though the blue cable is a little… obvious. I think the next upgrade will be ordering a real set of cable organizing channels that match the ceiling and wall paint. Someday!

Sun May 24
🛠 Made a copy of Mr. Alligator by curiousmedia.

The classic is back! Still one of my favorite prints.

Sun Apr 26

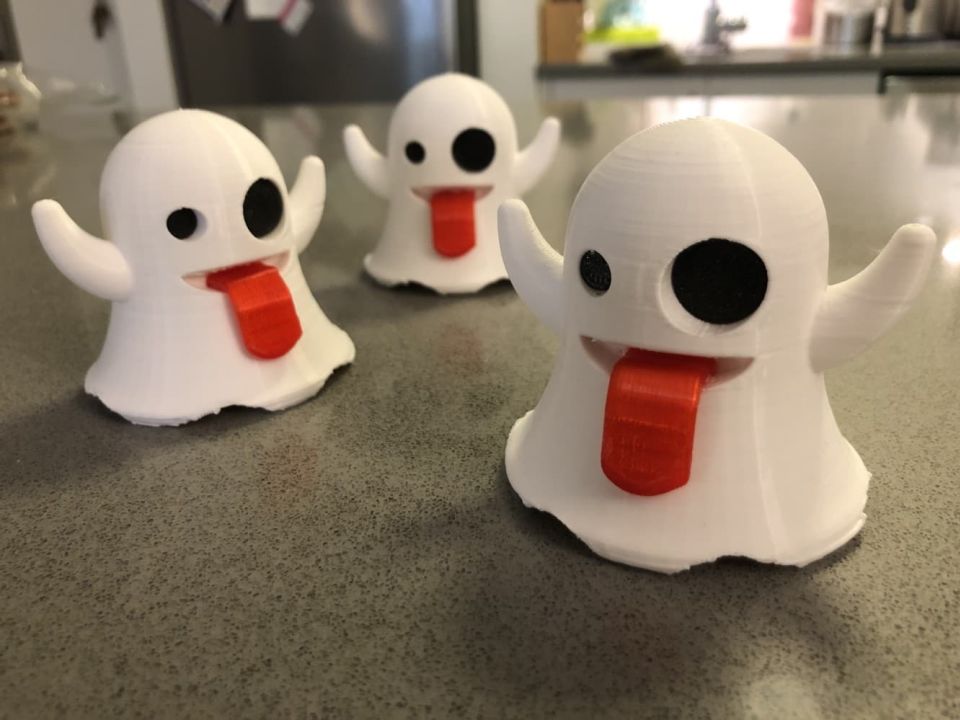
I made some Ghost Emoji, from rmoravcik’s design.

Printed on a Flashforge Adventurer 3 Lite in mostly white filament from Hatchbox. We used sparkle black PLA for the eyes, and the tongues in the FlashForge red sample that came with the printer.

I printed without supports, so the bottom of each ghost needed a bit of cleanup. I also found the tolerances for the eyes too tight, so I shrank them by 5% and those fit great.

I’ve sent some of these to the co-ghosts of GHOST PARTY 👻🎉!

Three finished 3D-printed Ghost Emoji figurines arranged on a grey countertop.
2019
Thu Feb 28

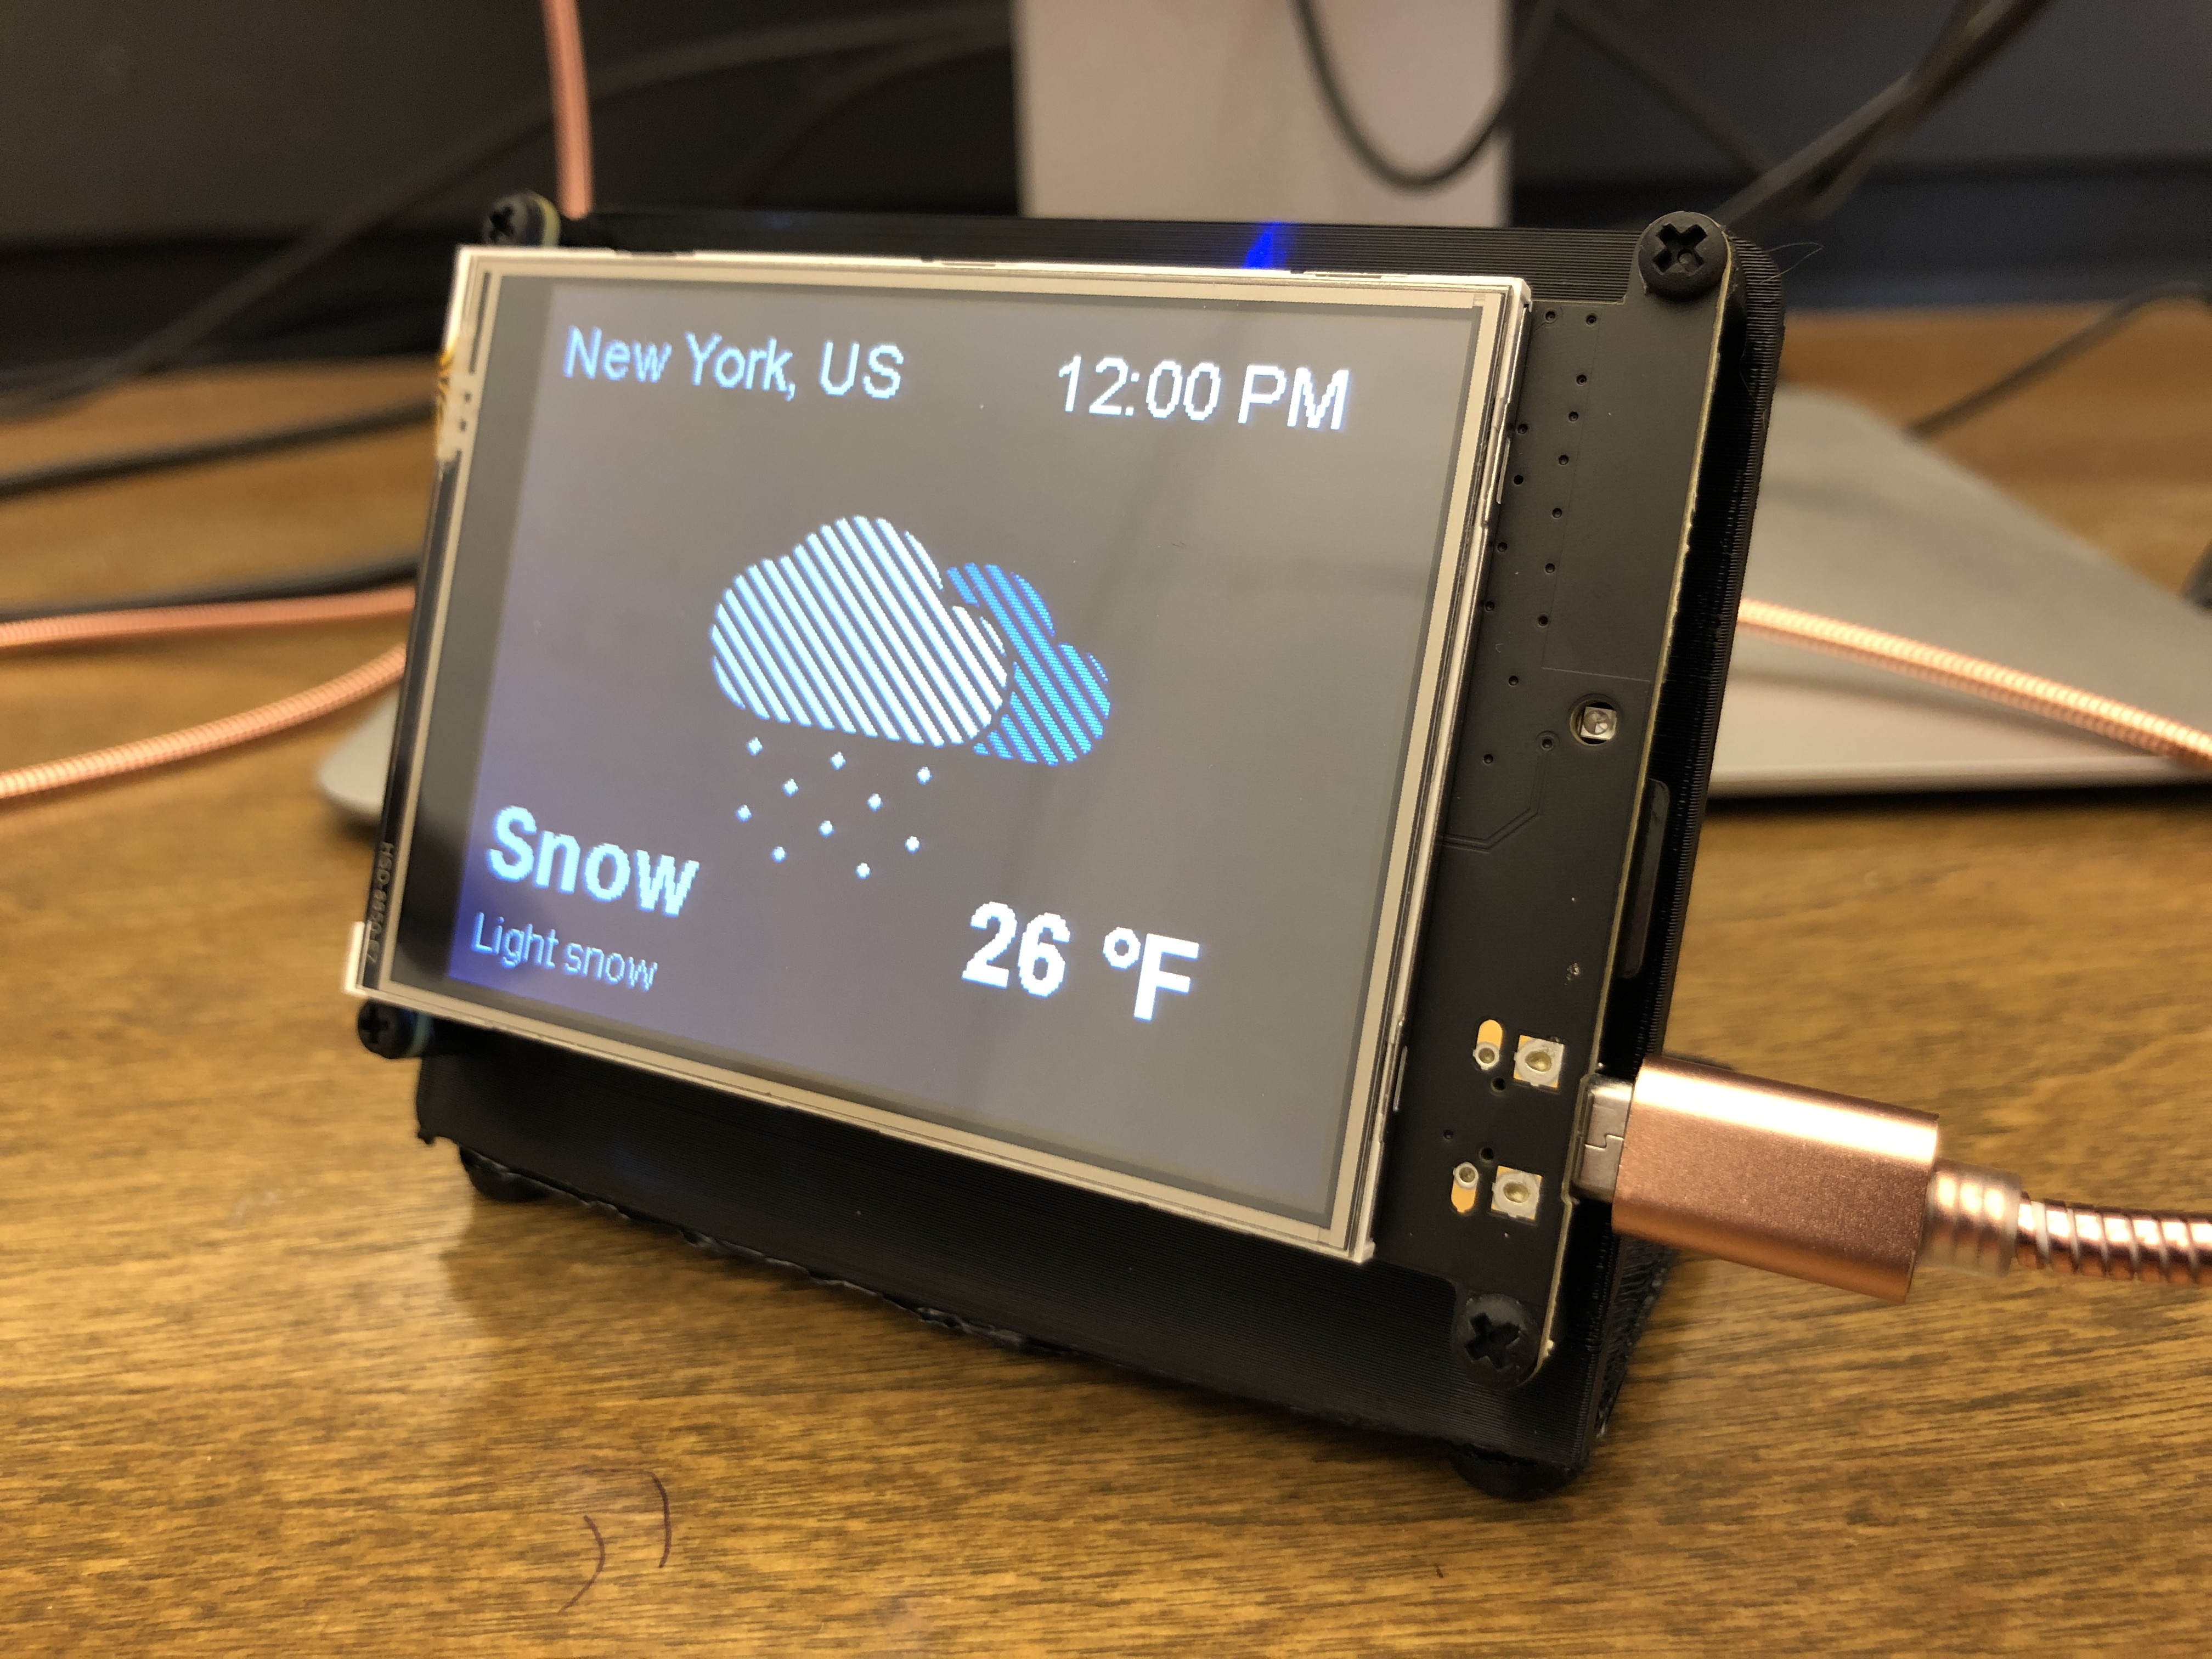
Made a PyPortal Stand by Adafruit

I made a PyPortal Stand, printed from Adafruit's design.

This makes a great little desktop mini-display!

Printed on a FlashForge Finder in black PLA filament from Hatchbox.

It printed fine without supports or a raft. I printed with a brim, but the bottom still curled a bit because my print bed needs some adjustment. I evened it out with rubber feet, but that changed the center of mass a bit so it's a little forward-tippy. 🤷

It was easy to mount with nylon M2.5 standoffs and screws. I used a nut, small standoff, and medium screw for each of the 4 mounting holes, finger-tightened.

2017
Mon Feb 27

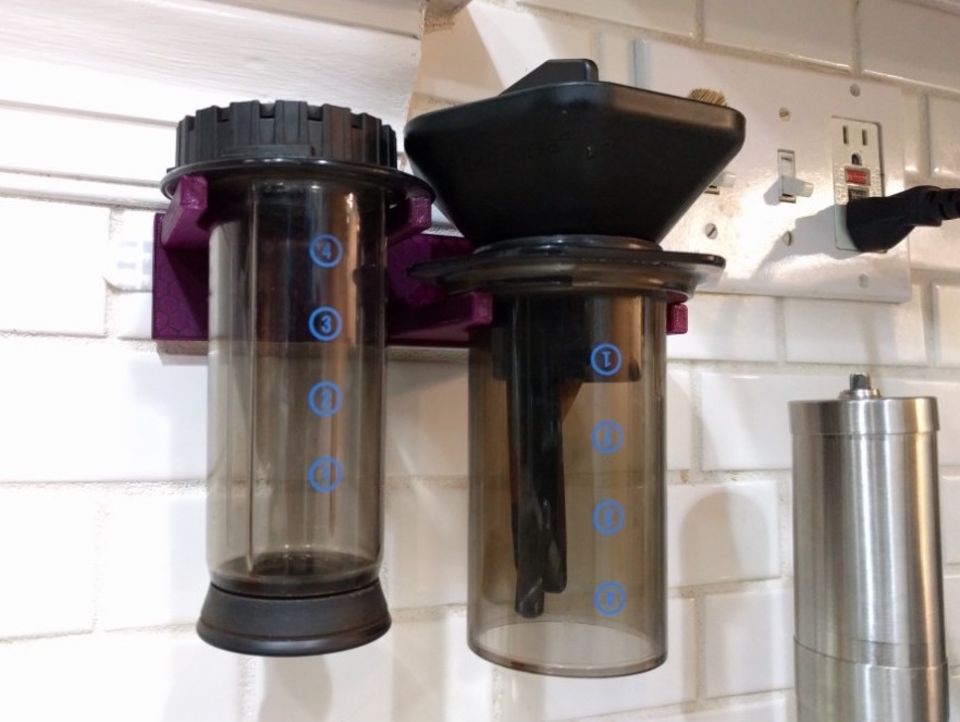
AeroPress Wall Holder LE (Two Parts)

A nice wall-mountable organizer for your Aeropress parts.

I chopped the design AeroPress Wall Holder LE by jspiro into two parts in FlashPrint. This allowed the print to fit on the bed of my Flashforge Finder.

Here’s the updated STL file for printing: AeroPress_wall_holder-two-parts.stl.

In keeping with the license on jspiro’s design, this design is licensed Creative Commons CC-BY 3.0.

Sun Feb 26
↩ Replied to https://www.thingiverse.com/thing:56074

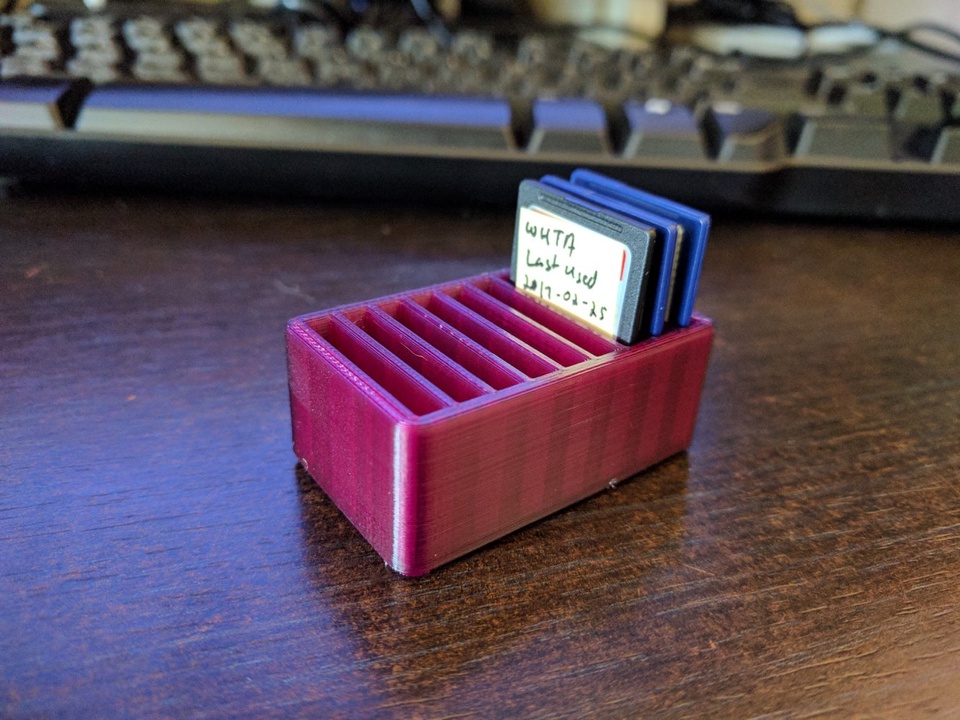
We've been filling up SD cards with episodes of the We Have to Ask Podcast, so I thought it was time to get a little more organized.

To that end, I printed this nice and simple SD card holder by mandy2tom:

Printed on a Flashforge Finder.

2013
Wed Oct 30

Vertical Stand for Two MacBooks

This work is licensed Creative Commons - Attribution.

Description

I’ve got an old white macbook and a newish retina macbook pro. Typically these live on my desk stacked on top of each other, with keyboard/monitor/mouse plugged in.

My cat likes to sit on top of them because they are warm. She also likes to chew on nearby cables. This is a problem.

So, here’s this Thing to stand them vertically!

Kitty came by looking for her warm spot, but didn’t stay long. My desk is now clearer, but also more lonely.

… success?

Instructions

I modeled this in Inkscape and OpenSCAD. I roll like that.

If you want to make your own changes:

  1. Edit up the SVG profile image to match the thickness of your laptop(s). I just eyeballed the curves for the corners and it mostly worked out.
  2. Make sure you end up with a single path.
  3. Use the Inkscape OpenSCAD Poly extension to export your new profile as laptop-stand-profile.scad
  4. Open up that file and look at the name of the module. It’ll be something like pathXXXX().
  5. Open up laptop-stand.scad in OpenSCAD, render and save the STL
  6. PRINT THAT SUCKER.

I printed my copy on a Replicator Dual with 0 extra shells, 10% fill, 0.2mm layer height. It took quite a while.

My Replicator is semi-enclosed, but I had some issues with cracking. Since I don’t care too much about the aesthetics, I just hit it with a heat gun to fuse the cracks together afterwards.

Files

laptop_stand.scad
69 bytes. Updated
laptop-stand-profile.scad
1718 bytes. Updated
laptop_stand.stl
44378 bytes. Updated
laptop-stand-profile.svg
2782 bytes. Updated