My Open Hardware Summit 2023 badge
I had ten years to figure this out and still managed to do it two days too late, but literally no one was keeping track, so that is fine.
Quick update, have a soundtrack for this post.
Ten years ago?
I attended my first Open Hardware Summit (OHS) in September 2013, at a time in my life when I had an... interesting relationship Open Source Hardware. One year previous, at OHS 2012, my then-employer MakerBot really stirred up some feels by announcing that they would not be releasing some newer designs as open source . I was not allowed to attend OHS 2012 due to MakerBot internal policy around the event.
Fast forward a year and I had left MakerBot, visited China where I helped my friend Matt at Blinkinlabs with software, demos, and more on their successful Kickstarter campaign for Blinkytape, a fully open source hardware LED strip for artists. During 2013 I had traveled to various MakerFaires to show them off, worked with some lovely beta testers, and generally re-engaged with the "maker" community and open source. By September, I was winding down my work with Blinkinlabs, and starting contract web work for Adafruit, which has since become my full-time employer.
So, I was feeling pretty good when Matt shelled out to have Blinkinlabs sponsor OHS2013 and invited me along!
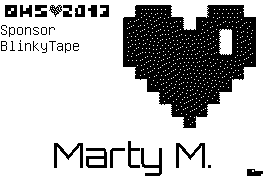
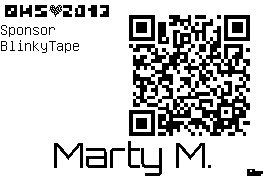
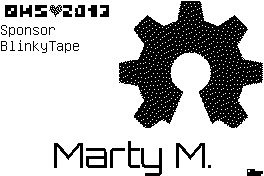
The badges at OHS that year were on-trend with many nerd and hacker conferences at the time. They were full-on hackable open source hardware with "electronic paper" displays. The organizers had even kindly loaded them up with contact info and some cute logos. Seen here are three PNG versions of the badge images on my badge. Each has my name as "Marty M", along with "OHS❤️2013 Sponsor BlinkyTape". One variant has a pixelated heart, one has the open source hardware logo, and one has a QR code linking to blinkytape.com.
Two Days Ago
OHS2023 convened in New York City on April 28th and 29th. While many (many (many)) things have changed in the last 10 years, OHS is still giving out sweet badges to early registrants. In fact, as a registrant for OHS2020, which was moved online for obvious reasons, they had made a sweet badge for me way back then and held onto it until this weekend, when I picked it up.
It was, while playing with this badge and being a little sad I had given them my government name, that I remembered I still had my badge from 2013 sitting in a drawer at home.
During a break in the action I returned home to scoop it up and maybe get it updated for the conference, but in the hustle and bustle of some extremely good talks and some impossibly great workshops, I didn't find the time. So, I proudly wore my "OHS❤️2013 Sponsor BlinkyTape" badge around.
Now that the event is over, I have plenty of time to do what I should have done a week ago.
The BADGEr
The OHS2013 badge was a collaborative effort of WyoLum, seeed studios, repaper.org, and more. It's an impressive little board, but even more impressive is the fact that 10 years later, all their documentation, source, and photos are still online. So, rather than me document it all here, just check out their excellent introduction and jumping-off page: https://wyolum.com/projects/badger/
The BADGEr comes with a lovely default firmware that reads images from an onboard microSD card reader. It looks for alphabetically-named folders (literally A, B, C...) and in those folders for specially formatted images (literally A.WIF, B.WIF, C.WIF). When powered on, it loads up and display A/A.WIF, and you can use the left/right buttons to change to the previous/next .WIF files within the current folder, or the up/down buttons to change to the previous/next folder.
I wasn't sure about this WIF (WyoLum Image Format) 10 years on, but once again their WIF introductory post is still up and all the friggin' code and documentation links still work!
As part of the BADGEr source, WyoLum includes a little Python tool with the unassuming name `greyscale.py`. This cute little utility does a lot more than I might expect (or ... want?) by showing a little Tk-based GUI to open image files, adjust their brightness and contrast to see a live preview of their dithered output, and then save them in WIF format.
Being from ~2013 it was written for Python 2.x (RIP), and didn't work out of the box. But surprisingly I was able to get it working on my Ubuntu 22.04 machine with very minimal changes.
So here's my updated version with instructions on installing dependencies, etc: https://git.schmarty.net/schmarty/BADGEr-WIF-util
(I seriously can't believe I was able to stumble through this. Look how few changes I had to make! Nice job, everybody!)
Let's badge already
Okay, yes, that was too much context. So I opened up my image editor of convenience and made a new 264x176 pixel image, loaded it up in "grayscale.py", saved the result as a .WIF, popped the microSD card into my laptop and made it the new A/A.WIF, and here we go!
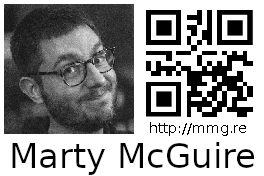

The new badge image has my smug mug, name, my short domain (http://mmg.re) and a QR code linking to the same. It could be more artful or interesting, include more info like my pronouns, but for now it is Good Enough™. (A note on pronouns: OHS2023 offered excellent pronoun stickers, so I did not need my badge to show them.)
I can't wait to wear it to, uh, OHS2033?? Maybe to an IndieWeb Camp or Summit?
OHS2023 deserves more words
I found my return to Open Hardware Summit very inspiring and - for lack of a better word - healing?? I am so grateful for all the folks that gave their time to show us the challenges they are taking on and how they are bringing others along by tackling them in the open. I have so many browser tabs and more to process everything I have seen. I plan to post more about all of it, even if it's just a miserably dense linkdump. So, stay tuned (or mute this ohs2023 tag, you do you).
Until then, please enjoy this playlist of all the Open Hardware Summit 2023 scheduled talks! Up already! Kudos to the organizers, wow. I mean. Wow.