Configuring Woodwind with imageproxy
A couple of days ago I wrote up a set of instructions for setting up a self-hosted copy of Woodwind with nginx and upstart. Since then I noticed that many images were broken on the feeds I was looking at - a common problem when a site that is served with HTTPS is displaying images and other content from another site that is served with HTTP.
I noticed that the main site woodwind.xyz was serving images through special URLs like:
https://woodwind.xyz/imageproxy/?url=https%3A%2F%2Fmartymcgui.re%2Fimages%2Flogo.jpg&op=noop&sig=...
Looking in the source code, I found that Woodwind has support for image proxies, which are neat little services that can help serve remote HTTP content over HTTPS, resize images on the fly, and more.
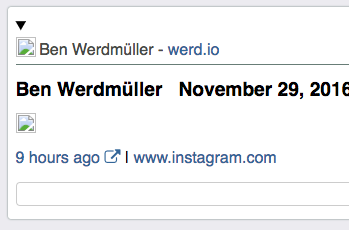
I'd been meaning to set up one of these services for my own site, so this seemed like a good time to jump in!
Since my server already has Go I chose Will Norris' imageproxy, which has a similar deployment setup to how I am already running Woodwind: Upstart manages a standalone process and nginx acts as a proxy to pass along requests.
Installation was fairly simple, once I had my GOPATH set up correctly:
go get https://github.com/willnorris/imageproxy
For running a persistent service, Will has an example Upstart configuration, which I modified a bit and placed in /etc/init/imageproxy.conf:
description "Image Proxy server"
start on (net-device-up)
stop on runlevel [!2345]

respawn
exec start-stop-daemon --start -c www-data --exec /home/imageproxy_user/go/bin/imageproxy -- \
    -addr localhost:4593 \
    -log_dir /var/log/imageproxy \
    -cache /var/cache/imageproxy \
    -signatureKey @/etc/imageproxy.key
Before starting up the service, there were a few extra steps:
Create /var/log/imageproxy and /var/cache/imageproxy and make sure they are owned by the www-data user.
Create the "signature key" in /etc/imageproxy.key. This is used to authorize each image request so that random folks can't proxy random stuff through your imageproxy. I used the command line openssl tool for this, with an extra pass through awk to remove the newline character that openssl spits out.
$ sudo openssl rand -base64 42 | awk 'BEGIN{ORS="";} {print} > /etc/imageproxy.keyI also made sure that /etc/imageproxy.key was owned and readable by www-data and no other user.
I could then start up the server with:
sudo start imageproxy
Next it was time to configure nginx to send proxied image requests along to imageproxy. I opened up the nginx woodwind.conf file that I had created and added a new location block:
location ~ ^/imageproxy/ {
        # pattern match to capture the original URL to prevent URL
        # canonicalization, which would strip double slashes
        if ($request_uri ~ "/imageproxy/(.+)") {
            set $path $1;
            rewrite .* /$path break;
        }
        proxy_pass http://localhost:4593;
    }
After restarting nginx, requests to https://woodwind.yourdomain.com/imageproxy/... would be forwarded to the imageproxy server.
Finally, it was time to configure Woodwind to use the proxy. I opened up woodwind.cfg and added two lines:
IMAGEPROXY_URL = '/imageproxy'
IMAGEPROXY_KEY = '...' # the contents of /etc/imageproxy.key
A quick restart of the Woodwind service, a browser refresh and I have images aplenty!

Thanks for reading! I hope this little HOWTO was useful. I look forward to more fun with imageproxy in my IndieWeb adventures. How might you be able to put imageproxy to use?