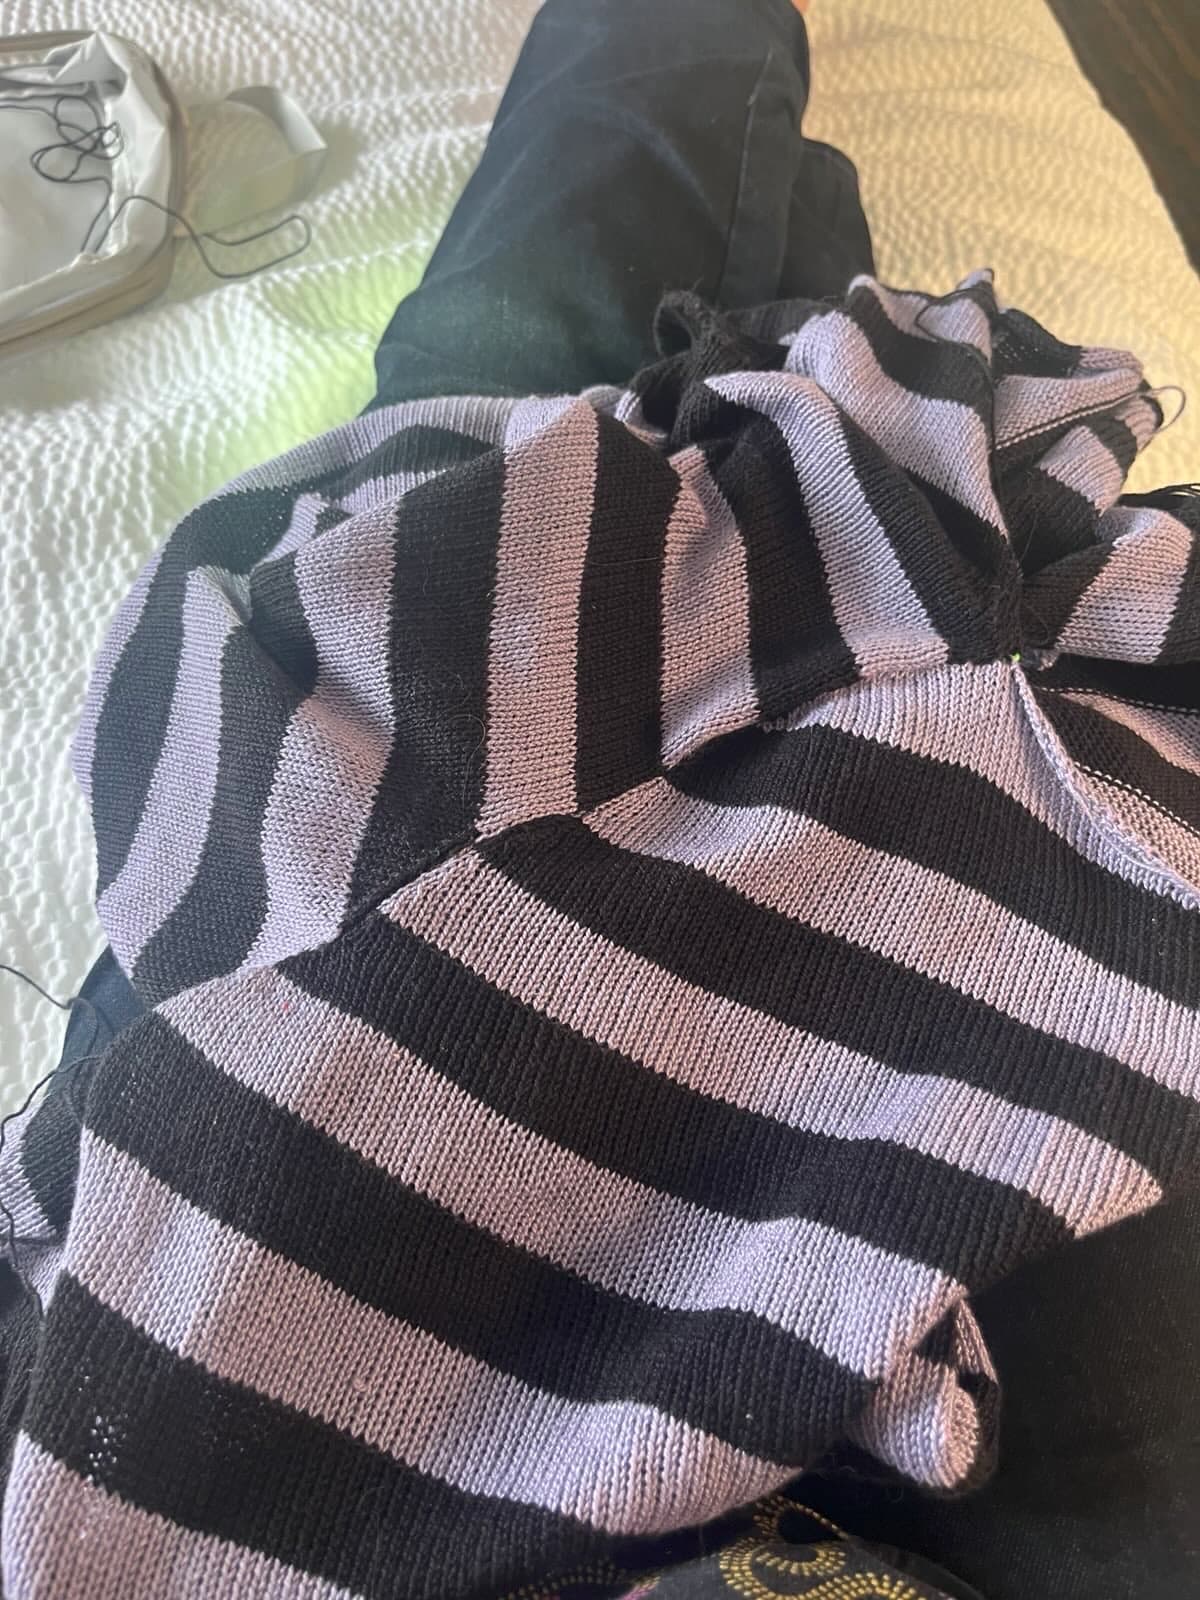
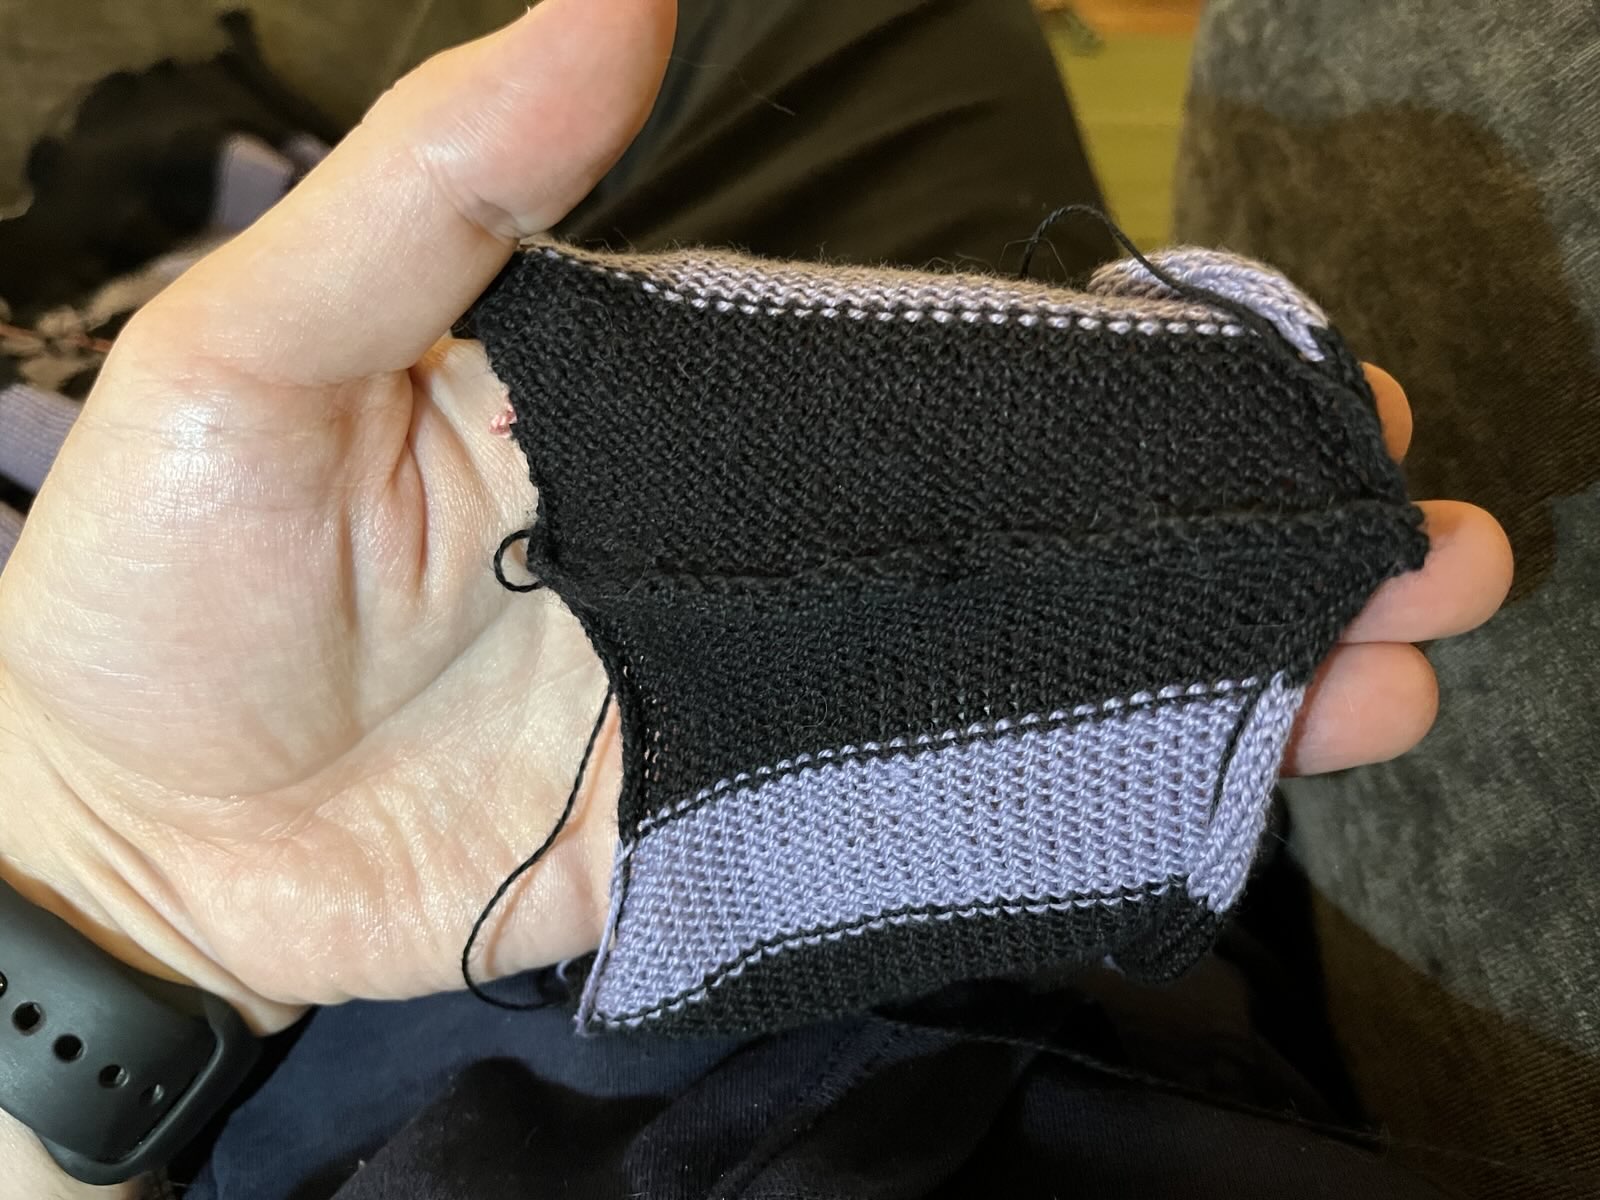
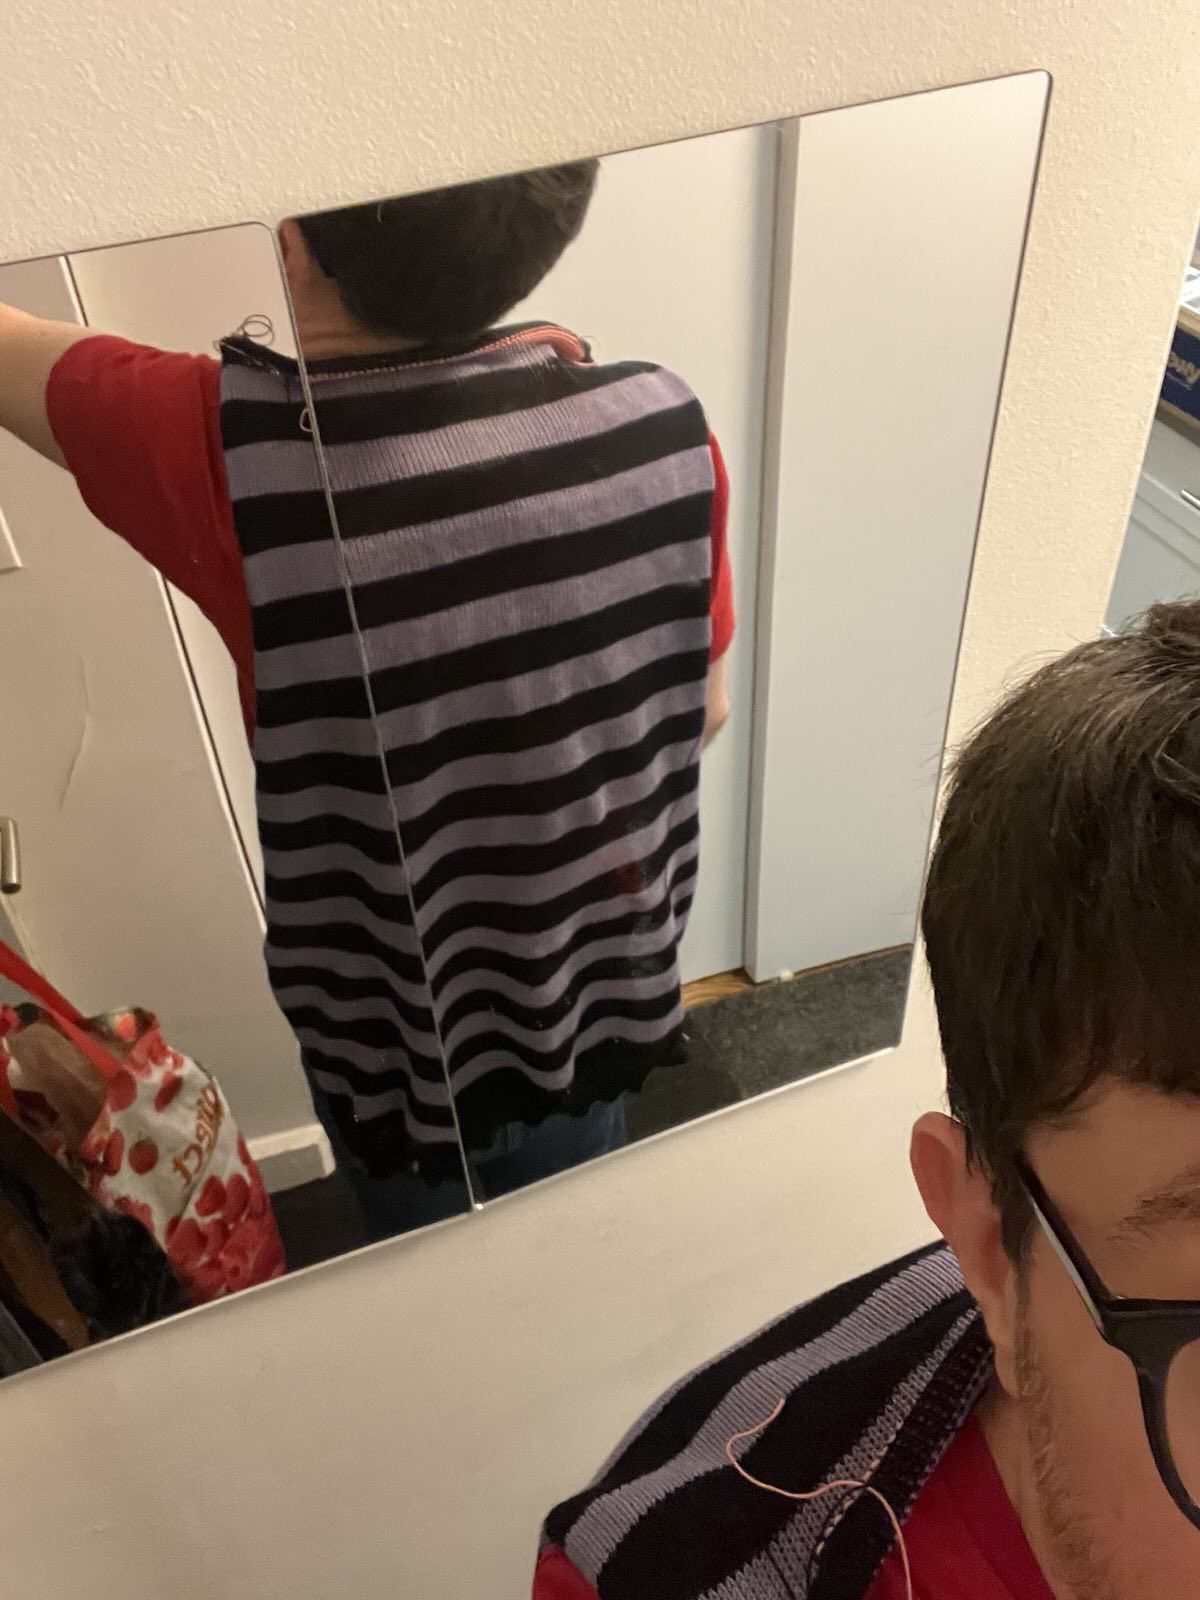
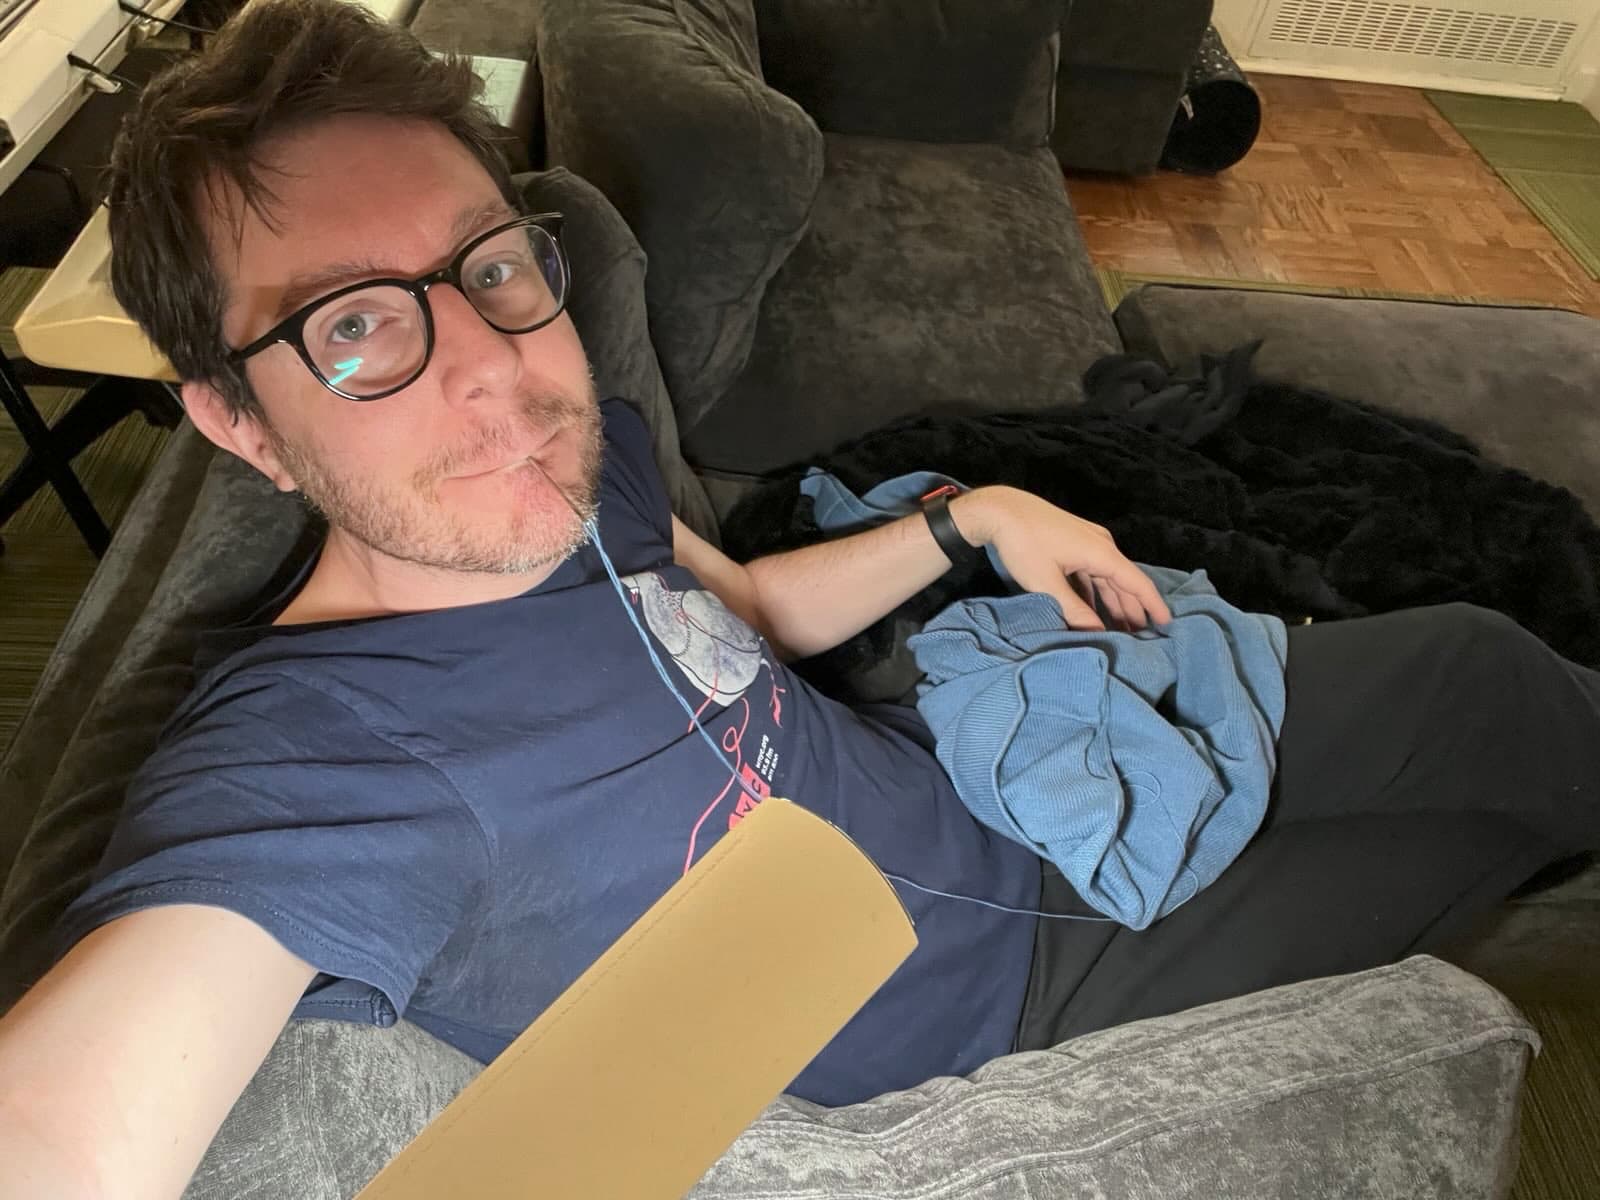
Well, I decided to try sewing it up as-is, rescuing dropped stitches as I went. After my hand-warmer adventures, I was a little more confident about how to sew up a ribbed edge.
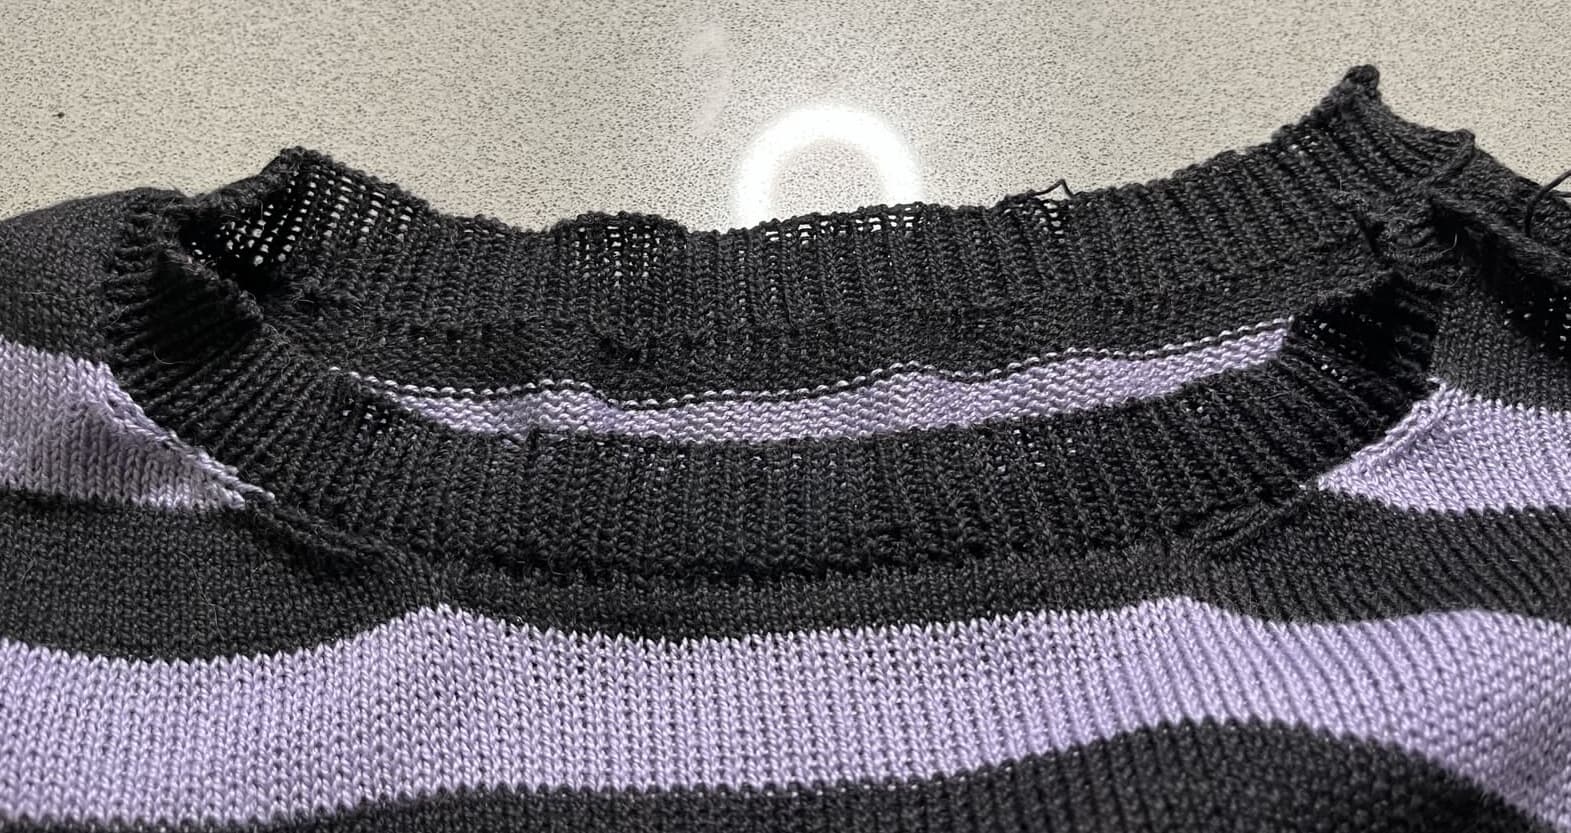
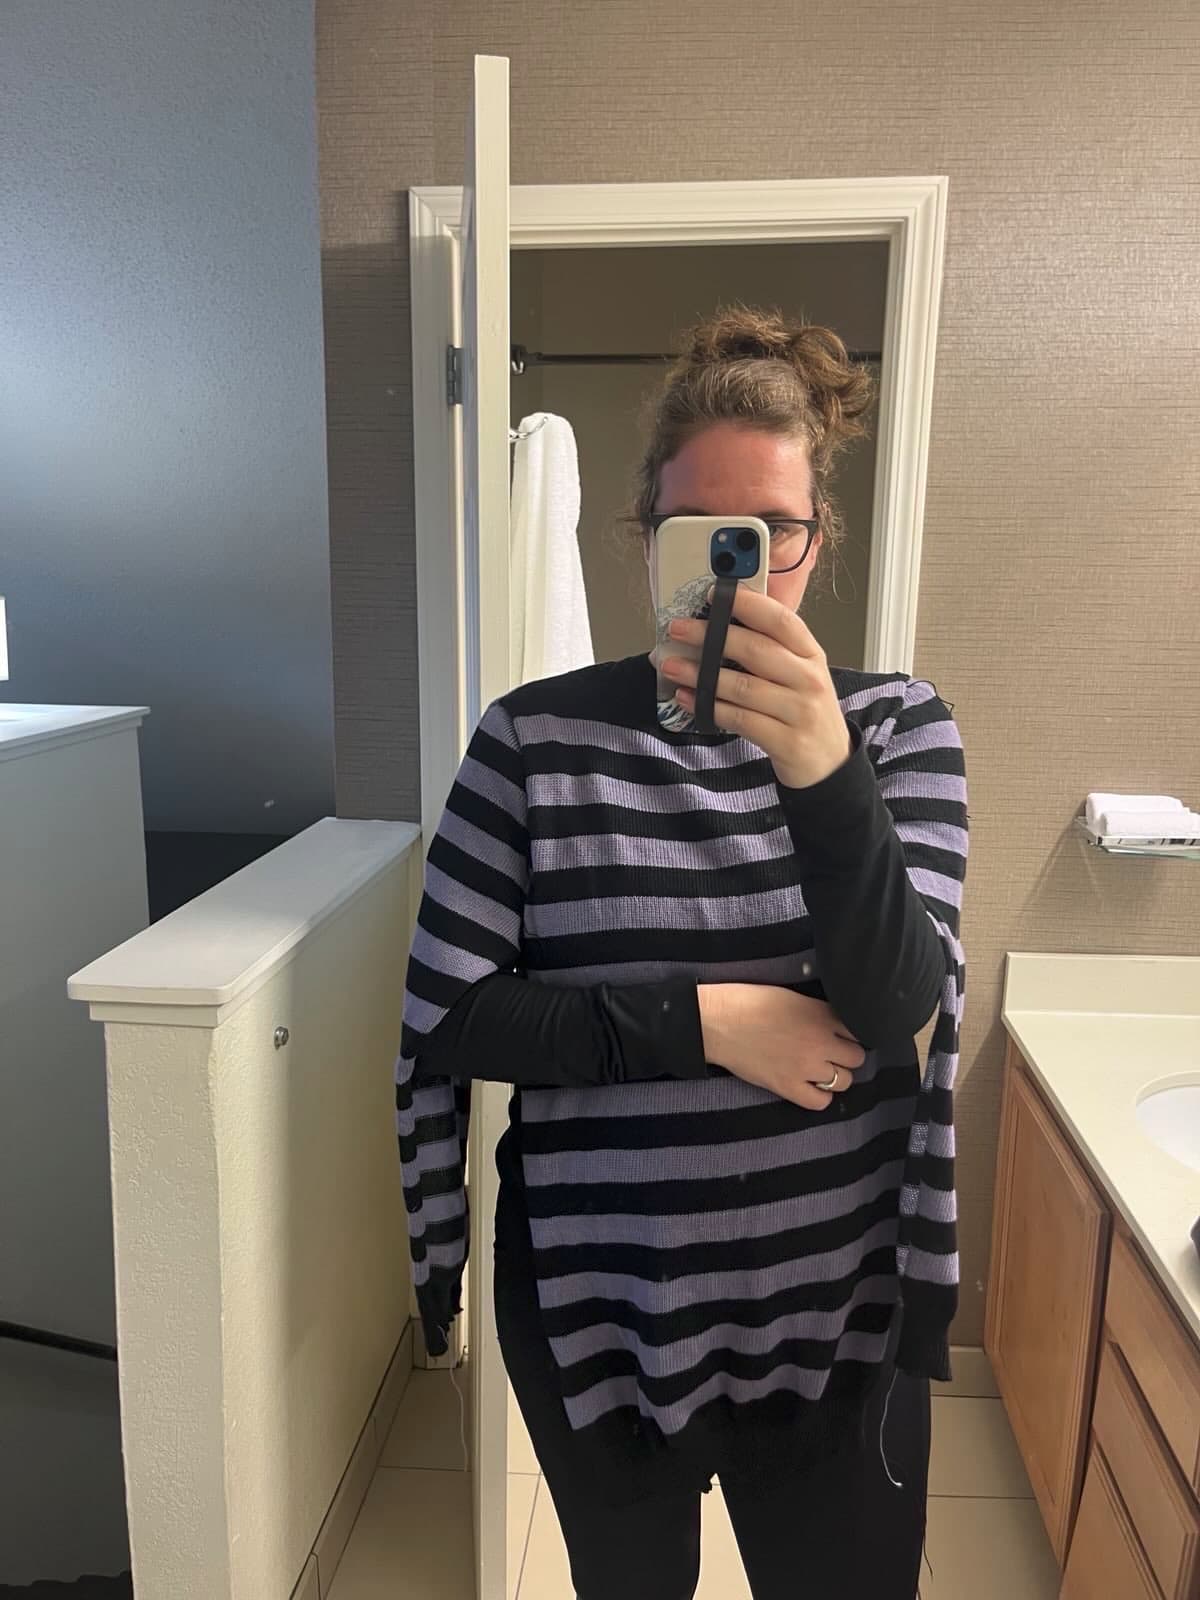
Yes, that's a dropped stitch in the back of the collar. No, I haven't fixed it, yet!
The process was slightly harrowing, but resulted in dropping only one stitch! What! Incredible!
So, of course, at this point I put in a box because I was afraid to finish it. I had intended this to be a gift for producer Amy upon her return from Berlin in early December. When she came home, we had other stuff going on, I got distracted, and I definitely wasn't constantly thinking about this unfinished sweater every day.
Just finish the sweater, Marty!
No! Well, okay! I mean: sort of!
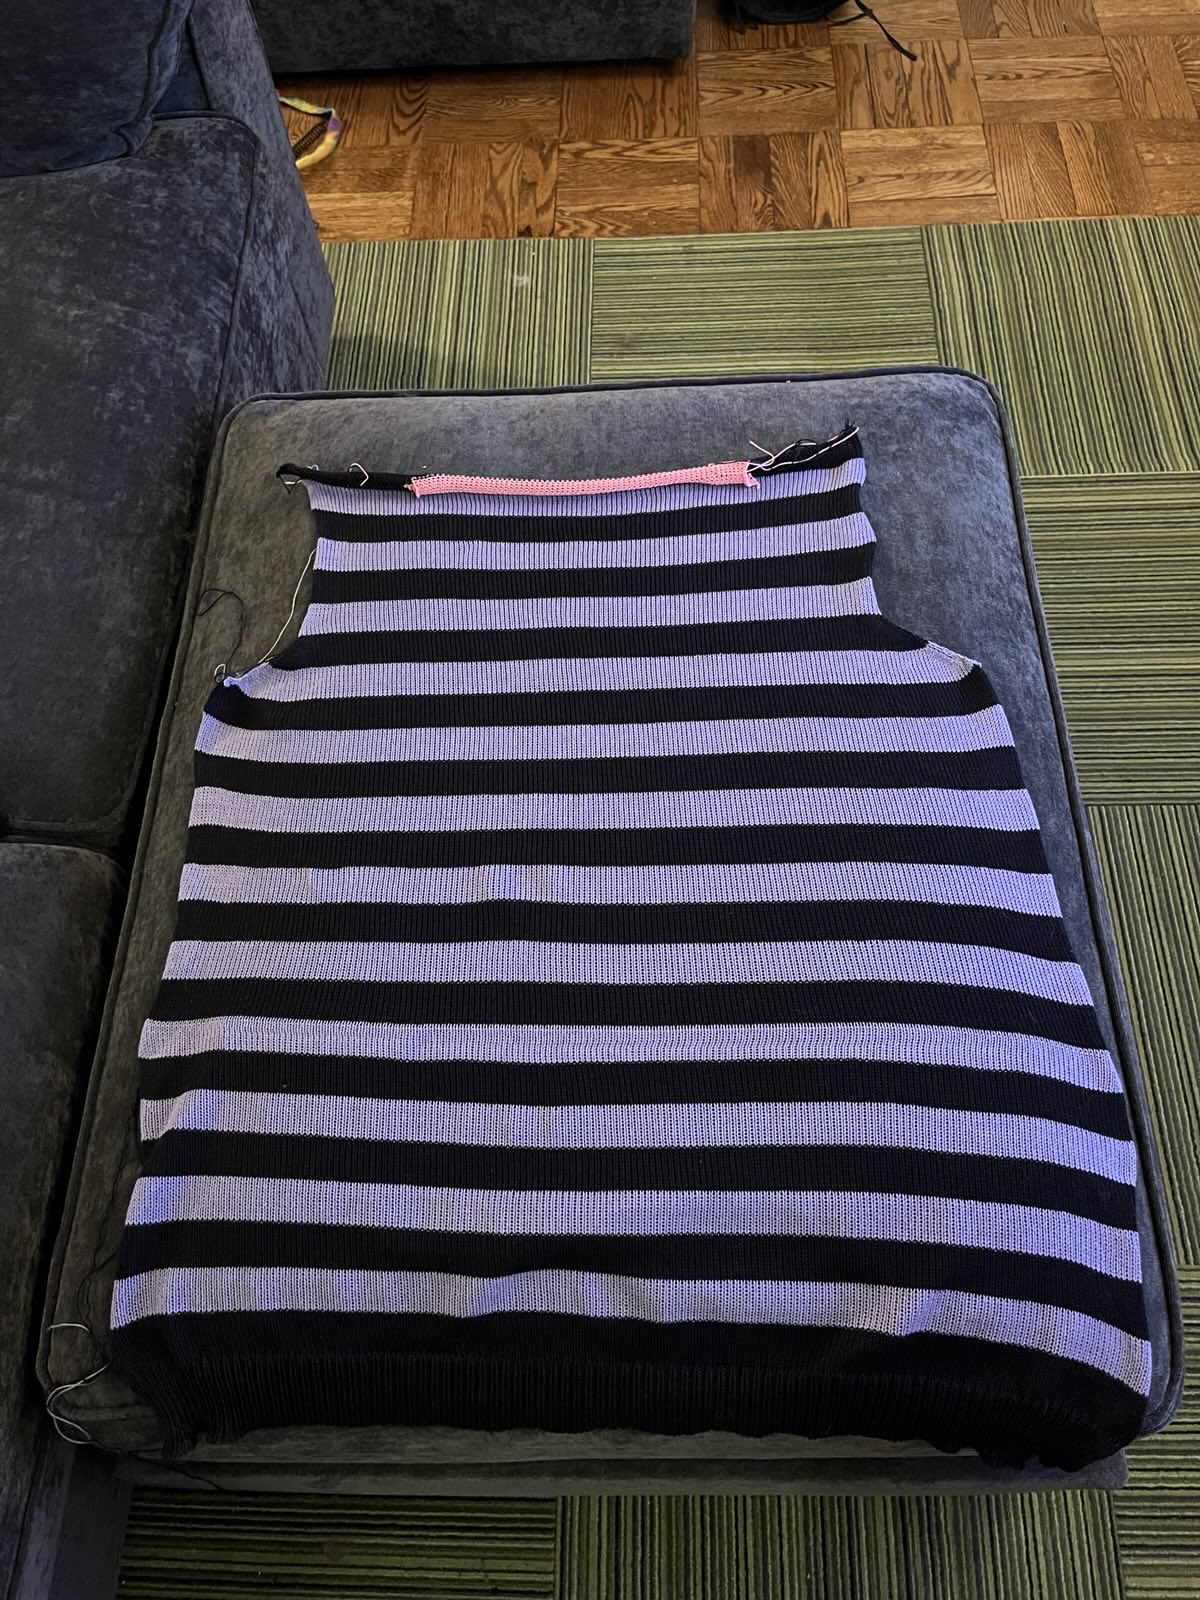
What I did do was finish seaming the neck and shoulders before Amy left in mid-December to visit family. I packed it with a length of yarn and a tapestry needle, as well as links to the videos on how to finish the sweater.
I gifted producer Amy a sew-it-yourself sweater kit. 😅
In truth, this was actually her idea. Several times she brought it up and I declined, insisting I would finish it, but eventually I relented.
So, the rest of this story is hers!
Okay, uh, finish the sweater, Amy!
She did! After watching Carson's video, and finding another video explainer or two on mattress stitching, this was Amy's on-the-road project for December.
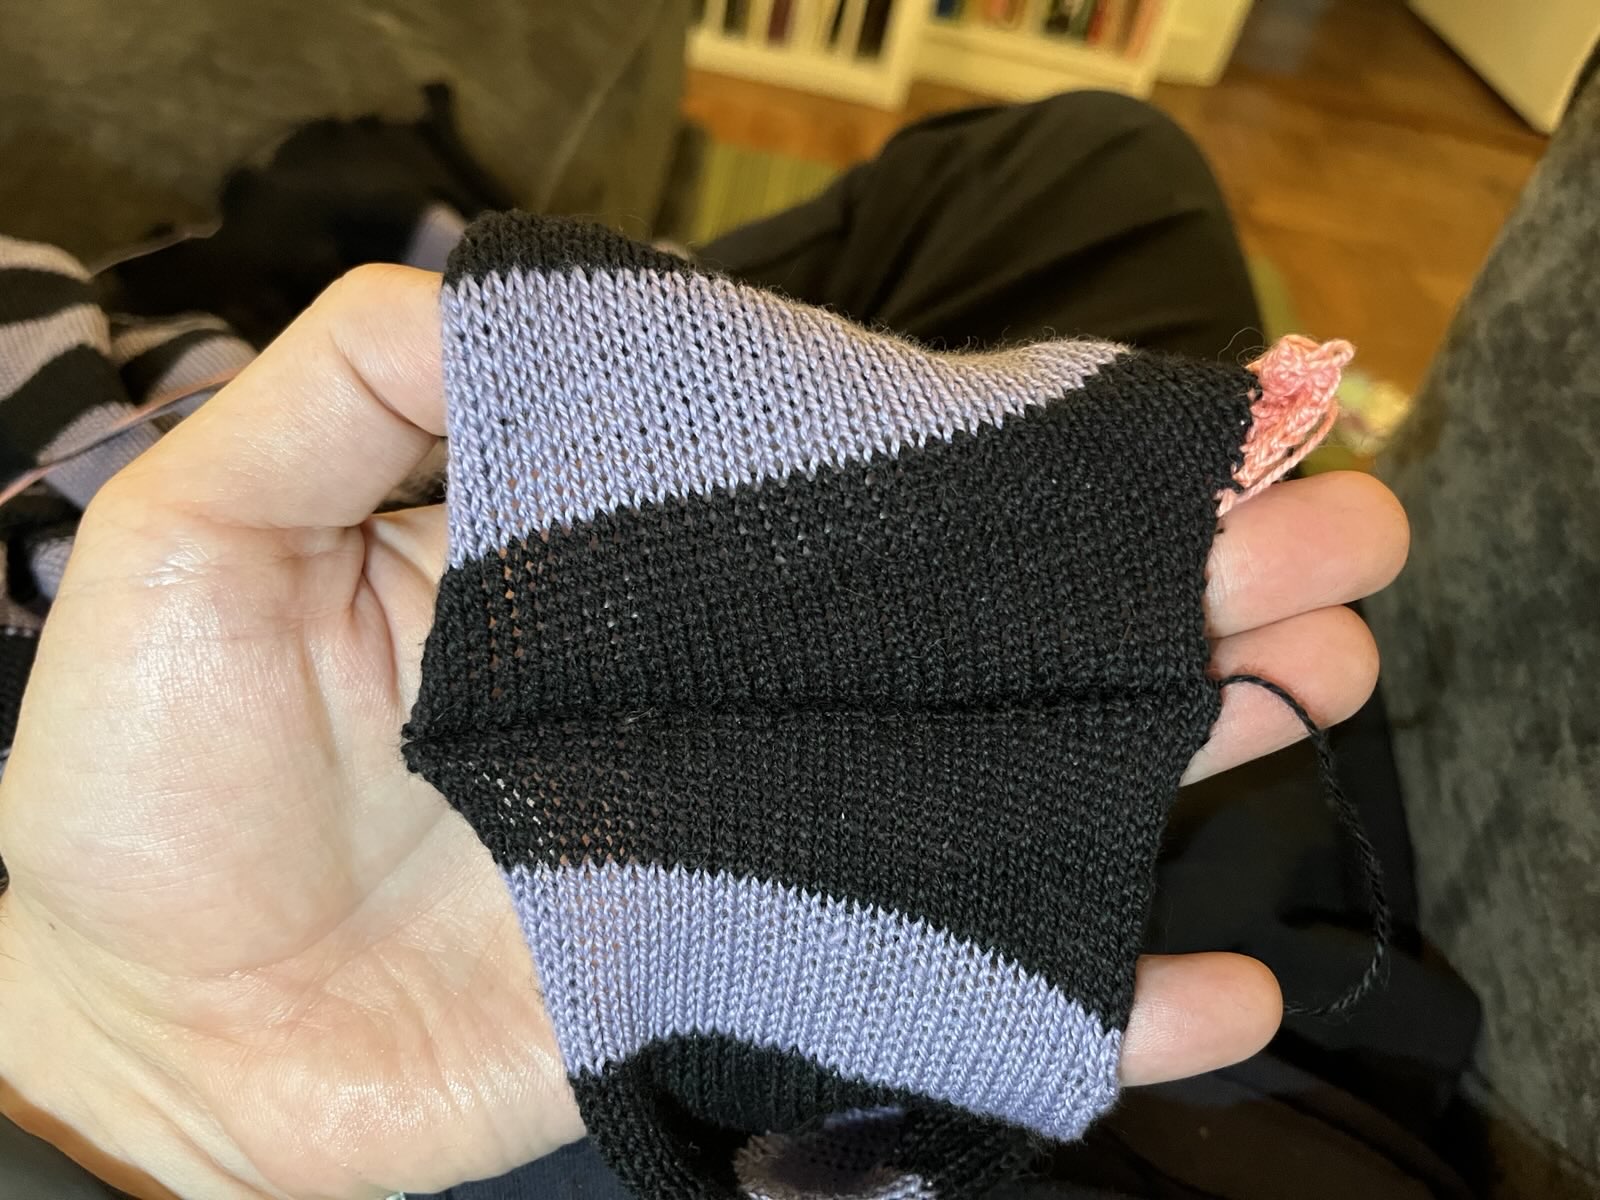
Beginning to attach a sleeve.A sleeve half-attached.One sleeve fully attached.One sleeve fully attached, one half-done.Two sleeves attached!One sleeve fully seamed.It's done! -ish!
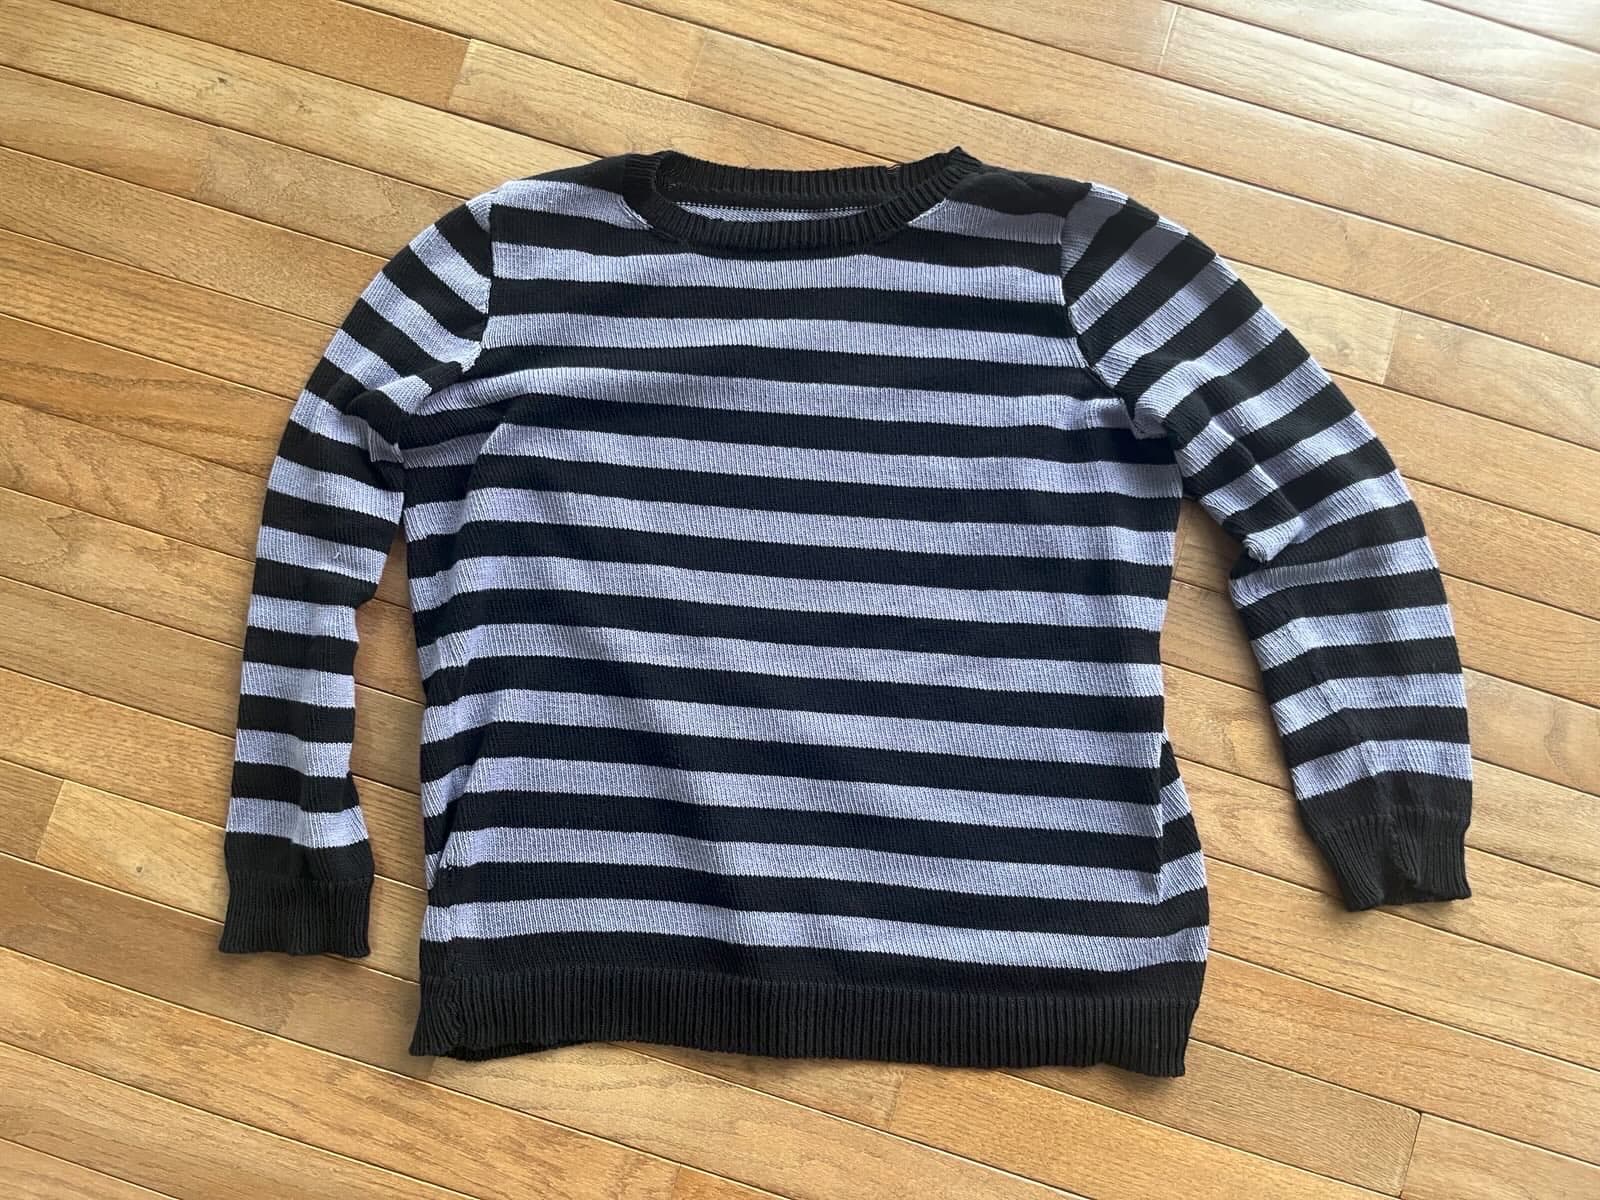
She got it finished on December 24th and popped it in the wash.
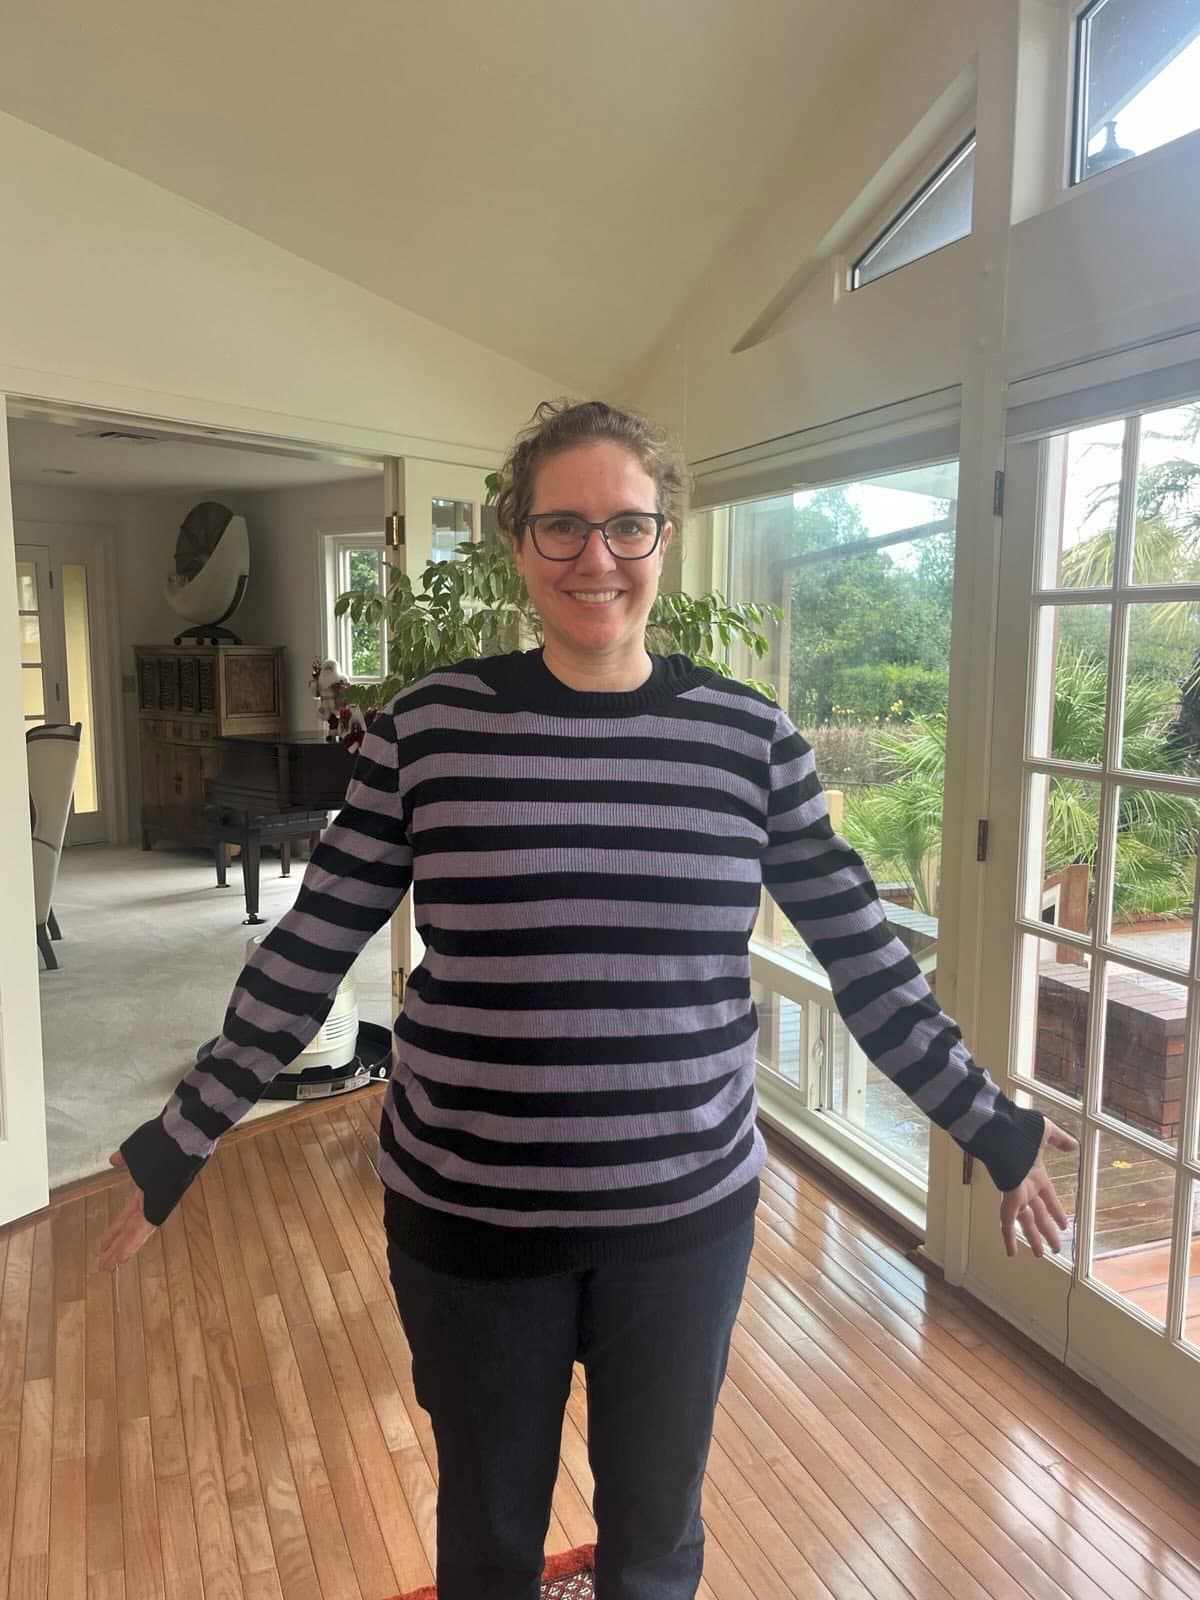
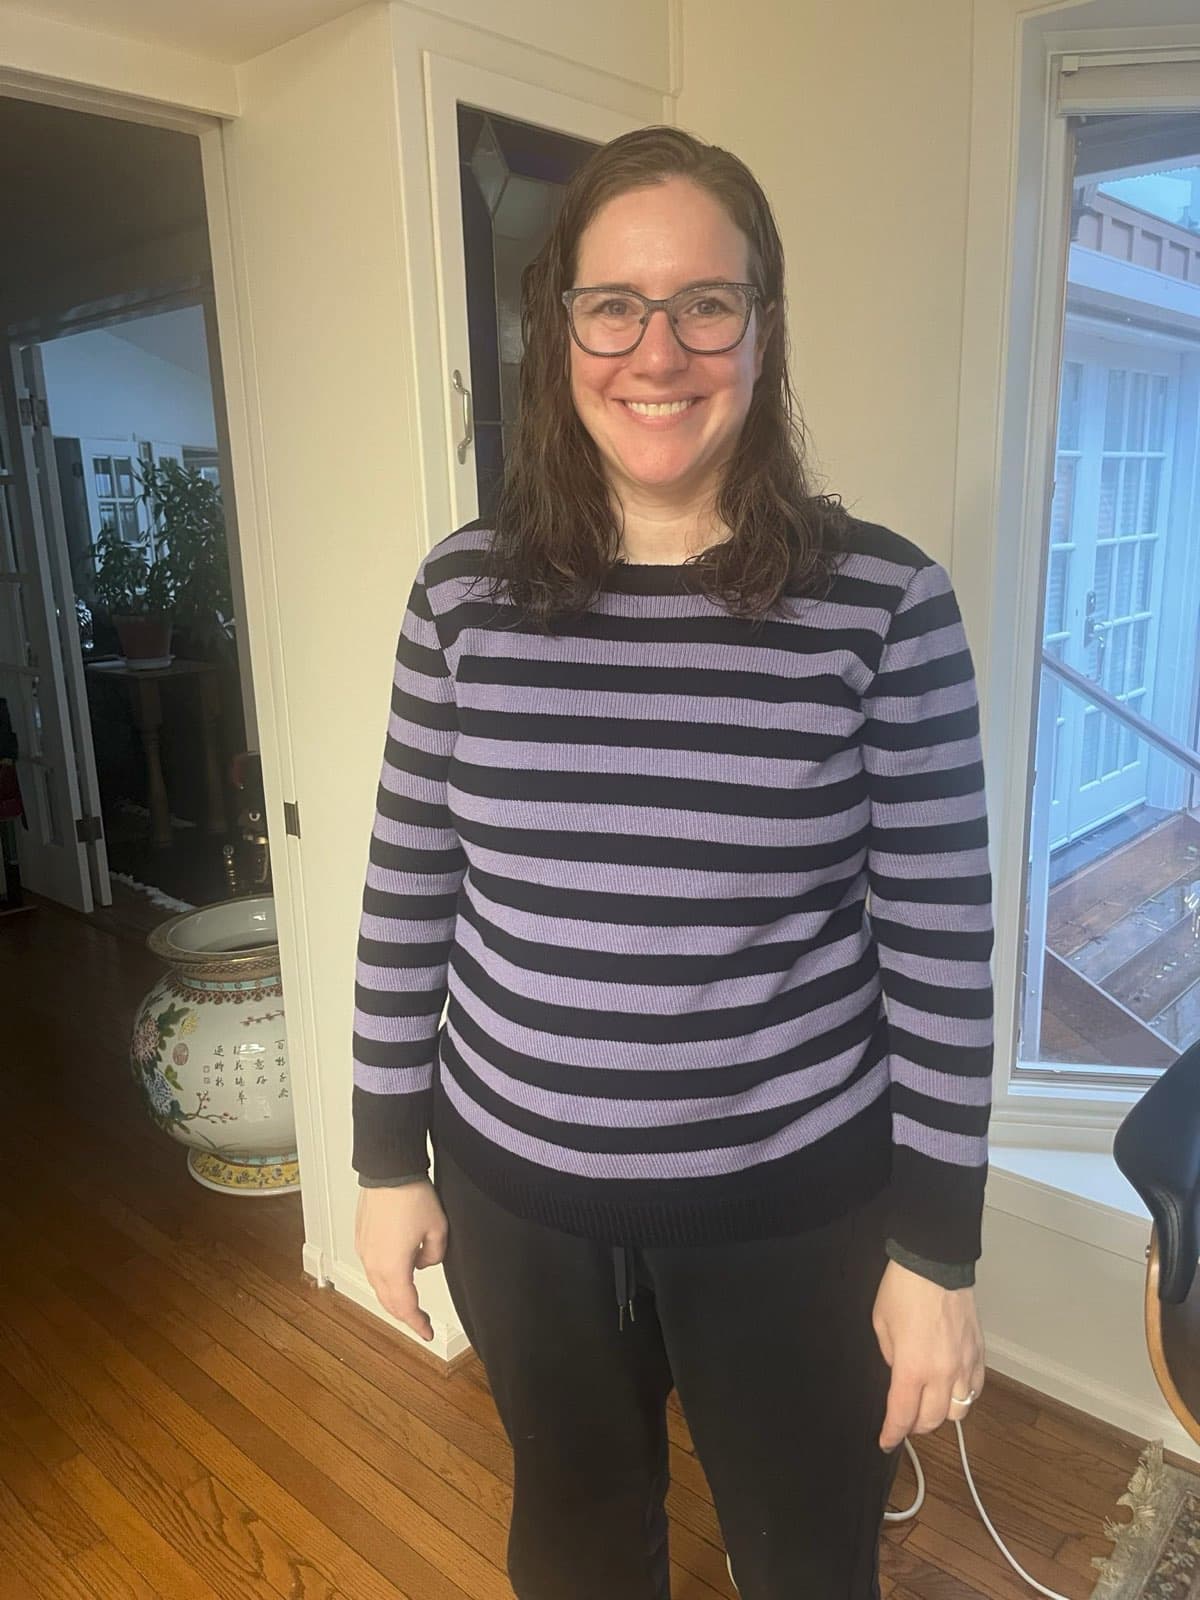
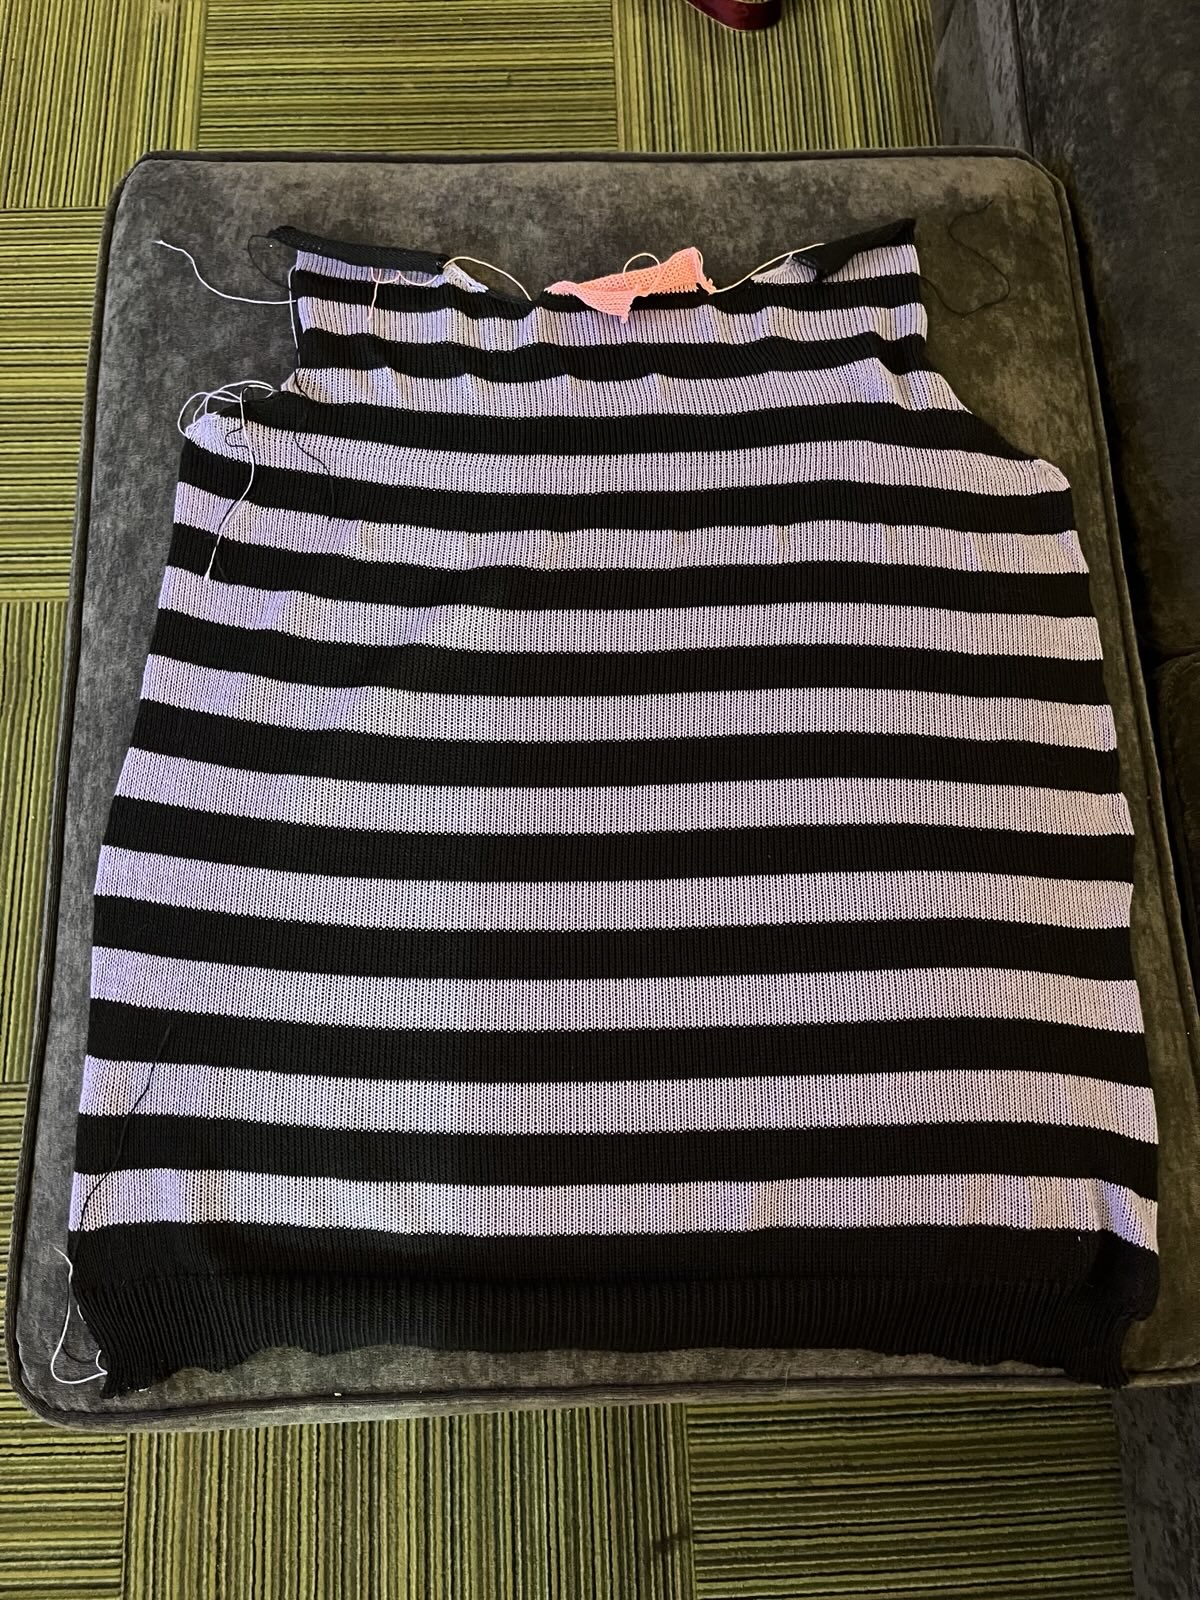
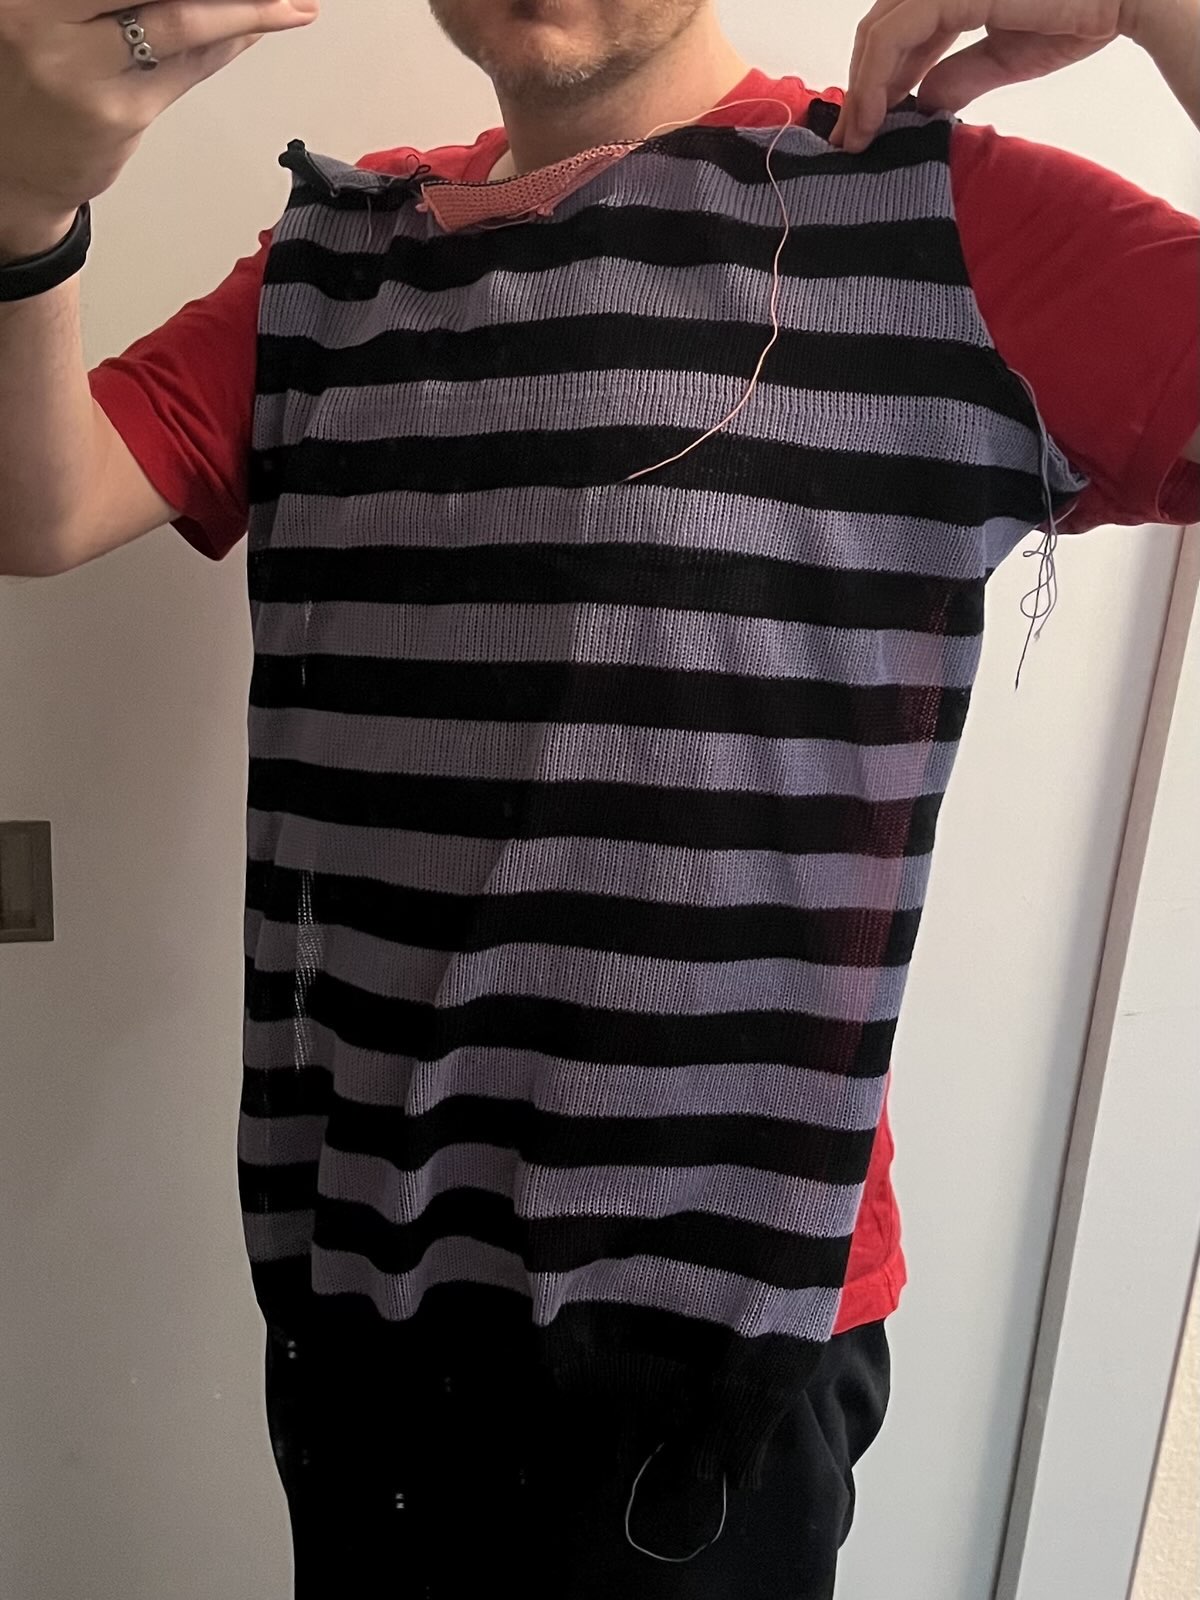
Finished and washed.A happy sweater model.
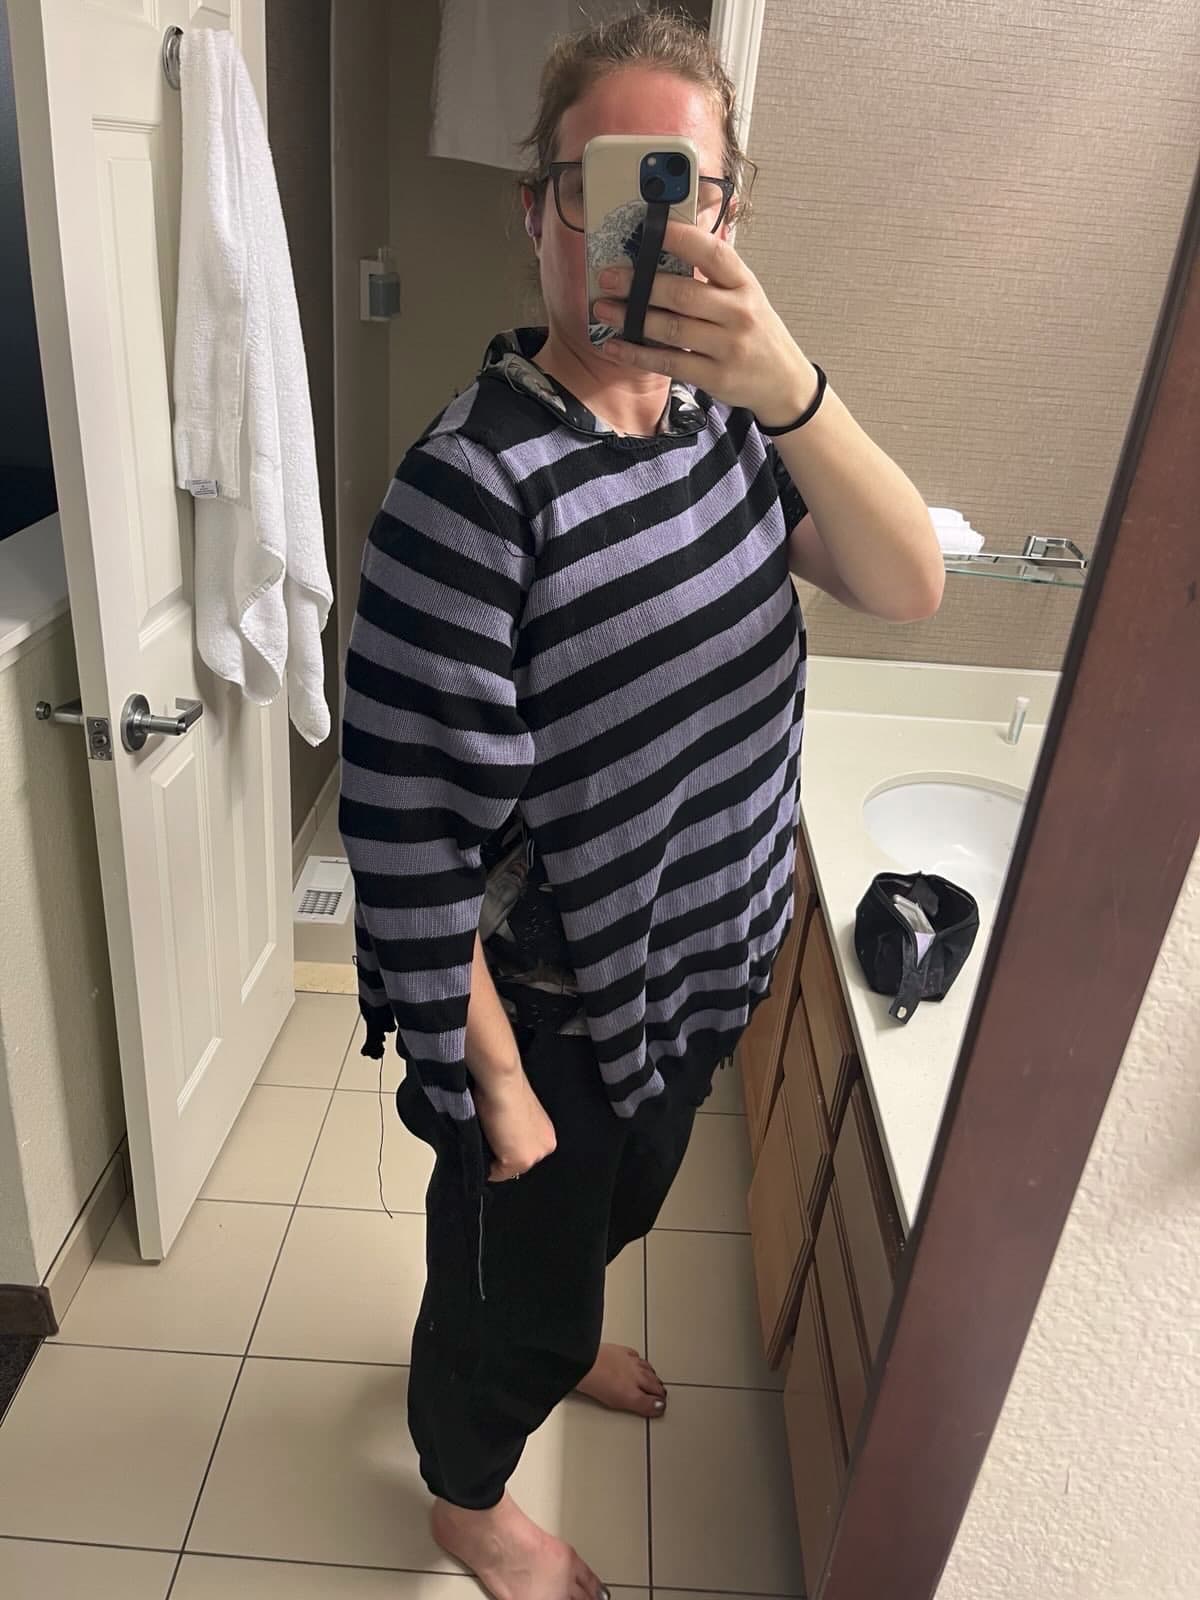
On Christmas morning, she found Santa had delivered a perfectly decent sweater! A bit short in the sleeves, and there's that dropped stitch in the back of the collar, but it's recognizably a sweater! And, according to producer Amy, it is quite cozy and I have seen her wear it several times. Amazing!
Thanks for reading
While I'm still somewhat embarrassed that I didn't finish the sewing-up on the sweater, I am really proud of how it turned out. I'm grateful that Amy graciously took it on as a DIY project. I certainly learned a lot, and Amy learned some new techniques, and we have finished a successful collab together.
And it looks like a thing!
This feels like a pretty great project to have accomplished at the end of 2025. A year that has been panned by critics, and most everyone, alike.
After completing the front panel, only one major on-the-machine task remains for this sweater, and that's the neckline.
This is easy to explain conceptually: connect the front and the back by seaming them together at one shoulder, rehang all the stitches on the knitting machine, knit some rows for the collar, then cast off on waste yarn.
Still, I was dreading this for some reason, so I procrastinated on it all day and then hemmed-and-hawed as I did it.
One shoulder: seamed! The view from the inside.The seam viewed from the outside.
Technically, the last bits of shoulder seams should include some purple stitches, but I found it too mind-bending to think about how to change colors while so many needles were going into hold and being wrapped. It's really just a few stitches so I don't think anyone will notice in the final sweater.
I then took a long break for food, exercise, and a shower, and only actually started hanging the neckline on the machine about 15 minutes before the live show-and-tell. 🫣
Can I knit and participate in a livestream event at the same time? Not really!
I really enjoyed the show-and-tell. It was encouraging to hear KnitFactoryImpl's own challenges and inspiring to see the final (extremely fluffy!) cardigan. I was delighted and honored that she shared my posts from this very website with some kind comments on my knitting setup and progress photos. I loved seeing photos from other participants, too! It was nice to have enough context to understand and appreciate some of the choices made in terms of stitch variety, yarn types, and (of course) colors and patterns!
I ended up waiting until after the livestream to finish hanging the stitches.
Once it was all back on the bed, following KnitFactoryImpl's advice, I:
hung a bunch of weights.
knit one row of normal knitting (at a slightly looser tension than the main body).
transferred half of the stitches to the ribber for 1x1 rib.
added more weights.
set up the carriages to knit the rib the same as I had done the cuffs and body panel hems.
I even got to use these cool weight hangers on the edges!
After all the effort to hang the stitches, set the weights, set up the carriage, knit the one row of stockinette, remove the carriage, transfer half the stitches, set more weights, and set up the carriages again, I was feeling pretty nervous about this going awry.
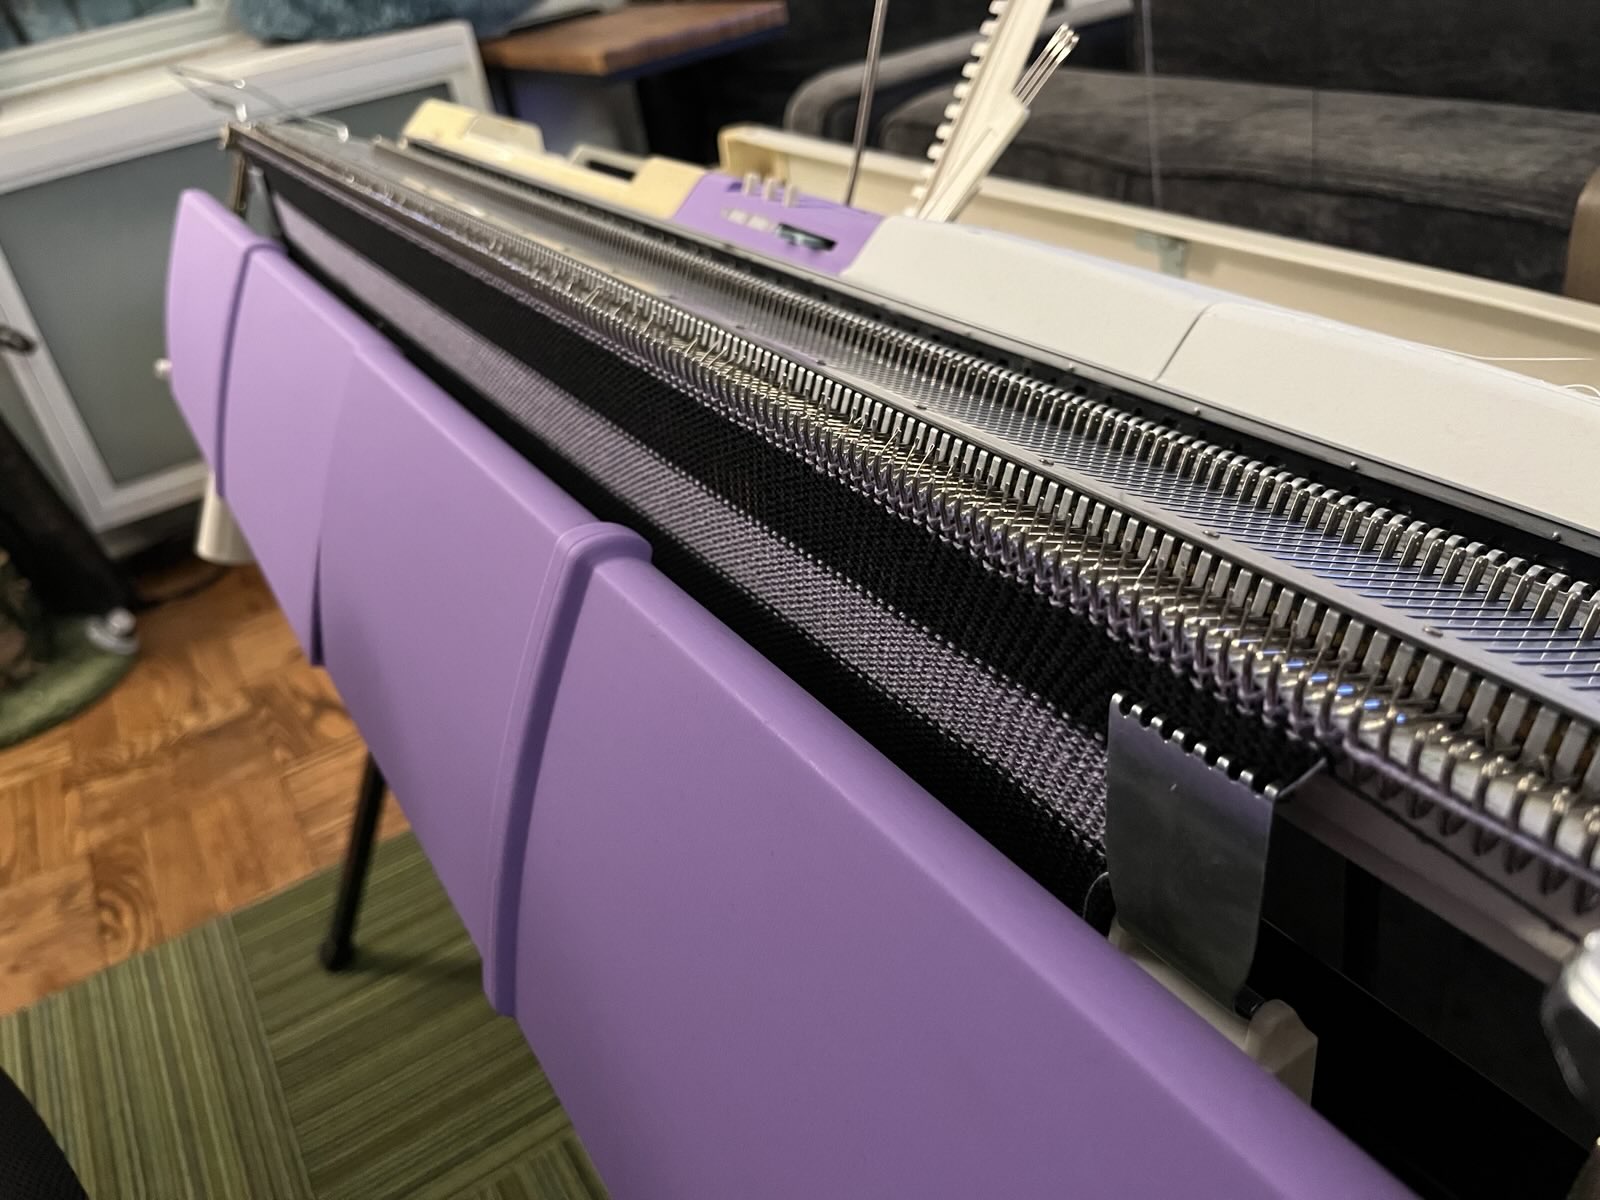
So I knit 12 rows of 1x1 rib very slowly, checking each stitch after every row. This was made more challenging by the fact that my main yarn is pitch black. 😅
To my relief, those 12 rows went great! It was time to cast off onto waste yarn with circular knitting. So, I switched yarns, set the carriages for circular knitting, knit a few rows back and forth-
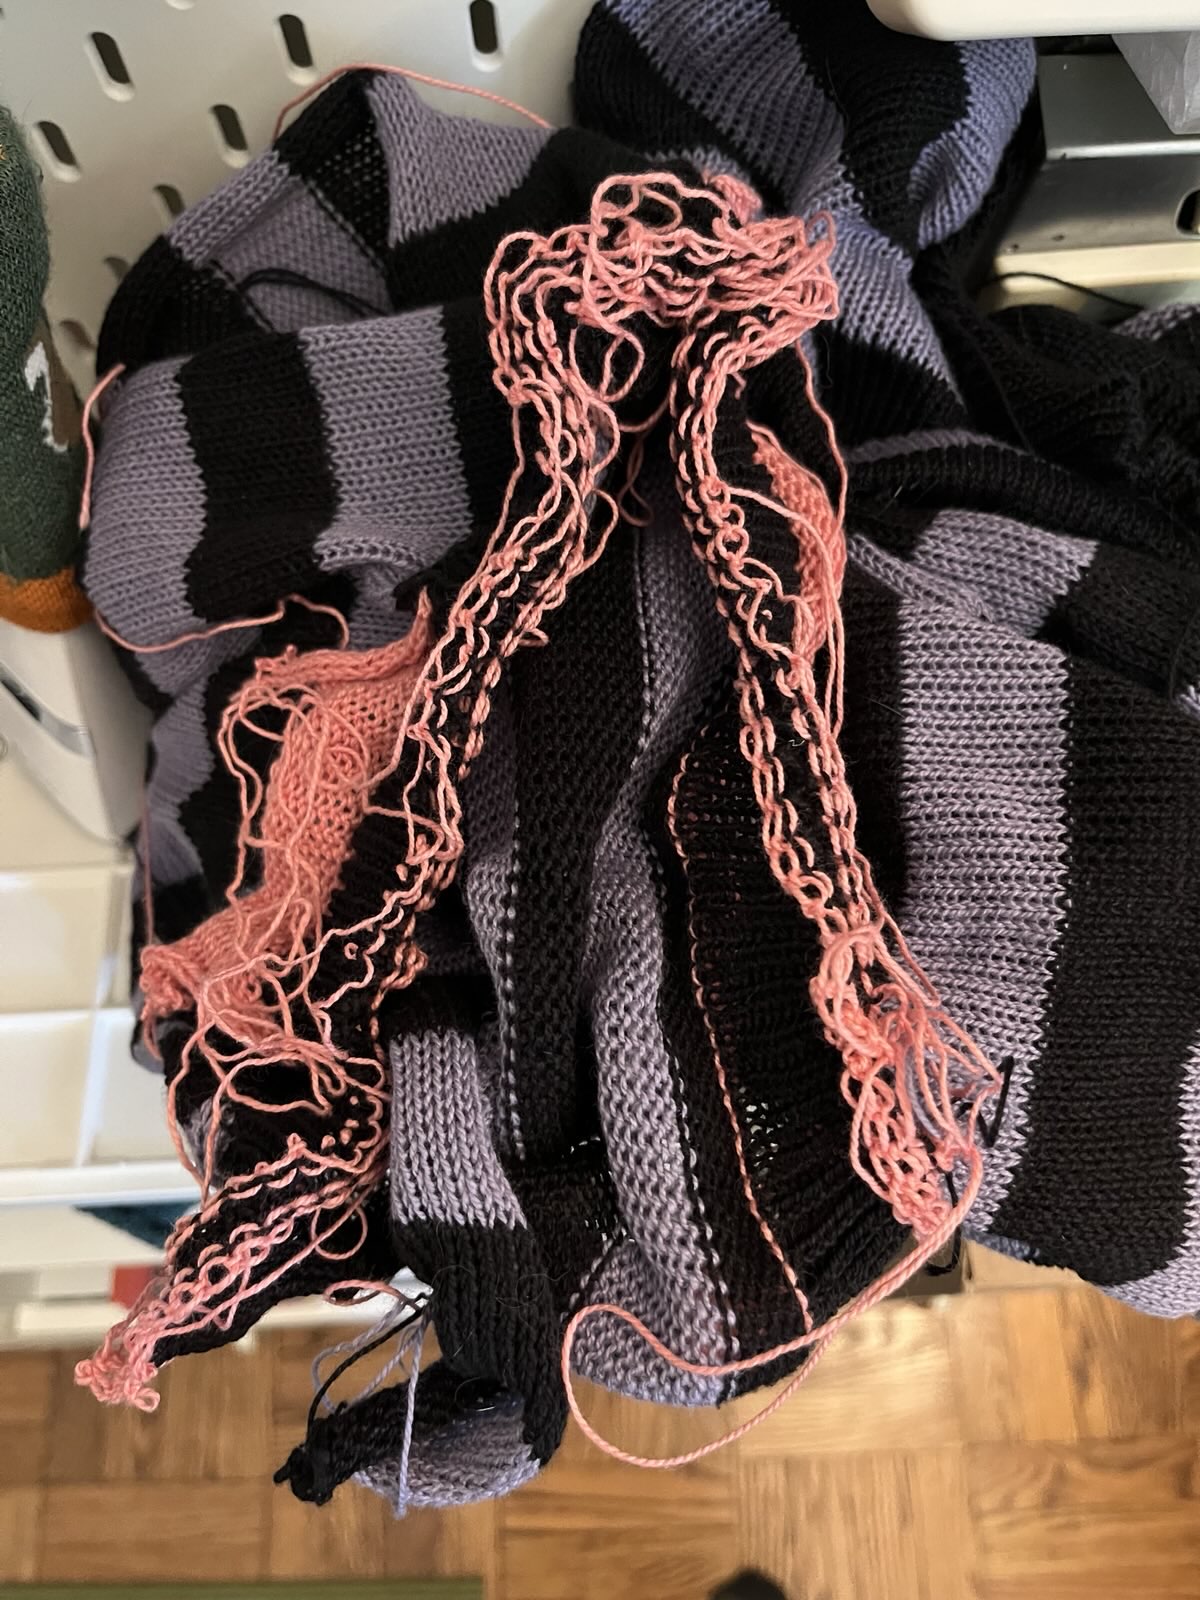
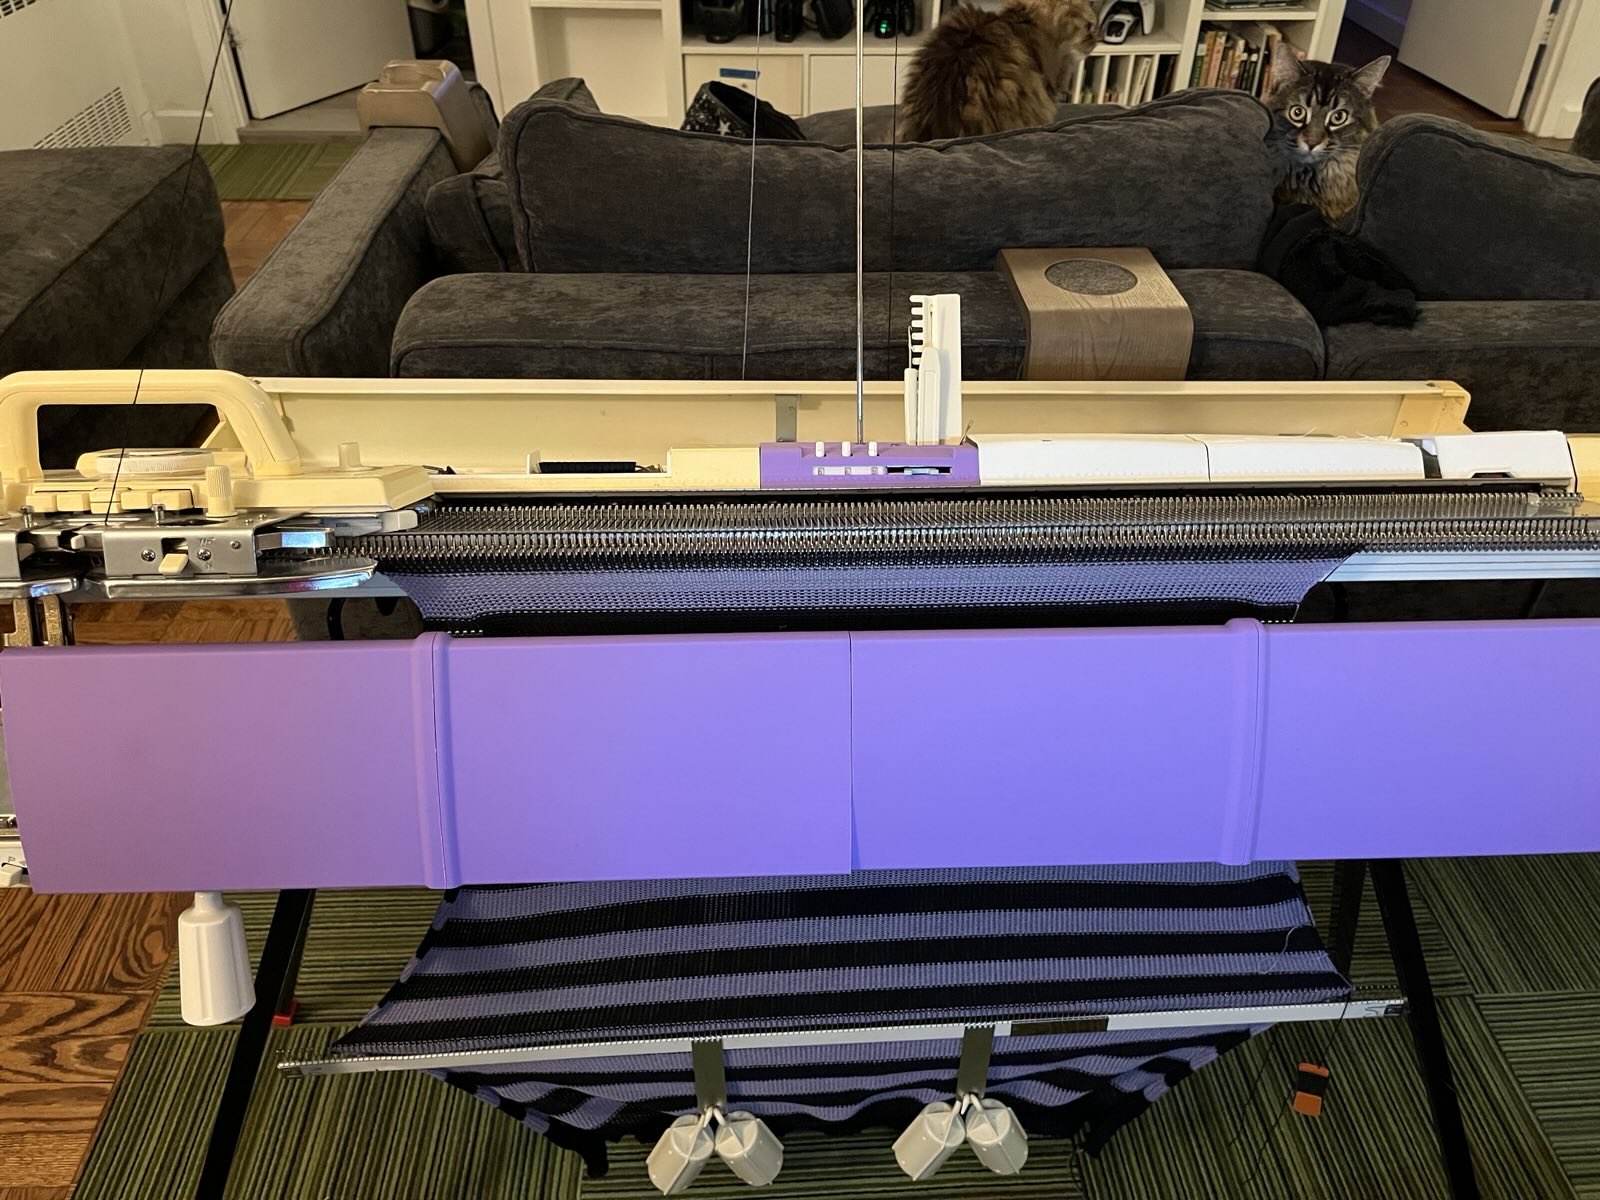
- and realize something was going very wrong! The tension from the weights just seemed to be not working. A bunch of stitches piled up loosely and then started dropping.
I didn't panic, but I did remove all the weights and start painstakingly removing the tangled knitting from the bed.
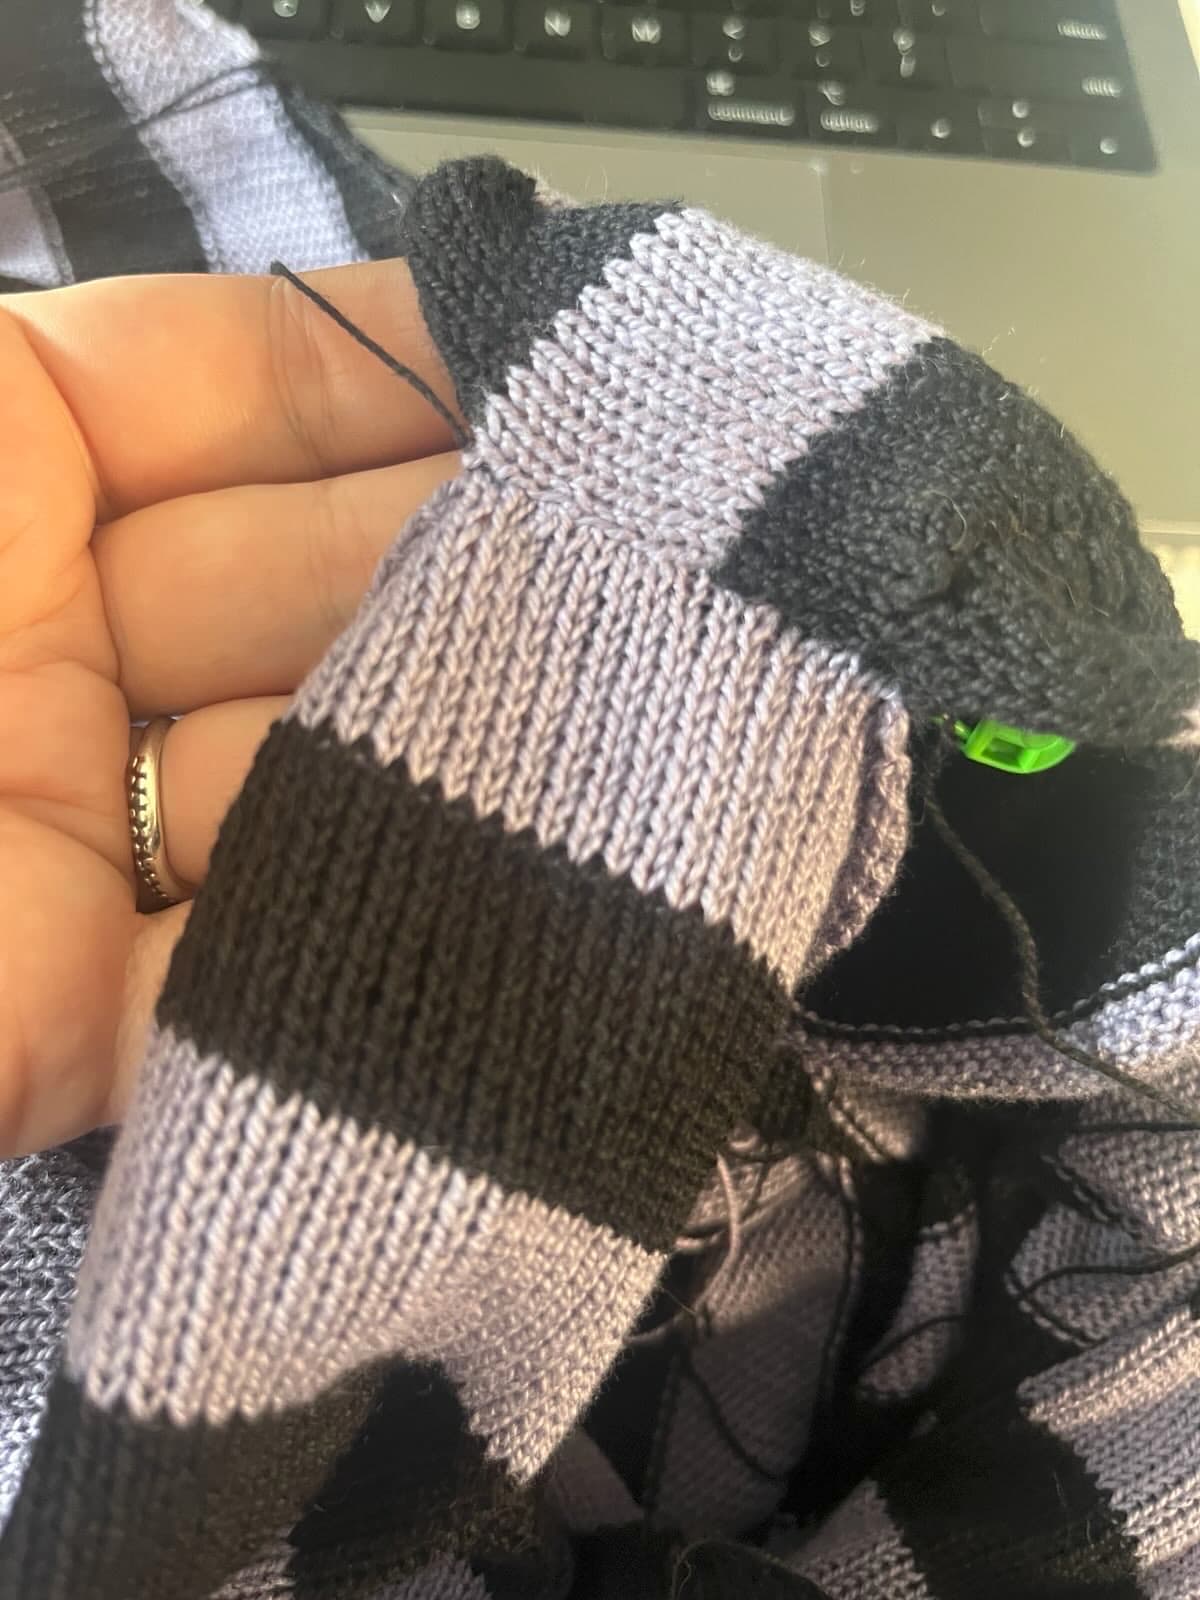
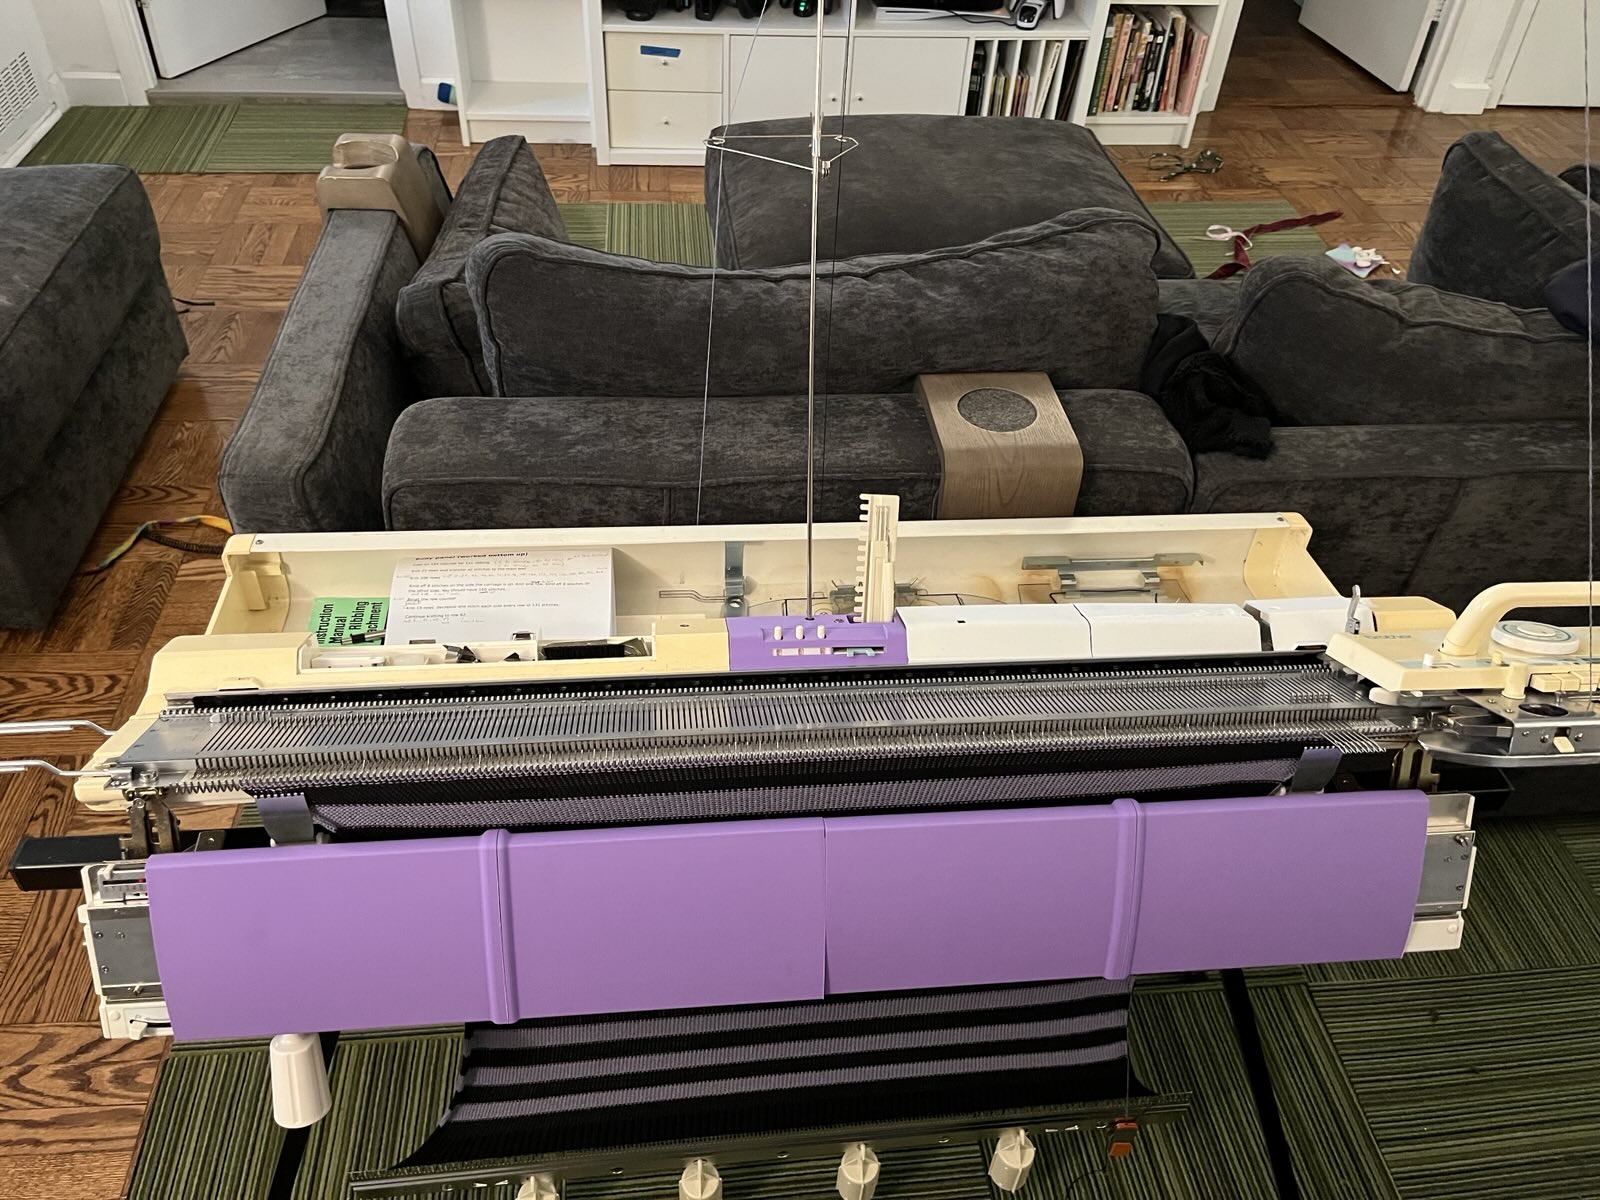
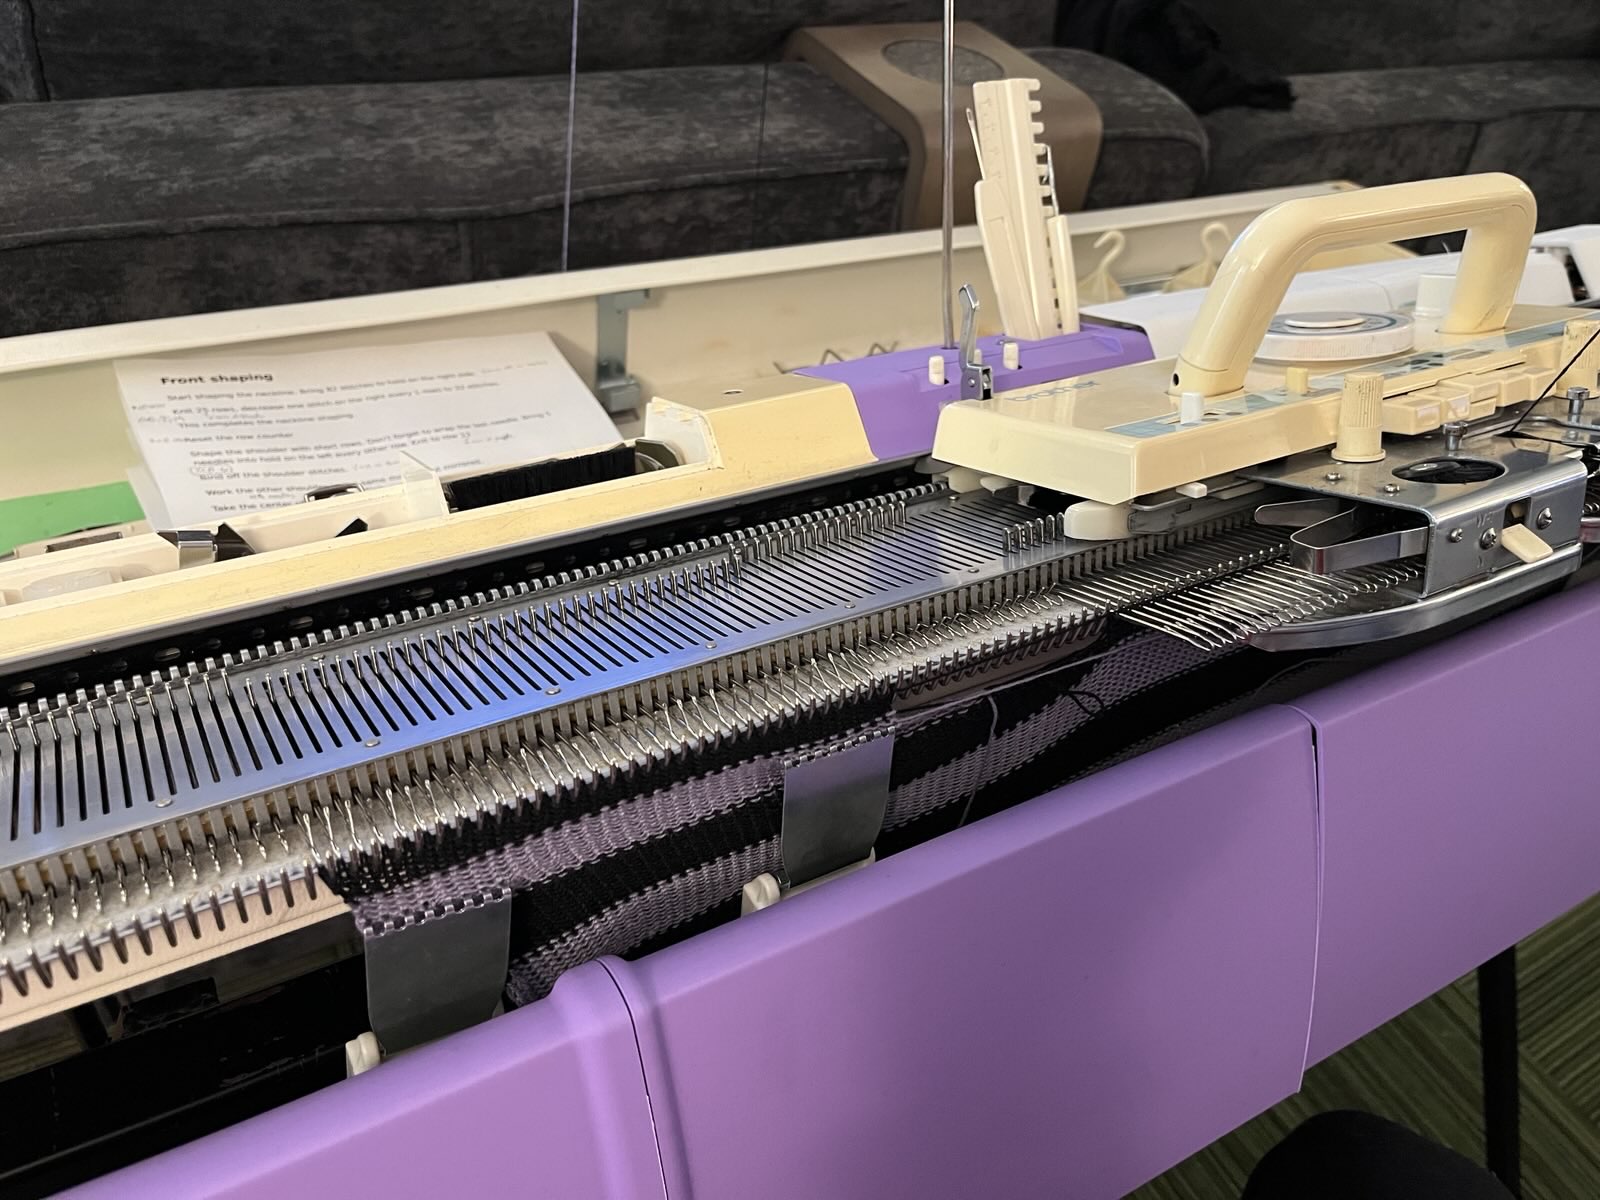
Yikes. Only one or two loops of the pink waste yarn are protecting the live stitches at the end of the collar.
Most of the actual rib came off the machine fine. A few stitches have dropped but, in theory, I can fix those while sewing up to finish the seam. HOWEVER: sewing up seams is definitely one of my weaker skills, so I am not sure I trust myself to do it without making a huge mess of things.
For the sake of my future as a machine knitter, I think I will probably pull all this ribbing off and try again. It will be a time-consuming process, but it's safe to do. Importantly, it will give me a chance to figure out what bits of the knitting machine / stand / cast-on comb / hanging weights are interfering with one another, causing the stitches to bunch up after that dozen-or-so rows.
I could also stand to practice seaming and mending, a good reason to try and "rescue" this delicate collar situation.
Which will I choose? Will I let this project languish now that the knitalong is over? Stay tuned to find out!
Meanwhile, many thanks to KnitFactoryImpl for running this knitalong, for providing a super versatile free pattern generator, making extra videos to detail each piece, and pulling together and sharing photos and more from the community! Also, you know, for the tons of great instructional and inspirational machine knitting content! Go subscribe and support her channel, already!
At the dawn of the final day of the knitalong, I was determined to finish the machine-knit portions of the build. That means making the front panel, seaming the front and back along one shoulder, rehanging the neckline, and knitting the collar.
The front panel is constructed about the same as the back panel, but with differences in the neck and shoulder shaping. Compared with my rough go of it on the back panel, the front panel went much easier. I found myself tripping over the combination of working the pattern and switching yarns for the colored stripes. And I'm afraid that no one on Earth knows exactly how the stitch and row counts on the arm hole and neck actually shaping turned out. Future me will, unfortunately, become the one to solve this puzzle.
Great success up to the arm hole bind off!
I played gravity chicken with the cast-on comb and weights and, unfortunately, they were near touching the ground just as the pattern called for the long series of decreases for arm hole shaping. I was able to hang the regular cast-on comb, but it added some complication with moving those stitches. If I had to do it again, I'd make sure to re-hang all the weights 10 or so rows before that.
Yarn (and my stress levels) under tension as I work the left neck and shoulder.
I also regret being precious and/or clever with managing the out-of-work yarn. To keep down the number of ends to work in, I let the out-of-work yarn float from one section to the next. For straight sections, I should be able to hide the floats in a seam. For areas with decreases and bind-offs, I should have just snipped yarn and worked in the ends as I went. I think I'll be cutting and adding extra yarn to several floats that ended up being pulled shorter than the stitches they are meant to hide among. 😩
Looks like a body panel of a sweater!Hanging it on my body has me worried about the arm hole depth, but we march onward!
With breaks for food and stretching, it took me about 4 hours to get through this body panel. With my other obligations for the day, I don't think I'll be able to finish the neckline tonight. But, hey, there's always tomorrow!
I'm not super confident in how this is gonna turn out, but I'm proud that I've pushed through so far! Plus I got to try draping all the major pieces on!
In the first installment of this series, I made some sleeves, putting me well on time for the knitalong. Since then, however, I spent two weeks in Berlin, a few days sick, and some days catching up on work. All that adds up to: the knitalong is already practically over! 😱
However, I can't let that get me down. It's not homework, there's no grade. I just want to practice some skills, learn some new ones, and make producer Amy a nice sweater. So, let's cast on and get back to it.
The second video in the knitalong series is on body panels. I started with the back. A process that was meant to look something like:
Cast on 1x1 rib and knit the bottom hem.
Transfer stitches to the main bed and knit the body (a long rectangle of plain knitting).
Shape the arm holes by binding off some stitches, then decreasing for a bunch of rows.
Shape the shoulder and neck by working one side at a time.
Because I'm working this sweater with a pattern of stripes, I peppered the printed instructions with the row count and color for each color change. This would become important when switching "sections" of pattern that restart the row counter to 000, and doubly important for the shoulder shaping, which has to be worked twice.
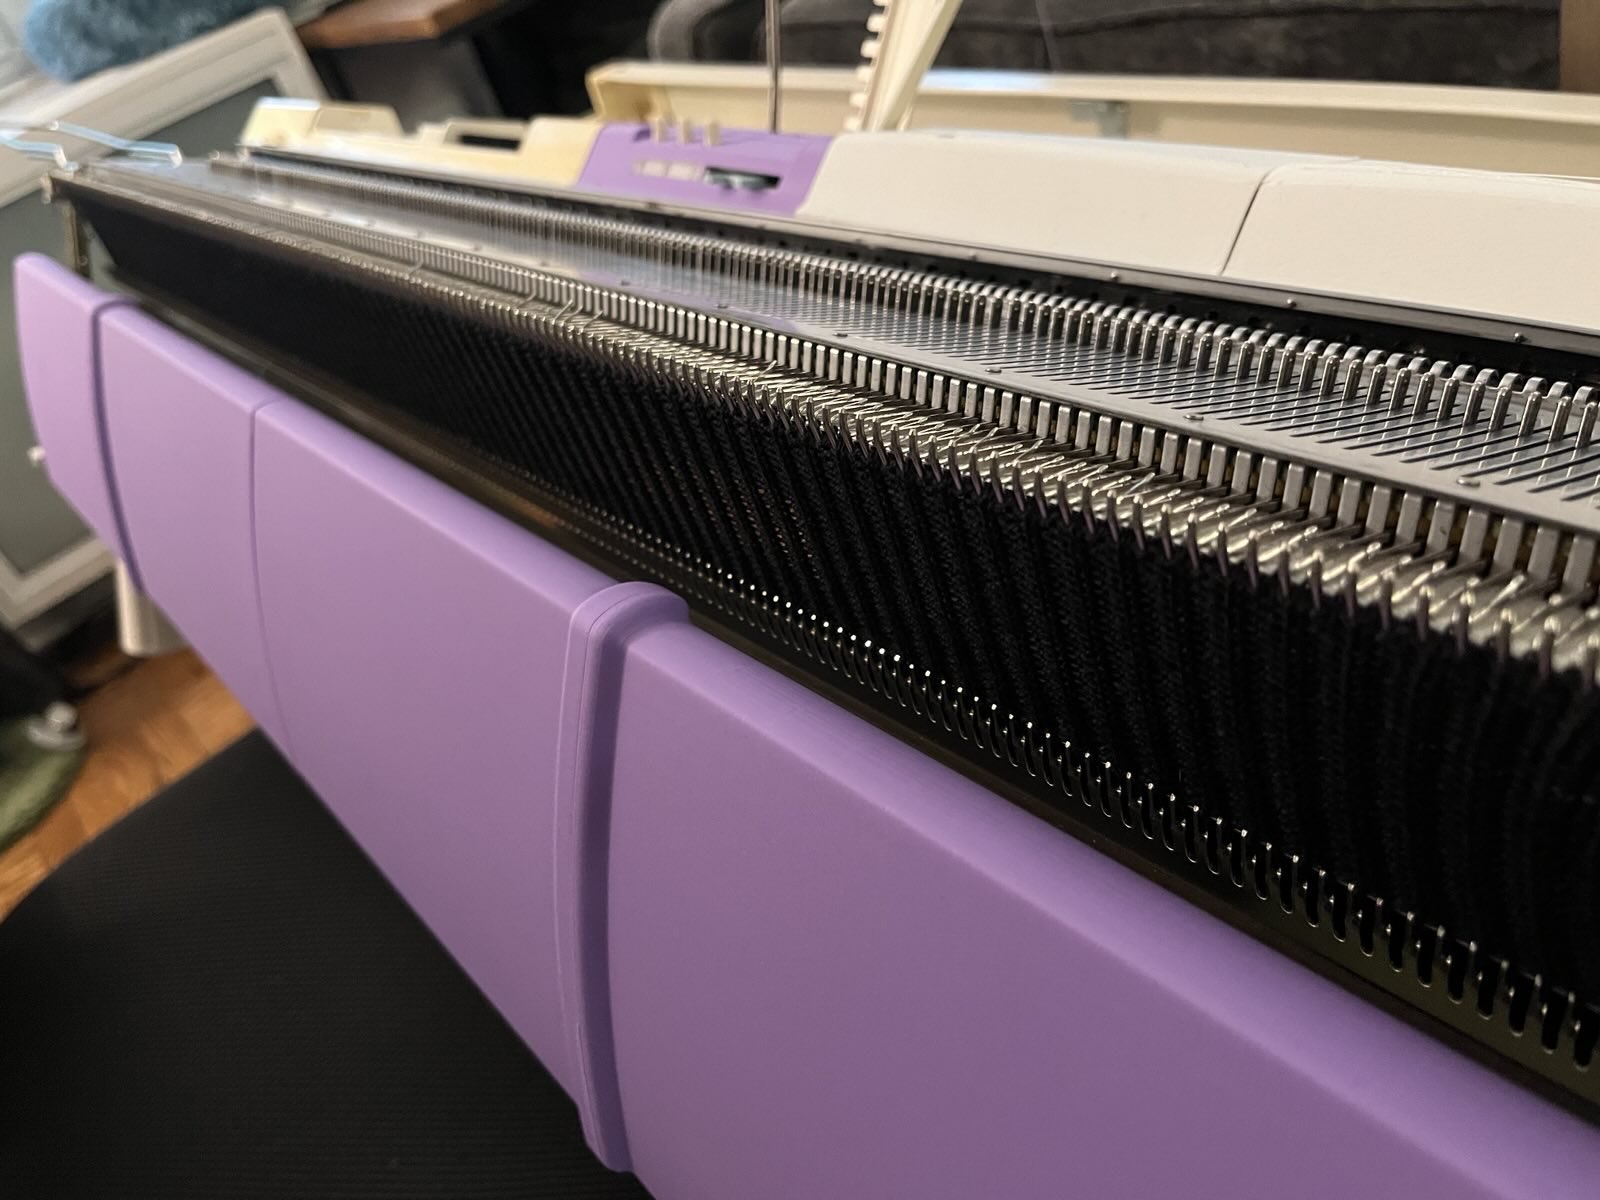
Tough to see in black yarn, but here's a ribbed hem for a body panel!
This was my first time casting on a 1x1 rib across almost the entire bed. I found it challenging to get the ribber's full-bed cast-on comb. In my first failed attempt the comb was one needle too far to the right and got caught on a piece of the machine. For the second attempt, one of the weights got stuck on a piece of my knitting machine stand, causing stitches on that side to bunch up and drop. Seen above: I finally got it right!
After transferring the stitches from the ribber to the main bed, it should have been smooth sailing for the main body. Unfortunately, working the striped pattern proved challenging with so many stitches on the bed. The area for "parking" the non-active yarn ends up under the carriage, making it easy to tangle and create long loops. And, oh no-
Dropped about half the stitches off the bed during a color change. 😭
Just over halfway through the main body, after switching colors and, I SWEAR, checking that the new yarn was properly in the carriage feeder, I dropped off a ton of stitches.
Thankfully, this was recoverable, if tedious.
Remove all weights from the work.
Carefully remove the work from the machine.
Go back to the last row of the previous color stripe and re-hang the live stitches. At 185 stitches this was quite tedious!
Reset the row counter to match.
Hang a cast-on comb and some weights.
Resume knitting, redoing the stripe that was dropped. It will be removed after taking the piece off the machine.
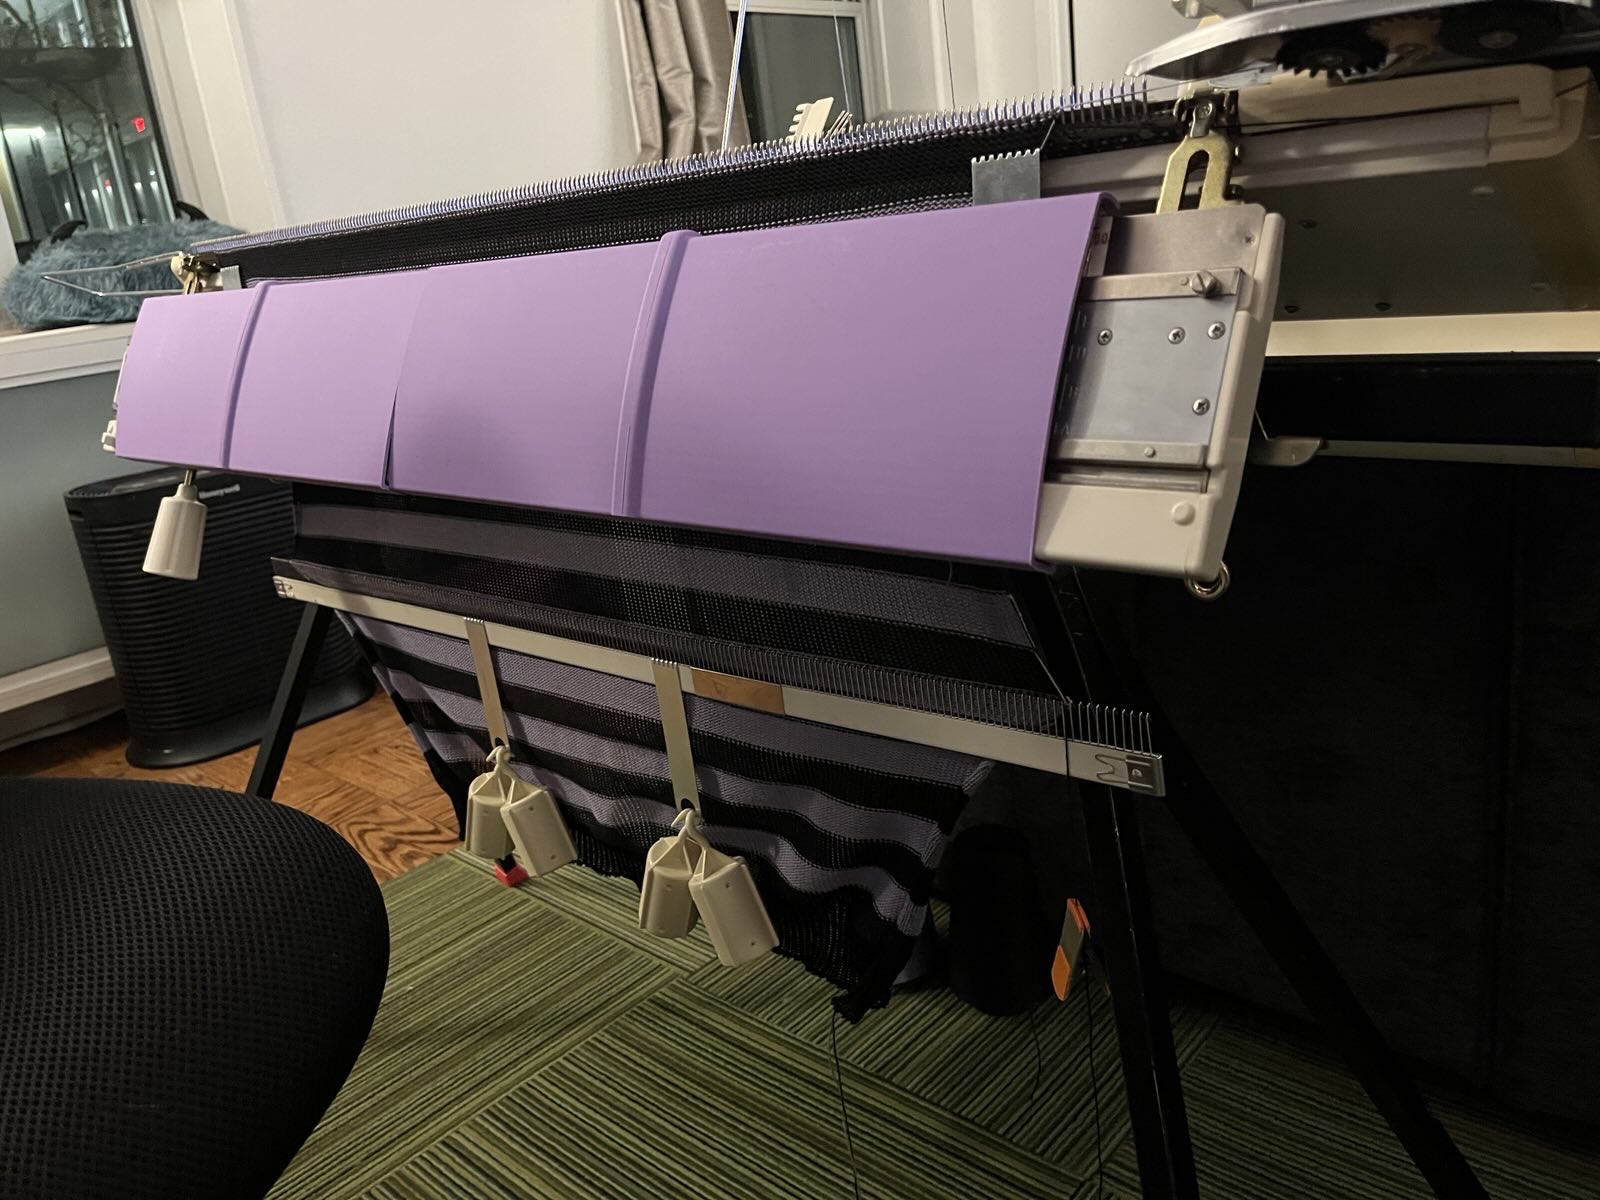
The new, somewhat ridiculous, weight configuration. Photo taken after several successful stripes.The more recent rows of stripes. The ribber sure gets in the way of photos!
That was, thankfully, the only major disaster.
When I made it to shoulder bind-off, I pulled up the knitalong video to start double-checking steps. The bind-off went fine. The reductions for the shoulder holes was made more complicated by needing to switch colors in the middle, but went pretty okay!
Ready for neck and shoulders. Lolly cat is staring because I'm wearing a neck light and moving lights cannot be trusted.
At this point, it was time to work the shoulders one at a time. I referred to the video multiple times. I goofed up and dropped some stitches that I was thankfully able to recover. I took it slow and sweat the details. I nodded along at the concept of short rowing on two sides as I watched the video a 5th and 6th time. I ver-ry care-ful-ly bound off stitches. I counted and recounted and still somehow ended up off-by-one stitch somewhere along the way.
But I finished! And I think it will be okay!
Test fitting by laying it on my back. Sure! Seems like a thing!I'm expecting this to relax and shrink up after washing!
I worked on this piece on and off all day, in between work and meetings and phone calls. I definitely putting in at least a few solid hours of work, mostly in recovering from mistakes. I wrapped around 10pm to write this post!
I'll be back at it tomorrow! My hope is to at least finish the front panel and the neckline and get a post online in time for the knitalong's Sunday show and tell. I'll still need to seam the final shoulder, sleeves, and sides, but I'll have finished the machine knitting part of it, and that should feel pretty good.
I got serious about learning machine knitting just this year, and only just finished my first sweater (which I need to post about!), so I think I barely qualify to do this project. It uses a combination of techniques that I have used in isolation, like increases, decreases, and short rows, but all together. I recently got an attachment for doing ribbing, which I've barely learned to use, but I want to do ribbed hems.
Adding to the challenge, I didn't quite know what sweater I actually wanted to make! Thankfully, producer Amy saw some promise in our yarn stash and made a request of a 4-color striped sweater made from some cotton yarn in sorta-trans-pride-flag colors.
Always be swatching
Following the instructions for the knitalong, and Carson's evergreen advice, I made gauge swatches for the body, with a couple of different striping options, as well as a sample swatch of ribbing. I used a tension that I've been pretty comfortable working with this yarn so far. We plan to machine wash and dry the finished sweater, so we treated the swatches the same way to see how the fabric turned out.
We were both pleased with how the swatches came out! I think the finished sweater will look nice based on these. More importantly, during swatching I learned that I absolutely do not have it in me to do a 4-color striped knit at the point in my knitting journey! 😅 Until I am able to invest in a color changer, I am going to focus on fewer colors, so we agreed on a pattern of black and purple stripes, evenly spaced at 12 rows each.
Sensing a pattern
With gauge swatches in hand, it was time to visit the pattern generator for the set in sleeve crew neck sweater and punch in my gauge measurements, as well as producer Amy's measurements for how she wants the final sweater to fit.
The resulting pattern is a set of written instructions for each part of the sweater: front and back panels that are worked the same from the bottom but differ as you approach the top, sleeves worked up from the cuffs, and the neckline which is worked as you combine the pieces.
Carson recommends starting with a sleeve, for many reasons, and that's the topic of her first video for the knitalong, so that's where I started!
One does not simply knit a sleeve
Each sleeve is a journey, starting with a cuff (25 rows of ribbing, in my case), then switching to stockinette ("regular") knitting for the long body of the sleeve, with regular increases as you widen the sleeve from the hand to the arm hole. At the maximum width, we're not quite done. We bind off some stitches for the underarm, then do a few different sequences of gradual decreases, and finally some round shaping with short rows, before finishing the piece to remove it from the bed.
For this sweater, color stripes would add extra complexity. No matter what else was happening in the pattern, I would need to stop every 12 rows to switch out one color for the other. In theory, the mechanics of each is not difficult - my machine has a little notch at the ends to park one yarn while the other works. But I would have to make a color switch every 12 rows while also following the rest of the pattern, such as increasing every 10 rows. In a way, I would be working two sets of instructions at once. Thankfully, I once again followed Carson's advice and printed the pattern on paper. After much fidgeting and scrunching of my face, I was able to scribble out number sequences until I was pretty sure it would work.
Sleeve time let's go!
With pattern in hand, I set up the machine and got to work. I followed my machine manual instructions for casting on 1x1 ribbing at the required number of stitches and knit the cuff. I transferred all stitches to the main bed for the body of the sleeve and knit my first 10 rows to an increase. Two more and it was time to switch colors. Increase again at the next multiple of 10. Then another color change at 24 rows and oh god-
Knitting machine with the carriage removed and set aside. Most of the knit piece has dropped from the bed with only a few inches still on working needles.Viewed from below, the weighted cast-on comb dangles at an angle as most of the knit piece has dropped.
I believe I improperly set the yarn in the feeder after changing colors. With the incoming yarn failing to feed, the machine promptly dropped switches from their needles. I was most of the way across the bed before I realized this.
In theory, it was possible to save this piece. I used my transfer tools to pick up a few stitches, but between the weights on the work and my clumsy fingers I was going to have to rework a lot of stitches. I decided to cut my losses, unravel everything so far, and call it a day.
Sleeve time, let's carefully go
The next day I started again, this time taking extra care to check that the yarn was properly ready to feed whenever I changed colors. Keeping track of all the changes was challenging, and at times during the decreases and short rowing I ended up off by a stitch here or there. But I made it through!
At this point I took a break, cast my ballot in early voting, and enjoyed my afternoon.
What's another sleeve?
With one sleeve done, the second was sure to go faster. I felt much more confident in the rhythm of the changes and techniques. I even stopped to take a progress photo!
This photo was taken after the long sequence of increases, which end with binding off some stitches on either end to make a "shelf" for the under arm. Completely by coincidence, I took this photo right before I made a horrible mistake.
After the bind-off for the underarm shelf comes a sequence of decreases, at difference cadences. Starting from this photo, I was meant to knit 12 rows, decreasing a stitch on each side each row, followed by a couple of sequences which involved decreases only every third row.
I got mixed up and did 12 rows at the slower cadence of decreases. 😭
I'm not skilled at it, but I was able to "unknit" a couple of rows, pulling the previous stitches back onto their needles. I suspected this would become confusing or problematic when I got to the rows where I had decreased, requiring complex moves to "un-decrease". However, before I got to that point, the unknitting process was causing stitches to fall off needles entirely, multiple at a time.
I removed the weights from the piece and carefully removed the piece from the needles. Then, I found the stitches from the row in the photo above, just after completing the bind-off for the underarm shelf. I carefully re-hung that row of stitches across the number of needles from that row of the pattern.
Then I tucked the knitting back in, added weights, and restarted the pattern as if I had not completely goofed it.
And... this worked out totally fine! After finishing the piece I went back and unraveled the "teratoma" from my miscounted piece. The anomalous row is barely visible, and I think the only side-effect is that I'll have a couple of extra ends to work end during assembly. Whew!
Lolly came to help. Ok really she is here to ask why dinner is late.
With two sleeves completed, I could not resist asking producer Amy to help me complete a familiar shot from Carson's videos.
One sleeve on the machine. Two sleeves on the machine!
Next time...
Neither of these sleeves is perfect, but I think overall they look really nice, and the little imperfections will be hidden in seams as it all comes together. Producer Amy is really loving the look so far, and we're both looking forward to how it shapes up after washing and assembly.
The body panels are expected as the next pieces in the knitalong. However, I'm not going to have much time to knit in the next couple of weeks! 😅
I look forward to checking out other folks' progress and a (careful, controlled, certainly not rushed) busy weekend of catching up when I get a chance.
Thanks to everyone involved in making this knitalong possible! I am grateful to be learning so much and feeling like part of a community of folks doing the same!
Hello from the future. This has been retro-posted. You're welcome!
Okay, this title is probably a bit misleading since, if you knew me around the time I was making it, I couldn't shut up about it.
After a couple of successful hats and a pair of failed socks, I was looking to check another major type of garment off my list. I wanted to have made a sweater.
The internet is, blessedly and cursedly (blursedly), haunted with sweater designs and patterns for machine knitters. I eagerly watched videos and scrolled instructions, letting my perfectionist brain absorb an understanding of the big choices to make, the major sections of the project, the techniques I'd need to skill-up in, and more. I even started to ponder what I might want in a sweater, despite thinking of myself as a person who wears hoodies, not sweaters.
All that ruminating came to an end when I came upon this bonkers deal on Craftsy-dot-com: Renée Callahan's Machine Knitting: Sweater Basics (DVD + Streaming), a $49.99 value, discounted 92% to $4 USD. An entire how-to videos series (available to stream whenever I want), with worksheets, and they mailed me a DVD, for way less than a recurring Craftsy membership, or even "buying" just the streaming content.
In fact, most of Craftsy's DVD courses are deeply discounted in this way. I don't know why they do this! Possibly they're losing money warehousing all the DVDs?
Think of the savings!
How is sweater formed?
Renée's design for this class is a drop shoulder jumper, featuring front and back body panels (knit from the bottom up, with hem options), sleeves with simple increases (knit from the wrist up, also with hem options), and a neckline with several options (knit by re-hanging the body panels to the machine).
Renée breaks the class up into six sessions: understanding your machine and choosing yarn, basics of casting on and binding off and making a gauge swatch, using your gauge and body measurements to customize the pattern into specific instructions with stitch and row counts, details on the back panel, the front panel, a sleeve, and sewing it all up.
I was familiar with my machine and with making and blocking a gauge swatch, so the first really meaty part of the course for me was the worksheet. Renée actually provides several worksheets, each the same sweater in a different size. I printed out the design that was closest to my chest measurement without going under, got out my computer's calculator app, and worked through the calculations along with the video.
When shaping a garment on a knitting machine, it's pretty common to make, approximately, trapezoids. You start with a certain number of stitches, and end with a different number of stitches (more, or fewer, depending on what you're shaping). This is often represented with instructions like "decrease one stitch each side every 2 rows until 162 stitches remain". I find these reasonable, conceptually, but I prefer turn-by-turn directions. I rely heavily on my machine's row counter to know where I am in a pattern and where I should be going, so I embellished my worksheet with row numbers for each increase, decrease, etc.
On the importance of checking your measurements
Keen-eyed readers may have raised an eyebrow earlier when I mentioned that I selected "the design that was closest to my chest measurement without going under" and, if you are among them, congratulations your sweater would have turned out better than mine.
What I did not do, but should have, was checked the other measurements of the sweater, either against my person or against an existing garment.
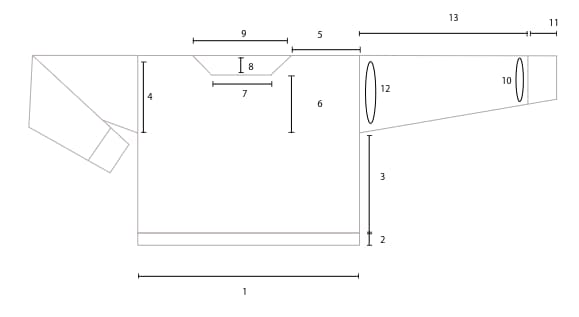
This diagram was giving me a strong hint that I ignored. (3)
I ignored a strong hint from the relative lengths in the diagram in the sweater. I also ignored a strong hint from Renée herself, when she said "if you want to make a tunic-length sweater, add a few inches to the body."
"Wow," I thought, "tunic-length would be pretty long."
That tunic goes down to like the... knee? Mid-thigh? I cannot read the leg anatomy on this cartoon fox.The sweater clearly goes down to the belt-line on this model, so the default measurements must be fine. "High-waisted jeans"? What do they have to do with anything?
Make the sweater already
Okay, okay!
I made the back panel according to the pattern instructions. Which wasn't hard, because it's just a rectangle in this design. I did think something was weird about the proportions, but I distinctly remember thinking "wow, I guess that will shape up when I block the sweater."
Then I worked the front panel. It's mostly a rectangle, with some shaping for the neckline which involved putting some stitches in hold, some decreases, and casting everything off on waste yarn.
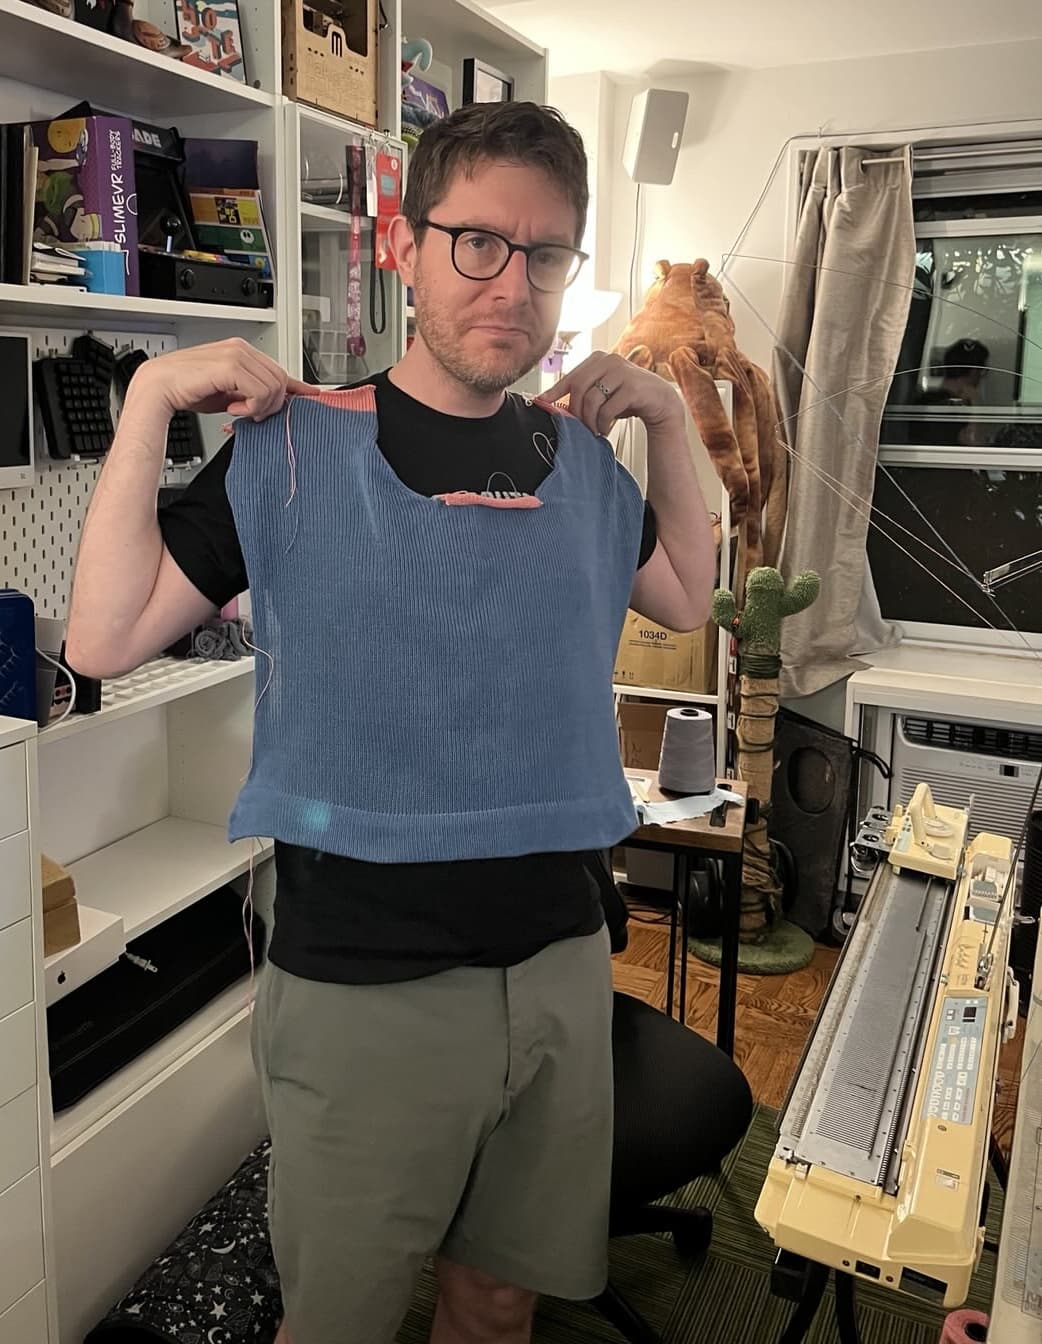
Finally, I could hold the two pieces together and get a sense of the final shape!
tfw you have made a crop top
Okay, so it's a cropped length sweater. It'll be, uh, the first of many cropped-length things I own, maybe. I'm a person who wears cropped toppes, now! That's the ticket.
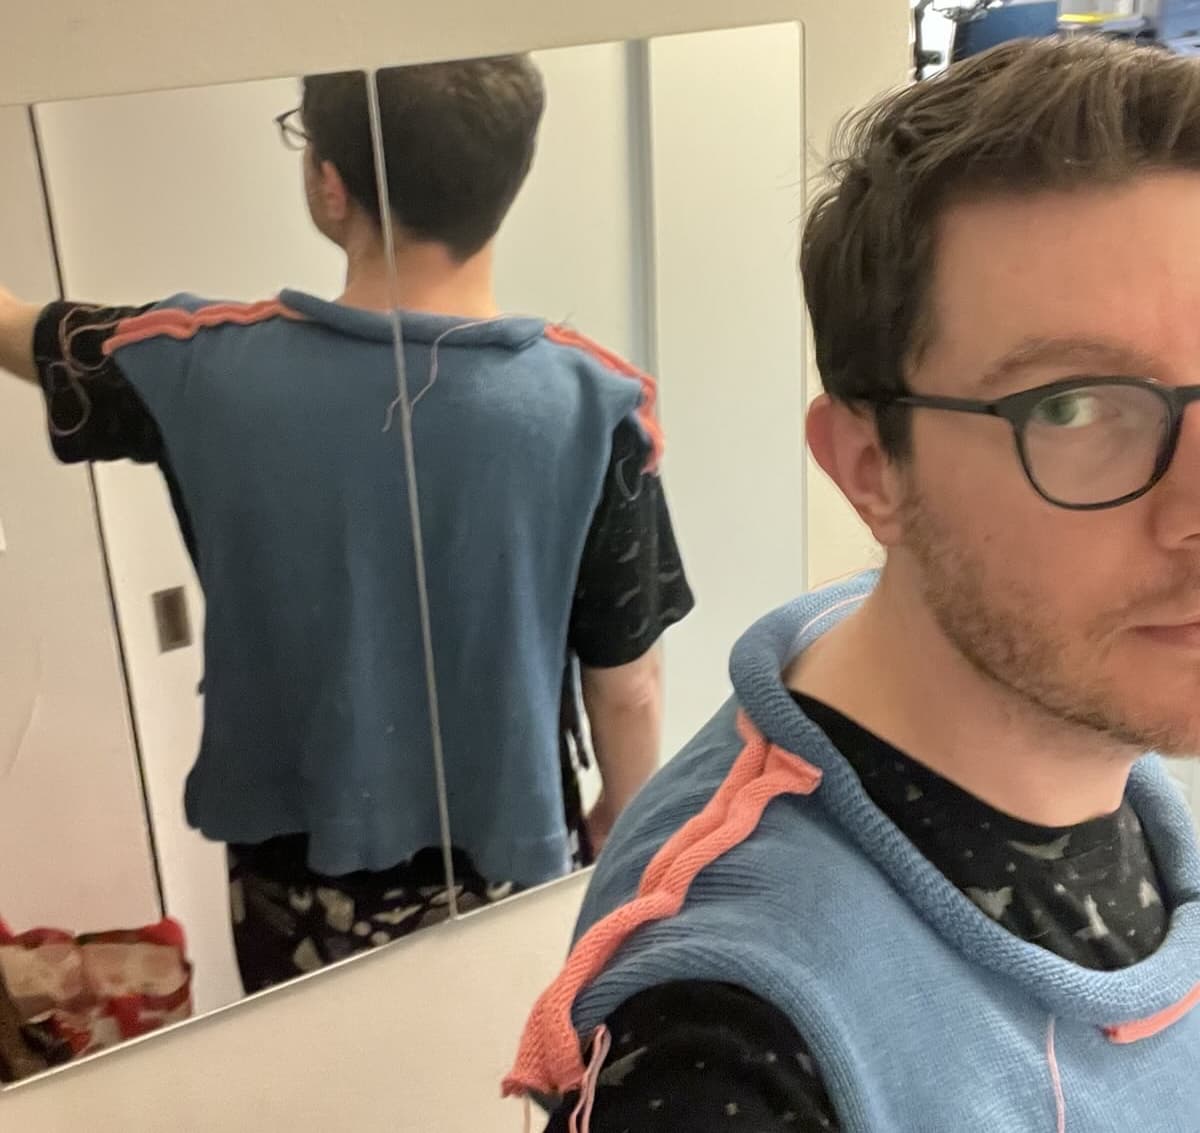
Anyway, I made my next bad decision by making the neckline only about half as long as the pattern called for.
The finished collar probably won't roll like this. 😅
With two major regrets committed to cotton, I decided I should actually measure for the sleeves, so I didn't end up with a sweater that only came down to my forearms, or with cuffs too narrow for my hands. This was a good idea and even almost worked out correctly!
The sleeves required the most manual work per row, with several increases and decreases. I got through this mostly successfully, with just one eyelet left where I failed to pick up a purl bump to fill a gap during an increase. I consider that to be pretty good.
With the pieces all knit, I promptly put the project in a box because I was afraid to finish it.
Some Time Later...
I wanted to be a person who had finished a sweater, dang it, so it was time to finish it.
Cozy determination. And task lighting!
Stitching up all the seams was really time consuming, wowee wow. It was made a little more difficult, I think, because I made the stitches really tight. I wanted the fabric to be nice and wooly and hide the stitches, but, it's cotton. You can definitely see the stitches and it was hard to work with! I was so concerned with pulling everything tight that I popped the seaming yarn a couple of times. Once during the seaming-up process, and once later when trying it on.
I got a lot of practice with mattress stitching. And some with mending the popped seam stitches! But the thing I practiced the most? Was my patience. 💪
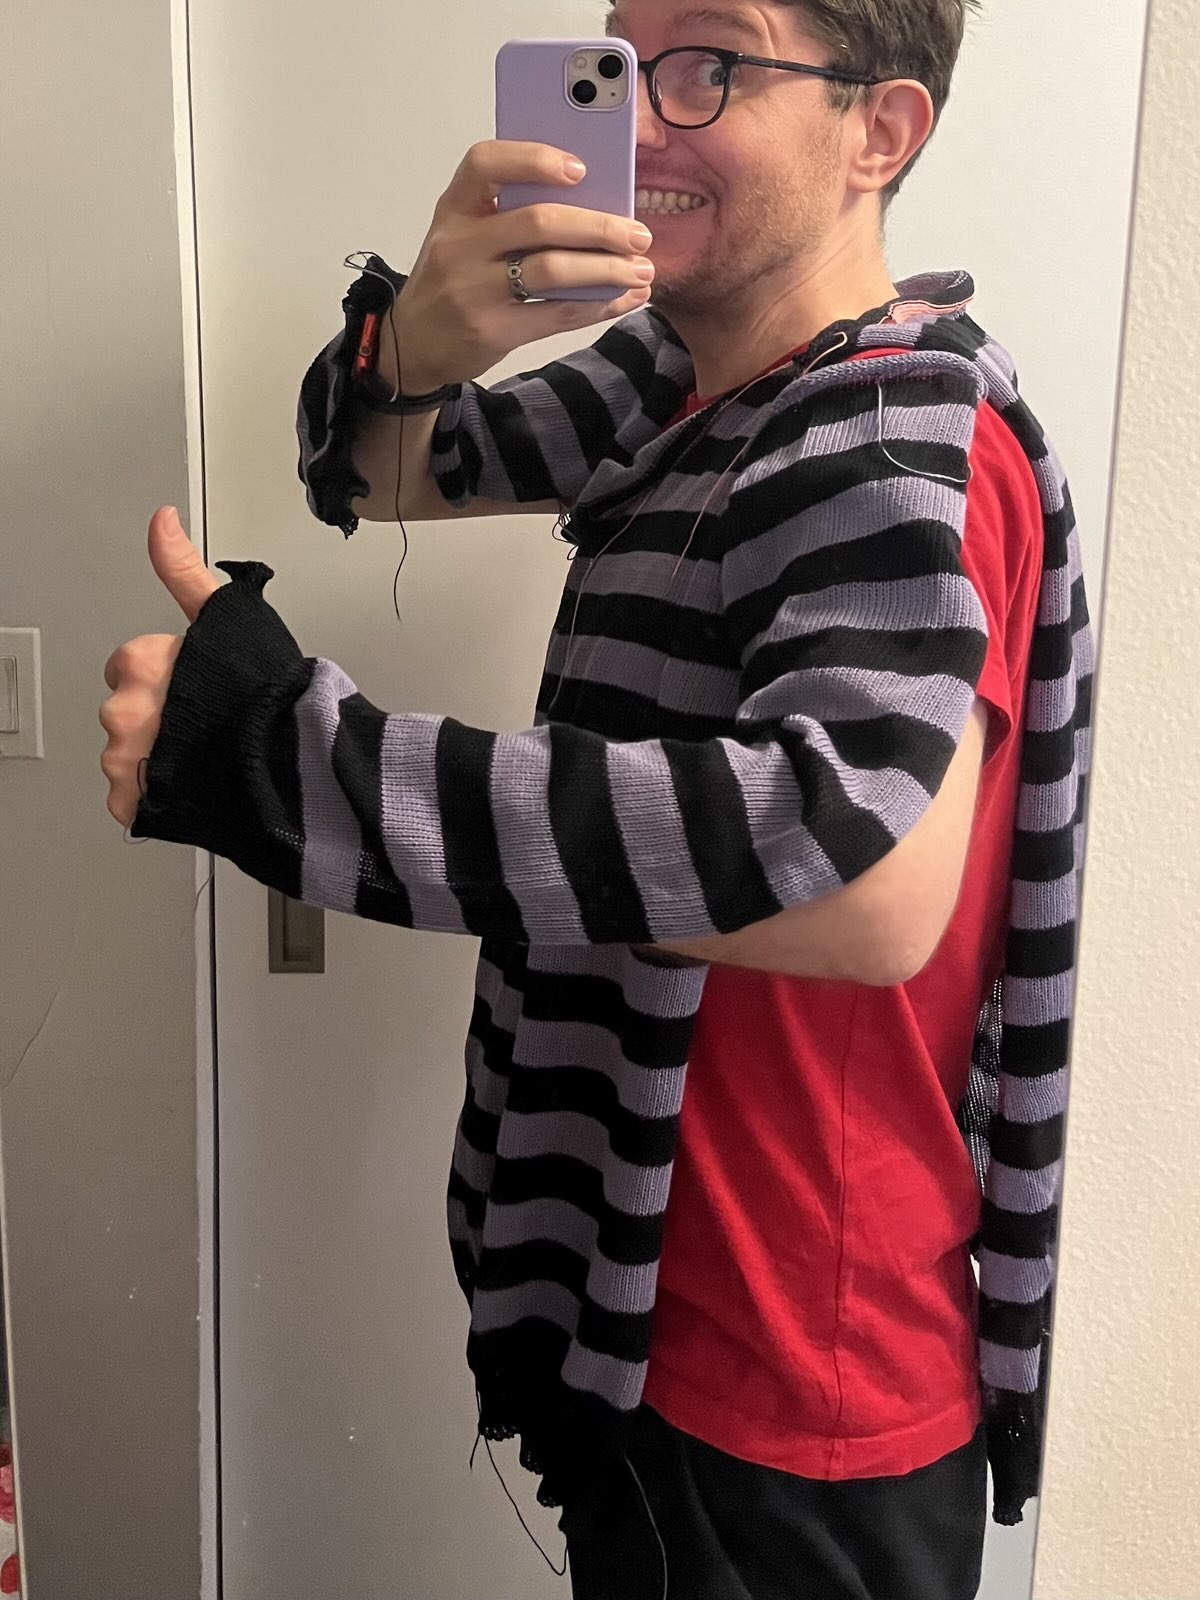
tfw you have made a crop top with very long sleeves
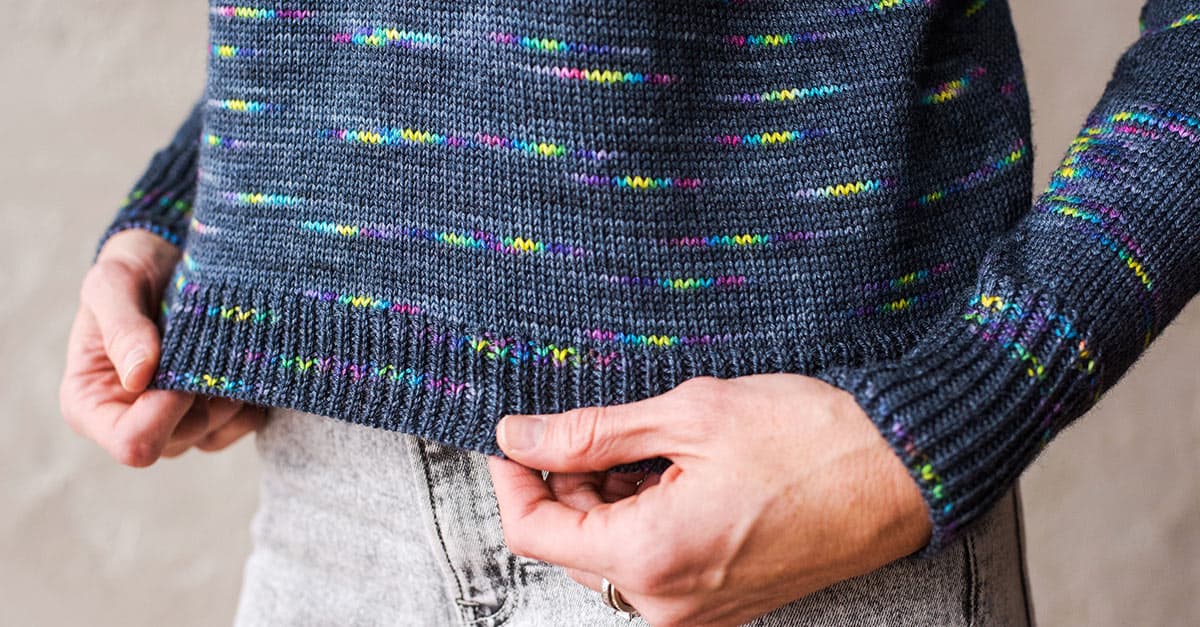
Here is is before washing and blocking. But it's a sweater!
is this fashion? 💁🏻🦋
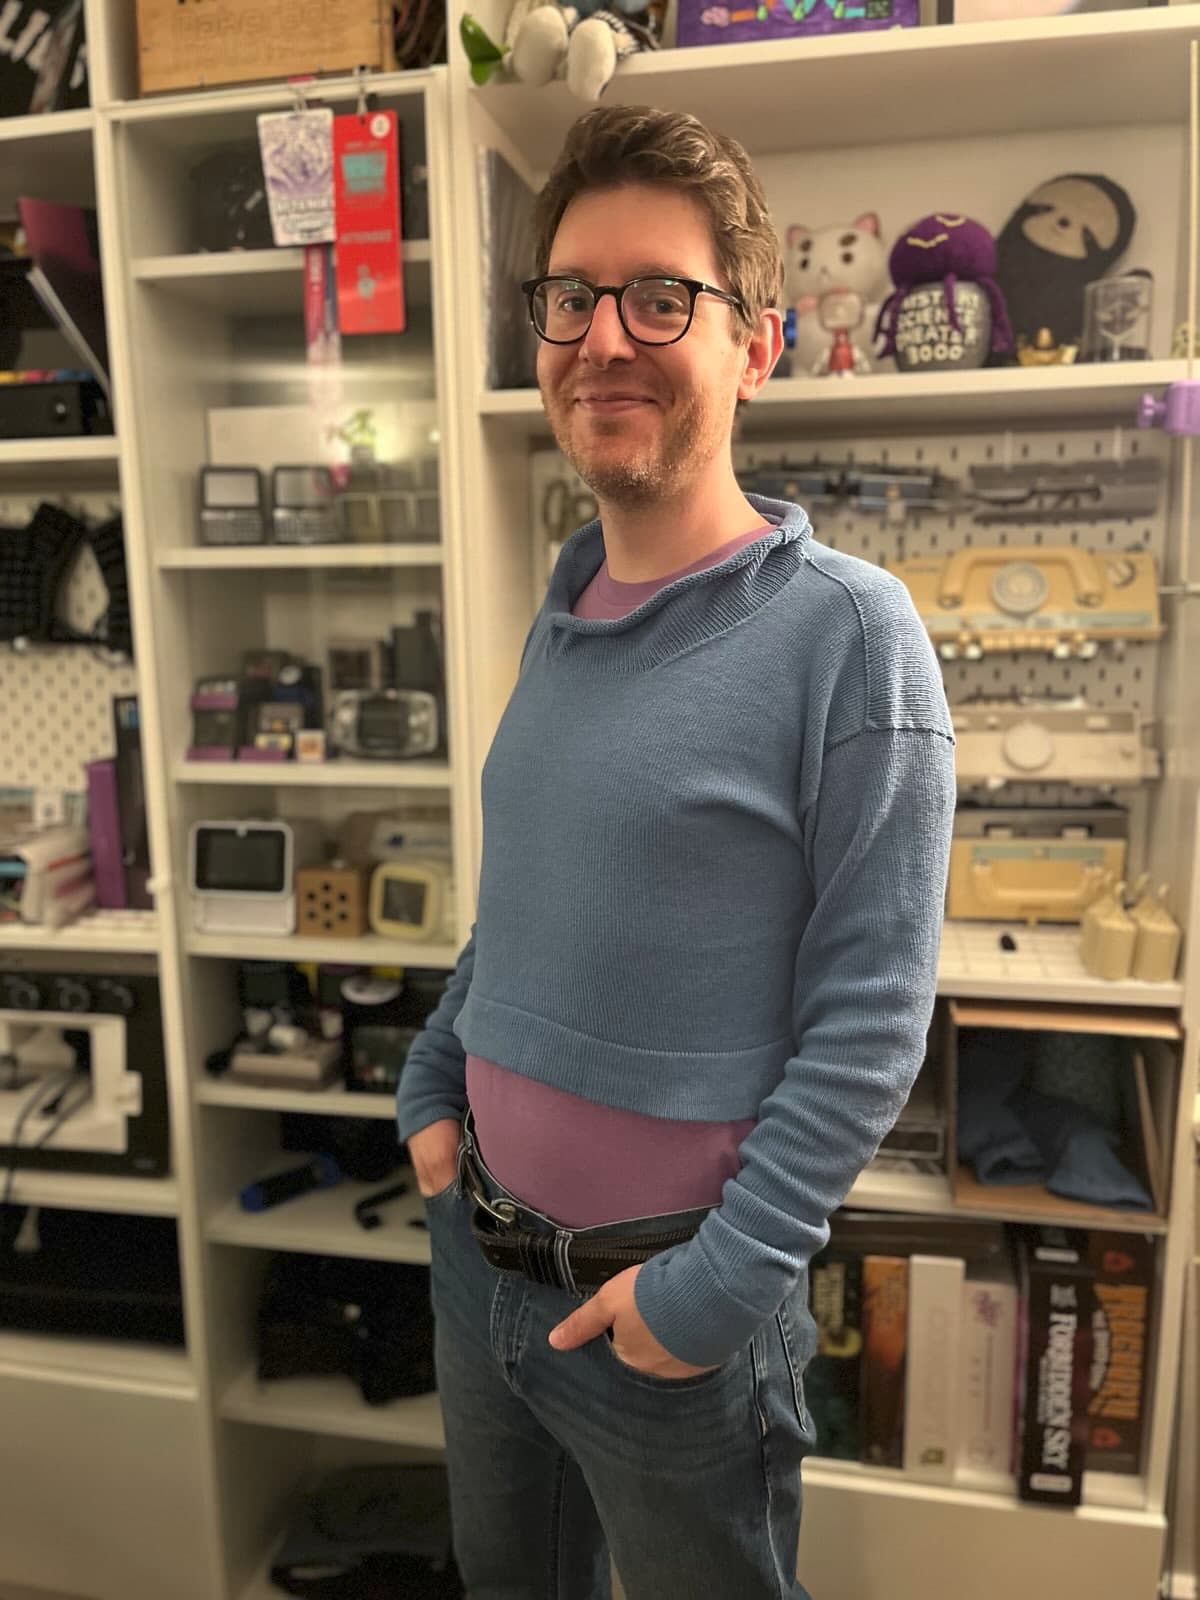
Here it is after washing. And some coming-to-terms. You can actually see in this photo that I did the top seam of a shoulder inside-out. And that the sleeves are too long because I forgot that the design is drop-sleeve and measured from the top of my shoulder. And man, that collar is weird.
I am, of course, fixated on the mistakes in this sweater. We learn from mistakes! But I feel pretty good being a person who has made a sweater. It's actually pretty cozy, and the sleeve length is just about perfect if I flip the cuff inside out.
Thanks for reading!
It's really rewarding taking on projects, learning a bunch, making mistakes, but in the end having a thing that I made. I am glad to be able to share these things here.
Will this sweater return? Well, I don't think I'll be wearing it out and about, but we'll see. For now, producer Amy has adopted it as an occasional around-the-house cosy layer. Which is a lovely result!