Today was a good day, I think, for making a little guy.
I started with the base pattern from Machine Knitting Monthly Oct 2025, intending to make the little guy without the hat. Instead of subtracting the rows for the folded brim in the pattern, I left them in, so he became extra looooong. I ended up stuffing some of the body rows inside during the sewing-up process, but he’s still kind of a tall bean.
Instead of the hat, I made a little mop of i-cord hair, inspired by KnitMachineImpl’s “Megan Donner hat” video.
Today is a good day, I think, to make little guys.
Pattern from Machine Knitting Monthly Oct 2025, which calls for spider legs, but I think the “little guy”-ness is correct without them.
Before I reveal the story foreshadowed in my post about machine knitting some first hats, a digression.
One of my main goals with machine knitting is to be comfortable enough with the machine and techniques required to make custom two-color patterns with AYAB. To that end, I had given myself a very short syllabus:
My attempt at a two-color Fair Isle patterned hat came out as a cool-but-wrong tuck stitch patterned hat. The "MC" button that activates multicolor Fair Isle knitting sits right over the "T" (tuck stitch) button, and they were well and truly frozen together. I will save that story for another time.
Meanwhile, the machine could definitely still knit, so I had no excuse not to keep learning and practicing.
Which brings me to socks.
As knitting project go, socks would appear to be small, fast, and easy. Depending on whose pattern you are following, there are a few techniques to learn. Plus you have to make two of them, so you are tested on your consistency.
Unfortunately, a lot of sock-knitting content is for circular knitting machines, or double-bed knitting machines with ribbing attachments, or for hand knitters.
Which is why I became obsessed with Diana Sullivan's No-Sew Socks
These socks are designed to be made on a single bed standard gauge knitting machine - like mine! They are knit top-to-bottom, back-to-front starting at the rear ankle hem, going down to a rounded heel, across the foot bottom, and around the toe. At that point, you switch techniques, picking up the stitches from previous rows to work your way back up and over the top of the foot, ankle, and hem. When it comes off the machine, it's a whole sock. You just need to hide the end threads, wash it, and block it.
While my machine matched the pattern requirements, Diana's pattern calls for thicker wool-blend sock yarn than what I have on-hand. In my "practice phase", I'm using thinner two-ply cotton, which means I have to adjust the row and column counts from Diana's pattern by a conversion factor - a multiplier based on the ratio of Diana's sock yarn gauge measurements with my own.
While some of this is easy multiplication, some of the techniques require adding or removing stitches at some "rate". In this case, creating the curved heel and tow areas involves "short rows", where more and more end needles are held at their current row while more rows are added to the middle. When the number of rows and stitches changes, you've also got to change instructions like "add one stitch into hold at the end of each row". Thankfully, my gauge's stitches-per-inch measured "close enough" to Diana's pattern, so I only needed to deal with the difference in rows - my thinner yarn came out to about 1.5x rows-per-inch compared with Diana's.
I did my best! Here's the pattern I came up with to try and make socks for Producer Amy.
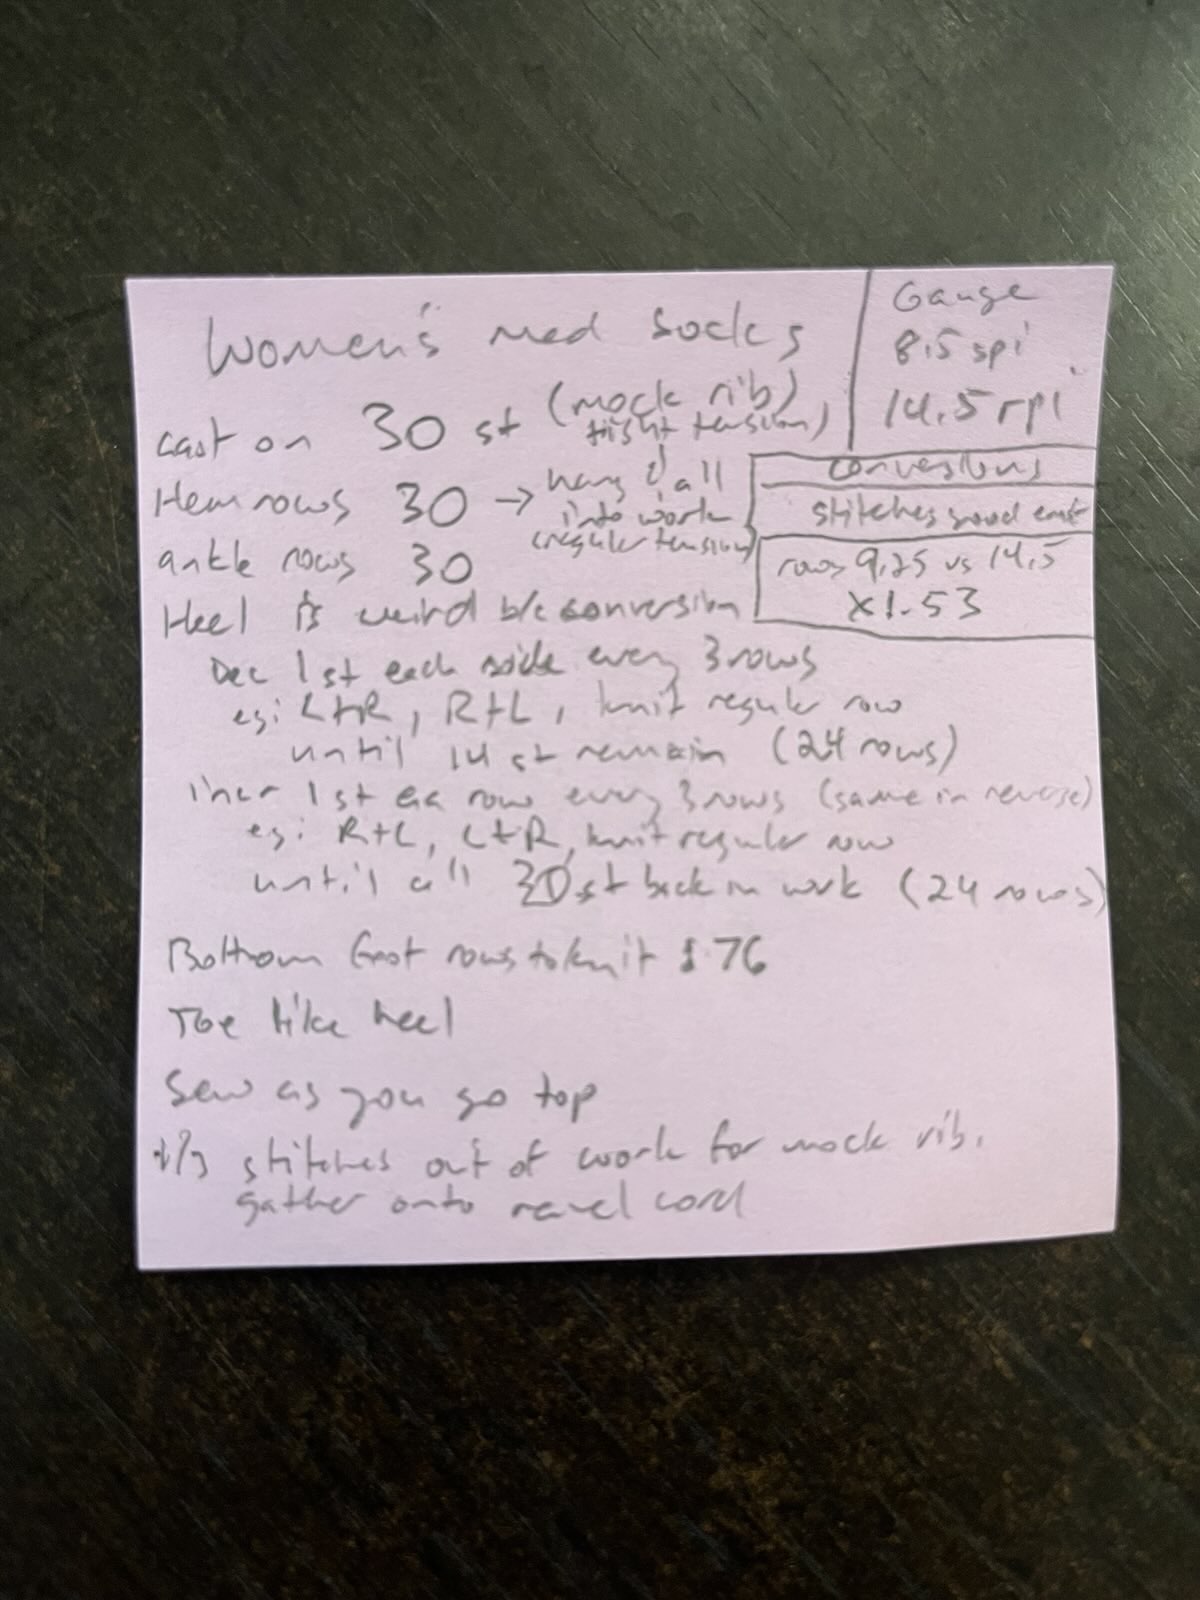
My pattern mostly follows Diana's until we get to the short rowing. Here, she calls for putting one needle into hold on each side as you knit each row, down to a certain number of needles, then short row back out at the same rate. The one-to-one ratio really simplifies the technique. Comparatively, I would need to knit 1.5x the number of rows with my thinner yarn. So I came up with a three-step waltz that moves two needles out of (or into) work every 3 rows.
The resulting socks have some holes of various sizes in the short row areas. Being new to this technique I can't be sure whether each hole is from a mistake I made in the technique or because my two-stitches-per-three-rows adjustment needed an extra needle wrapped here or there.
Anyway. Sock photos.
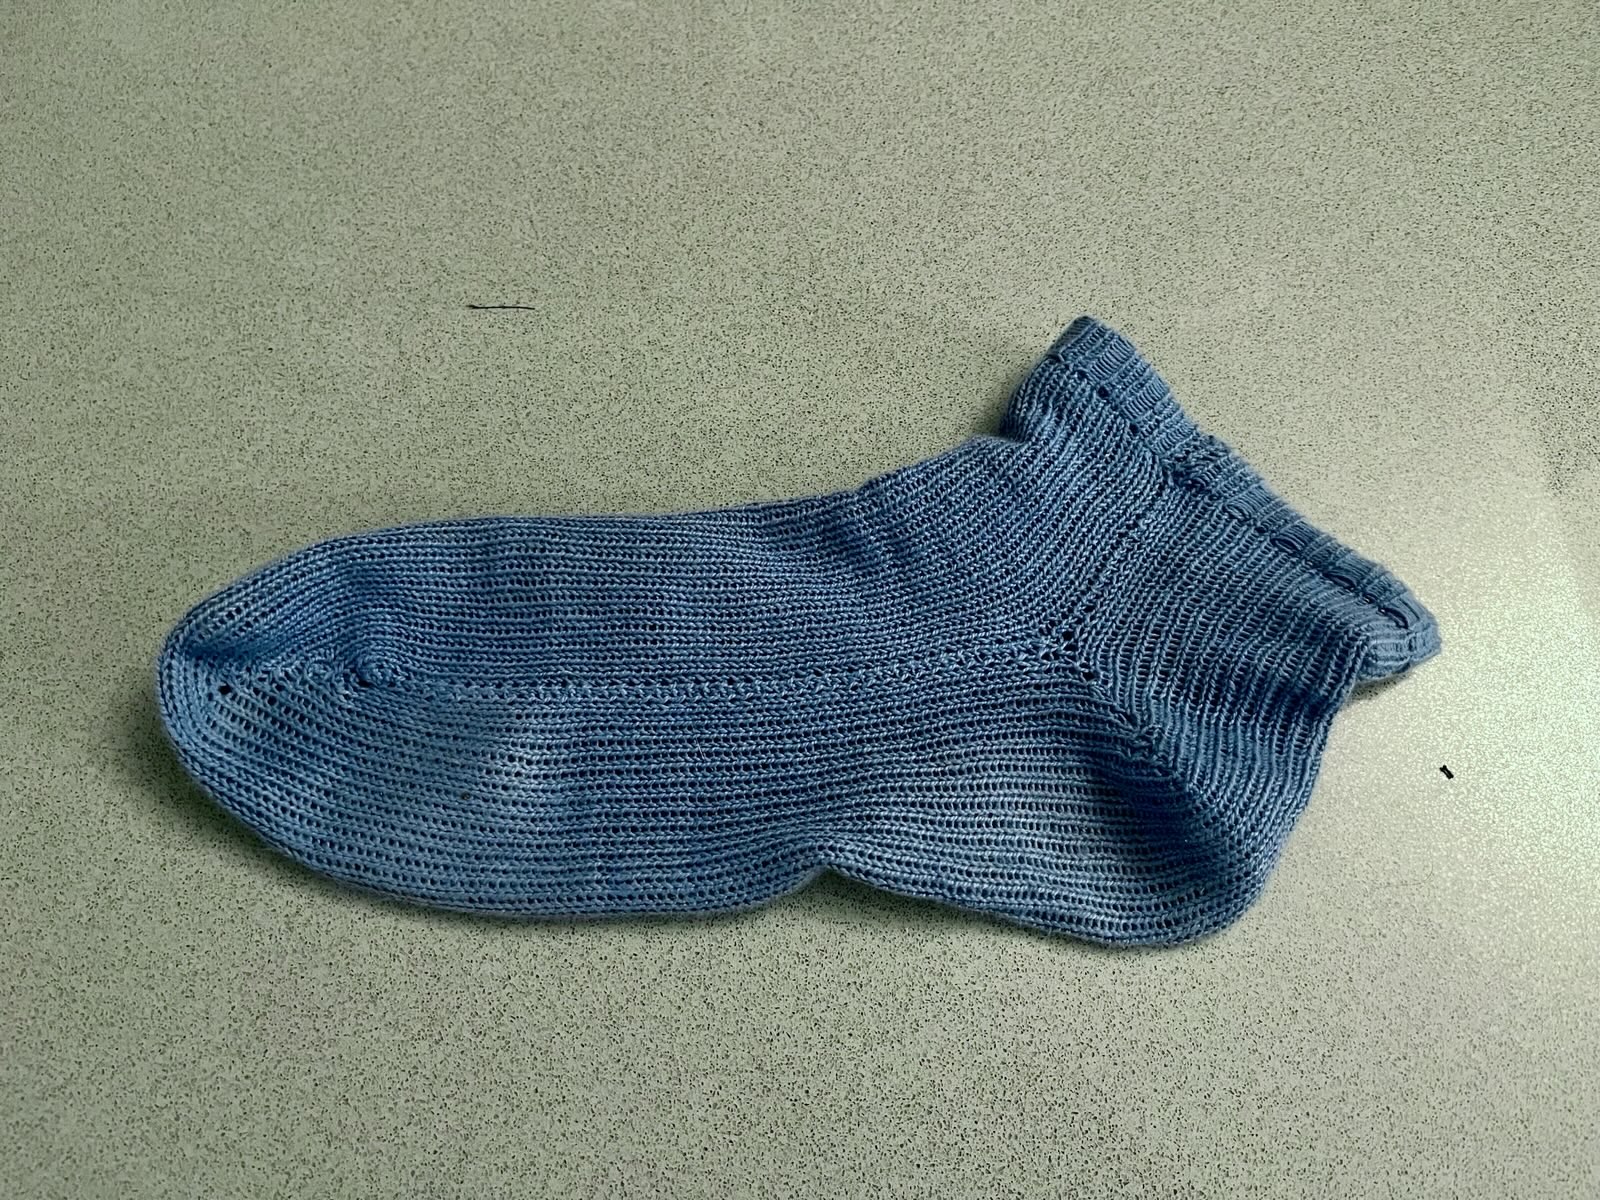
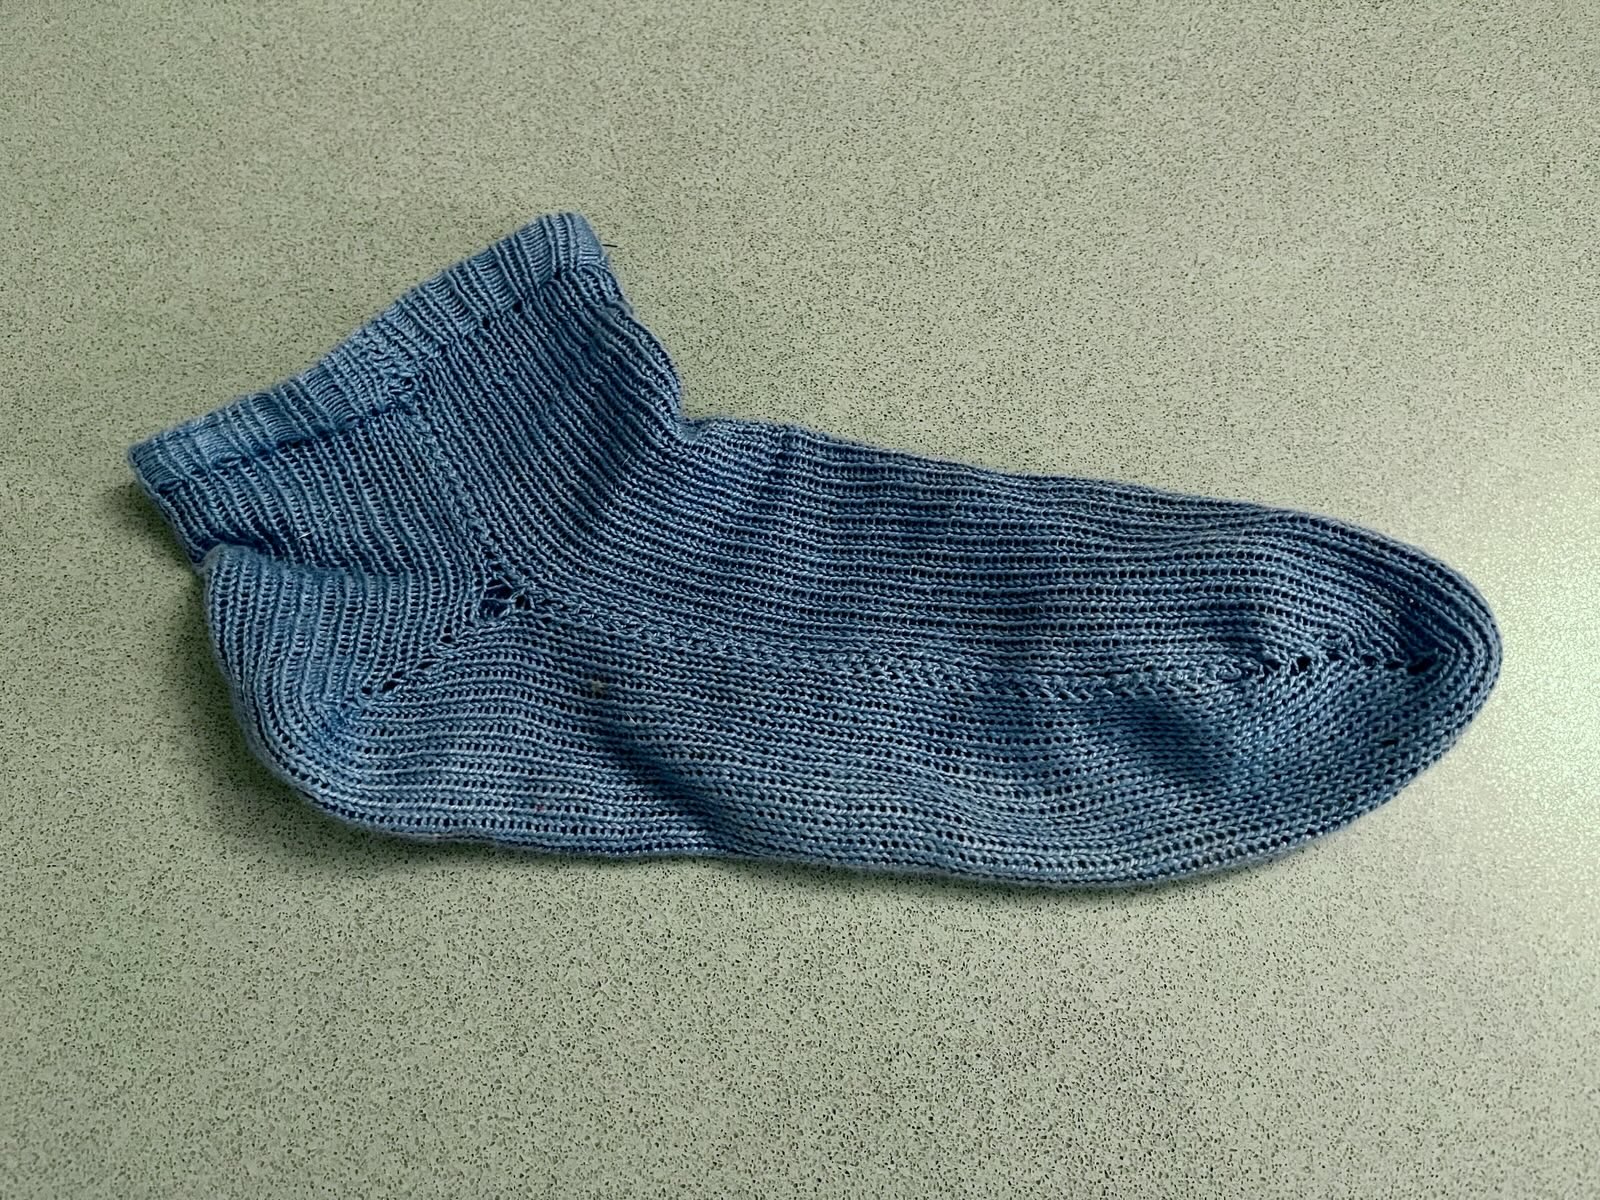
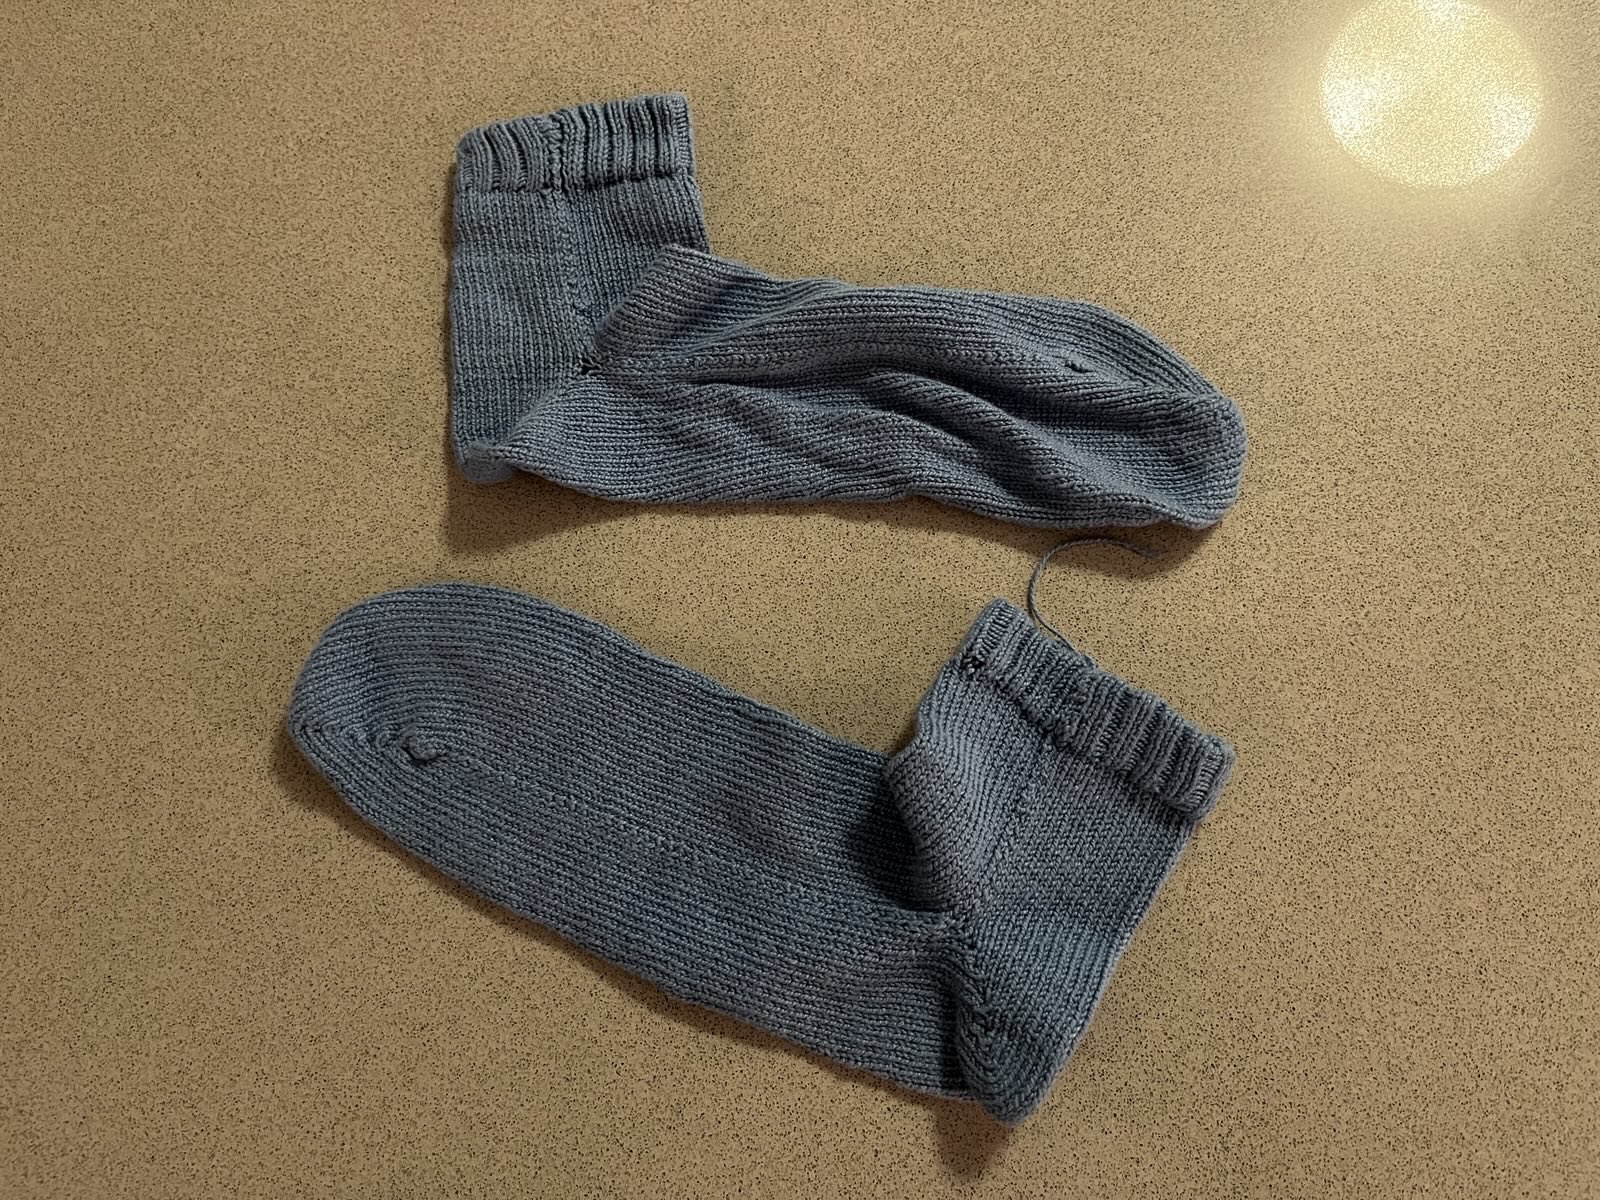
Despite some issues, they look like socks! But do they sock??
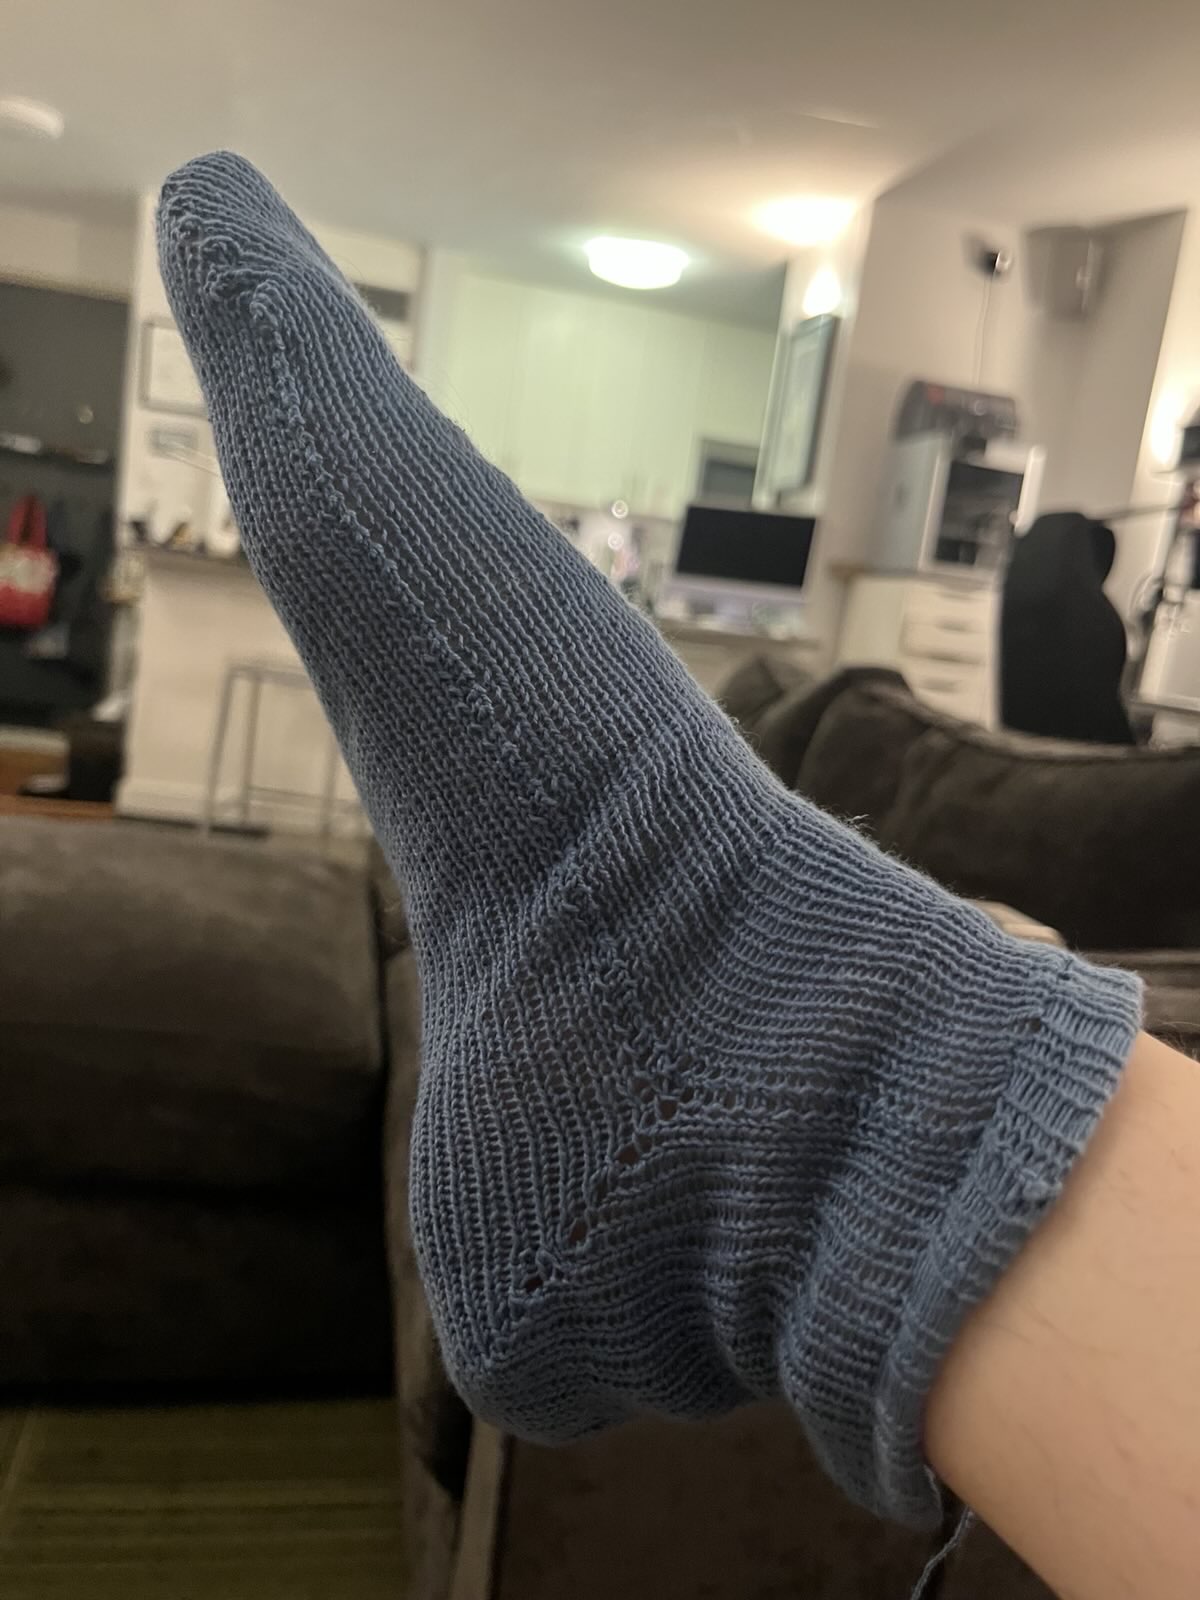
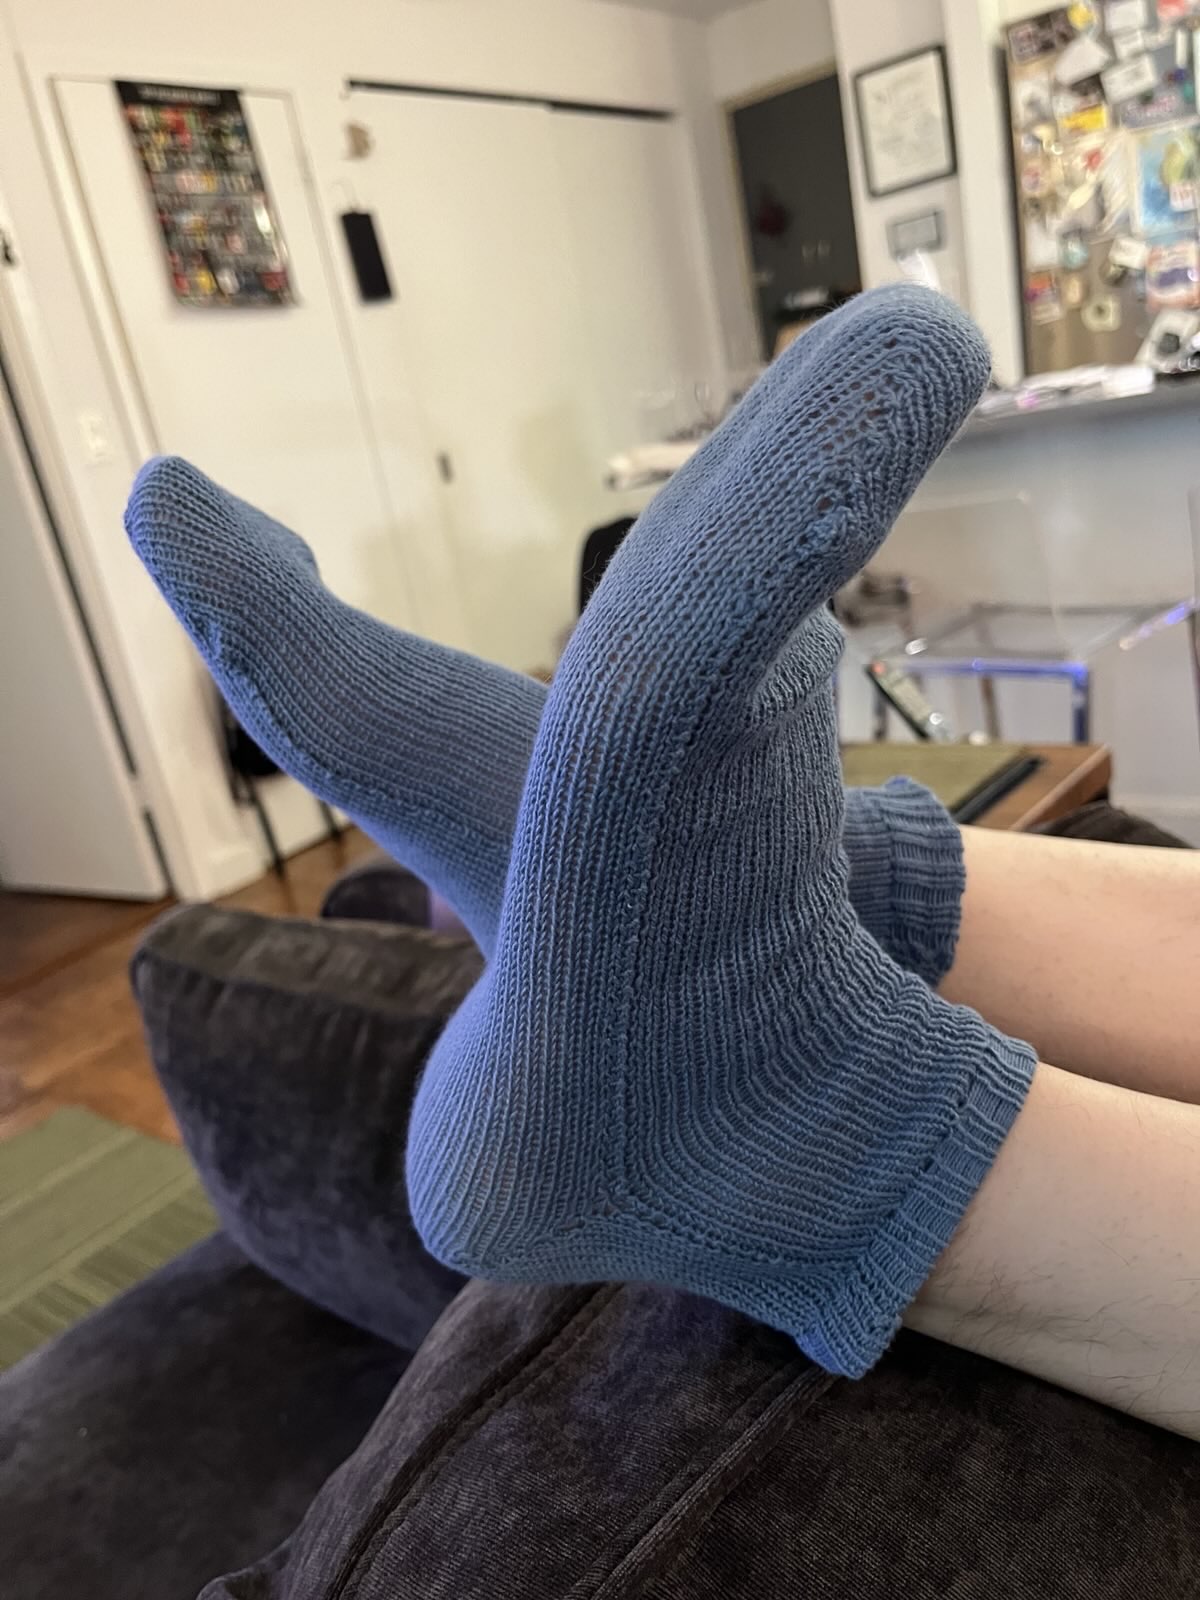
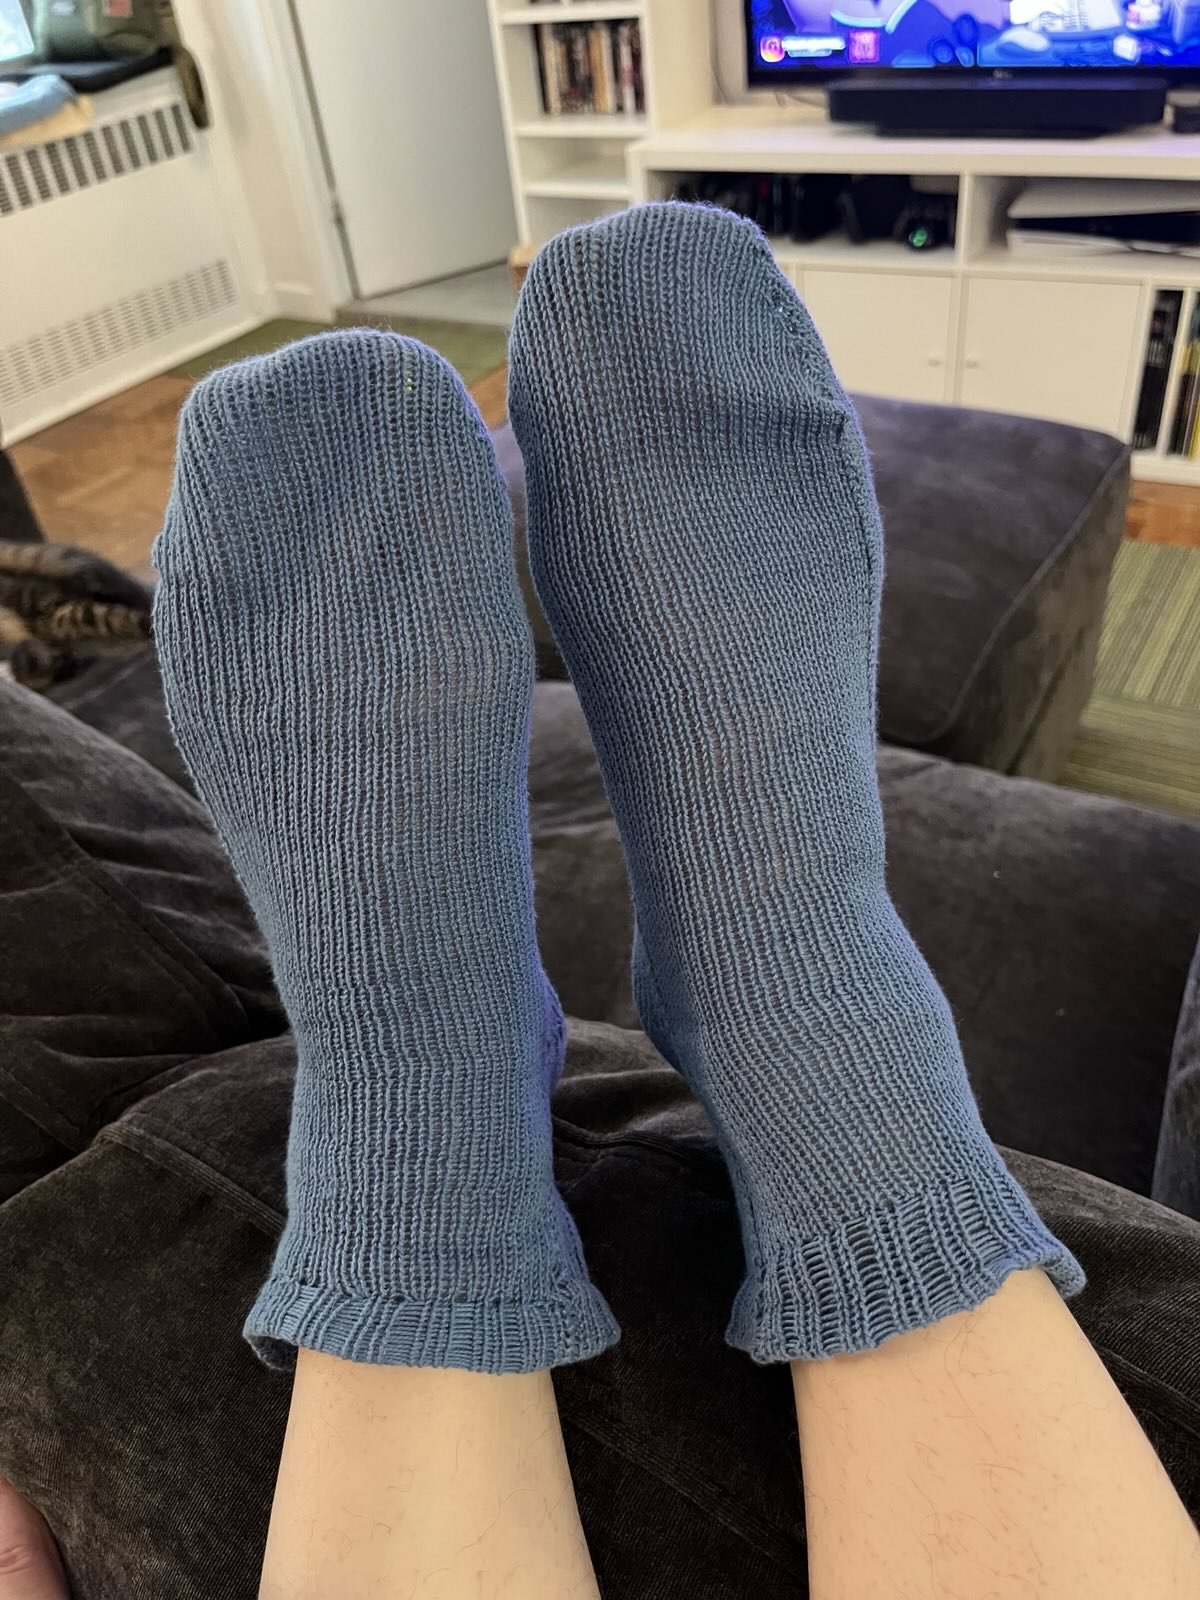
Something is... not right with the final seam inside the front hem of the socks. I think perhaps I am finishing them off the machine too tightly. Or perhaps a different yarn would have more give. Whatever the reason, these were really difficult for Producer Amy to get on her feet, stretching only up to a point and no further. These photos were taken before washing and blocking, which I knew would shrink the final socks further.
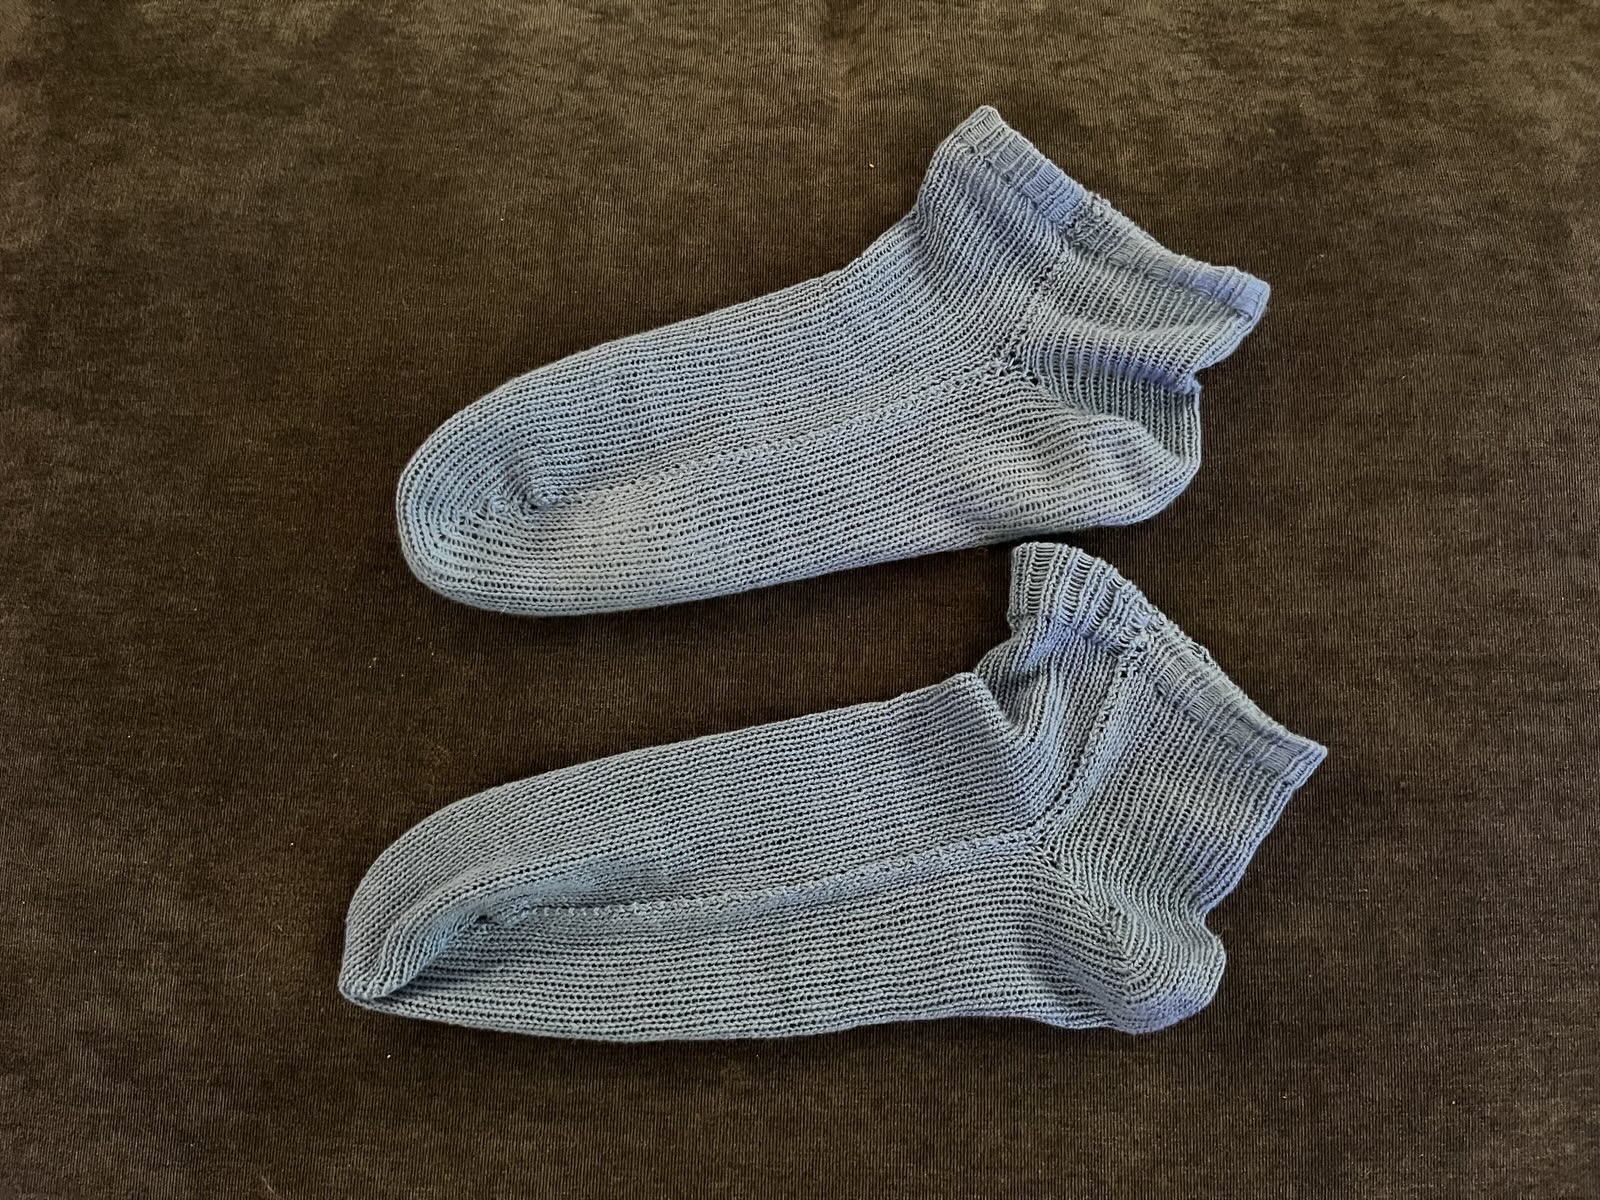
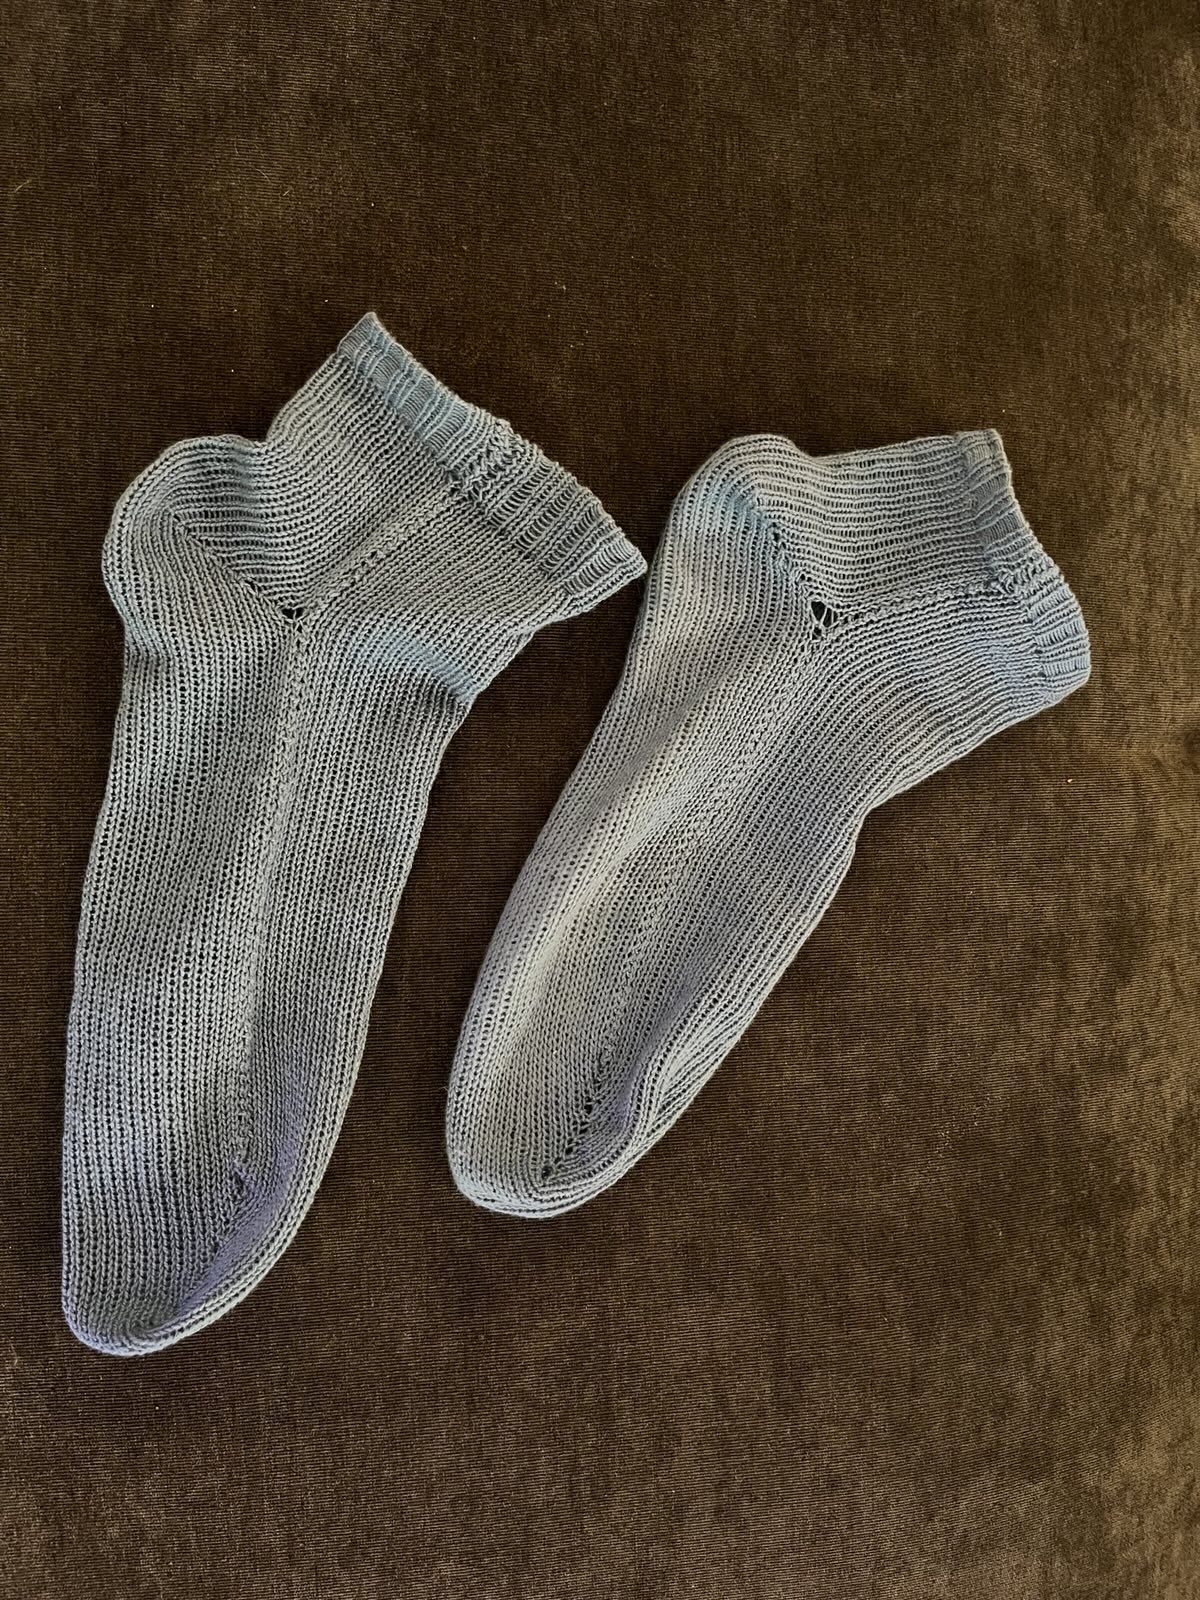
After washing, these look a little better! The fibers have pulled together. The too-loose front hem on one sock is more visible.
Neither of these are wearable now, unfortunately. But I learned a lot and got experience with some important techniques. I look forward to trying again with some actually-meant-for-socks yarn that more closely match the pattern. And some more practice!
Last weekend, I joined forces with my buddy Hunter to make a game for PlayJam 8, a game jam for the adorable yellow Playdate game console.
Introducing: Stellar Scrapm'n! Descend into debt as you ascend to the stars in a clunky little hauling ship. Crank to steer through rocky caverns in search of valuable junk you can sell to pay off a little bit of that financial liability at a time. Also: robots will shoot at you, pew pew, watch out!
If you're so inclined, we'd be grateful if you checked it out! You can check out our jam entry to download, rate, and review.
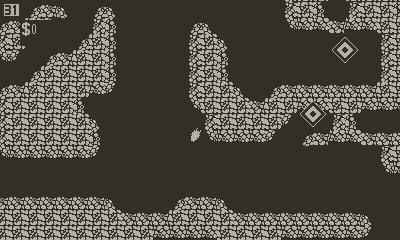
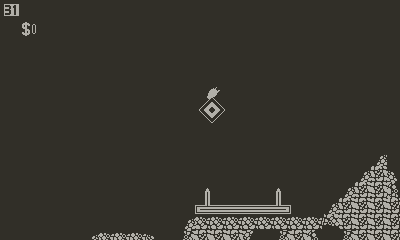
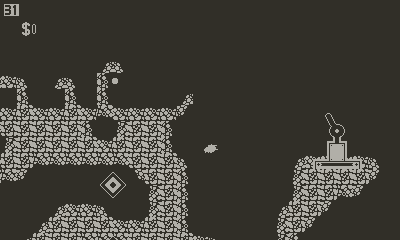
If you have a Playdate, you can sideload the game. If you don't have a Playdate, you can still check it out by grabbing the Playdate dev kit and using the Playdate Simulator!
The review period is open until September 22nd. Check out the other submissions, too! There's slightly more than a dozen little games to check out.
Thanks for reading. You may also enjoy Hunter's post about the game / jam. Feel free to eject at this point because what comes next is-
Hunter and I are both computer science boys with web business jobs. We don't write much code that looks like game code day to day, but we do enjoy dabbling in "the game dev". Hunter has done some pretty impressive projects in Unity in the past, I enjoy working through Godot tutorial content to keep up with that community, and we are both drawn to the rinky-dink little Playdate console with its retro-aesthetics, thoughtful constraints, and inviting dev tools and documentation.
Before we knew about Playjam, Hunter had been building up a Metroidvania game, inspired by working through SquidGod's YouTube tutorials for working with the Playdate. I recognized a lot of the fundamentals from working through a similar Godot course from Heart Gamedev. Neither of us had done a lot with Lua, but the Playdate API and docs offer a lot of structure for folks coming in with experience working with other languages.
When PlayJam 8 came across our radar, it seemed like the perfect opportunity to work on something together, sharpen our skills, and have fun making a thing. So, we cleared our calendars and set our expectations for success. How hard could it be? (This is foreshadowing.)
PlayJam8 kicked off on Friday with the announcement of the theme: ascending. Hunter and I (along with my producer, Amy) brainstormed a lot of potential concepts. Being nerds, we thought a lot about space and our nostalgia for retro games about space.
This is when Hunter introduced me to Space Shuttle Project for the Nintendo Entertainment System.
We did not make a "shot for shot remake" of Space Shuttle Project. You are free to imagine what it would be like!
We were more interested in making a game where you are in space, rather than getting to space. Unfortunately once one is in space, the concept of "ascending" becomes murky as references like "up" and "down" become negotiable. Another thing that is negotiable is money and getting to space is expensive. Hunter was reminded of Hardspace: Shipbreaker where, good news, you've got a cool space job but, oh no bad news, you're in crippling debt and the exchange rate for your hard labor will not fix that. Maybe you can ascend to financial freedom??
This sounded like a fun kernel of an idea, but of course we needed something simpler to implement. I was reminded of one of my favorite childhood games, Solar Jetman: Hunt for the Golden Warpship. This old ad for the game, in my opinion, does not explain the gameplay very well, but the vibes are incredible:
Based on our inspirations, we planned more-or-less these features:
Here are some things that we used:
We had a lot of quick wins early on, but stubbed our toes many times. I'm tired, so this won't be hour-by-hour or day-by-day. Feel free to skip this unless you are future me (or Hunter)!
A recurring theme for me personally: I often knew the concepts for what I wanted to accomplish but had little or no practice directly with the tools, like LDtk and Aseprite. Climbing multiple learning curves during a crunch is stressful!
It's a little tricky to get curvy "cavernous" shapes with 2D tilemaps, but it's not too bad. What is bad is the feeling you get when the Playdate's native "axis-aligned rectangles only" physics system goes haywire every time your ship touches terrain. We reined in a lot of the chaos, but there are still plenty of places where a wall tile's bounding box doesn't line up with the actual pixels, making it look like your ship has suddenly stopped for no reason, or like you're embedded in the rock.
I went down a lot of rabbit holes for the physics issues, including evaluating alternate physics engines (which usually require building C extensions and wholly separate level-creation tooling) and adding a layer to take over to see if there was "really" a collision when the Playdate says there was. We simply ran out of time on this.
The other major toe-stubber was our choice to bring in, but not commit to, the Noble Engine.
The built-in concepts of Scenes that you can move between, with Noble taking care of transitions and lifecycle management, sounded like a great way to separate out concerns. Our focus started on the GameScene, which holds the level and player and enemies and collectibles and- you know, gameplay.
Unfortunately, we did not test our understanding of how Noble manages multiple scenes until very late. It turned out we were making sprites that Noble could not clean up on transition, loading things before Noble was ready, expecting things to be cached that Noble was throwing away, and more. A mess!
After finding this out so late, my instinct was to cut our losses and drop features like a title screen and different levels, which would have let us focus on building the game as if Noble's scene management stuff wasn't there. Unfortunately, I ignored that instinct and spent a lot of time moving code around, chasing down references, touching many parts of the project, breaking-and-fixing, finally getting things barely-working. The result is that we got our title screen, but we didn't have time to add any actual interstitials or extra levels. So... the menu basically serves no purpose, haha! Bonus: I accidentally left in a debug option in the player controls so you can bounce yourself to the title screen and back again and resume with everything exactly where you left it. And by "exactly where you left it" I mean it reveals some object cleanup bugs that we missed, as all enemies, collectibles, and even fired bullets suddenly return from the void! 😂
I tend to focus on the negative, but this whole thing was pretty fun and we learned a lot! To ask "what would I do differently?" would be foolish - time only moves in one direction - I am grateful for the experiences and will carry this learning into the future.
Hunter and I both want to keep filling in the holes in the project, and (eventually) release something that feels like a complete game experience. I think that rules!
I look forward to becoming more fluent with the tools that were new to me! Theory is not the same as practice, and I could use more practice. Particularly the meta-practice of doing things that I am not already "good" at. Practice at being bad at something and struggling to get better.
Hell yeah!
In my apartment we are lucky enough to have a big countertop, open on three sides, creating a nice flat project surface for even sprawling projects.
However, we also have a lot of projects that compete for this space! Producer Amy is often working on increasingly complex sewing projects that require the entire surface. Likewise, the knitting machine occupies an entire edge of the space. Both of these are time consuming, with potentially complex setup and teardown procedures. How can we accommodate both fiber arts hobbies?
You may not be surprised to find that I found inspiration from Carson (@KnitFactoryImpl) on YouTube. In her videos I noticed a low-profile metal stand that basically amounts to a single horizontal bar and four splayed legs, clamped together by a couple of big screws. She mentioned briefly that they aren't manufactured anymore, but you can find them on eBay "from time to time".
With the fear of scarcity in my heart, I jumped when I found a similar one on eBay a few days later.
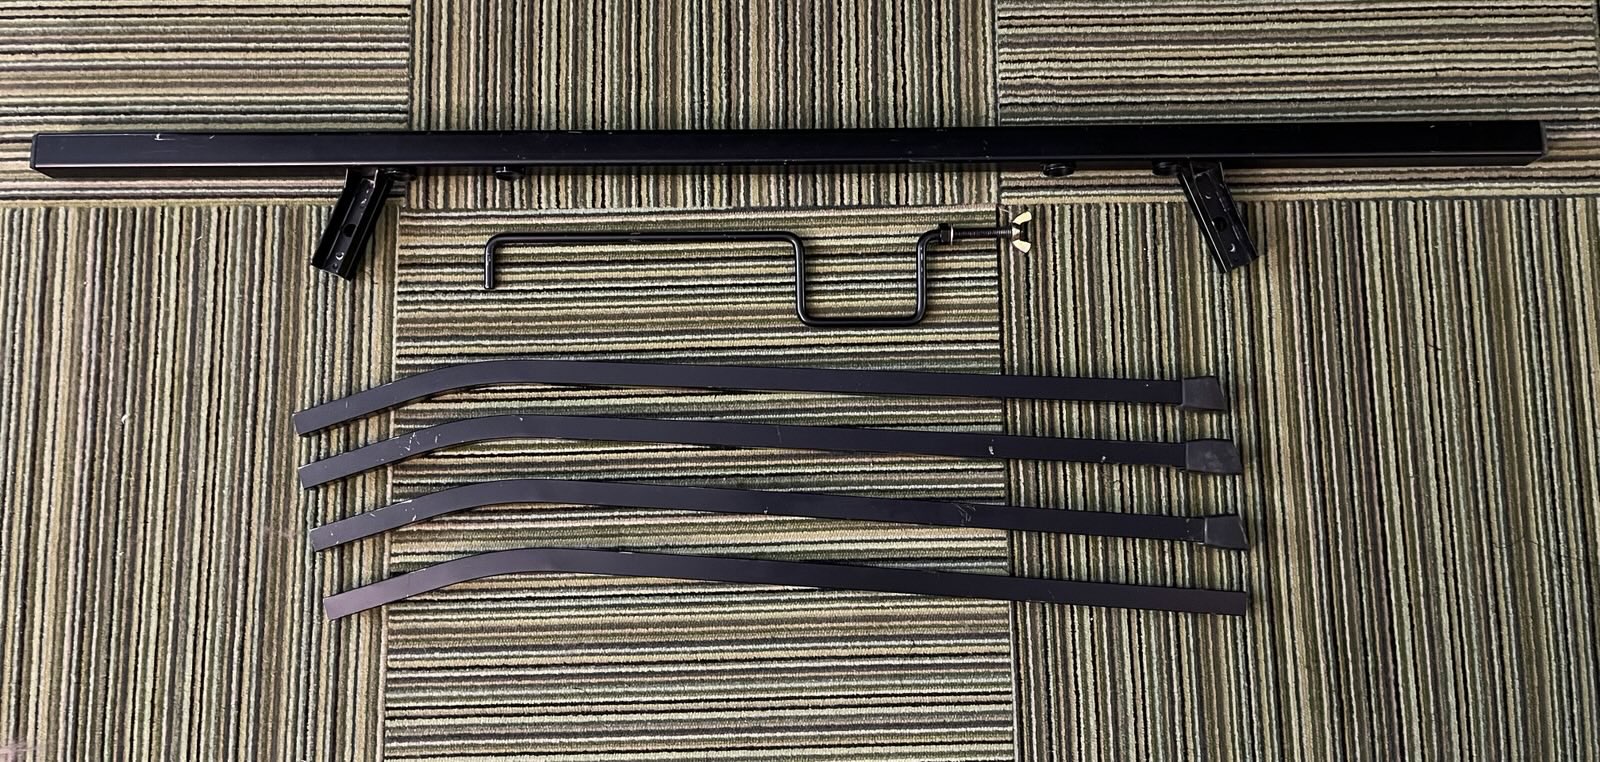
As you can see in the photo, the stand can break down quite small! Pictured here are 5 of the 6 parts required for it to work. The long body bar has circular recesses where the knitting machine can be securely clamped, as well as slots for the legs. Each leg splays out at an angle to withstand the force of moving the machine back and forth. The body bar and legs are held together with a pair of screws and wingnuts, and the screws are at the end of long bent metal bars which do double-duty to provide some stability for the mounted knitting machine, as well as providing a place to rest the top of the knitting machine.
You may note that I said "5 of the 6" in the previous paragraph. One of the screw/bar pieces was missing. Thankfully the seller had simply misplaced it and, after contacting them, they found it and mailed it to me.
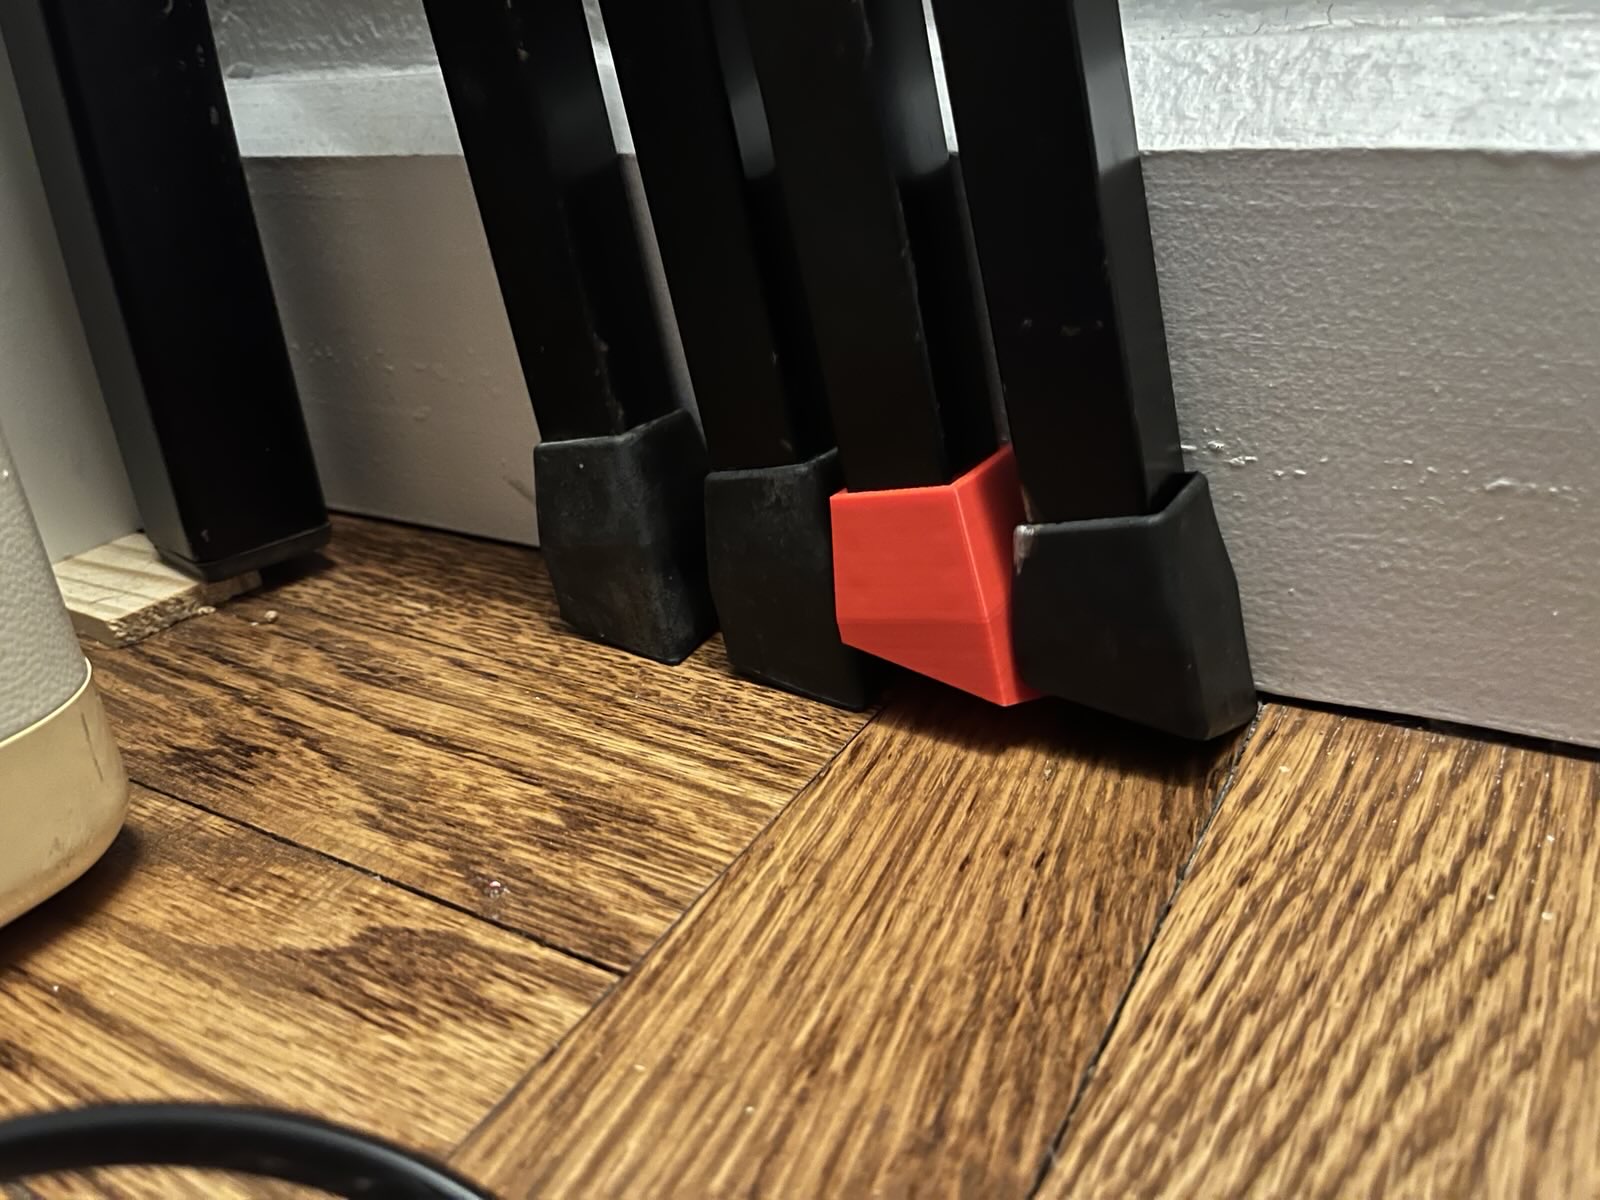
Meanwhile... If you have a keen eye you may have noticed another missing part. Because each leg splays out at an angle, each also has a rubber foot with a special shape to let it rest flat and provide traction. One of the legs was missing this foot.
In this house we 3D print, so I dusted off my calipers, OpenSCAD, and trigonometry skills to make a replacement. I'll attach the OpenSCAD and final STL files to this post for posterity, but I definitely hit a point where the math looked right but the piece looked wrong, so I did some eyeball-based adjustments when tweaking the foot's resting face angle and a fudge factor to help the foot slip onto the machine leg.
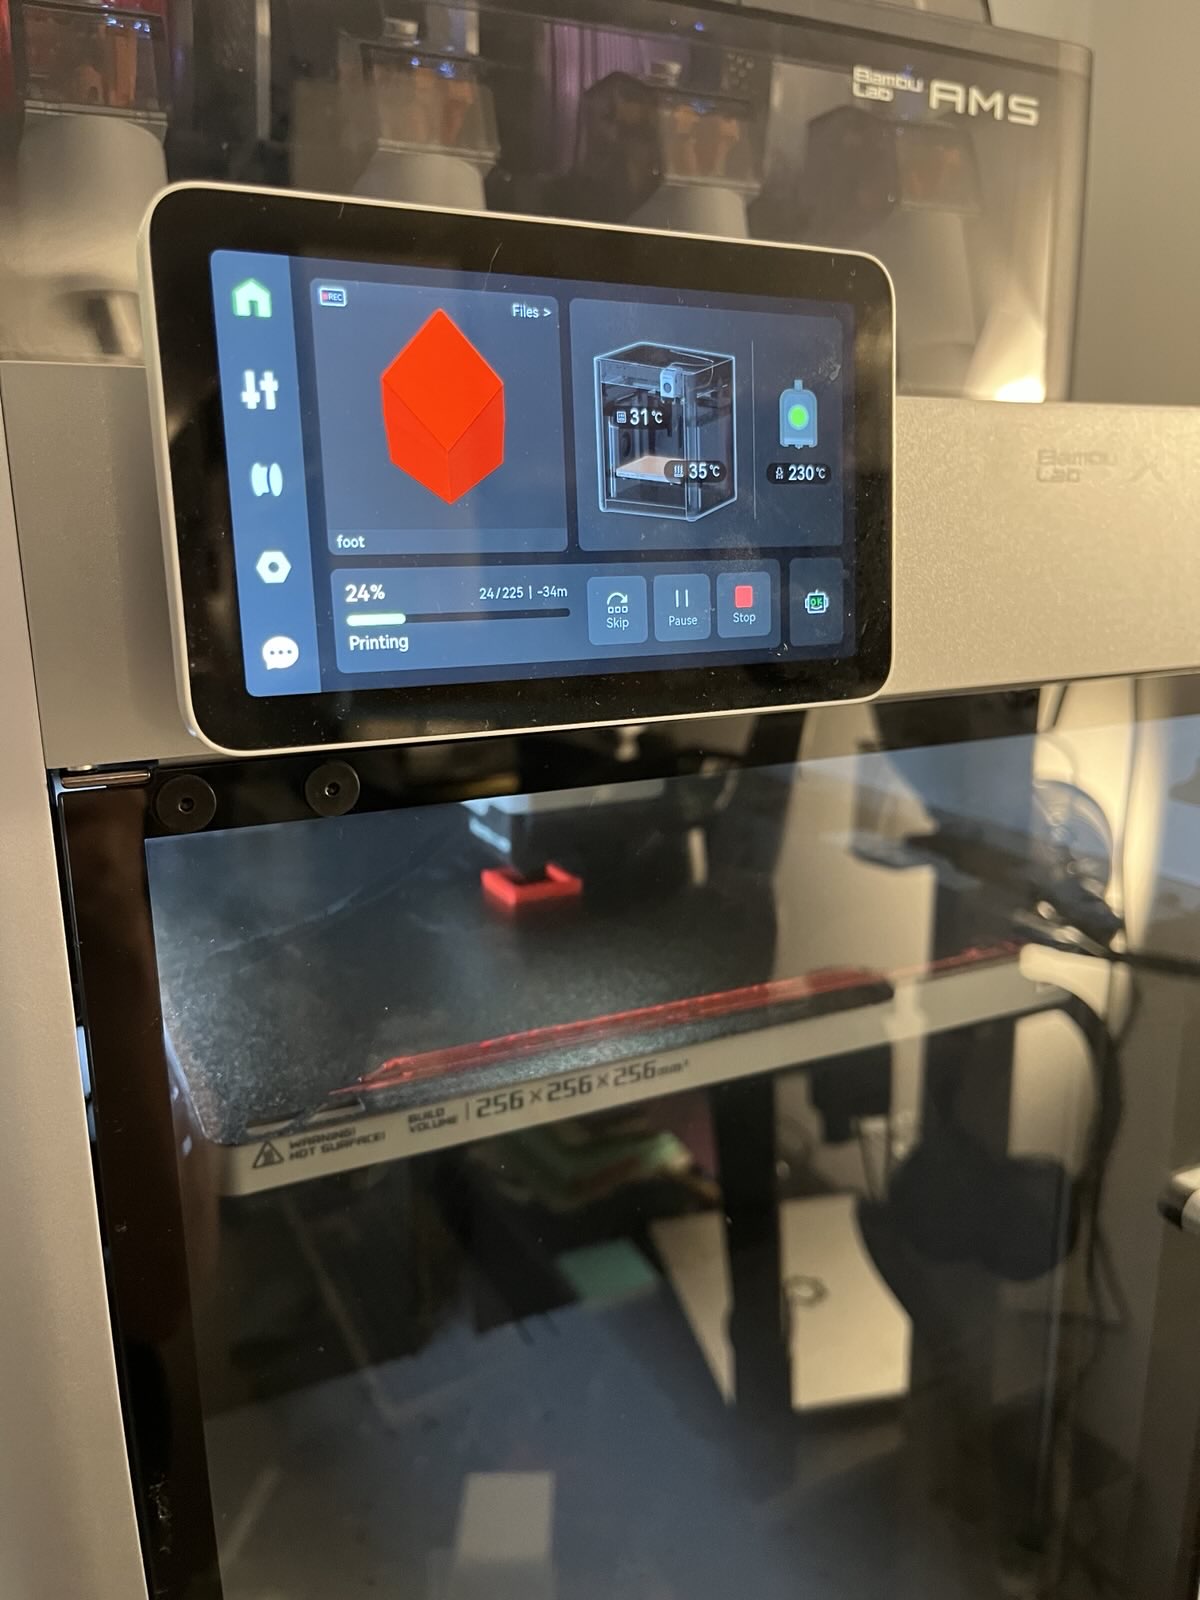
Now I can machine knit without taking up the countertop space. This reduces my anxiety about having the machine "out" for long periods of time as I practice skills or work on more time-consuming project.
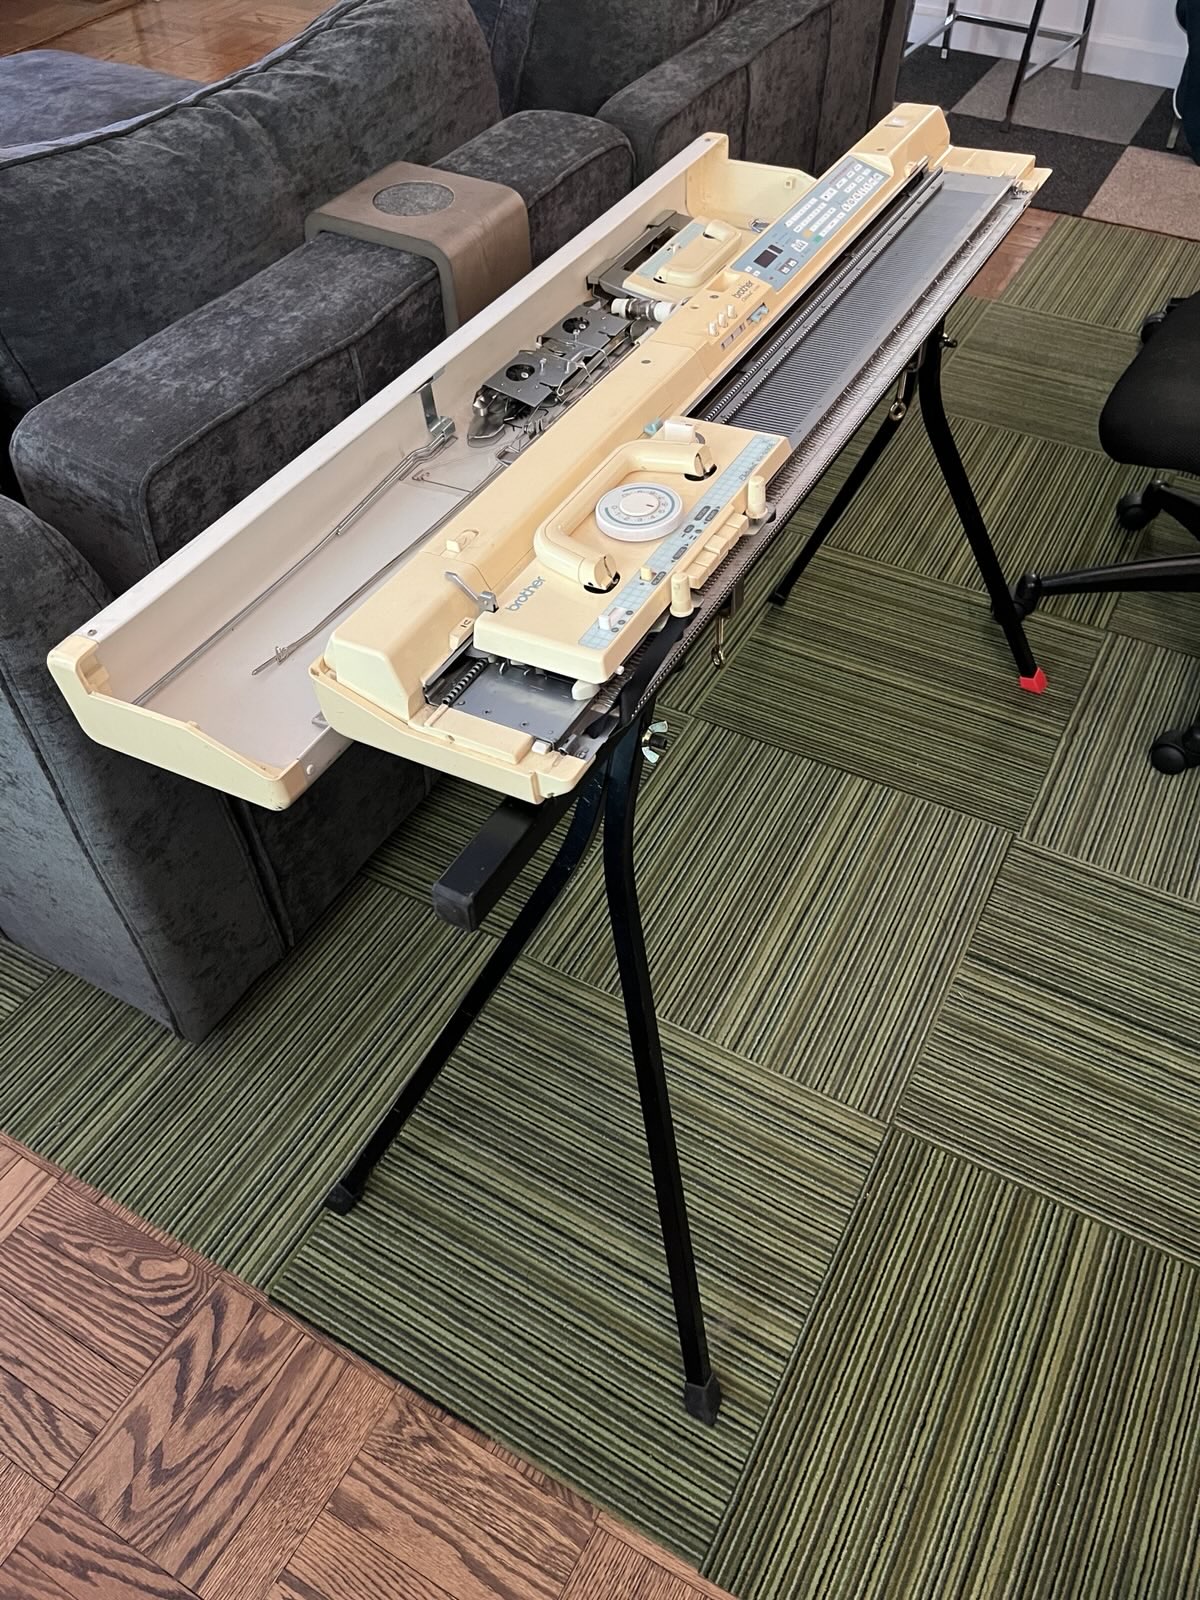
Of course, there is floor space to talk about, but that is slightly easier to negotiate at this point.
Heck yeah, I’m retro-posting. Hello from the future!
It’s August 3rd, 2025 and time for more machine knitting!


I started the day practicing some of the techniques from day one of the class.
I have forgotten the first technique Elaine taught us for the day, but it let us work in a second yarn by hand as each row is knit. Seems like maybe a cool way to work in wires or conductive thread??

Next up, we learned about putting working needles in hold, aka short-rowing, which allows you to “grow” sections of the knitting by adding rows just to one section, while other parts of the work stay put.


Next it was time for two-color patterned knitting with fair isle, powered by punch cards!
The knitting carriage needs several adjustments to begin following the punch card pattern.
Then… knit a bunch of rows! Here’s a little video.
When you’re done patterning, you can snip the contrast yarn, turn the carriage back knob back to ‘NL’ and disable the ‘MC’ button, then proceed knitting in your main yarn color as normal.
After a lunch break, we spent most of the rest of the time practicing what we’d learned so far. Near the end, Elaine taught a few important techniques that you do off the machine.
Note to self, or anyone who wants to book some studio time to do some machine knitting at the TAC:
And that was the end of the class! I learned so much, but mostly that I have so much yet to learn.

Besides the big swatch of worked-in yarn, here’s the rest of my swatches for the day!

From top-to-bottom, left-to-right:
Will I continue my machine knitting journey?? Stick around to find out! Subscribe in your favorite feed reader, and so on, and so forth!
Happy HTML Day!
I'm taking a two-day machine knitting workshop intensive, so I did not have the energy to join the folks at the Valentino Jr. Park meetup.
Instead I am writing this post (in HTML) while watching along to Jenn Schiffer's "HTML Day From Home (hdfh)" stream.
The workshop is Machine Knitting 101, from Brooklyn's Textile Arts Center's line of Machine Knitting classes and workshops. Today, our instructor Elaine walked us through some of the basics.
We bought a knitting machine, a Brother KH-930e, back in, checks notes, =chokes= like 2011 or 2012?? Enticed by Becky Stern's post on on hacking the KH-930e. As it turns out, the electronics hacking was NOT the difficult part of working with one of these machines! After some rounds of buying replacement parts and maintenance, we got a couple of little projects out of it, but found it challenging enough to work with that we stopped messing with it. But, we still have it, and I'm excited to try again!
Here's a photo of the workshop syllabus, as well as some of my debris from today's workshop.
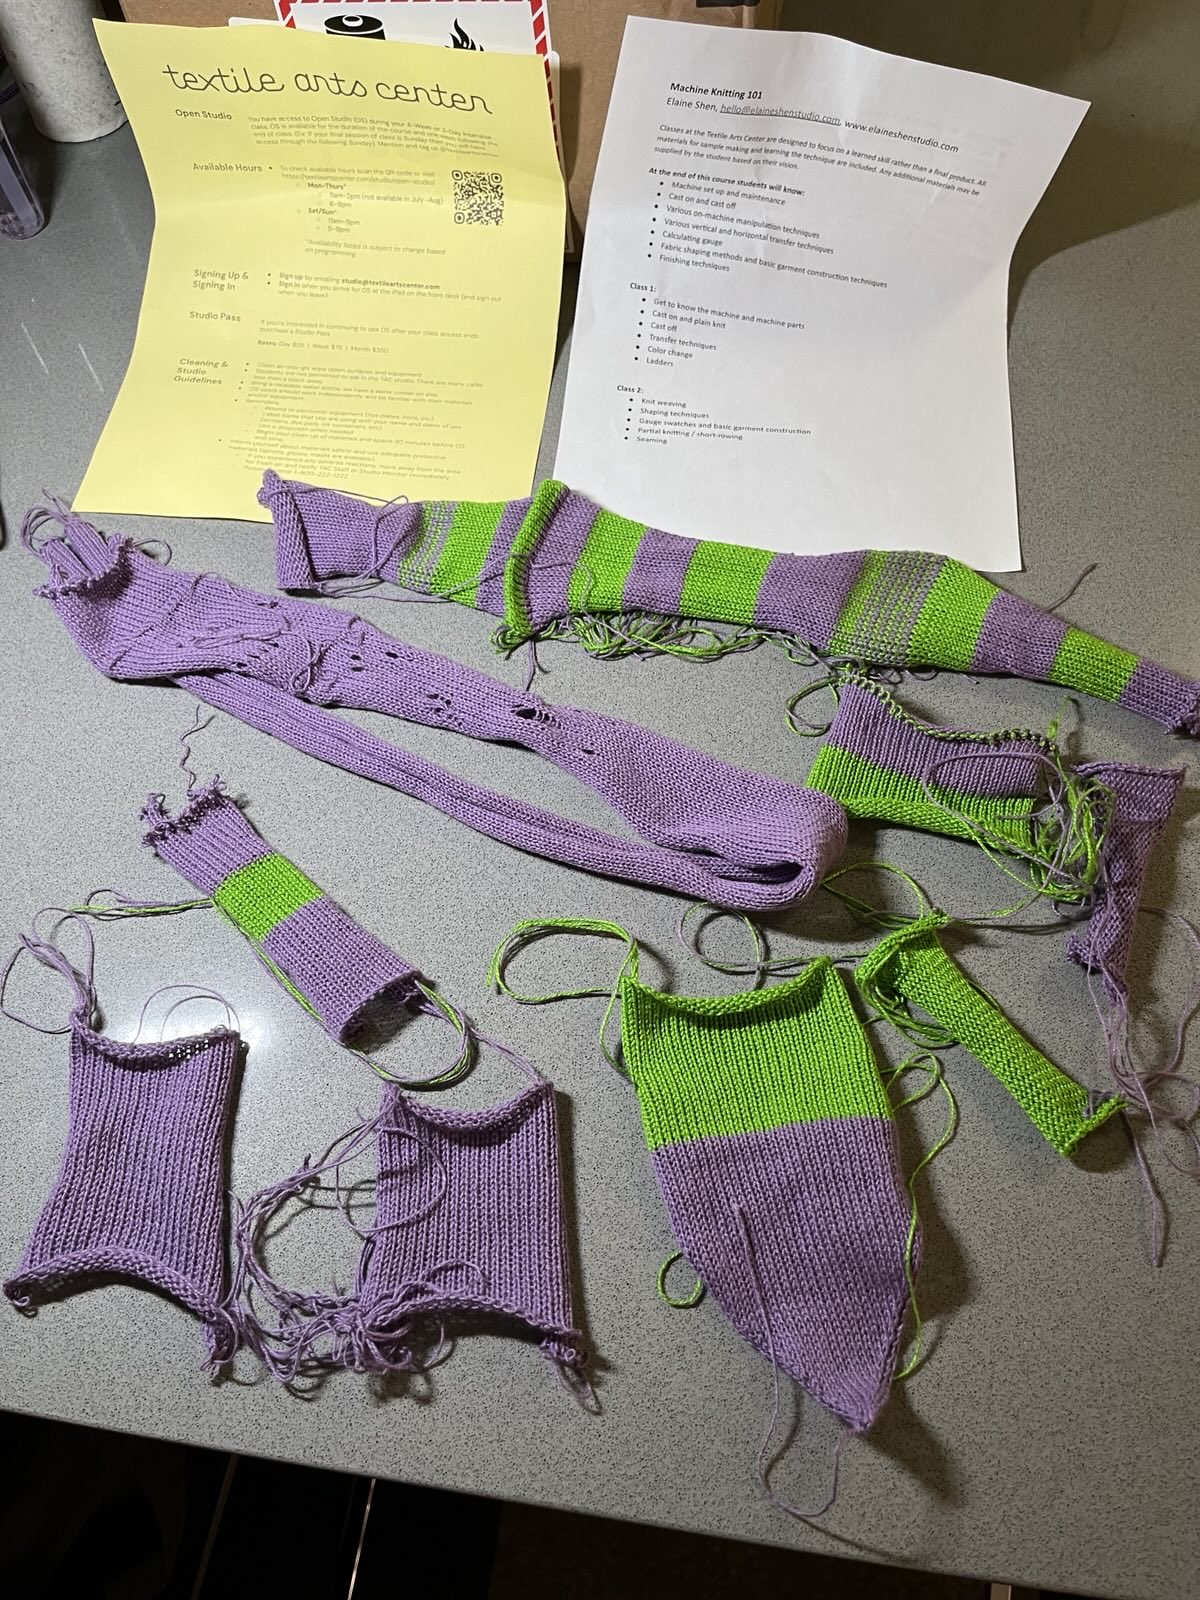
From top to bottom, left-to-right:
Thank you for reading. I hope to post more knitting projects. I hope to read your HTML Day creations!
'til next time!
This post is about a month overdue. As compensation, I will waive the customary subscription fee to read it.
Every month, Blake Andrews hosts a 2-hour game jam at Brooklyn indie arcade / bar / awesome place Wonderville.
I attended as my first in-person game jam on April 12th, where we were jamming on Bitsy. With Bitsy's browser-based editor, a bunch of great learning materials, and Blake's thorough live intro, it was easy to dive in!
Jam themes are chosen by asking Wikipedia for a random page. In this case, it was Town of North Fremantle, an Australian municipality that became a "town" in July of 1961, only to be amalgamated into the city of Freemantle, across the river, in November of the same year.
I kind of fixated on the idea of civic bureaucracy, going through a political process, and finding out that it was a pointless exercise. So, I decided to make a little game about collecting and filing signatures.
While Bitsy is lovingly simple, I have very little game jam experience and few skills, so I reused a lot of the default game assets, as I worked to just figure out how things are wired up. The base engine can do some pretty fun and complex stuff, but I found it confusing to find some concepts in the base editor. For example, an "if / else" block for dialog is under "Lists" because it is a "Branching List". My programming background expectations misled me several times.
In the end, I made a little thing, and even got to demo it live along with about a half-dozen other folks there.
You can find my jam entry here: Civil at Last, on itch.io. (I have my own itch.io page, now!)
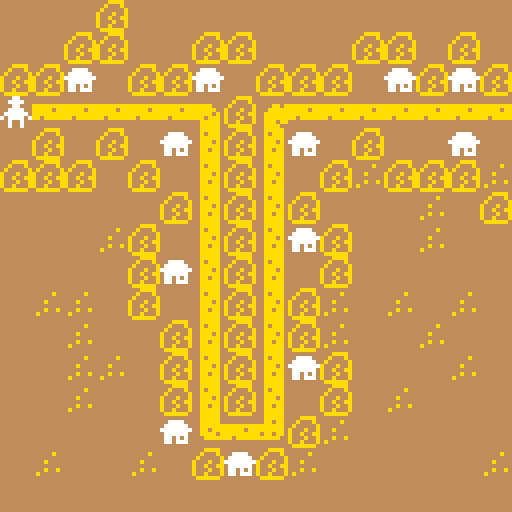
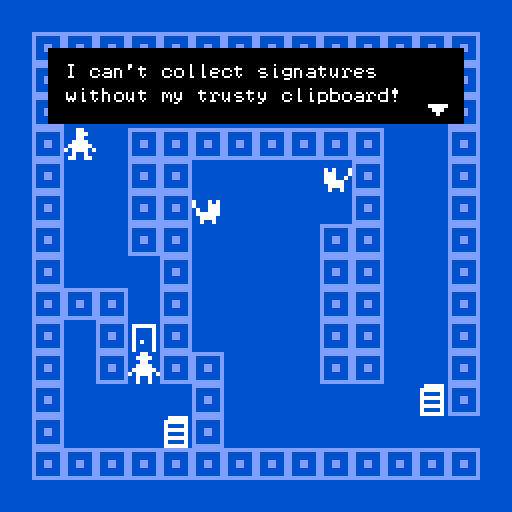
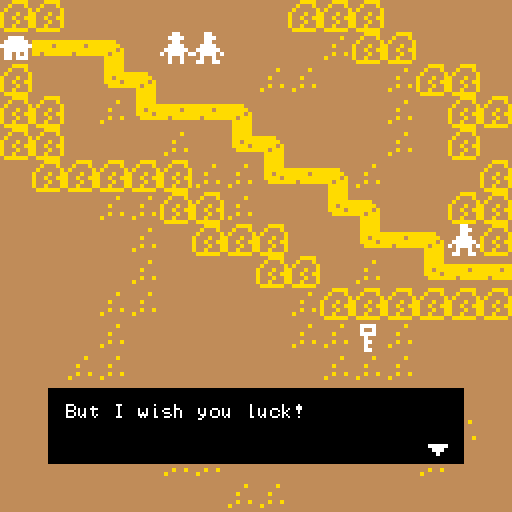
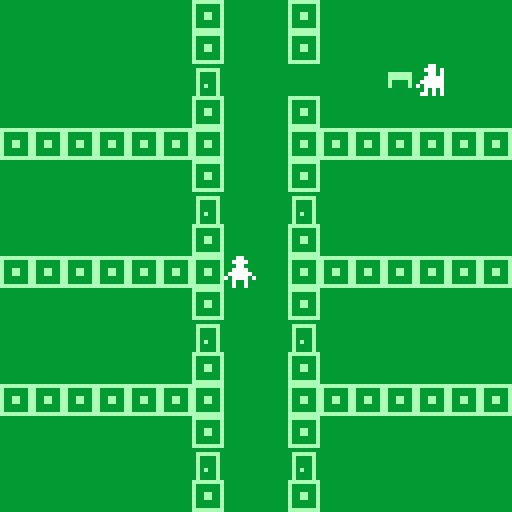
You can also play it right here!
You can find more details about the jam, and links to all the entries, at the 2 Hr Game Jam Club April 2025 page at itch.io.
Let me know if you play and enjoy the game! Can you find all two endings??
I'm trying to do things that get me out of the house and reduce the amount of time I look at torture rectangles (aka screens with internet). This Refurbish a Game Boy workshop from Craftsman Ave. felt like a perfect opportunity. Not only would I get some quality time in a (quality!) makerspace and get my hands dirty doing some tinkering (with expert guidance and few opportunities to truly mess up), but I'd also get to bring home a joy rectangle to improve the joy-to-despair ratio of rectangles in my life.
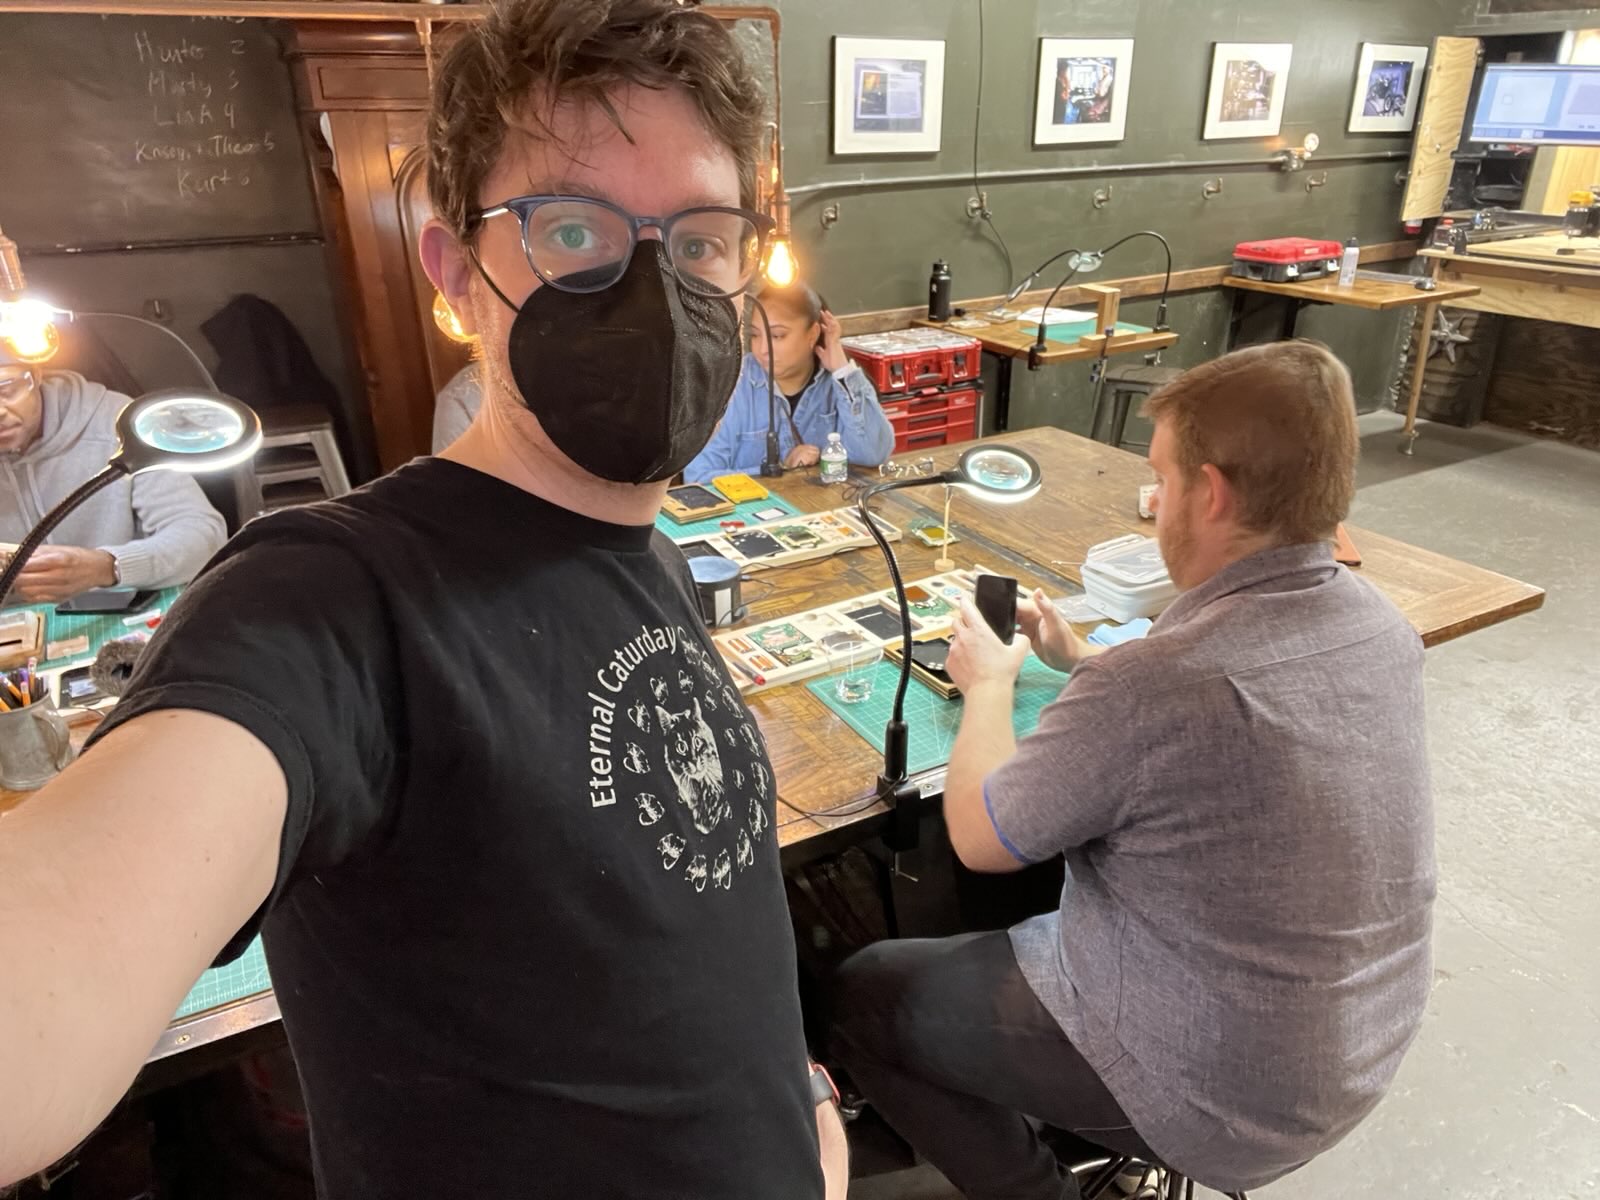
There were a lot of things to like about the workshop. The Craftsman Ave space itself combines super functional with ✨aesthetic✨. Or, to paraphrase how they put it, "we foster the illusion that beautiful things are made in beautiful places, when we know better." Workshop instructor Zach was super prepared, knowledgeable, and patient. Helping out was Chris who was so nice and humble, but did so much so smoothly behind the scenes, it felt like we were all his guests.
Did I mention prepared? Here come a bunch of photos about how prepared!
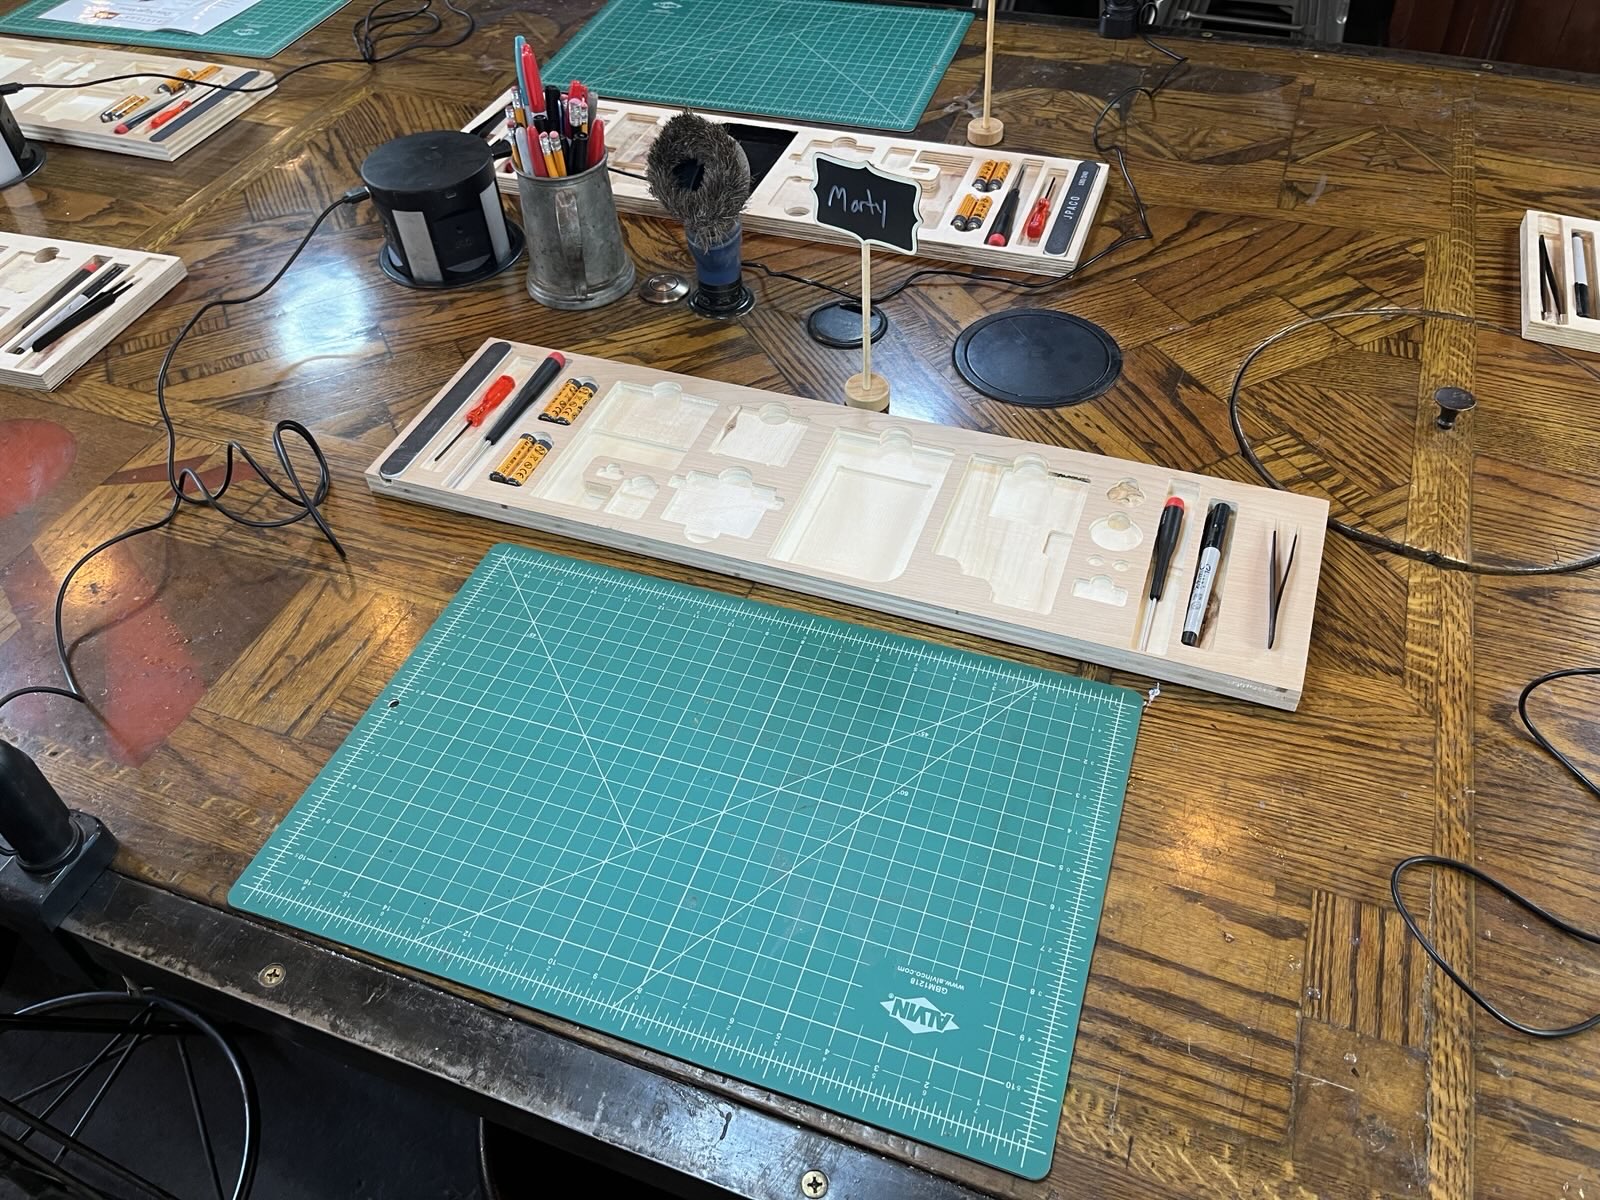
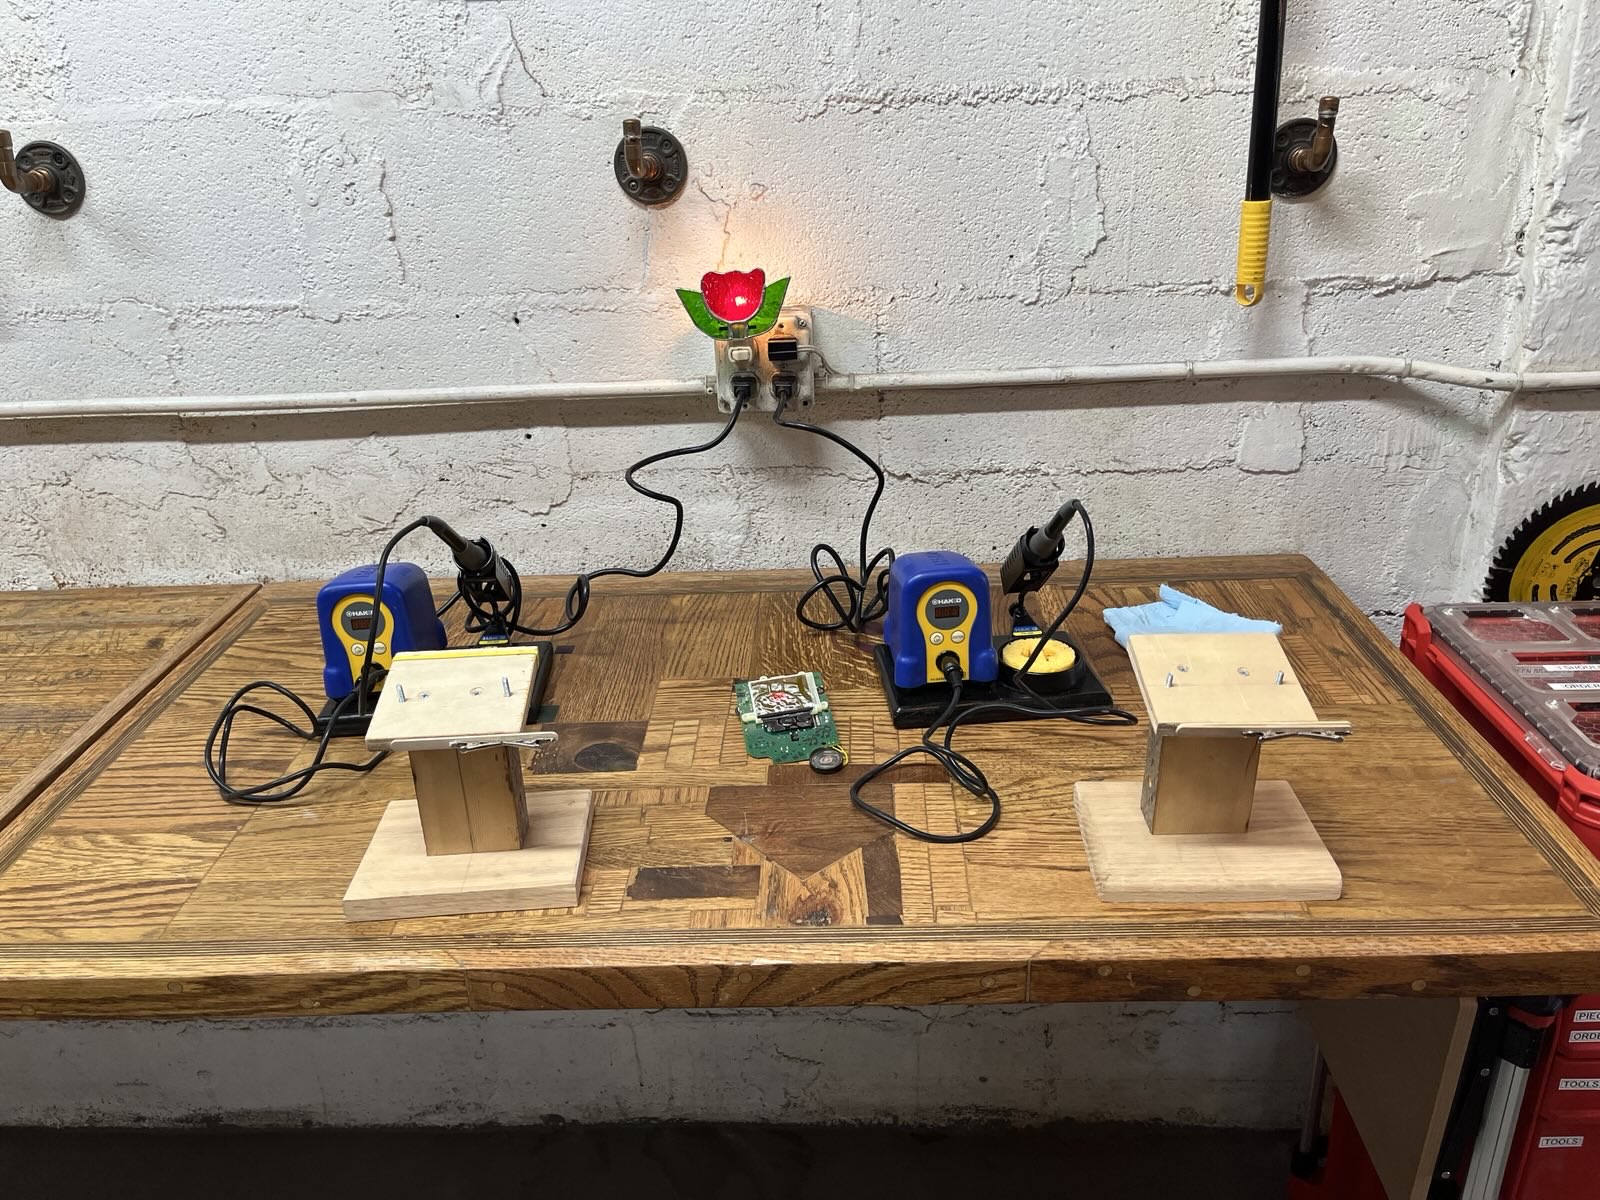
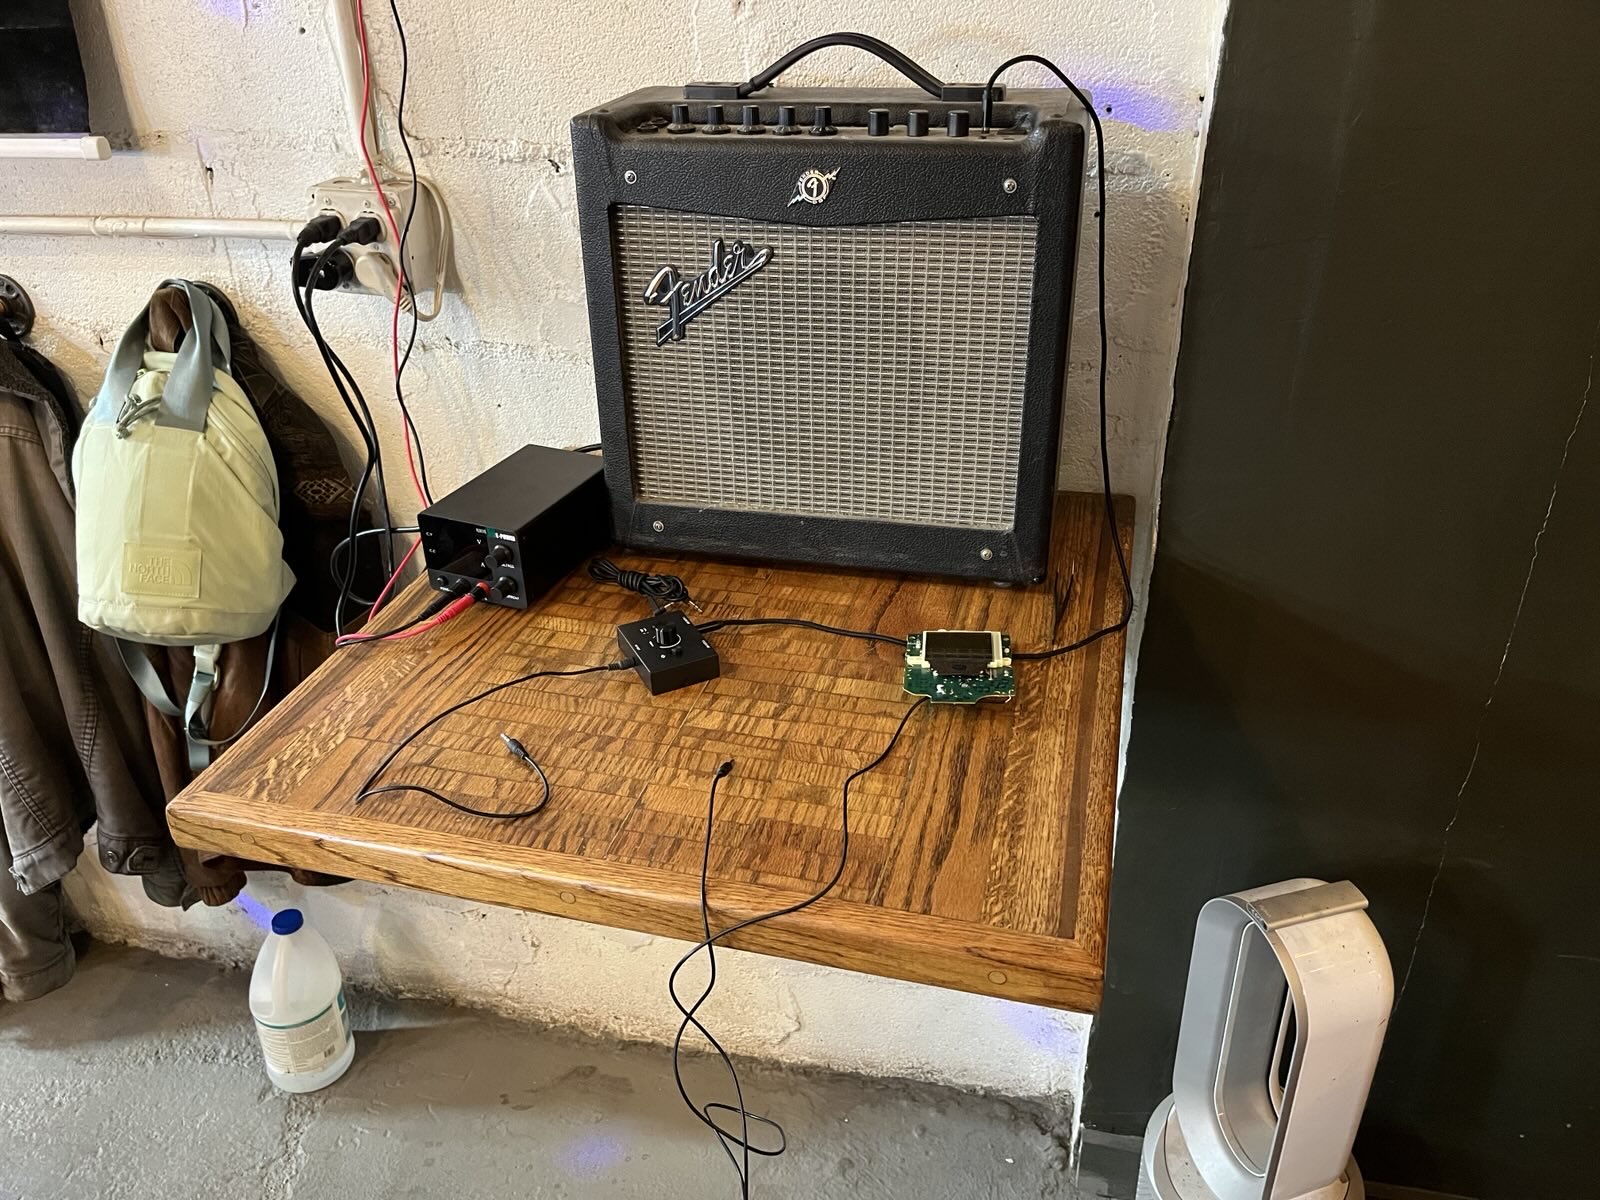
The workshop accommodates up to 6 units being refurbished, either on your own or with a partner. We drew lots to determine the picking order from the set of available Game Boy units. (I keep writing "Game Boys", disliking it as a term, and replacing it with "Game Boy units". What is language?)
Anyway, here were the pickings for the evening!

I chose this sad boy which had very little sign of aging plastic but a lot of signs that it had probably been through a flood, with grit on the surfaces and in the holes, major signs of water damage on the screen, and all that was obvious before looking inside.

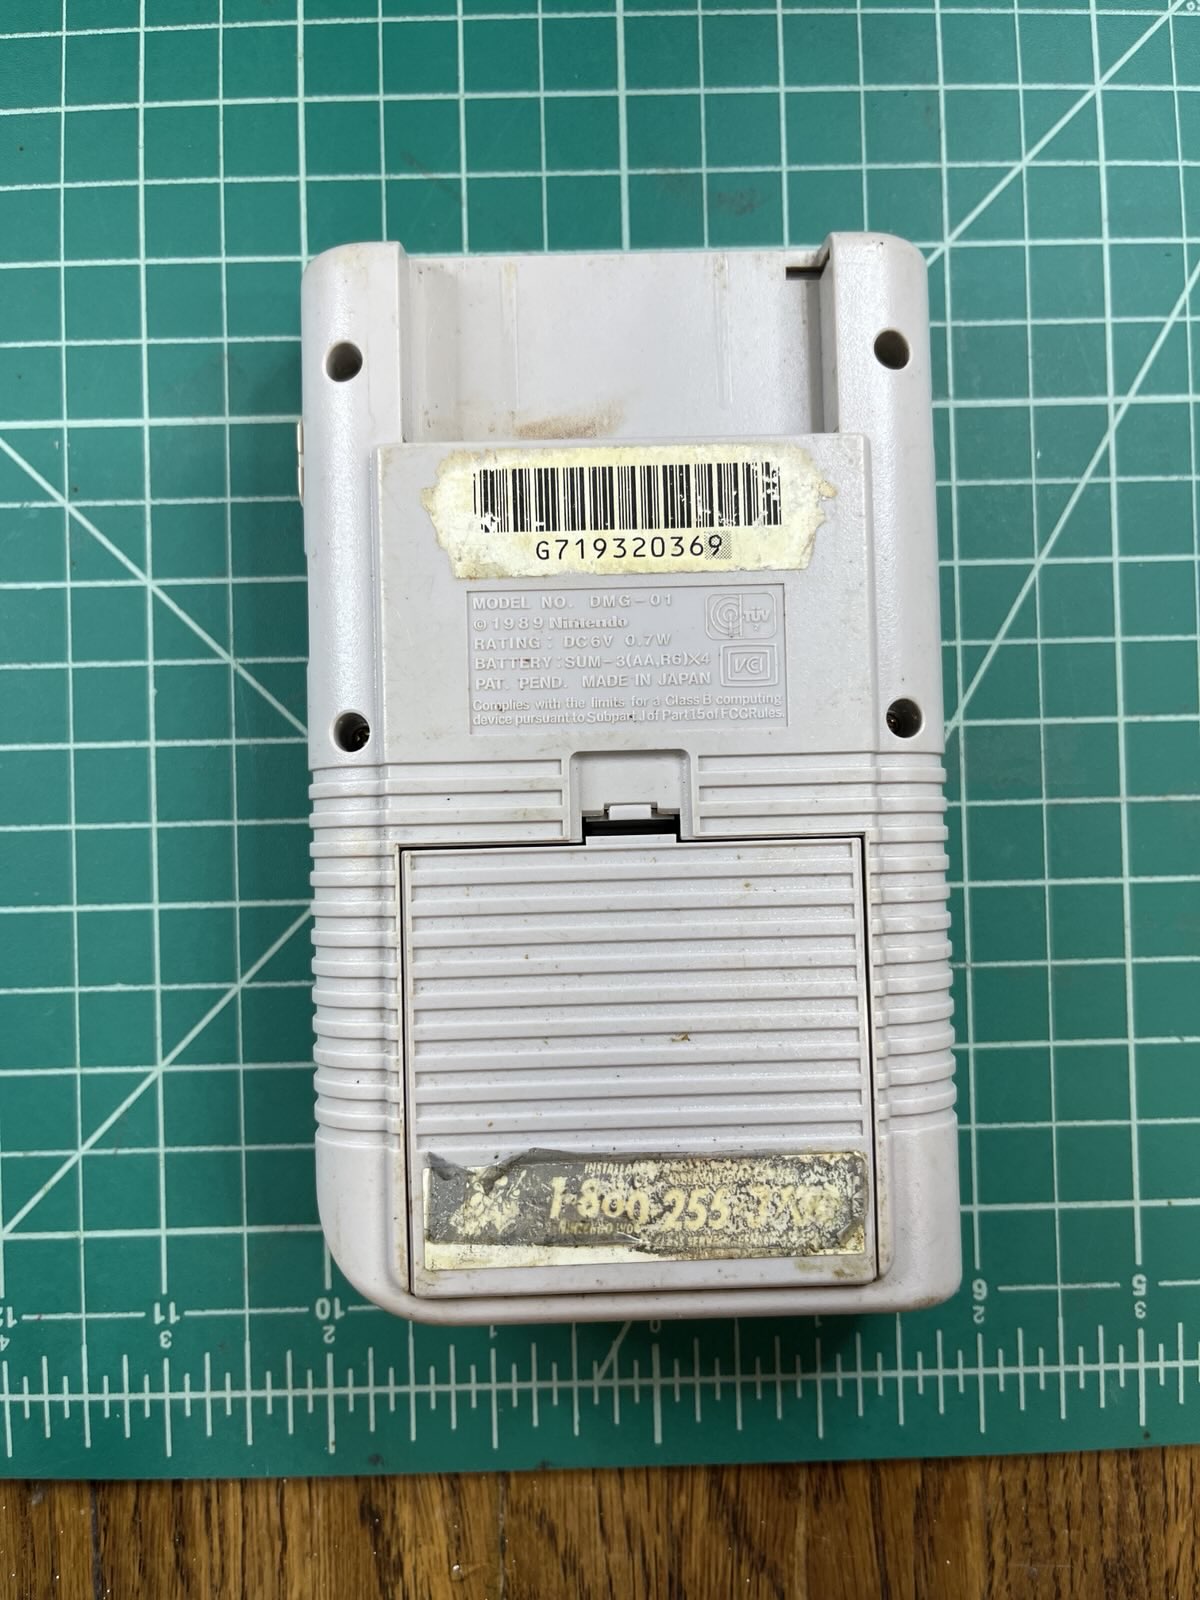
Looking inside gave me some bad feelings...
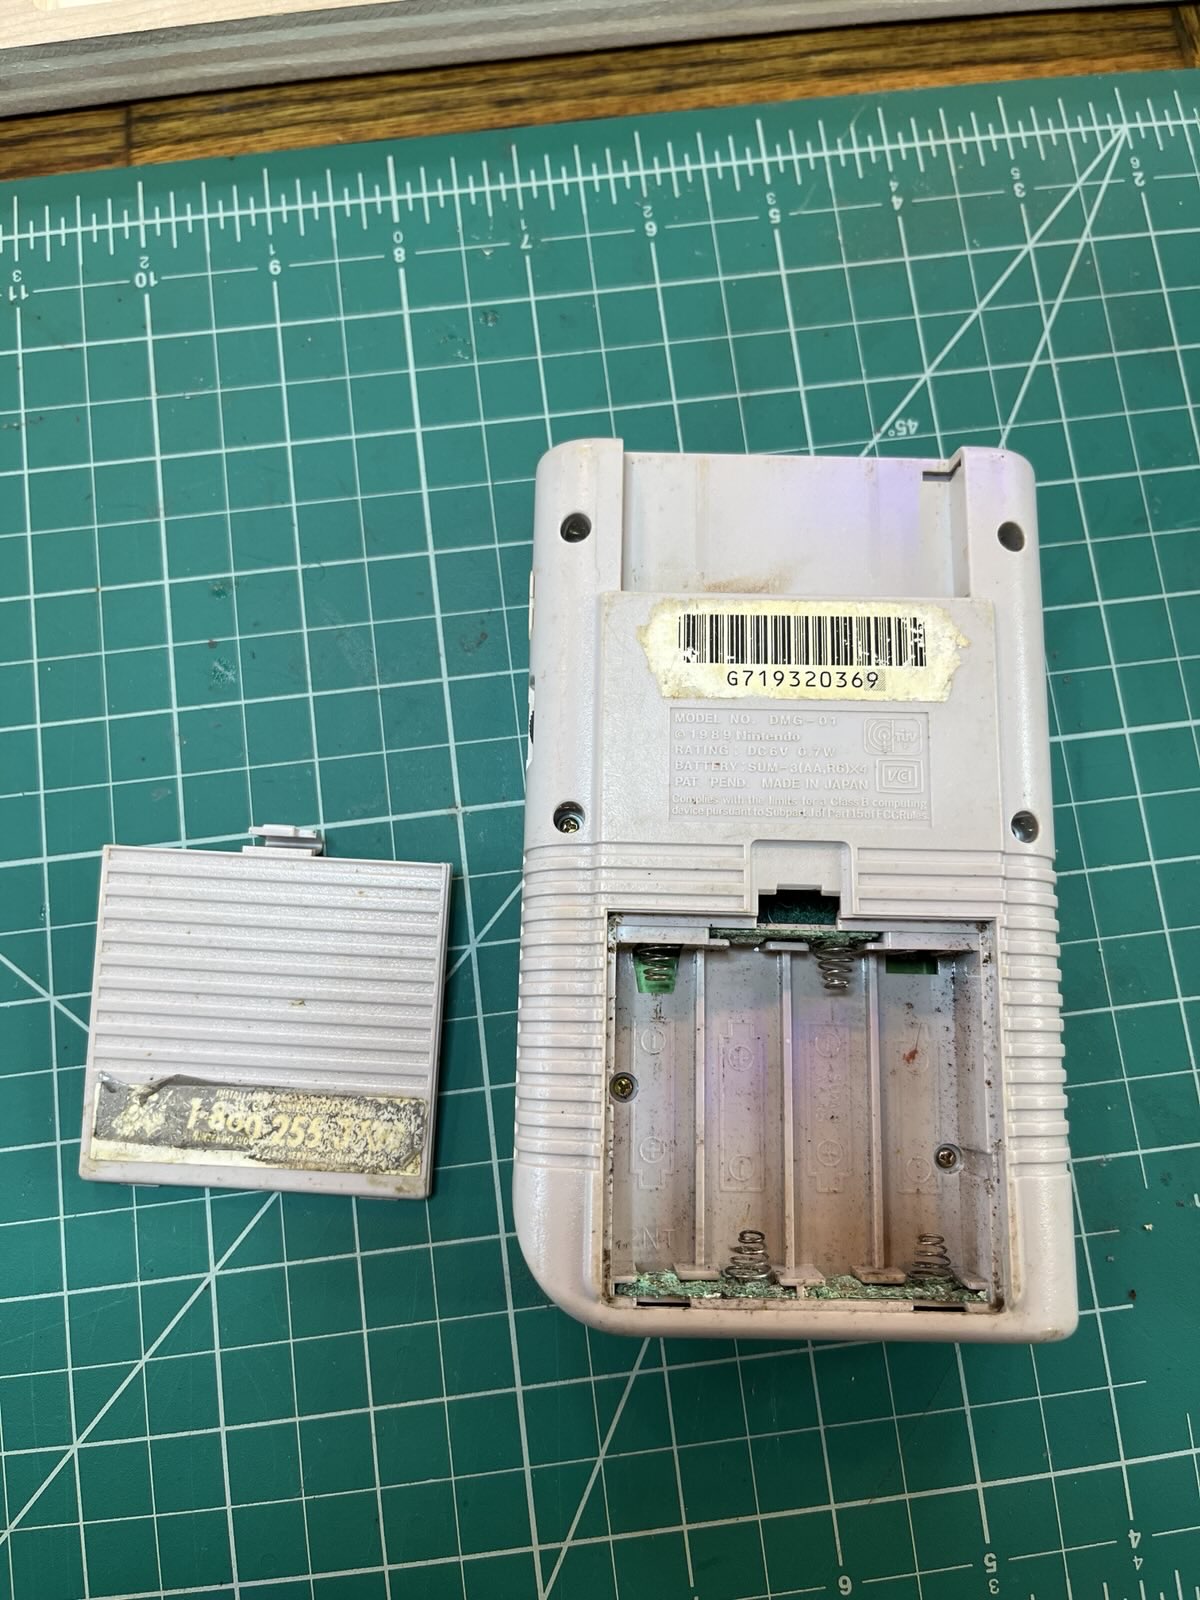
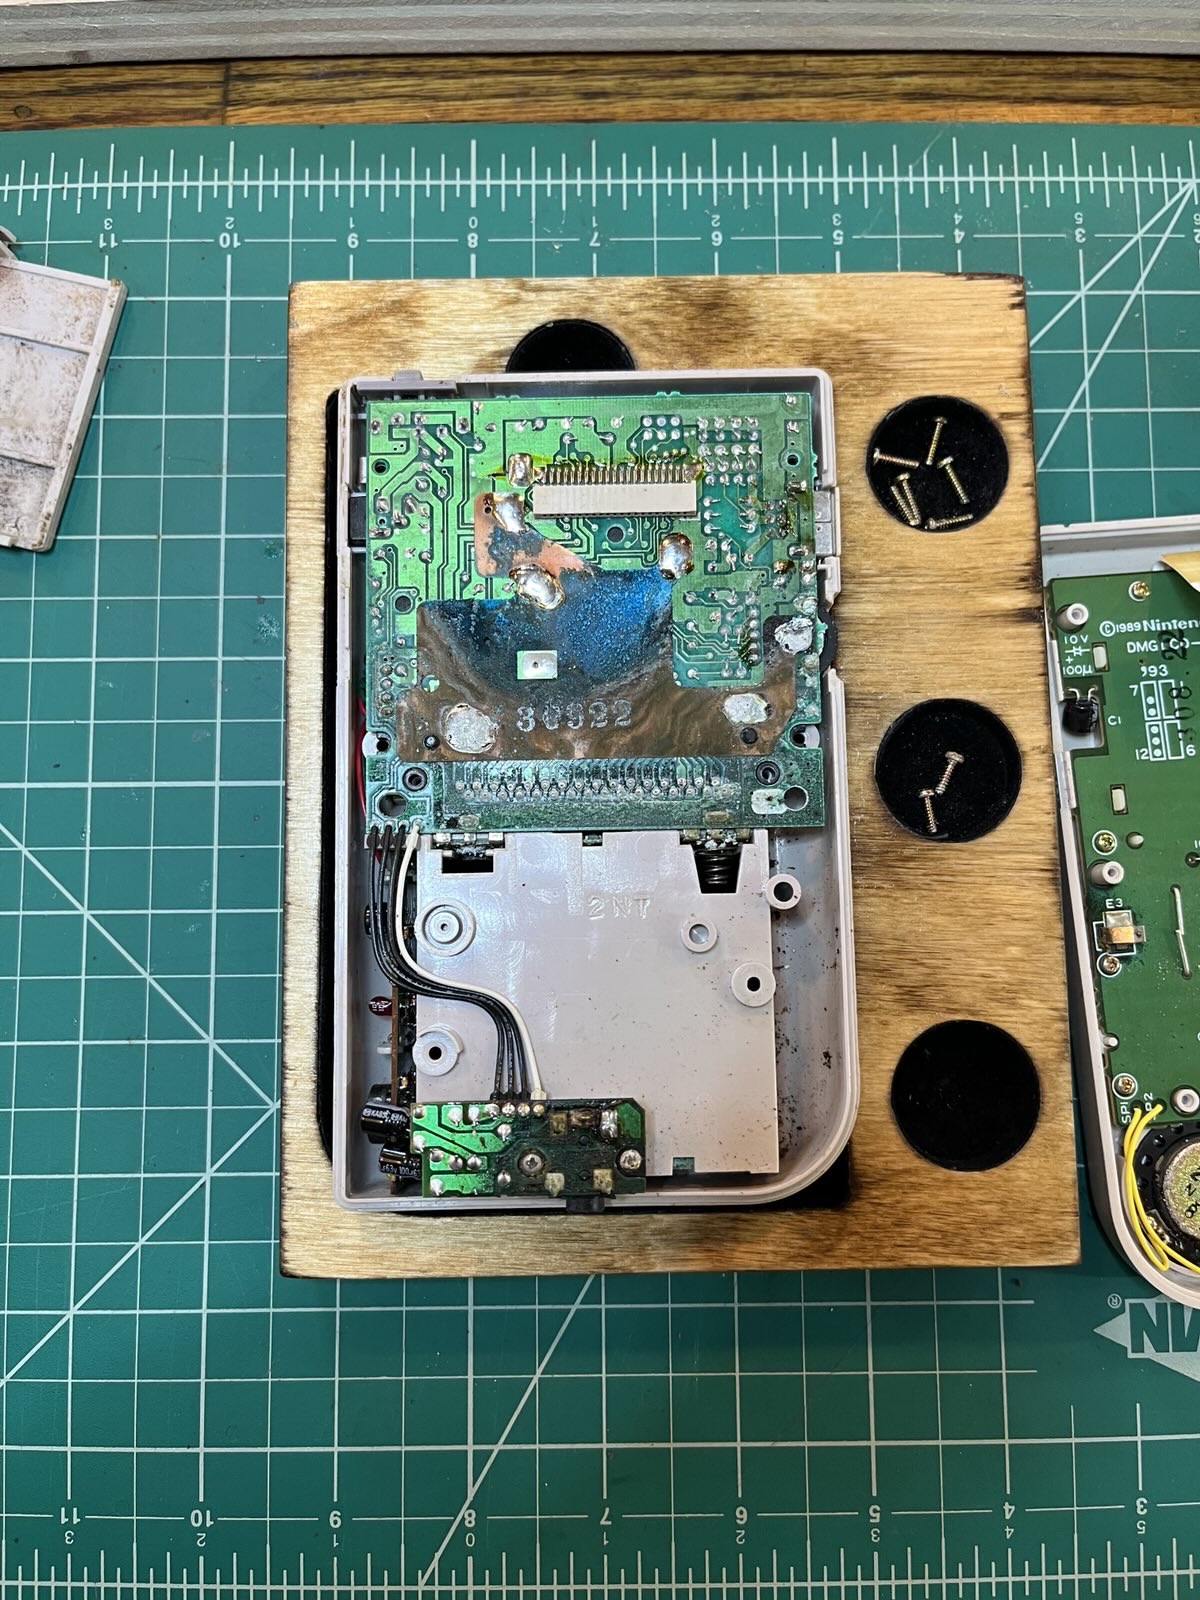
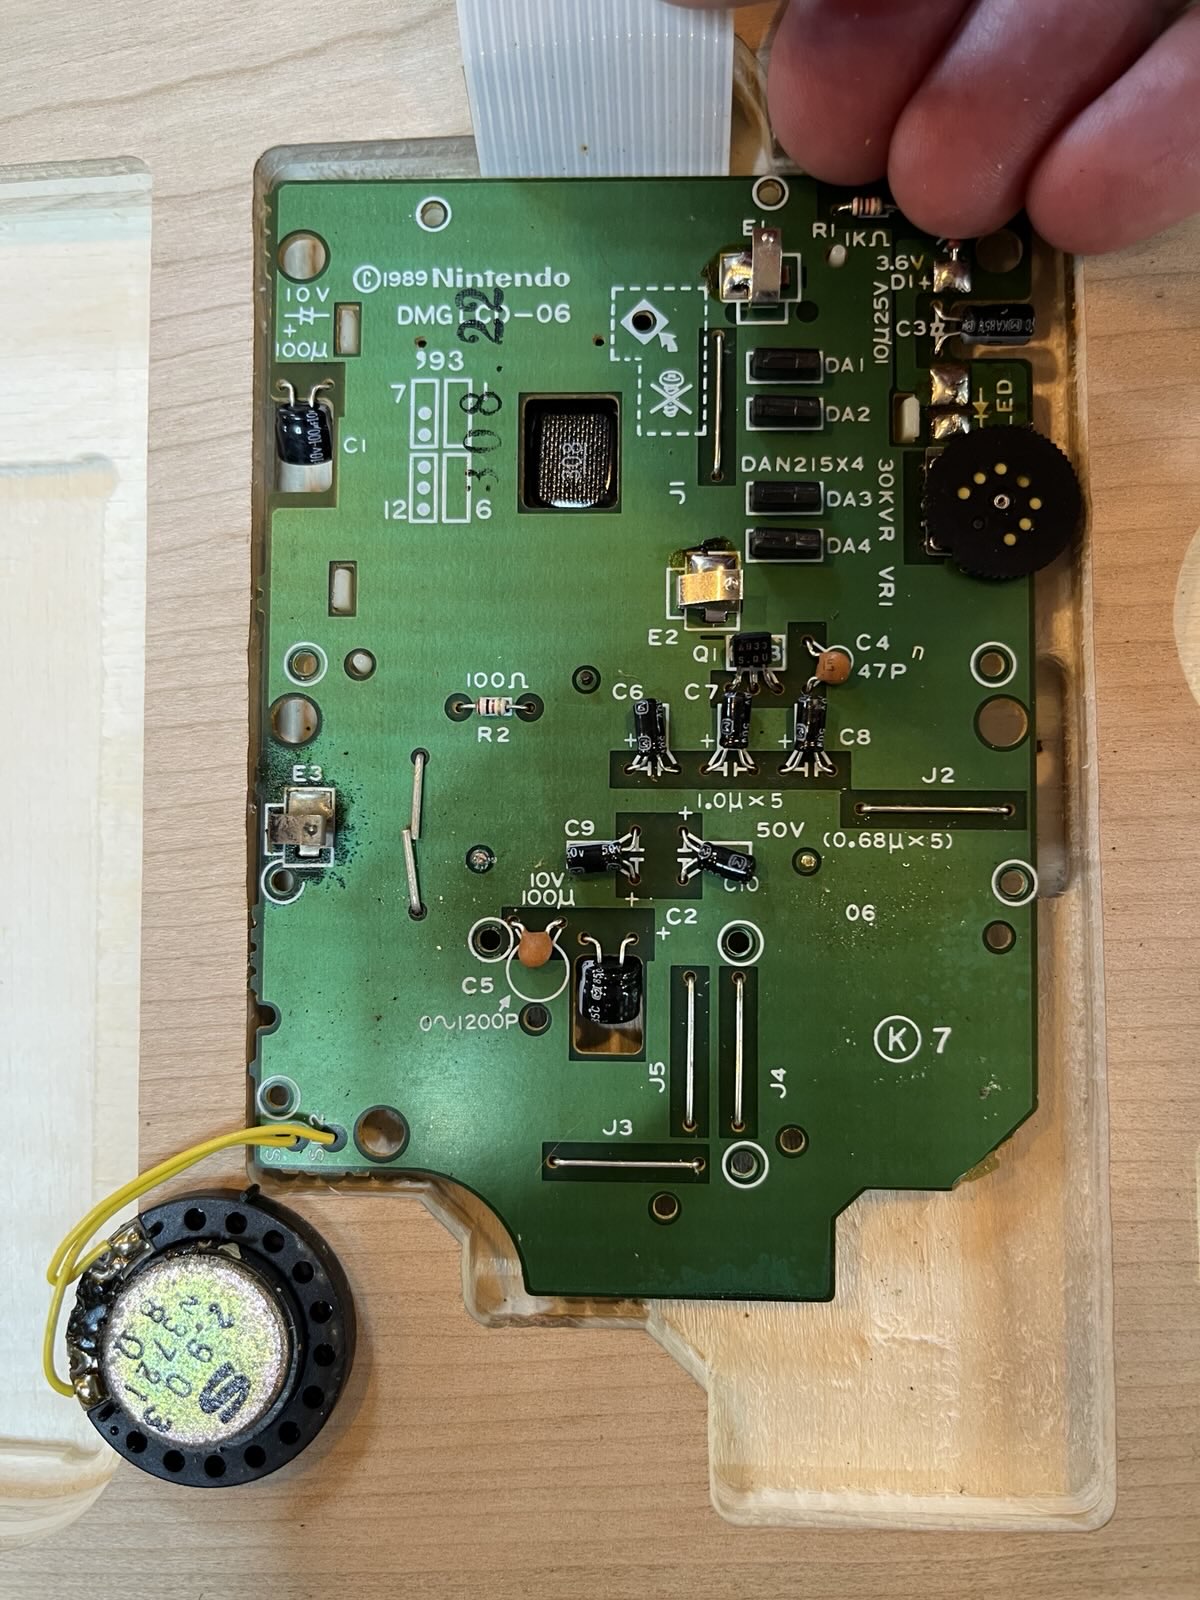
Zach had us examine the media daughter boards of our units, which indicate when it was manufactured.
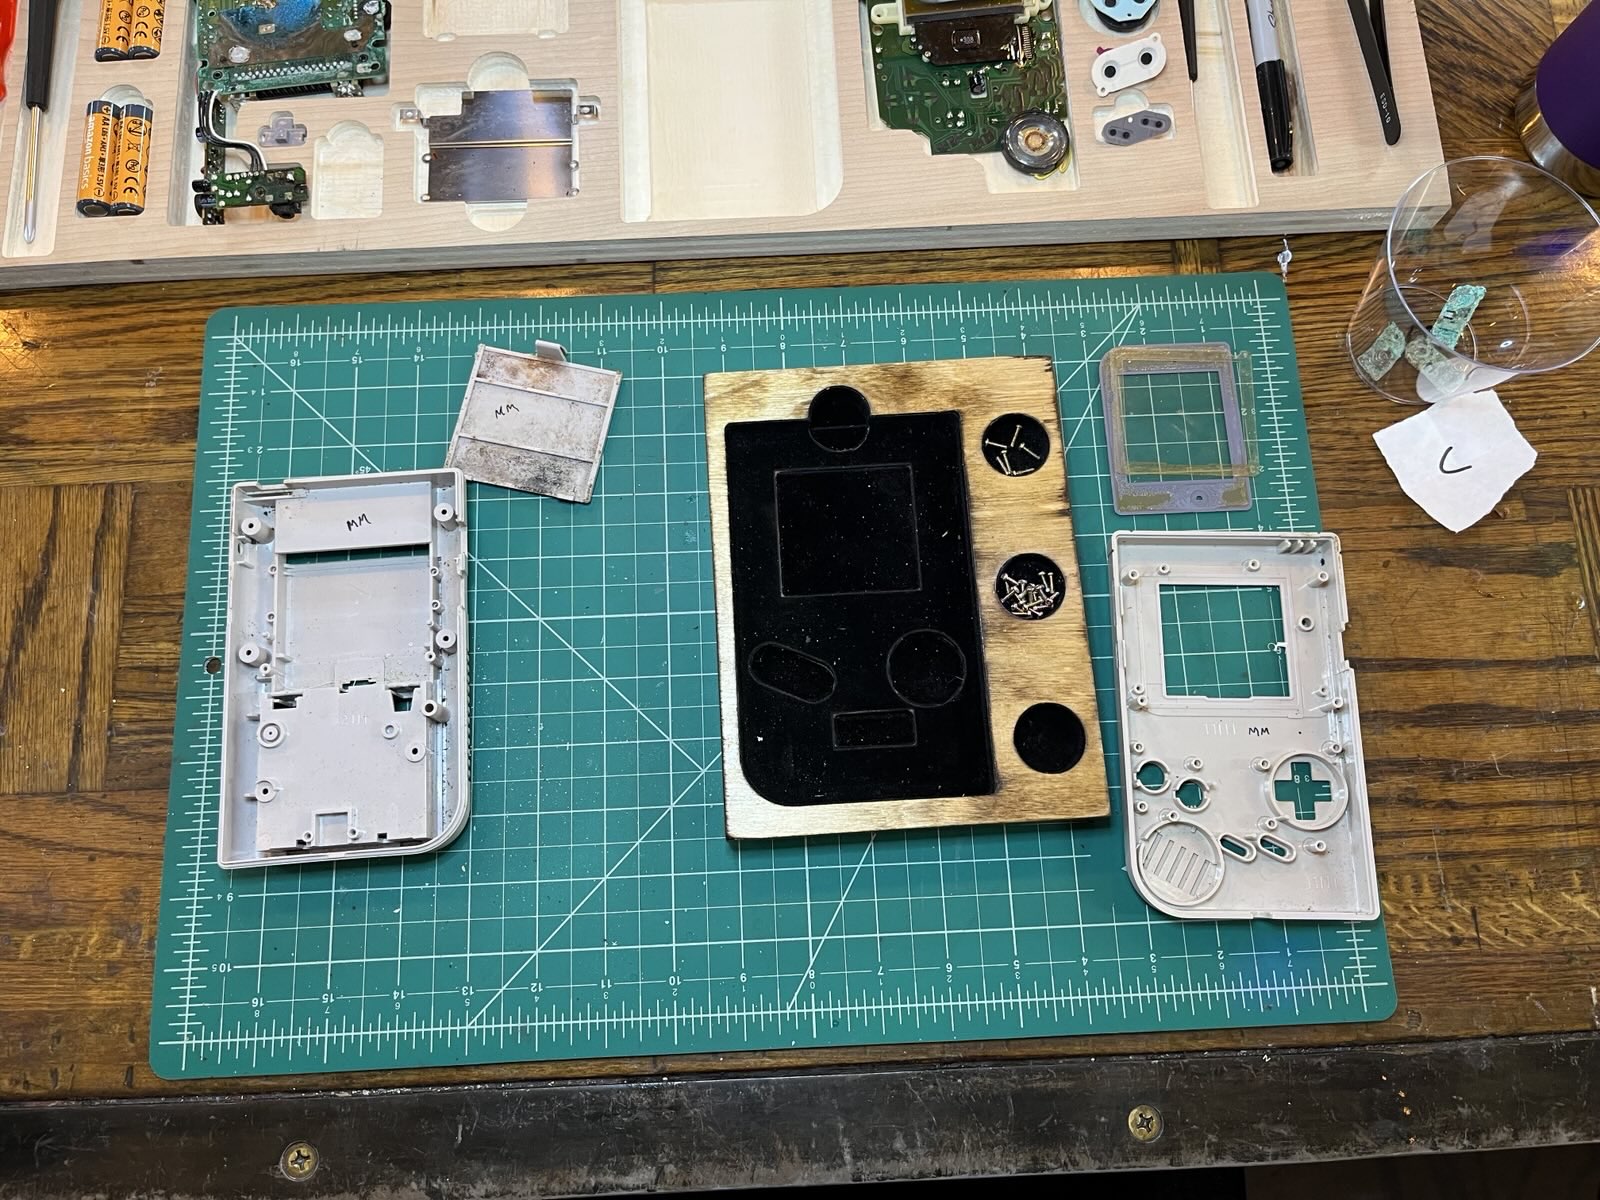
We used tri-wing and Phillips screwdrivers to separate all the electronic parts from all the plastic parts, then put our initials on the plastic bits in Sharpie before giving them a soap bath and scrub-down to remove grit and grime.
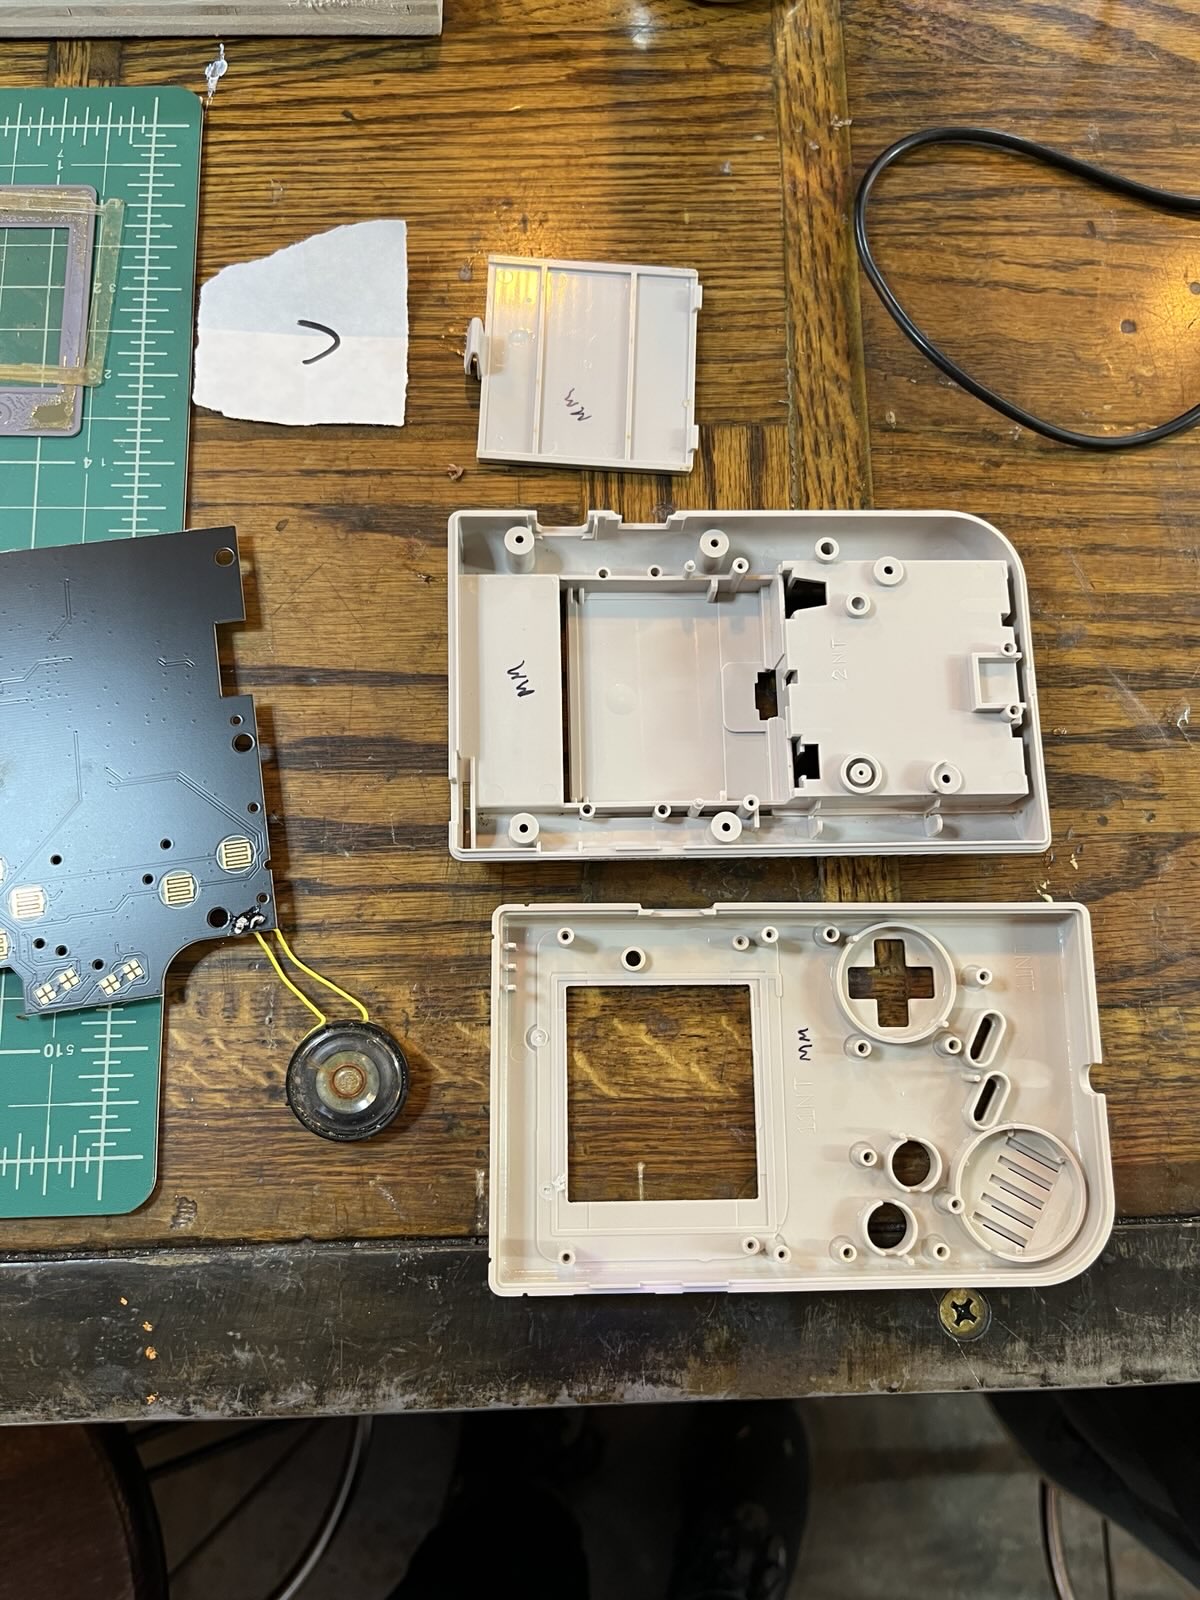
With the electronics disassembled, we took turns using the Fender amp to test whether our Game Boy motherboard worked, using a 6-volt power supply and alligator clips to the power terminals. Mine, unfortunately (but not unexpectedly) did not produce the signature "bling!" sound indicating a successful boot. So, it was taken away (for recycling or a viking funeral, I don't know) and I received a known-good working one.
After motherboard testing, we took turns at the soldering stations, removing the little mono speakers from the original media boards and attaching them to the new boards. Comparing the new sleek black PCB to the old crusty speaker had me pretty convinced the speaker wouldn't work.
There were even more things happening in parallel. Our new media boards were part of a full screen replacement, upgrading these units to crisp, backlit IPS displays, with brightness controls and many more features. Critically, the new screens are bigger than the originals, requiring some alterations to the case.
This is where Craftsman Ave's X-Carve machine comes into play. A custom jig holds the front of the Game Boy case in place, while a router bit removes two screw support posts, some space on the side for the new LCD's control toggle, and carves back the edges of the screen.
At some point, Zach gave us a little demo of removing corrosion from the battery terminals using vinegar. The acid eats away at the corroded bits in a bubbly reaction. These parts were too far gone to use, but Zach had plenty of spares.
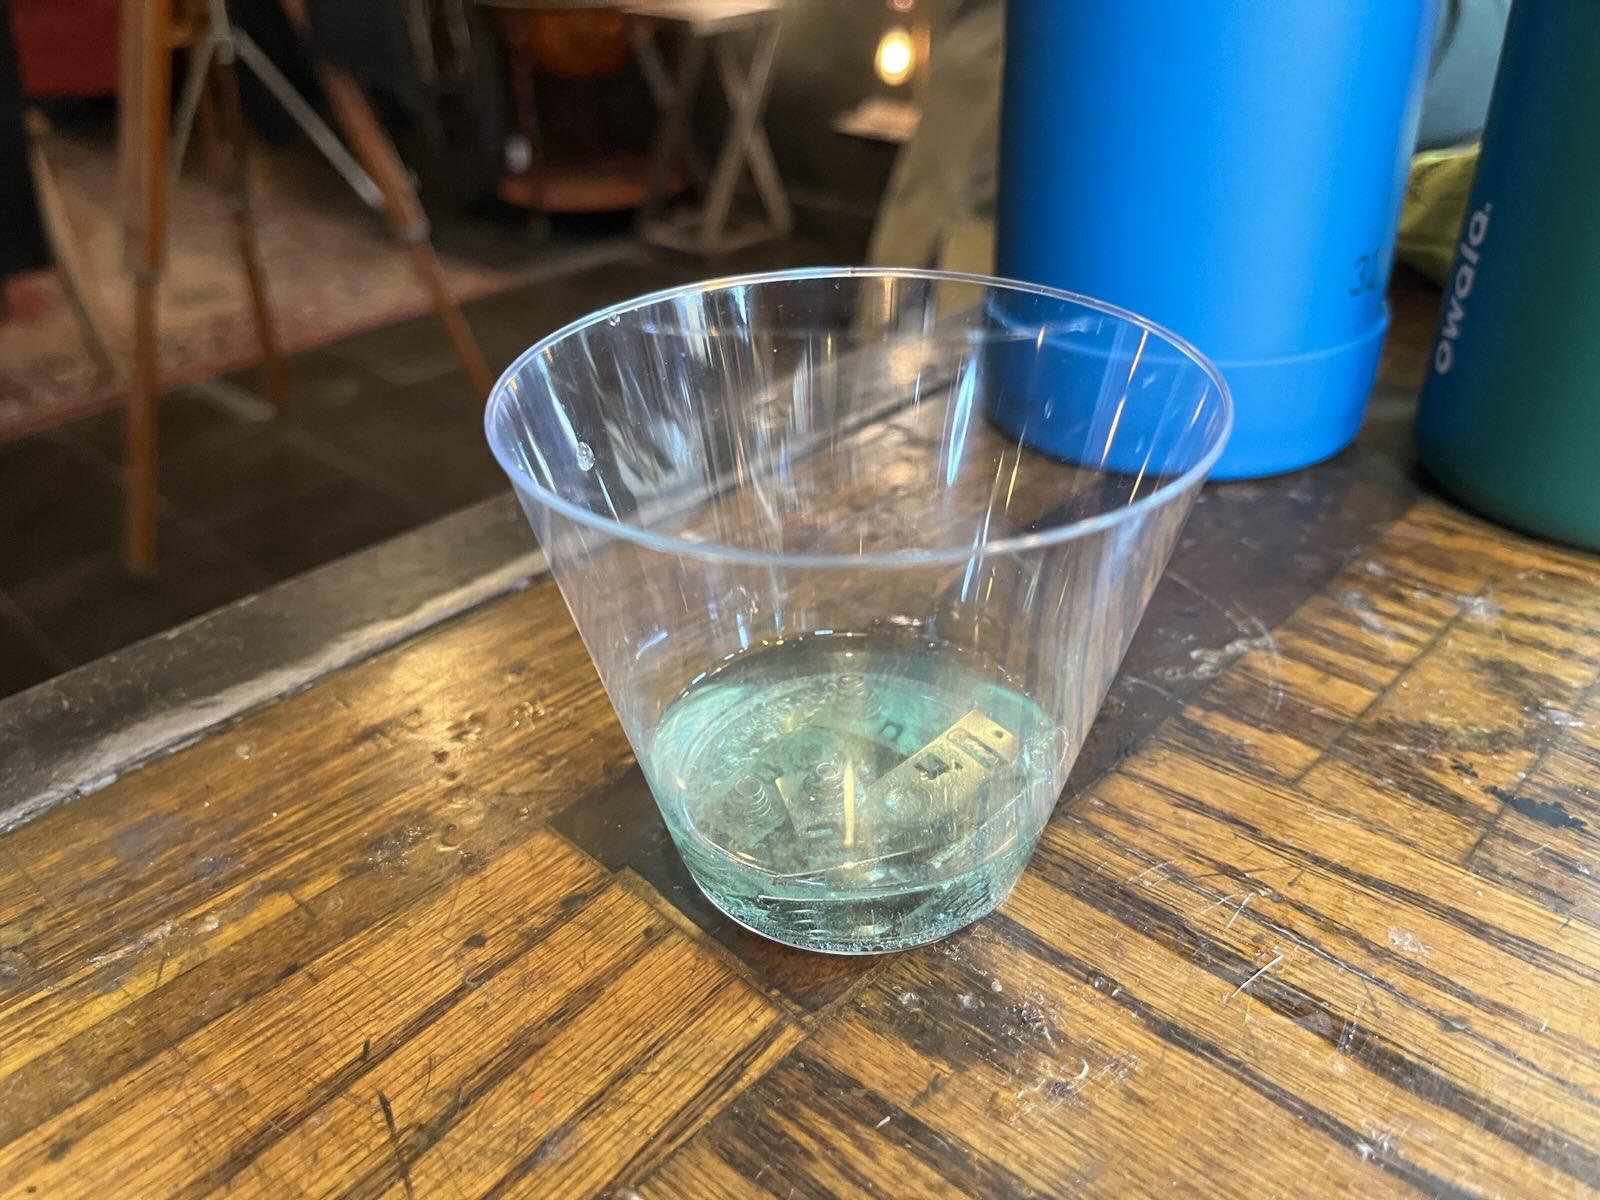
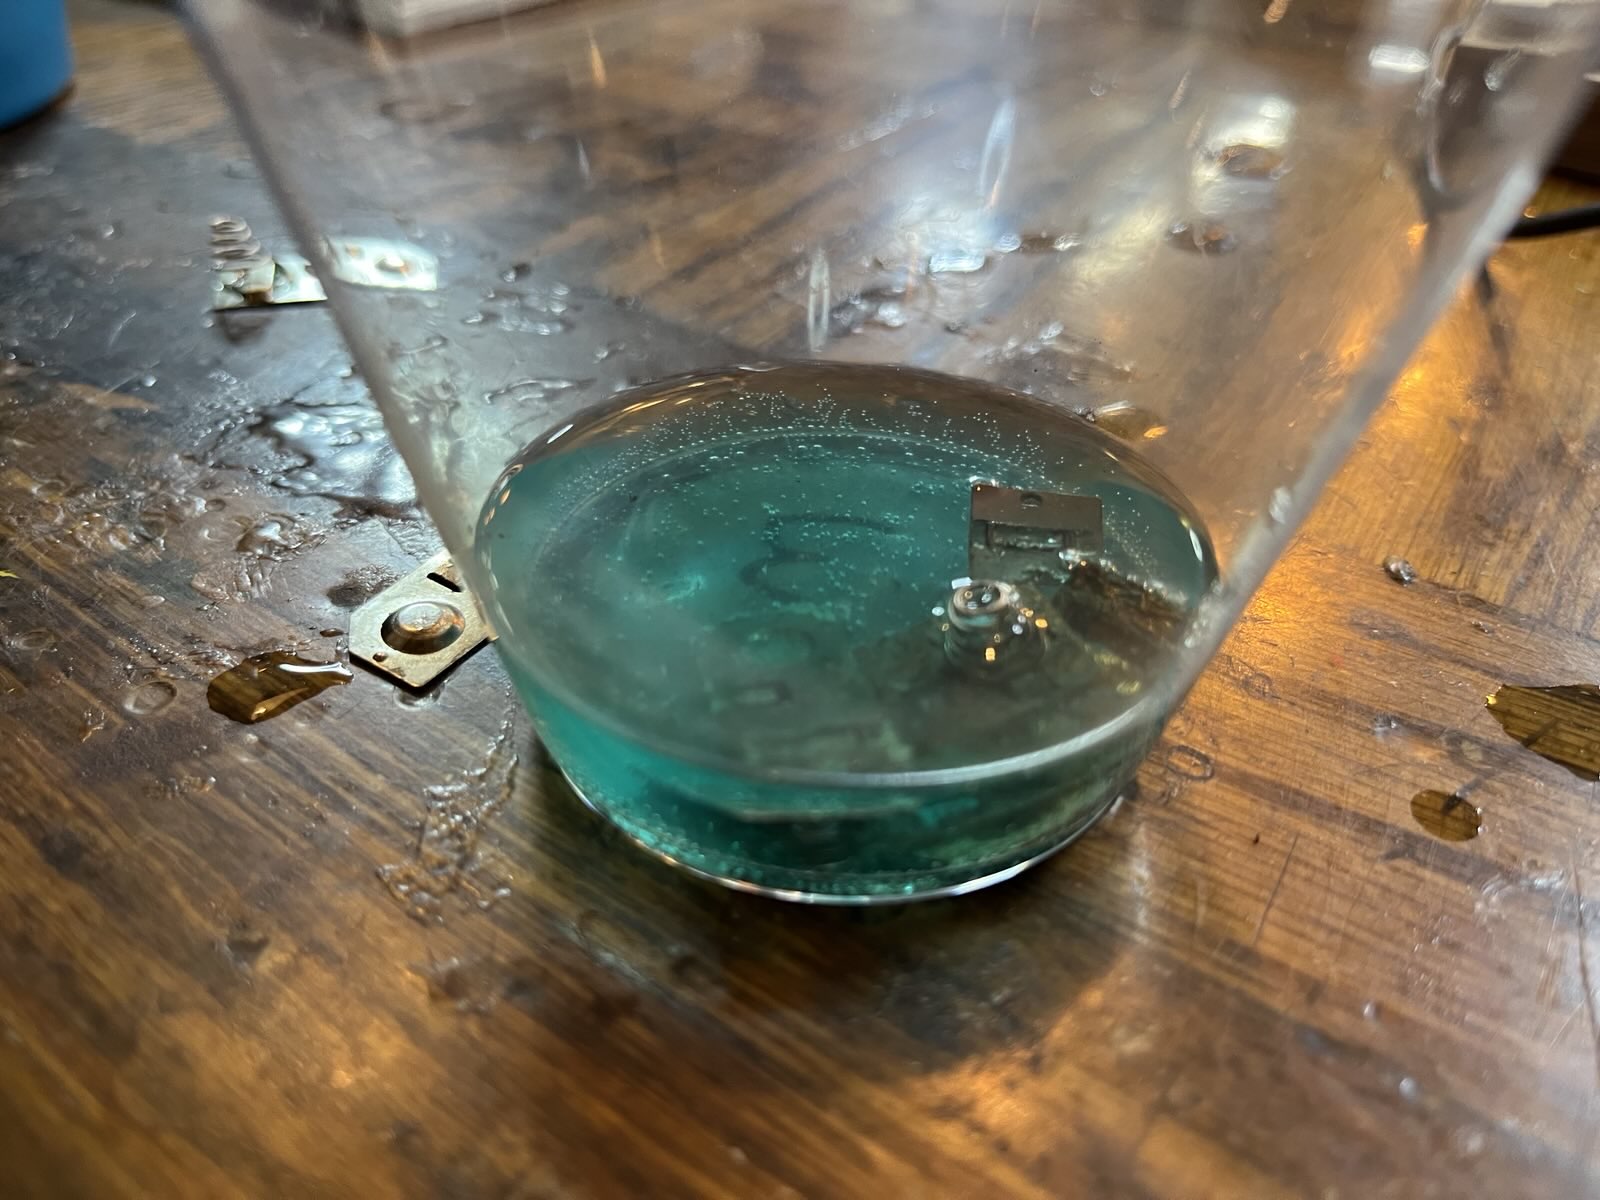
I didn't take many photos of the actual process. Re-assembly went pretty quickly, with a few key pointers from Zach about tricky placements and order-of-operations. I appreciate the care taken to make sure our new front "glass" and screens were installed free of dust and fingerprints!
Finally, it was time to put in the batteries and put in a test game. While Zach had a lovely collection, I had made sure to bring my own.
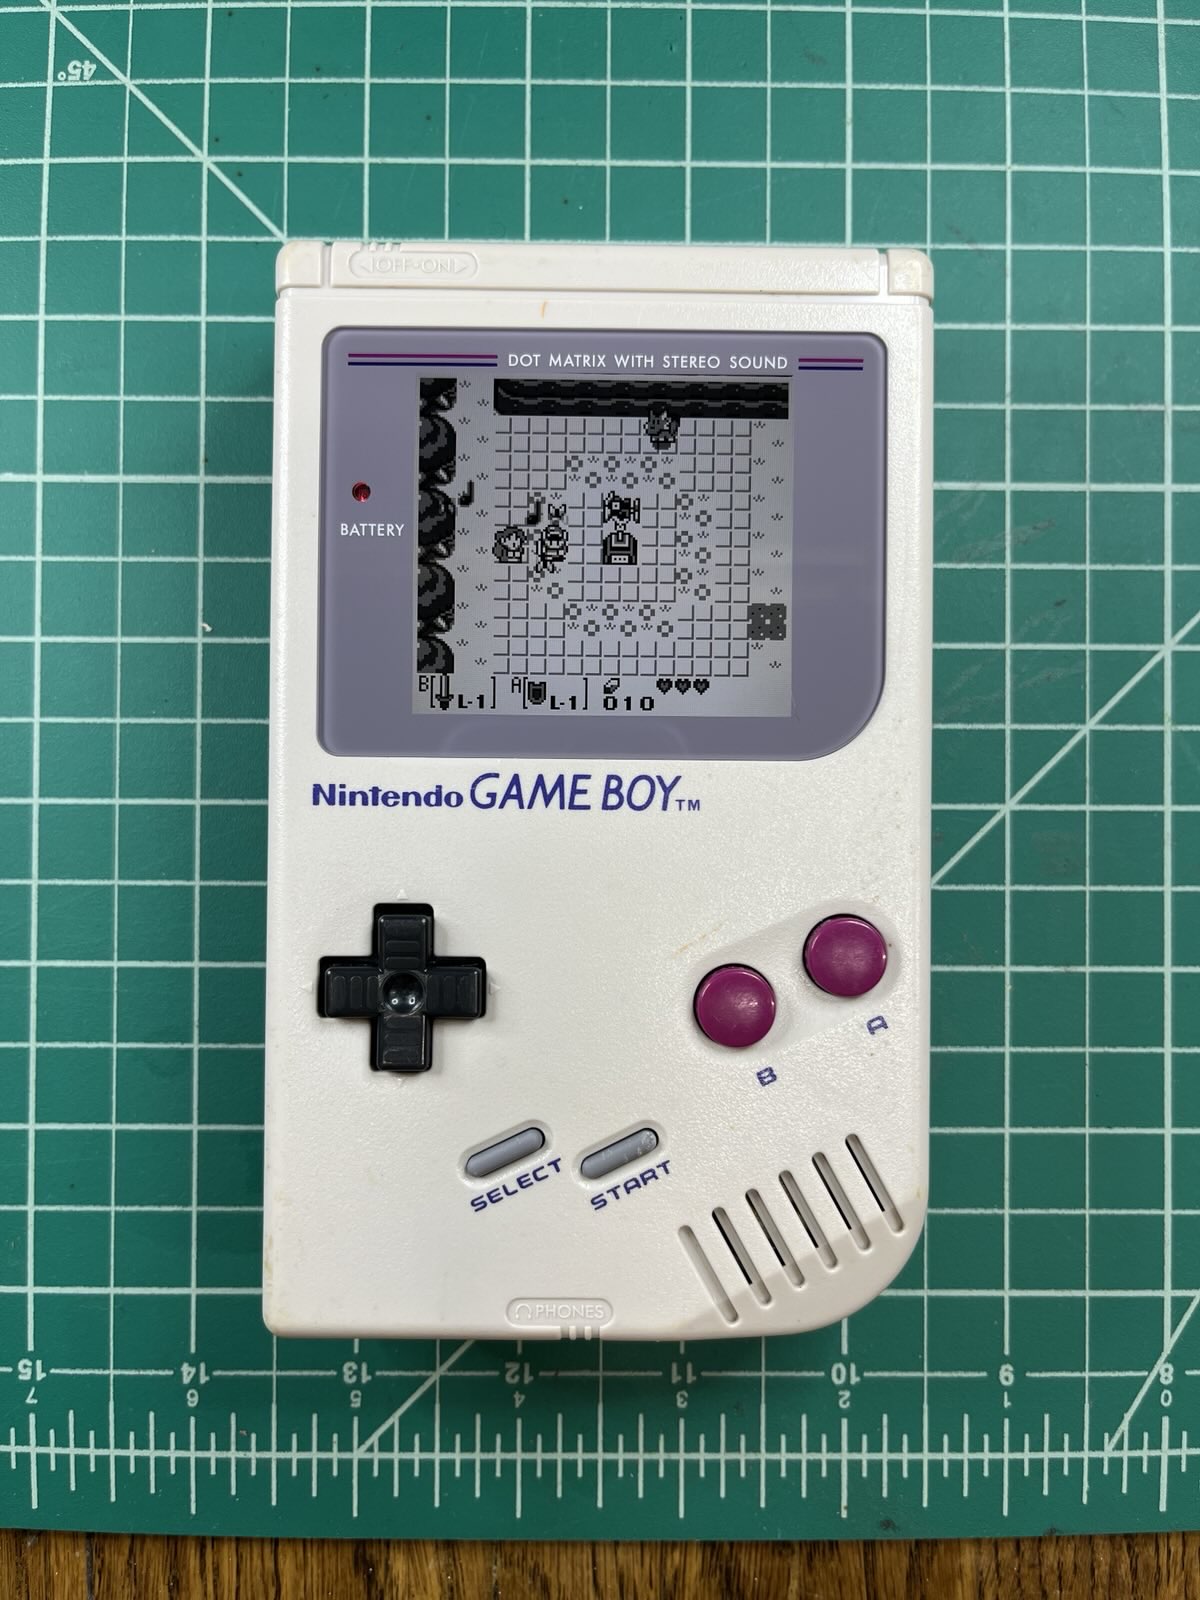
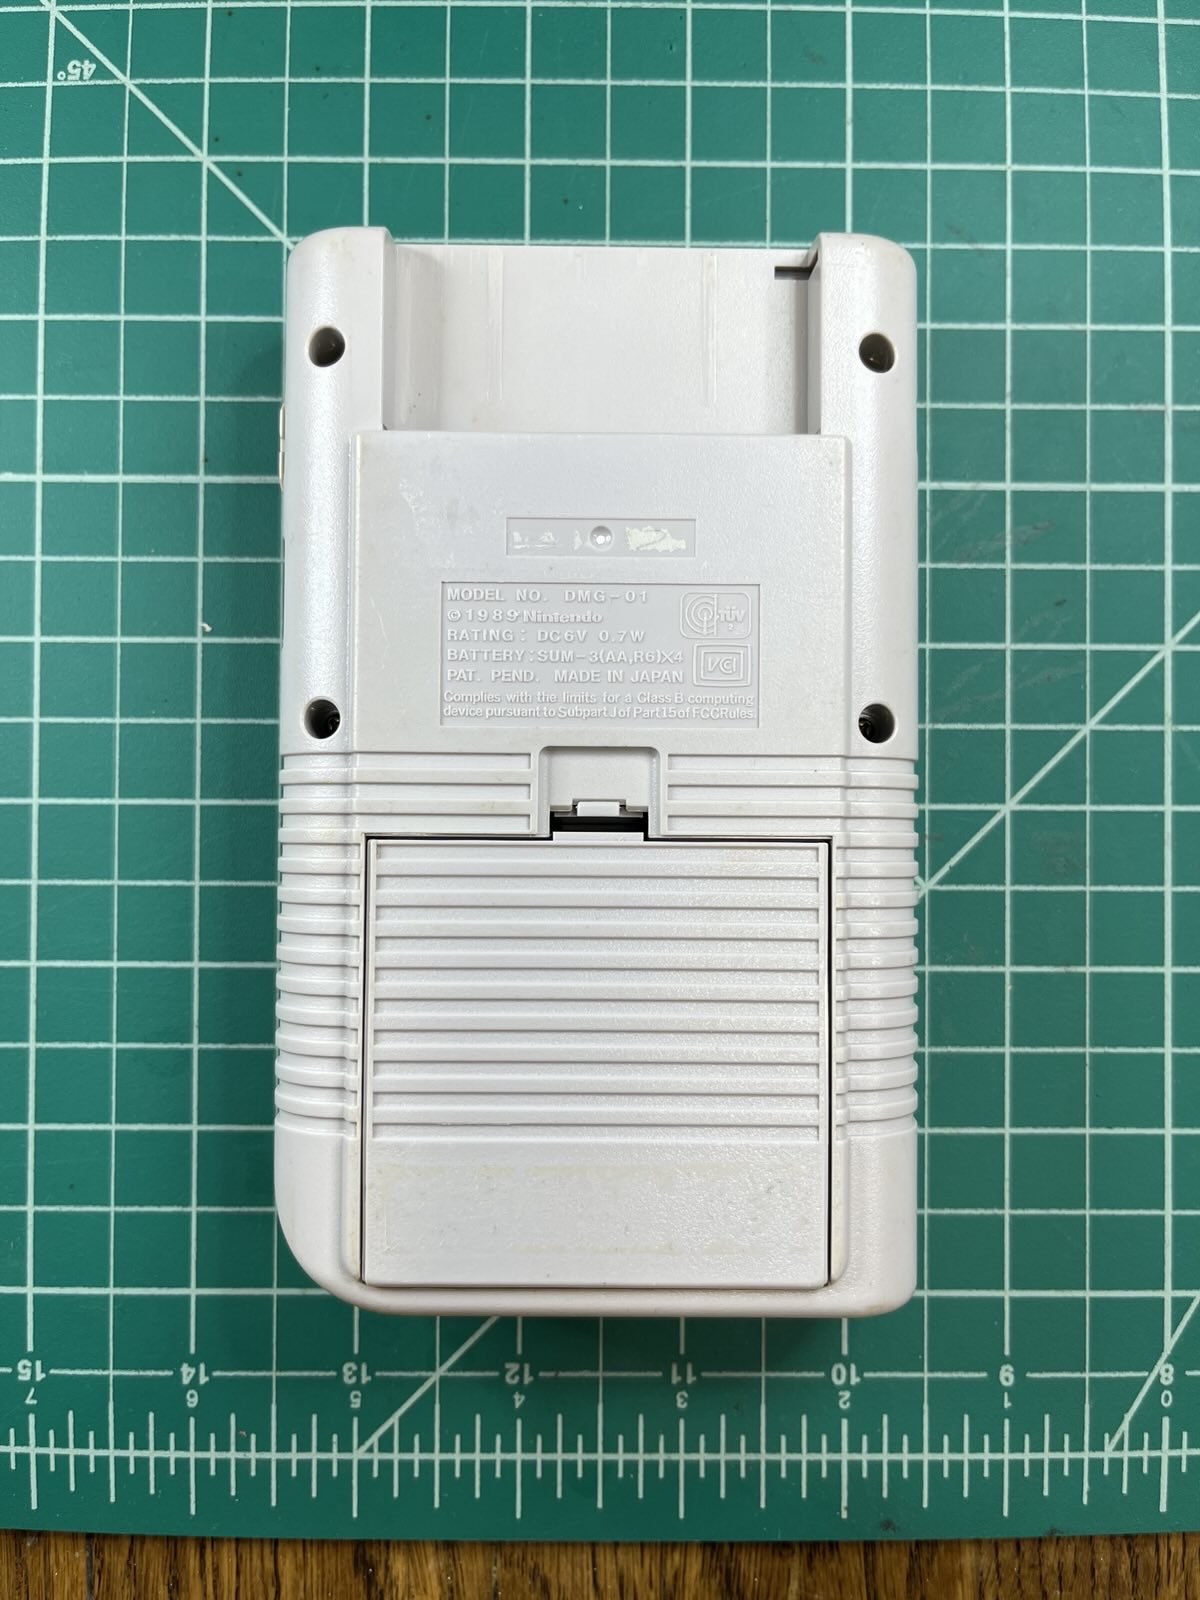
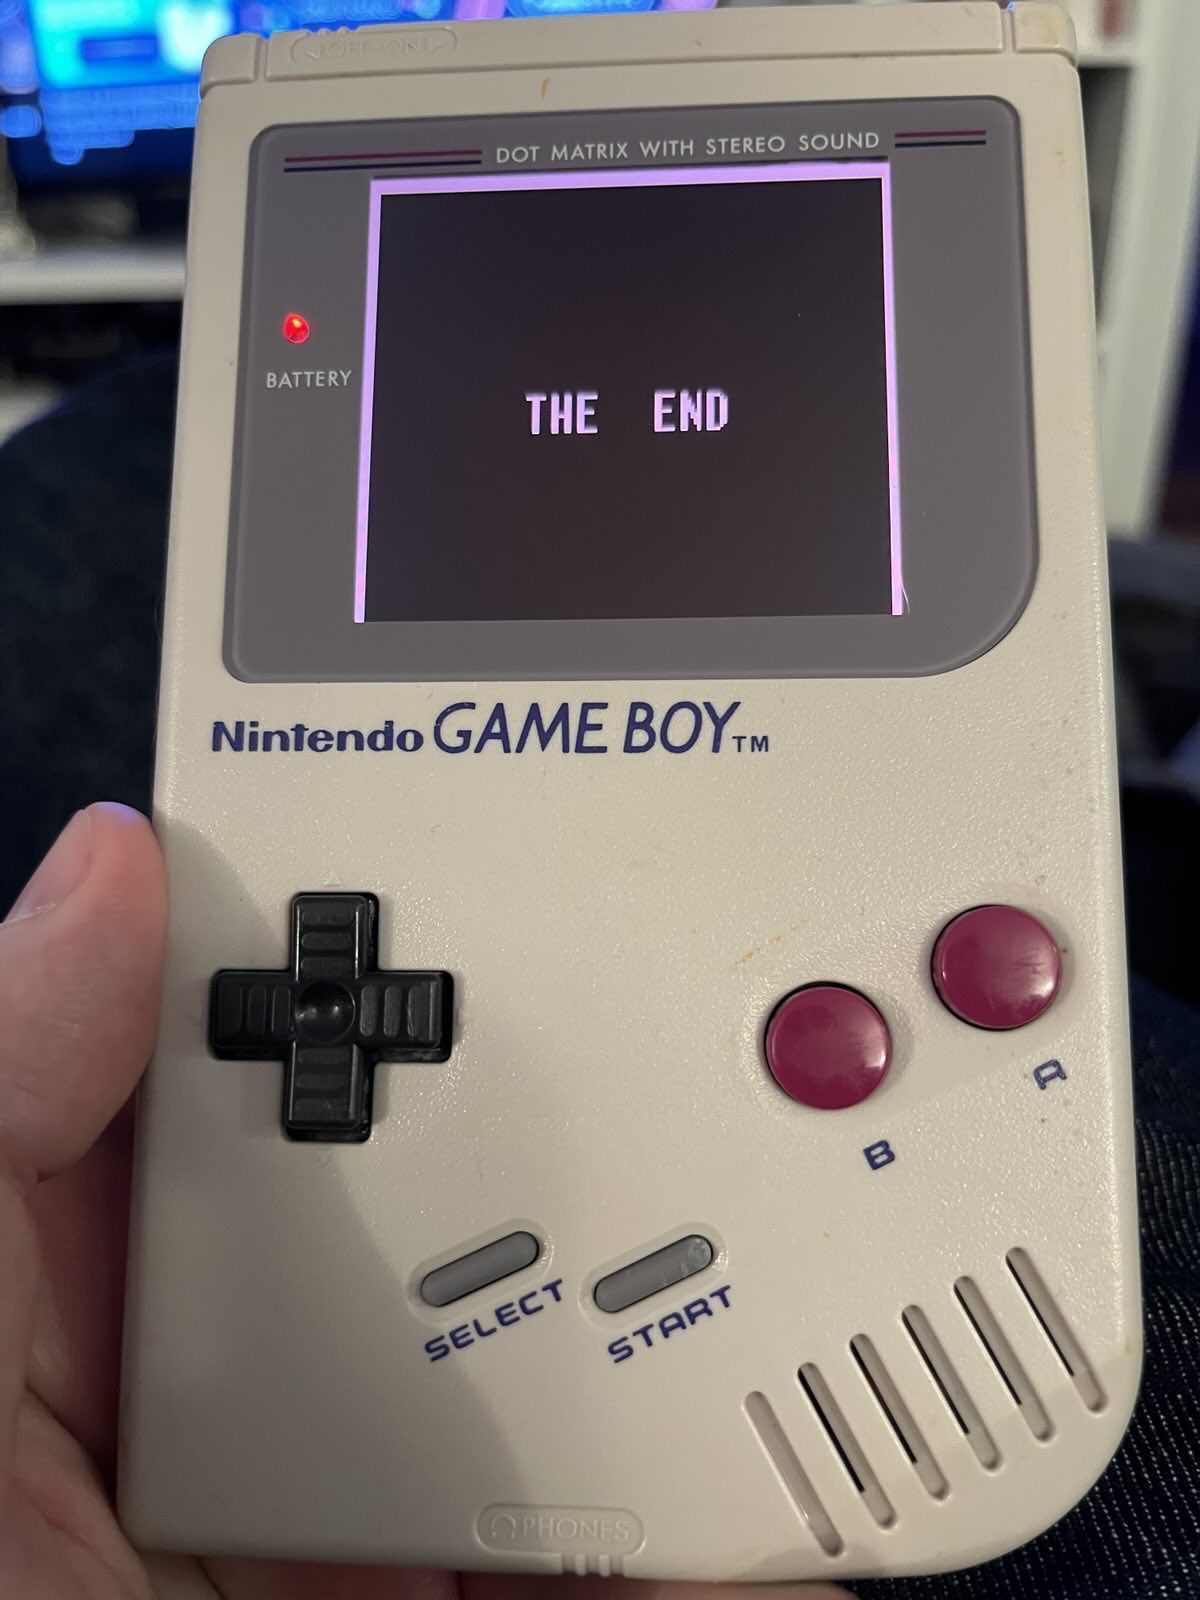
There's definitely more I could say about the workshop, the people, the space. All were excellent! But for now, I'll leave you with an abrupt:
