Transfers: I'm still having a hard time using my transfer carriage to move ribbing stitches from the front ribber bed to the back main bed. This time I bent a needle on each bed! 😱 I also discovered that this transfer process is where some of my dropped stitches came from in the previous hat. I ended up recovering most of these before seaming, which saved a lot of fixing up time later! 😅
Joining / seaming: somehow, for the second time, I have set out with the intention of joining the hat body to the brim with the seam on the knit side of the hat body, where it will be hidden by the folded brim, but ended up with it on the purl side, against the head. I'm also still getting the feel for seaming things on the machine. I decided to hang the hat body on directly to the needles with the finished brim and do a transfer-tool bind-off, but found the hung-on stitches really got in the way. After dropping a stitch (and some f-bombs) and losing the yarn tail, I backed things up and did a crochet-style bind-off with the latch tool, instead. I still managed to drop four or so stitches along the way. I manually repaired these later.
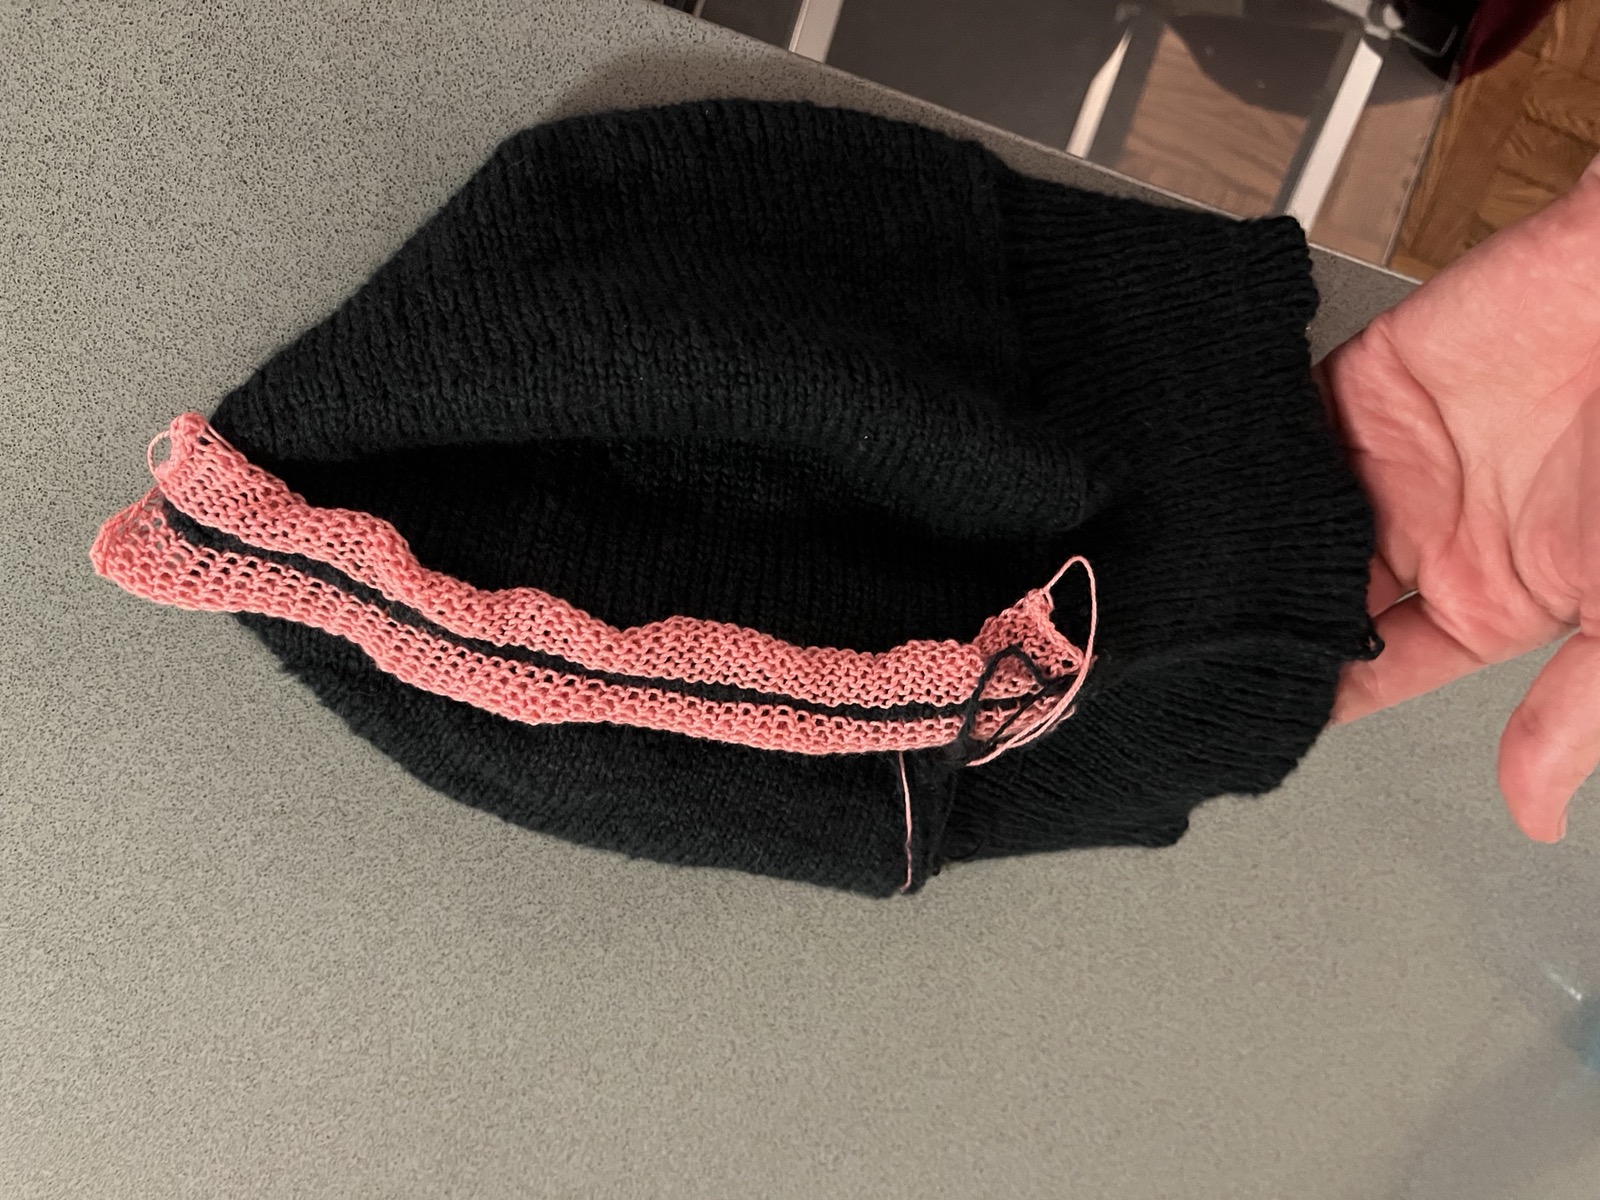
Grafting: I had a better time seaming up the side of the hat using Kitchener stitch. After my last go at it, I found a video tutorial on Kitchener for machine knitting from Diana Sullivan that made a lot more sense. This time I only screwed up one thing about it. Unfortunately that thing makes the resulting seam pretty obvious! A Kitchener stitch graft is supposed to look invisible, because you're basically creating new knit stitches by hand. However, if you create those new stitches from the wrong side, what you get is a row of purl stitches on the knit side of the garment!
SEAM
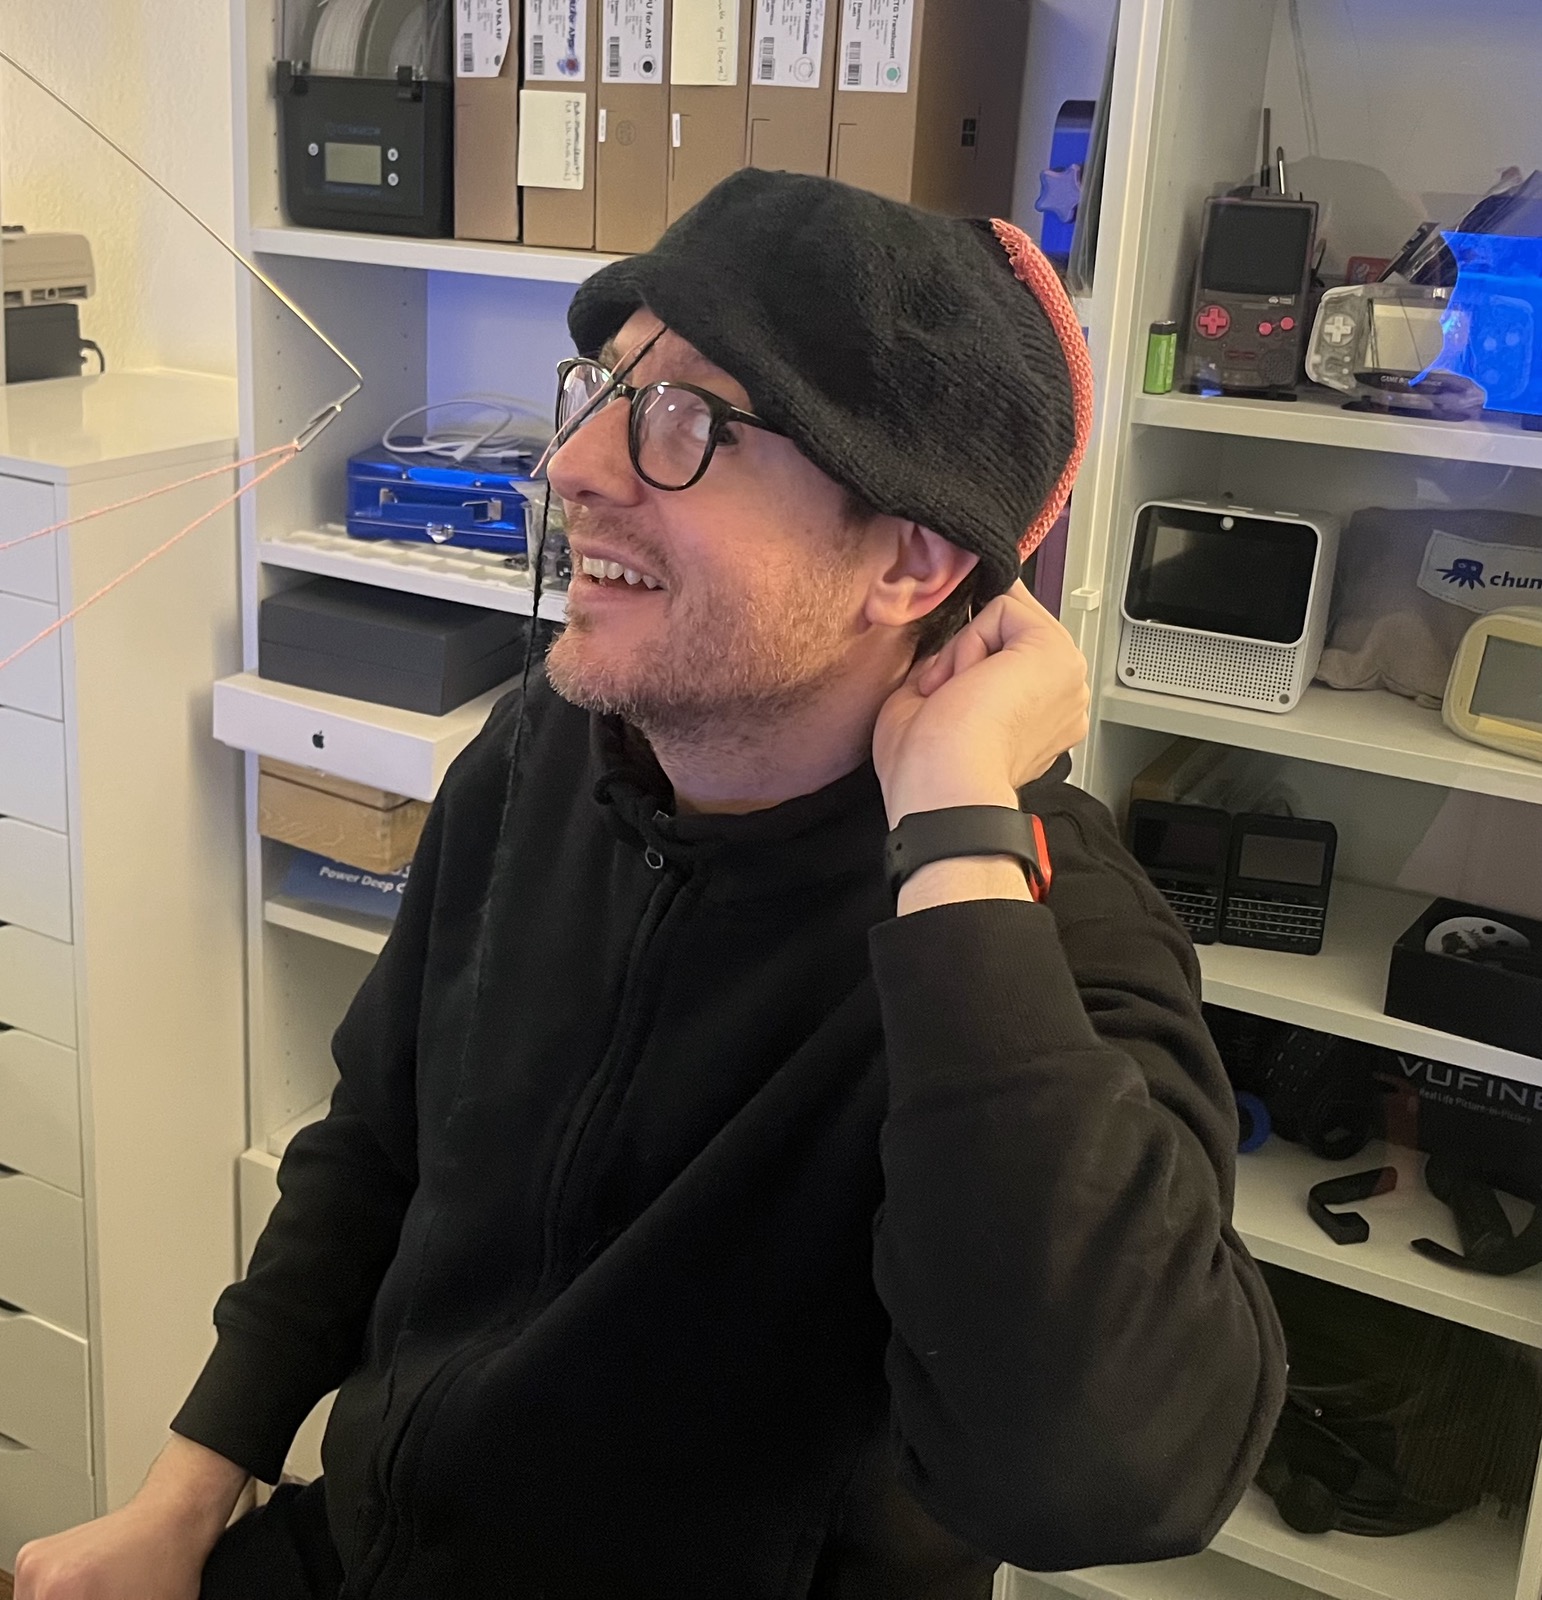
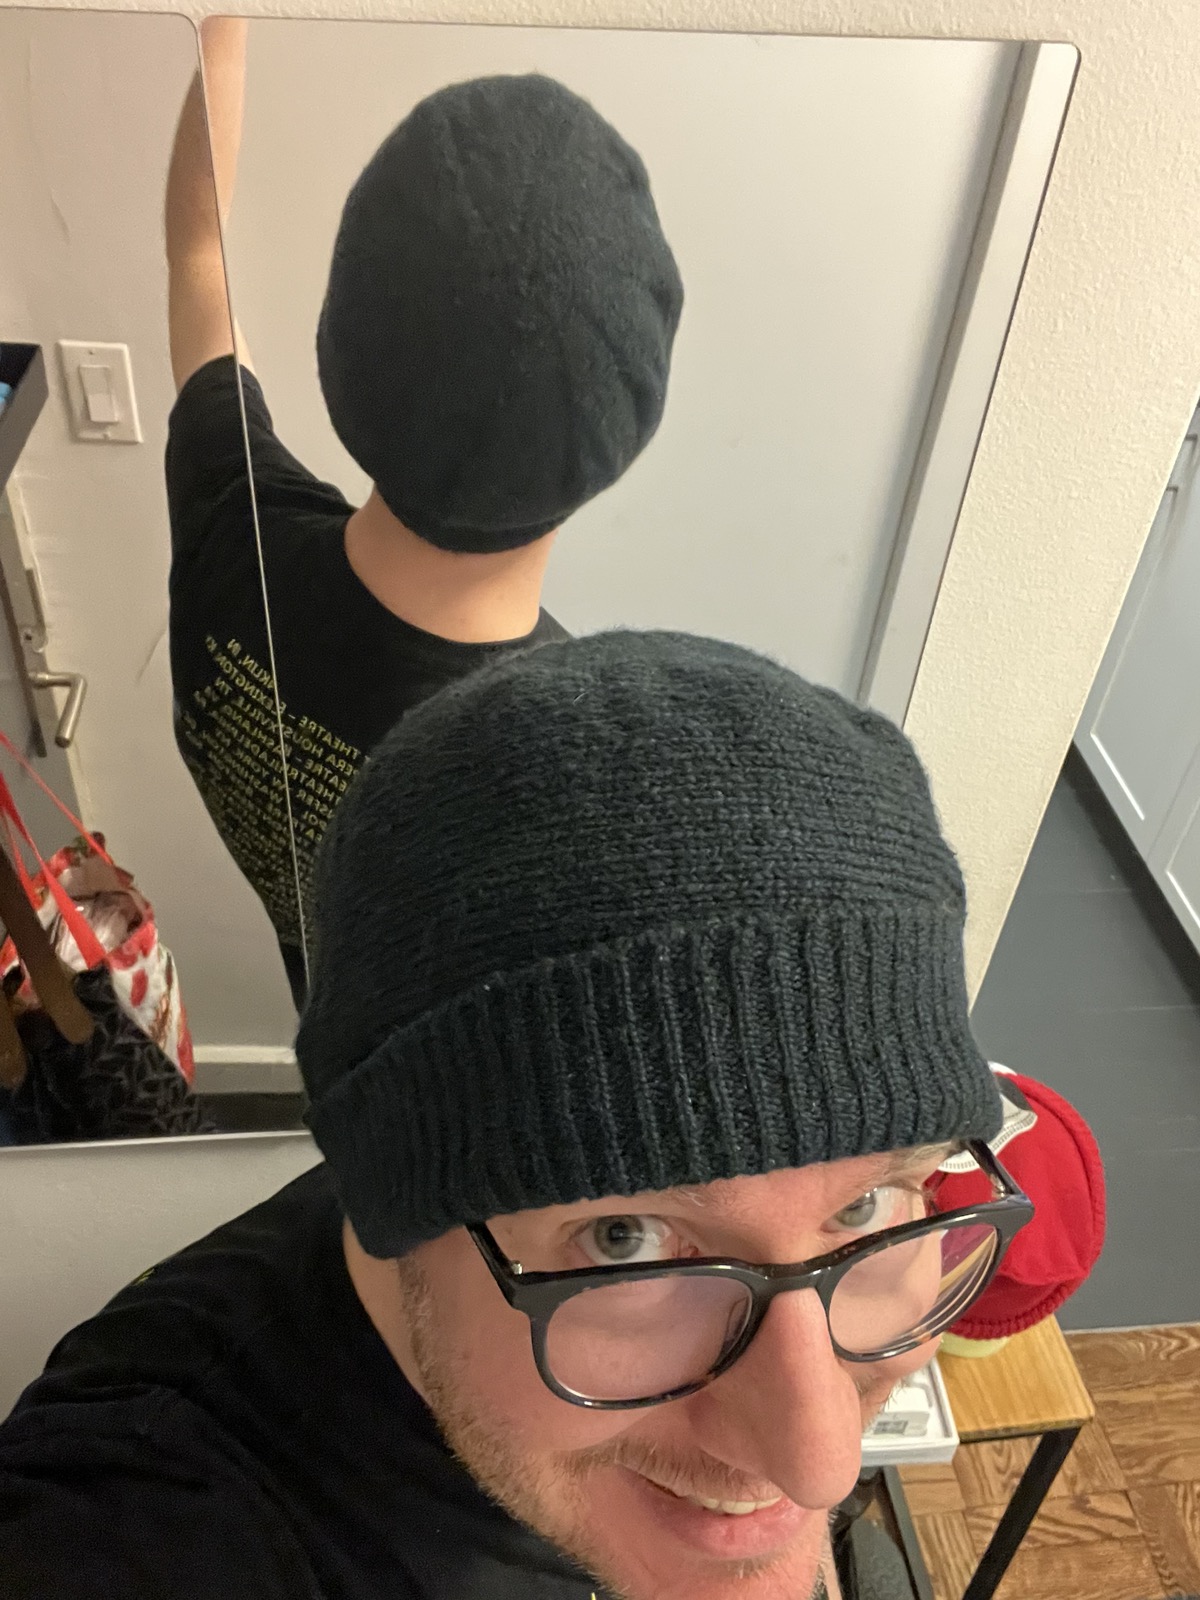
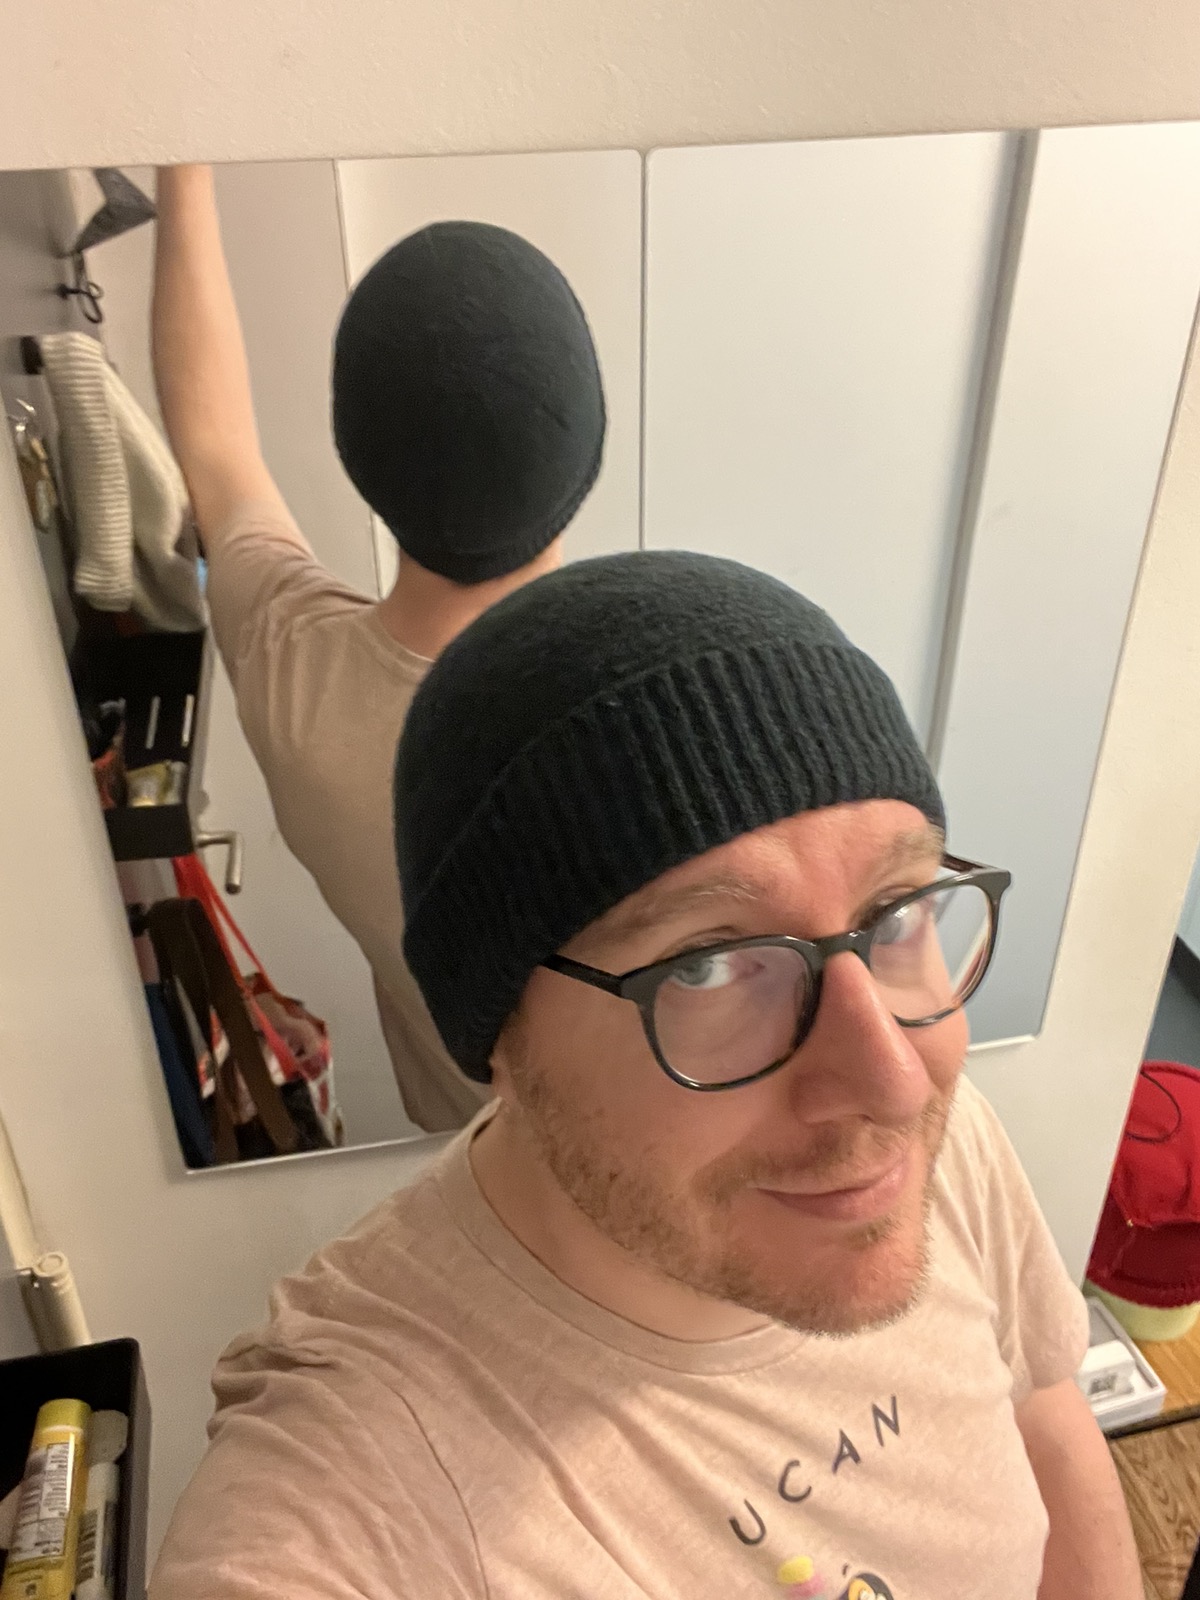
Despite the issues, it wears just fine!
I'm happy to wear a hat that I made for myself! I was proud to wear it on outings yesterday and this morning. Possibly the last cold days of the season! 😂
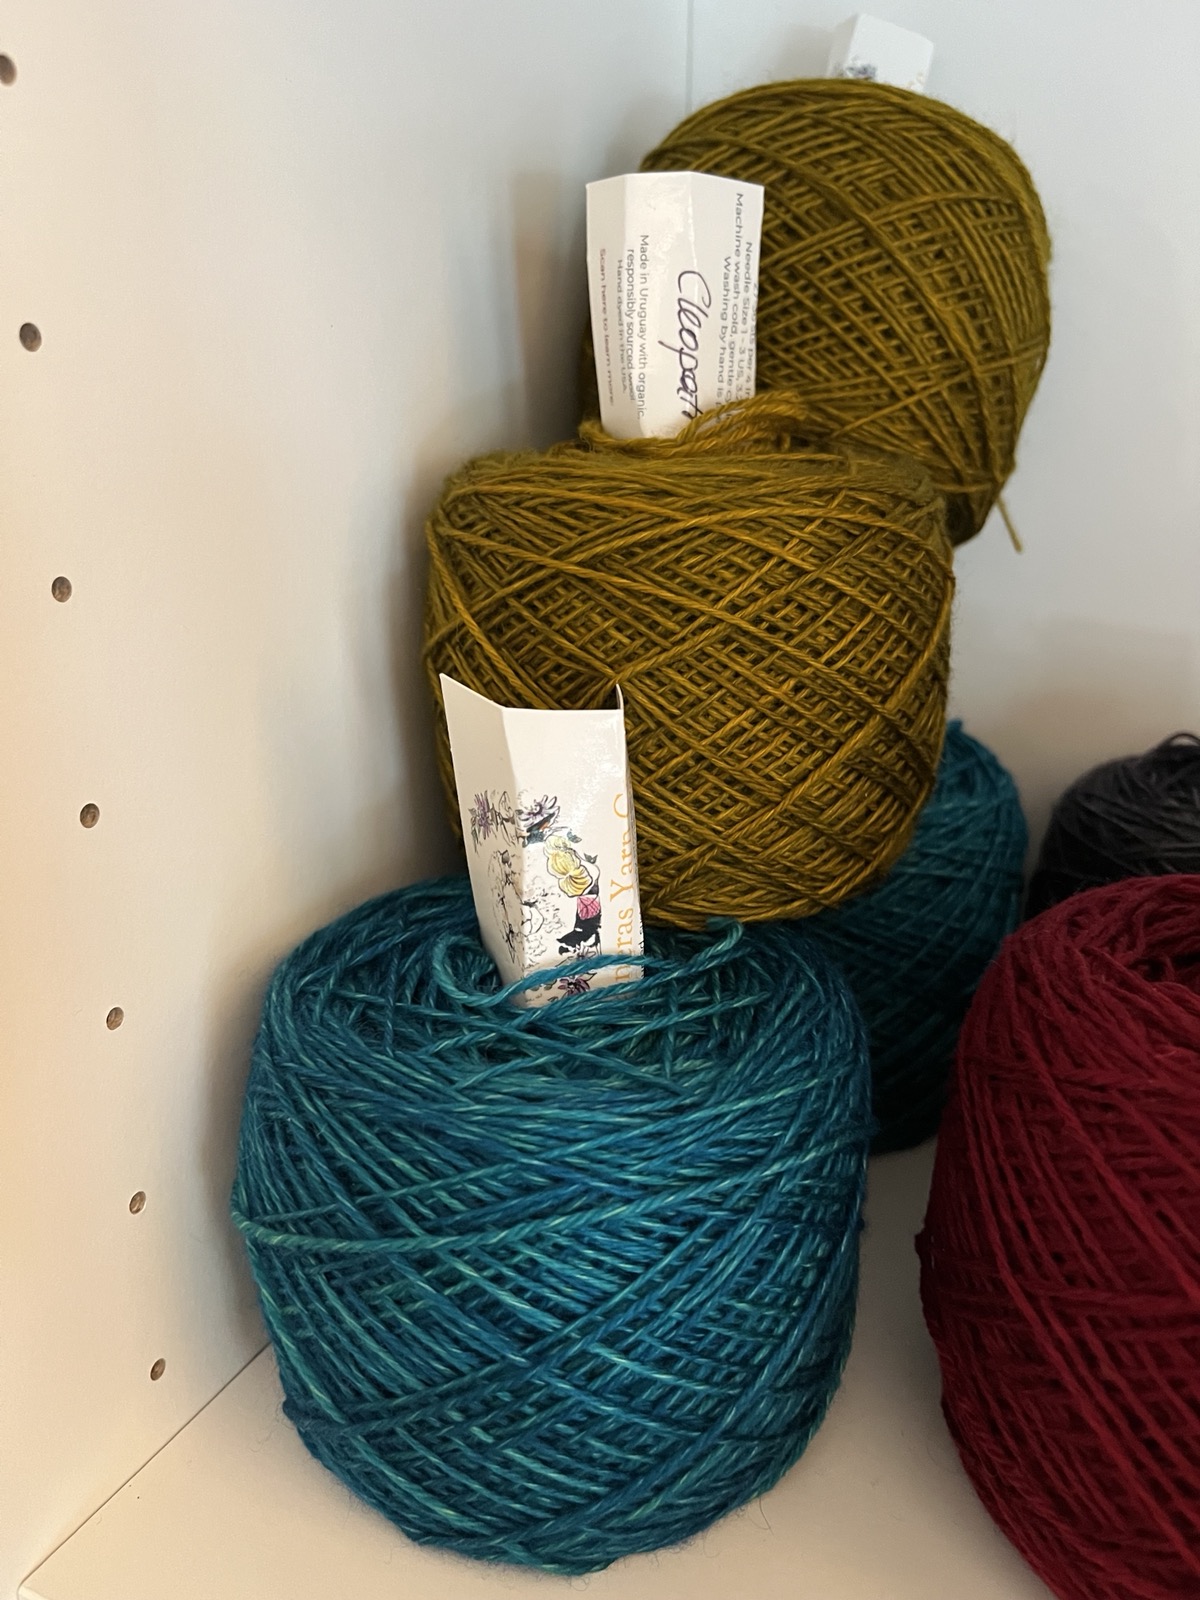
What's next? I think I'd like to make another thing for myself. Probably a vest, using these beauties:
Producer Amy has ultimately adopted the “test” Chattie as her own, wearing it
through this strange NYC winter, and even held onto it when a friend and
colleague politely but firmly attempted to transfer ownership. Consequently,
I received a commission request for a new Chattie.
Planning-wise, the commission called for something in dark colors, slightly
smaller than the one Amy wore, but similarly fuzzy and warm. I had a spool
of fuzzy cotton from the “Skinny Latte” series that I picked up at Fab Scrap
in black, that should work exactly as well as the white yarn I used for the
“test” hat.
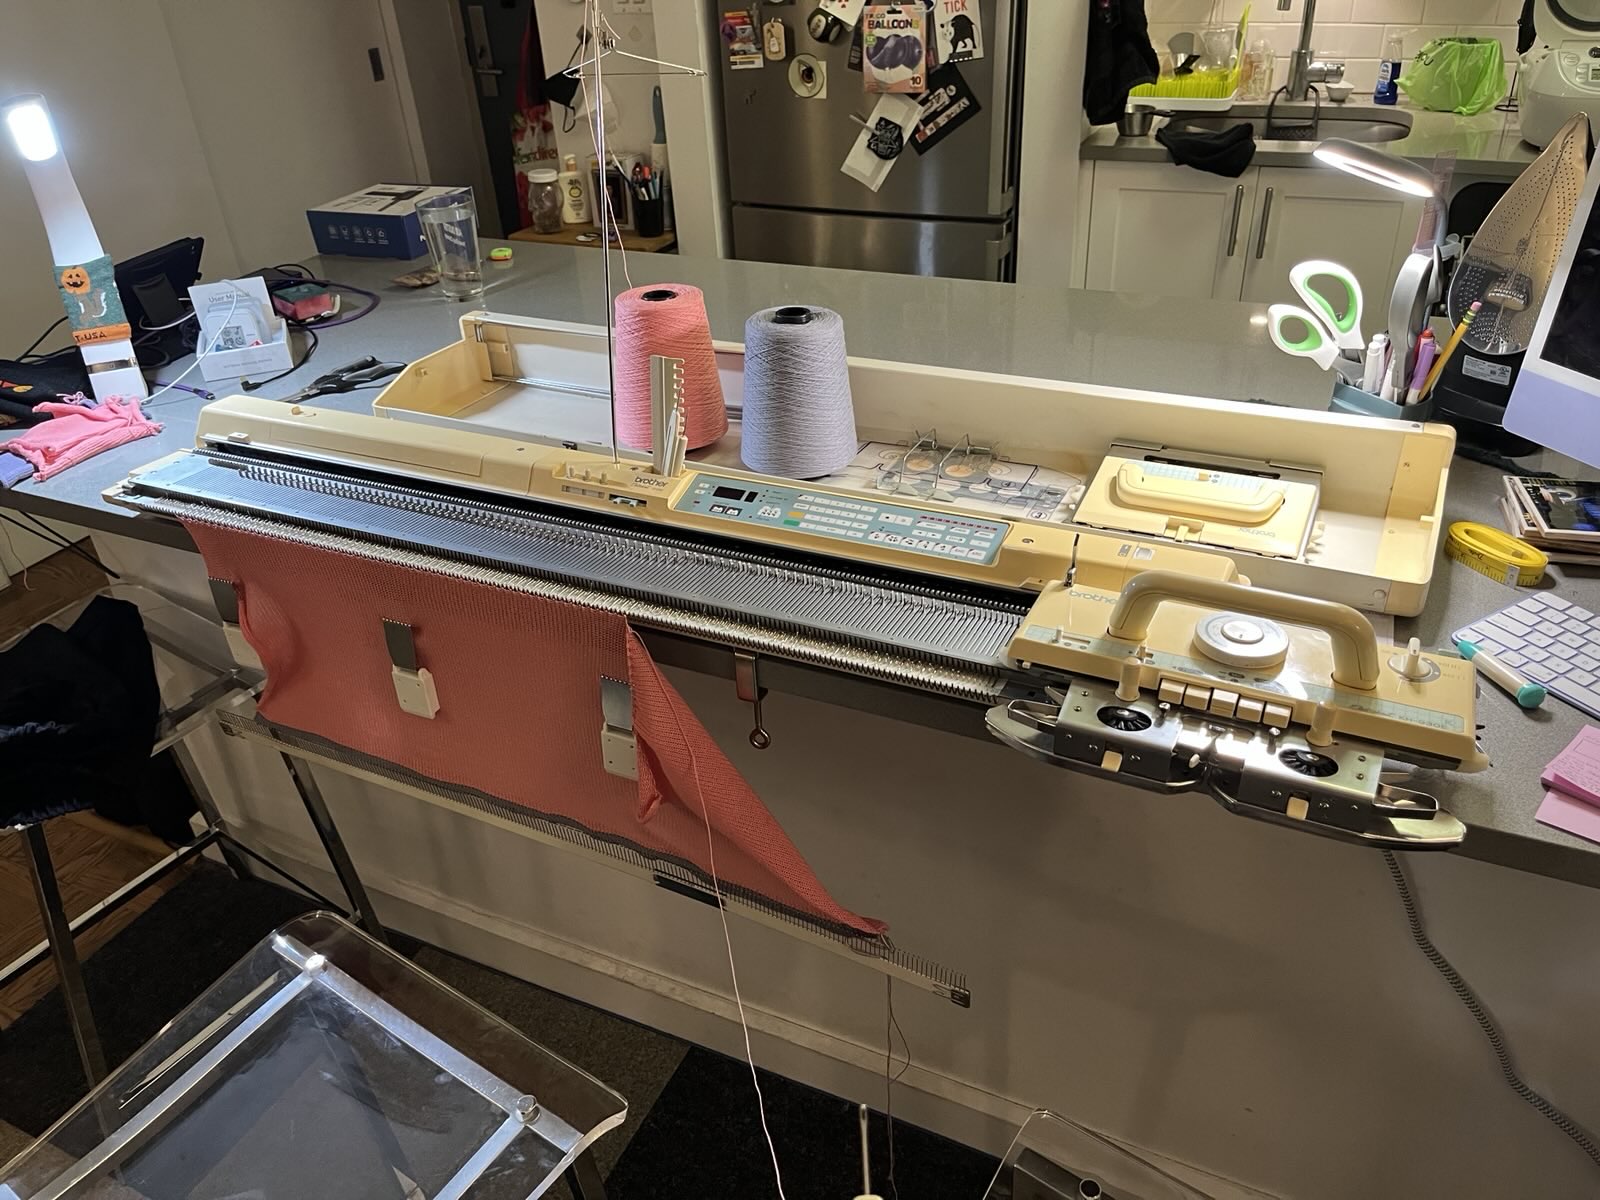
Construction began with the top body, which is knit sideways with 10 sections of
short rows. It went astonishingly smoothly! This yarn is quite thick, knitting
at a T9 tension when doing single-bed, and T4 on both carriages for ribbing. My
tension mast also didn’t want to feed this yarn nicely, but I settled into a
rhythm of moving the carriage slowly and pausing as needed to pull more yarn
through.
I was in such a good mood about my progress that Amy snapped this photo of me asking "This could become a hat, right?"
Not Pictured: Struggles
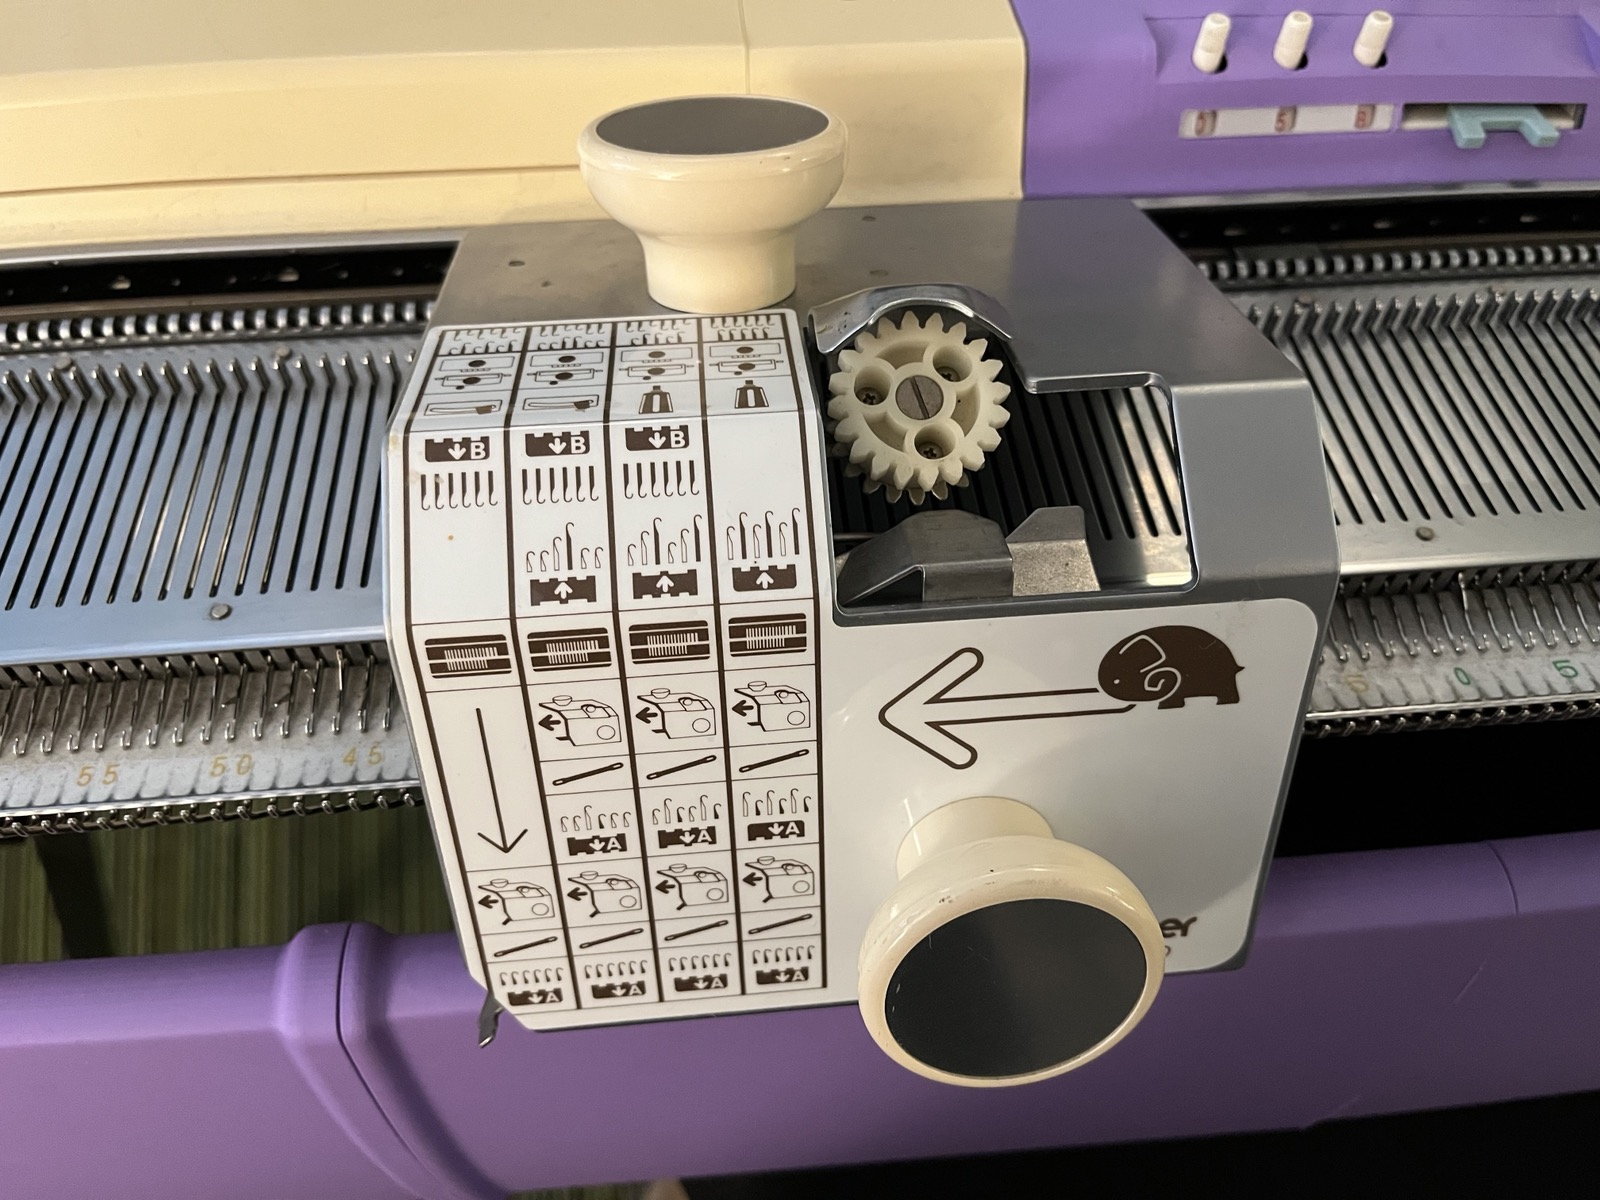
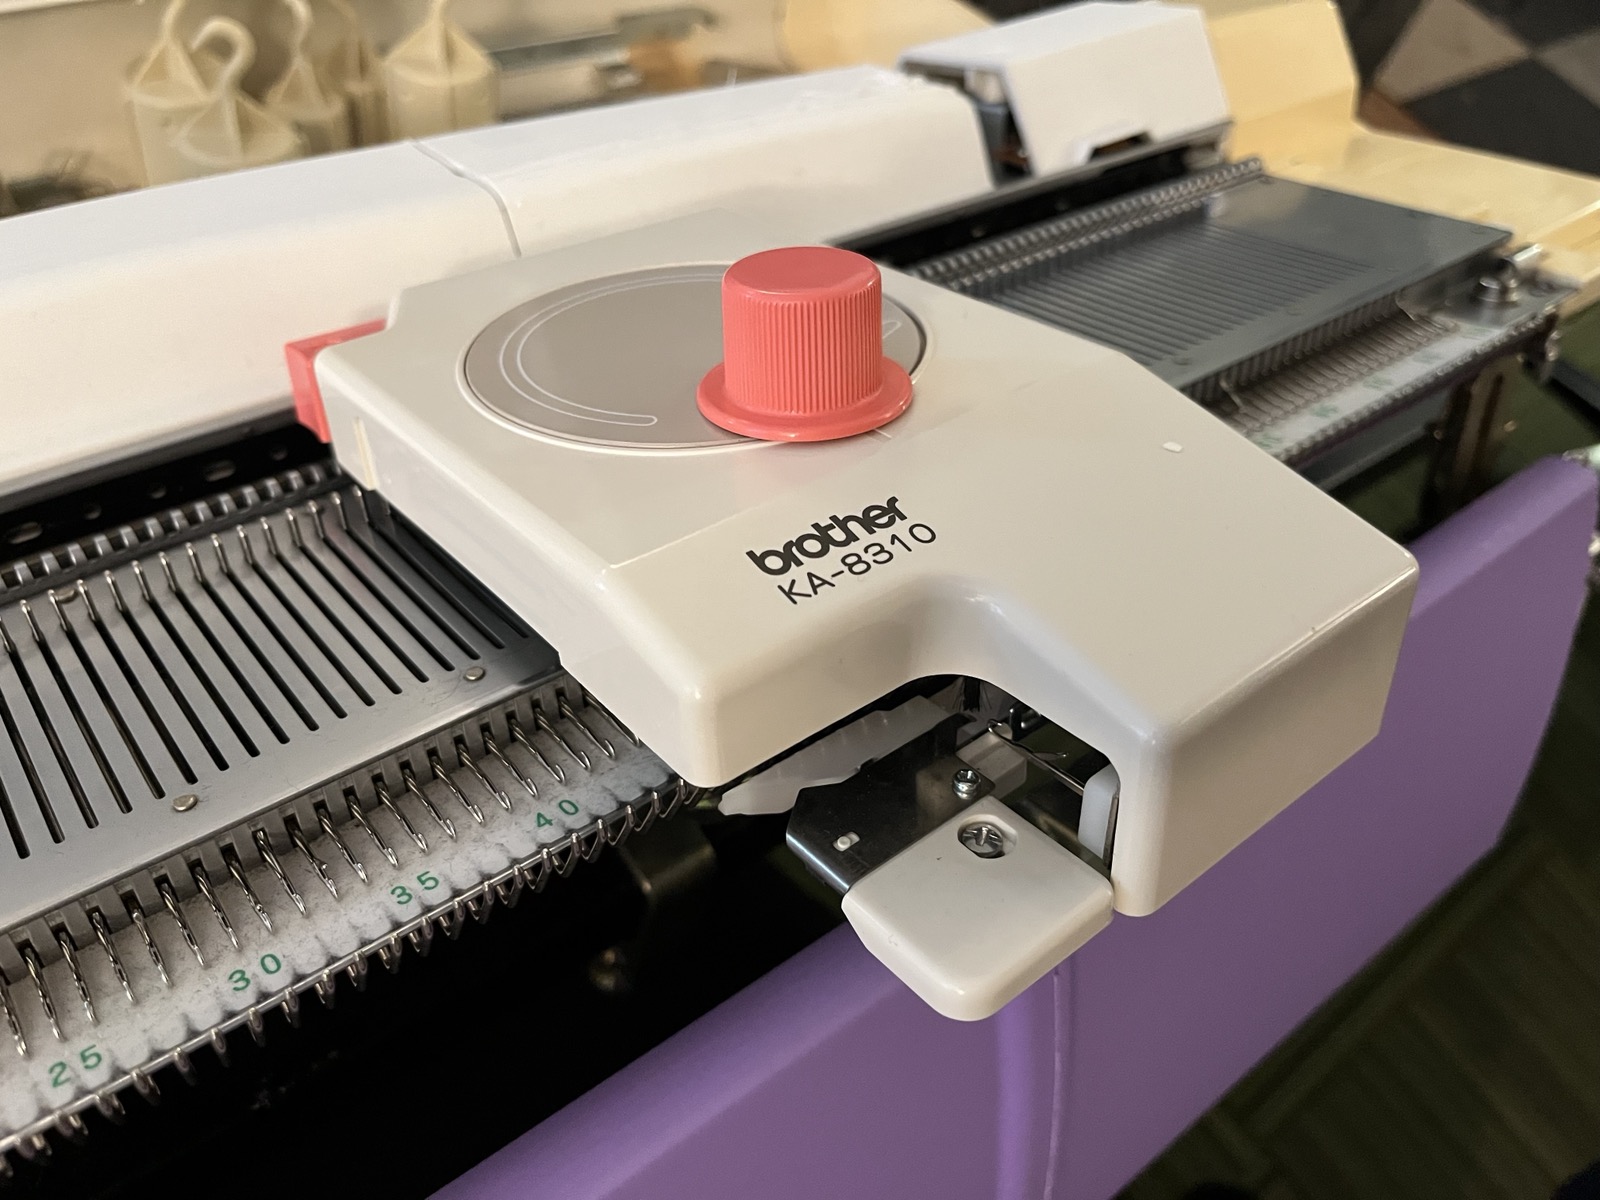
I’ve been watching eBay for accessories for my standard gauge Brother knitting
machine setup, which has included a Brother KA-8300 Transfer Carriage and a
Brother KA-8310 Linker Carriage.
KA-8300: An elephant is about to charge through your live stitches.KA-8310: 🎼Just turn the crank, snap the plank, boot the marble right down the chute- 🎶
I knit about 3.5" inches worth of 1x1 rib, across enough stitches to form a
reasonable circumference for the brim of the hat. After the Dishcloth Chattie
fiasco, I knew to use make the rib at least 2/3 the number of needles wide as
there were rows in the top of the cap.
When done with the ribbing, I used the Transfer Carriage to move the stitches
from the front ribber bed onto the empty stitches on the main bed. This mostly
worked, actually, leaving me with just a couple to transfer by hand.
I then took the whole brim off on waste yarn. This got a bit weird, with not
every stitch actually knitting cleanly onto the first row of waste yarn. I
managed it, but it was weird, and probably caused problems to come. I believe I
should have knit a final row of regular knitting before taking things off onto
waste yarn.
For the next step, I could have grafted / seamed the brim and hat body
together by hand, but I really wanted to use my new Linker Carriage. So, after
thoroughly reading the manual several times, I:
hung the bottom edge of the hat body (which, being knit sideways, means I was
hanging on stitches of a finished side edge).
hung the live stitches from the brim in front
pulled the body stitches over the live brim stitches, so the live stitches
are the only stitches remaining on the working needles, having been pulled
through the side stitches. This was a cool-sounding maneuver that in
practice I found very fiddly.
knit one row of a thinner (but same-colored) yarn at the loosest possible
tension, to form a final row of live loops.
used the Linker Carriage to crank my way across the bed, letting the carriage
pull one loop through the next all the way to the end.
Or, well, that’s how it was supposed to go.
I had two false starts with the Linker Carriage, followed by one absolute
failure which locked the whole thing up, requiring several minutes of struggle
to even free the carriage from the machine. In that chaos, I dropped several
stitches and several f-bombs.
After leaving it to rest overnight, I came back the next day and finished the
loop-through-loop bind-off by hand, then went back and “rescued” the dropped
stitches.
Checking my work afterwards, I found that somehow a couple of dozen live
stitches from the brim, likely all from the front ribber bed side, had simply
not been picked up in my attempt to seam things together. So, I grabbed a
sewing needle and a long line of waste yarn, ran it through as a “lifeline” for
all the dropped ribbing stitches I could find, and once again the project
got to rest for a day or two while I stewed about it.
I have very little in the way of hand-sewing, hand-knitting, or hand-crochet
skills, but I finally decided that I could “rescue” these dropped live stitches
as if they had been correctly handled on the machine, by running a sewing needle
down through the bottom edge of the hat, through a dropped live stitch, pull the
stitch up through the edge, then secure it with a knot or a backstitch,
depending on how far away the next dropped stitch was. This took at least a
couple of hours over a couple of sessions.
Finishing
Finally, it was time to seam up the side of the hat. Though it had been my
original plan, I opted not to try the Linker Carriage again for this. Instead,
I made my first attempt at a Kitchener stitch, which is meant to seam together
two edges of live stitches in an invisible way that looks like just another
row of knitting. Mine … doesn’t look that nice. But it is still pretty hard
to see unless you’re looking for it, so I’ll call that a win (and try harder
next time)!
I also mattress stitched the ribbed hem together, making sure to put that seam
on the outside of the hat, because the brim is meant to be folded up.
With the waste yarn, this reminds me of Audrey II.
Then it was a matter of running a line through the top 10 stitches at the top of
the hat to pull them together and close it up.
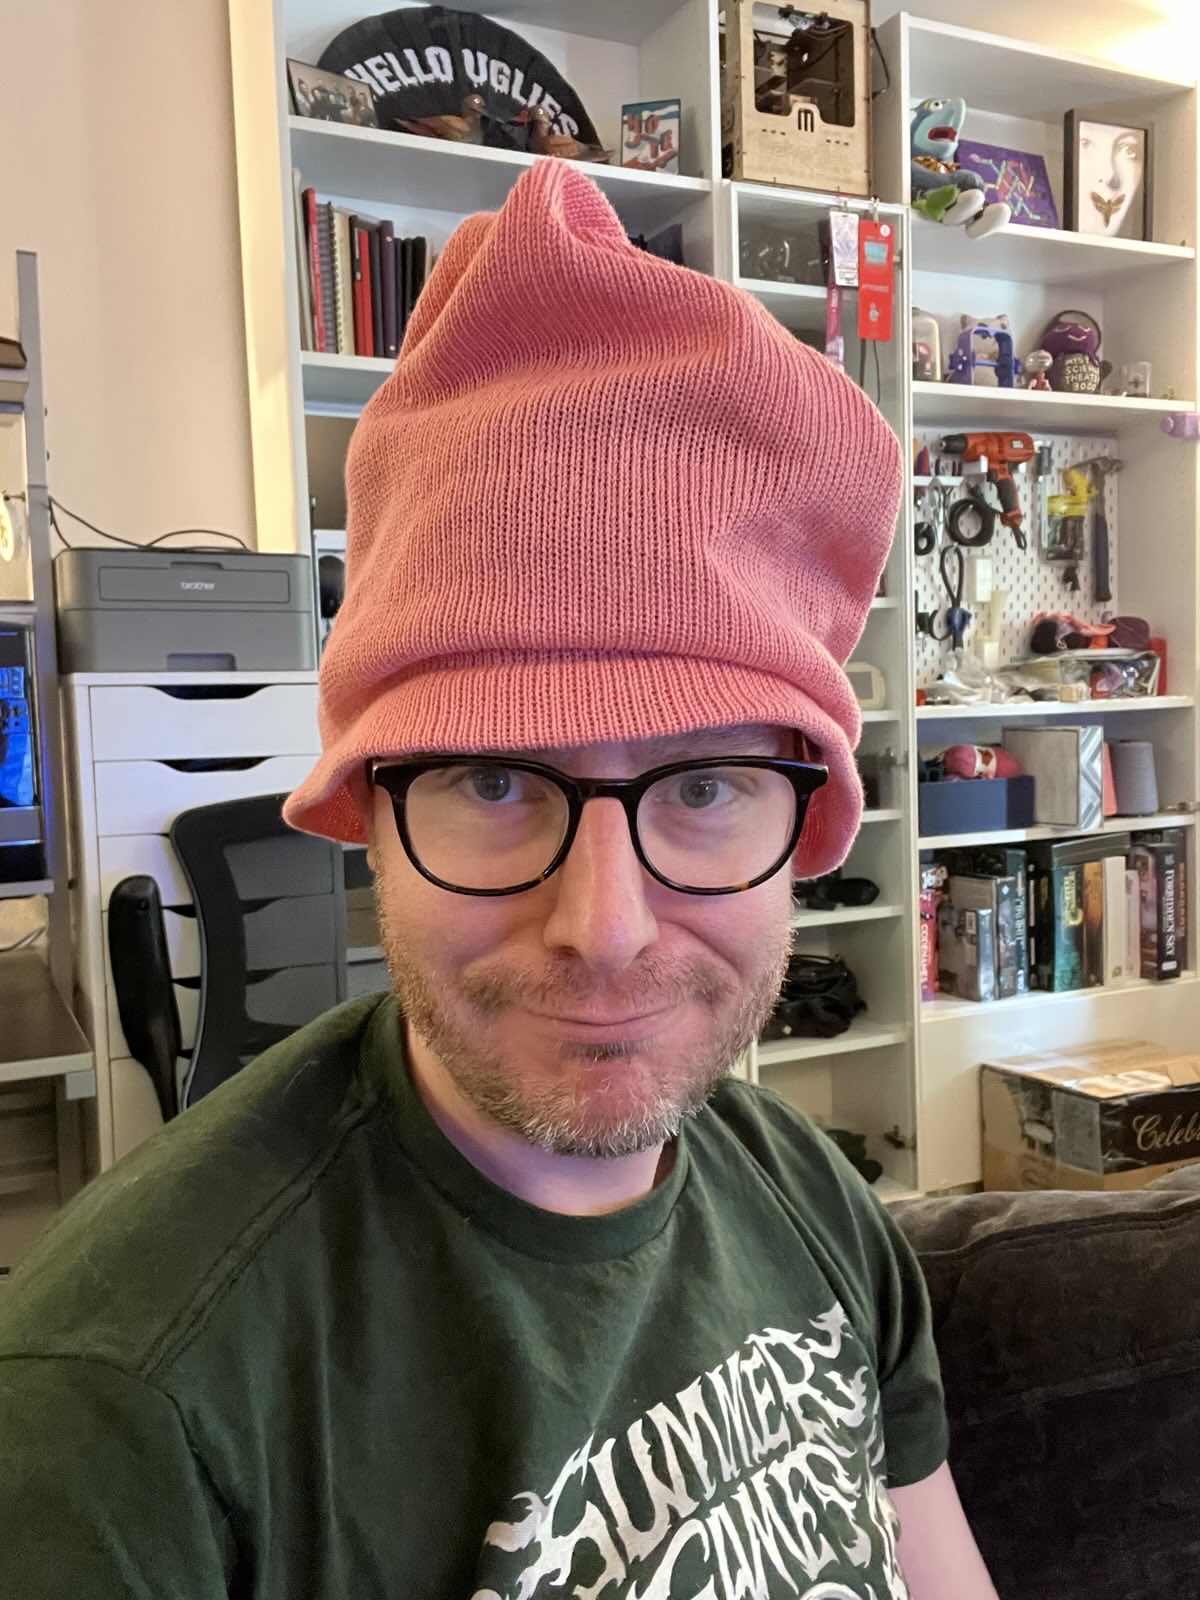
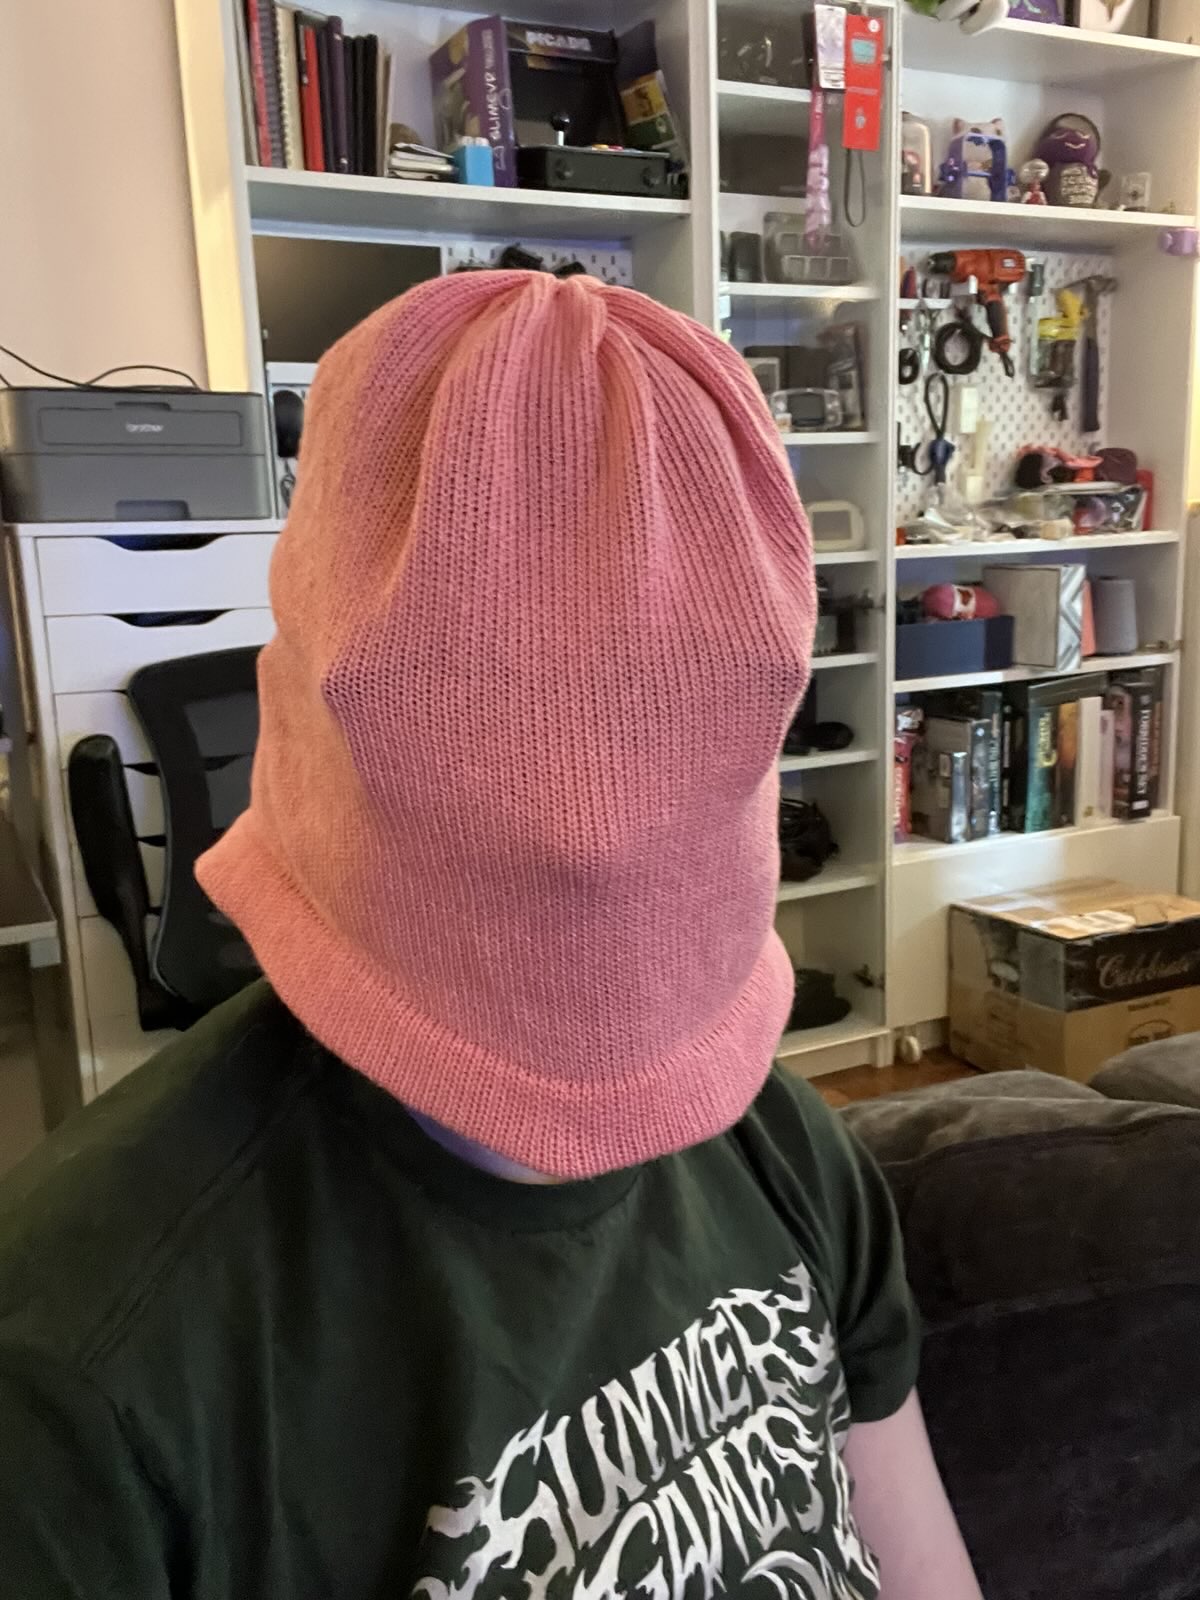
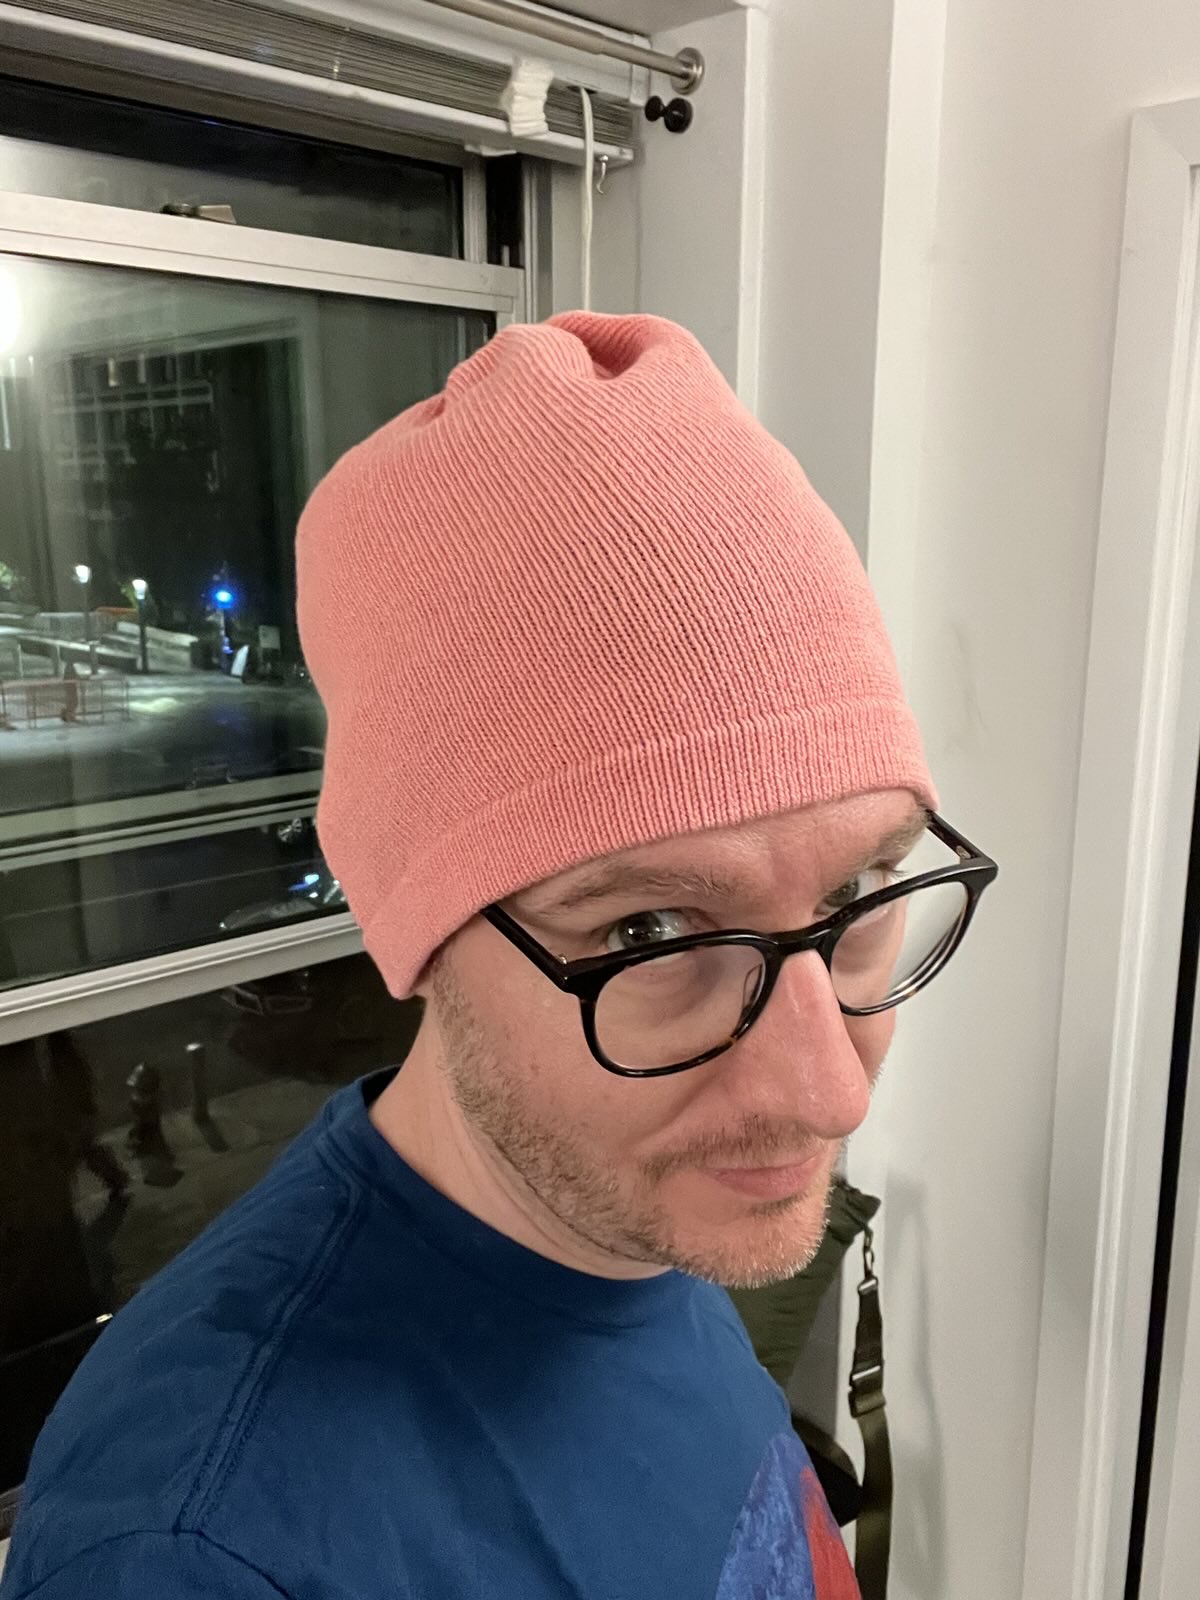
Before washing and drying, it's definitely hat-like!
Then a trip through the laundry to see its final form!
It is a hat!
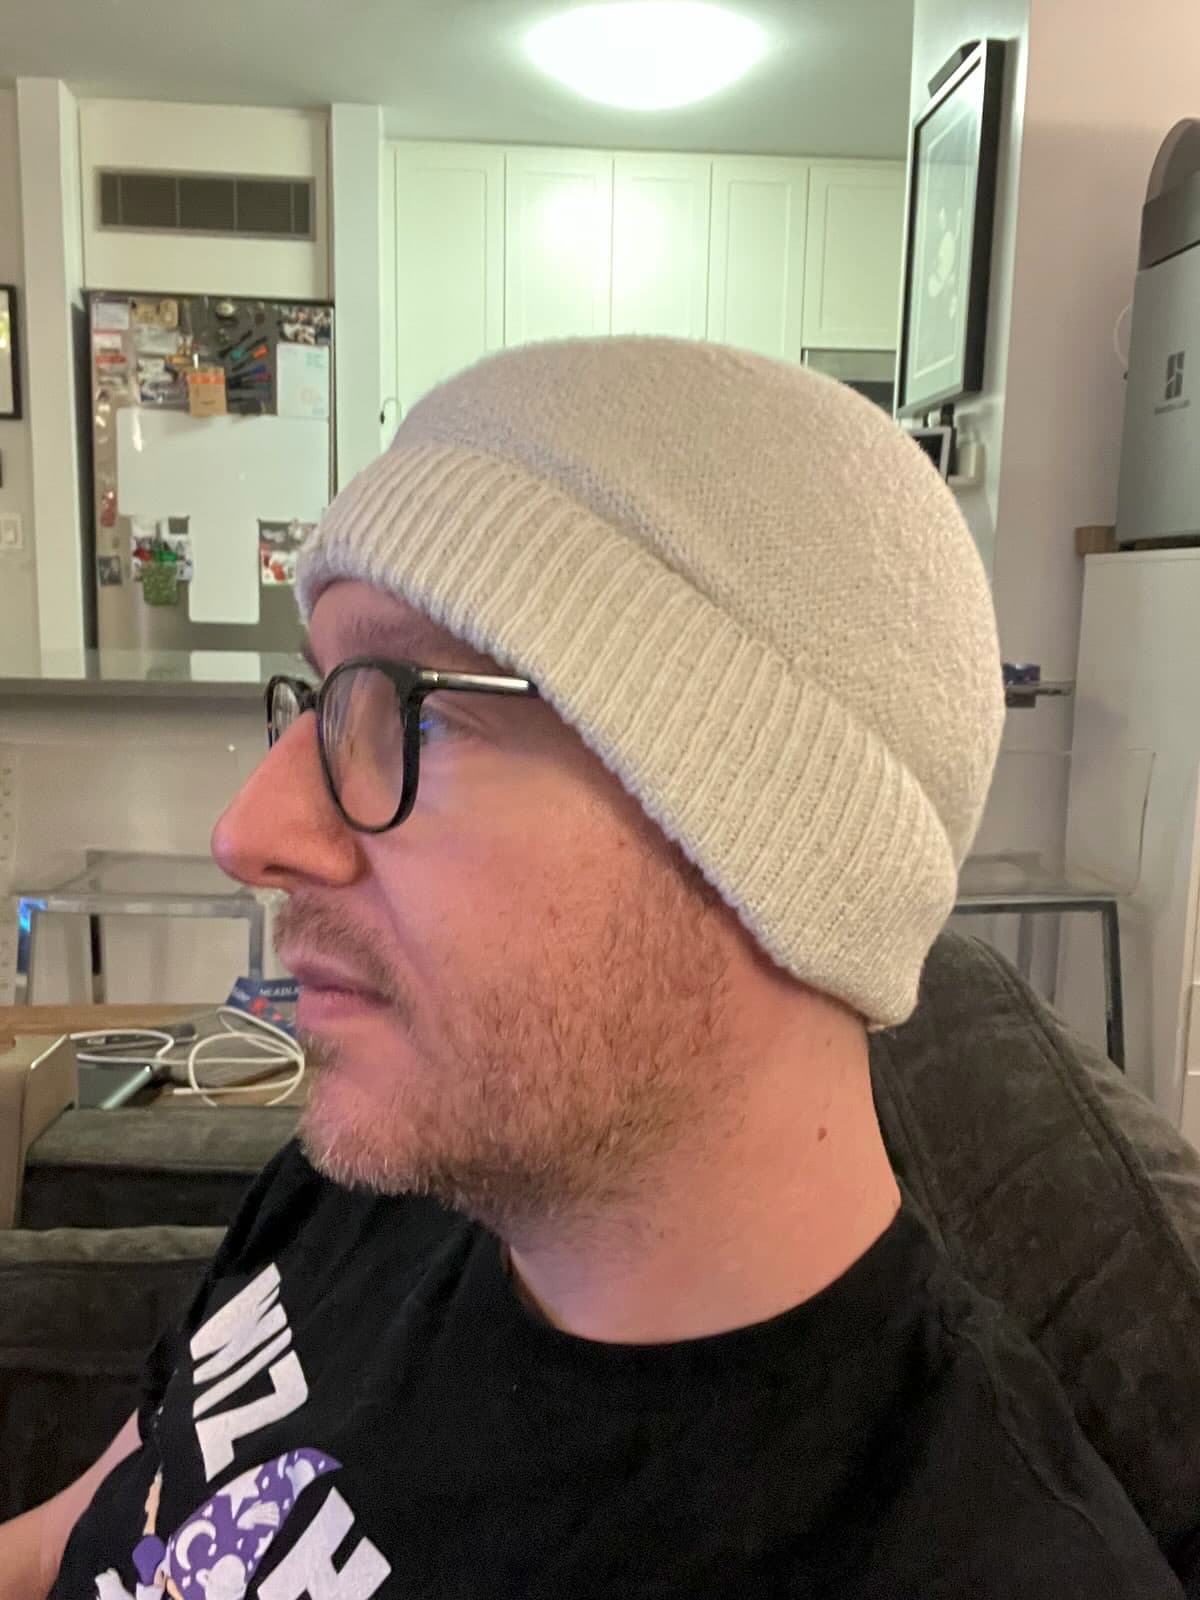
I really should go ahead and make one of these for myself, and stop wearing
beanies that came from a store. For my version I think I would make a few
extra changes:
add a row of plain knitting on top of the brim before casting off onto waste yarn.
join the brim to the hat with the seam on the “outside”, since the brim is meant
to fold up to cover it anyway.
probably try the linker carriage again even though I got so burned by it. 😂
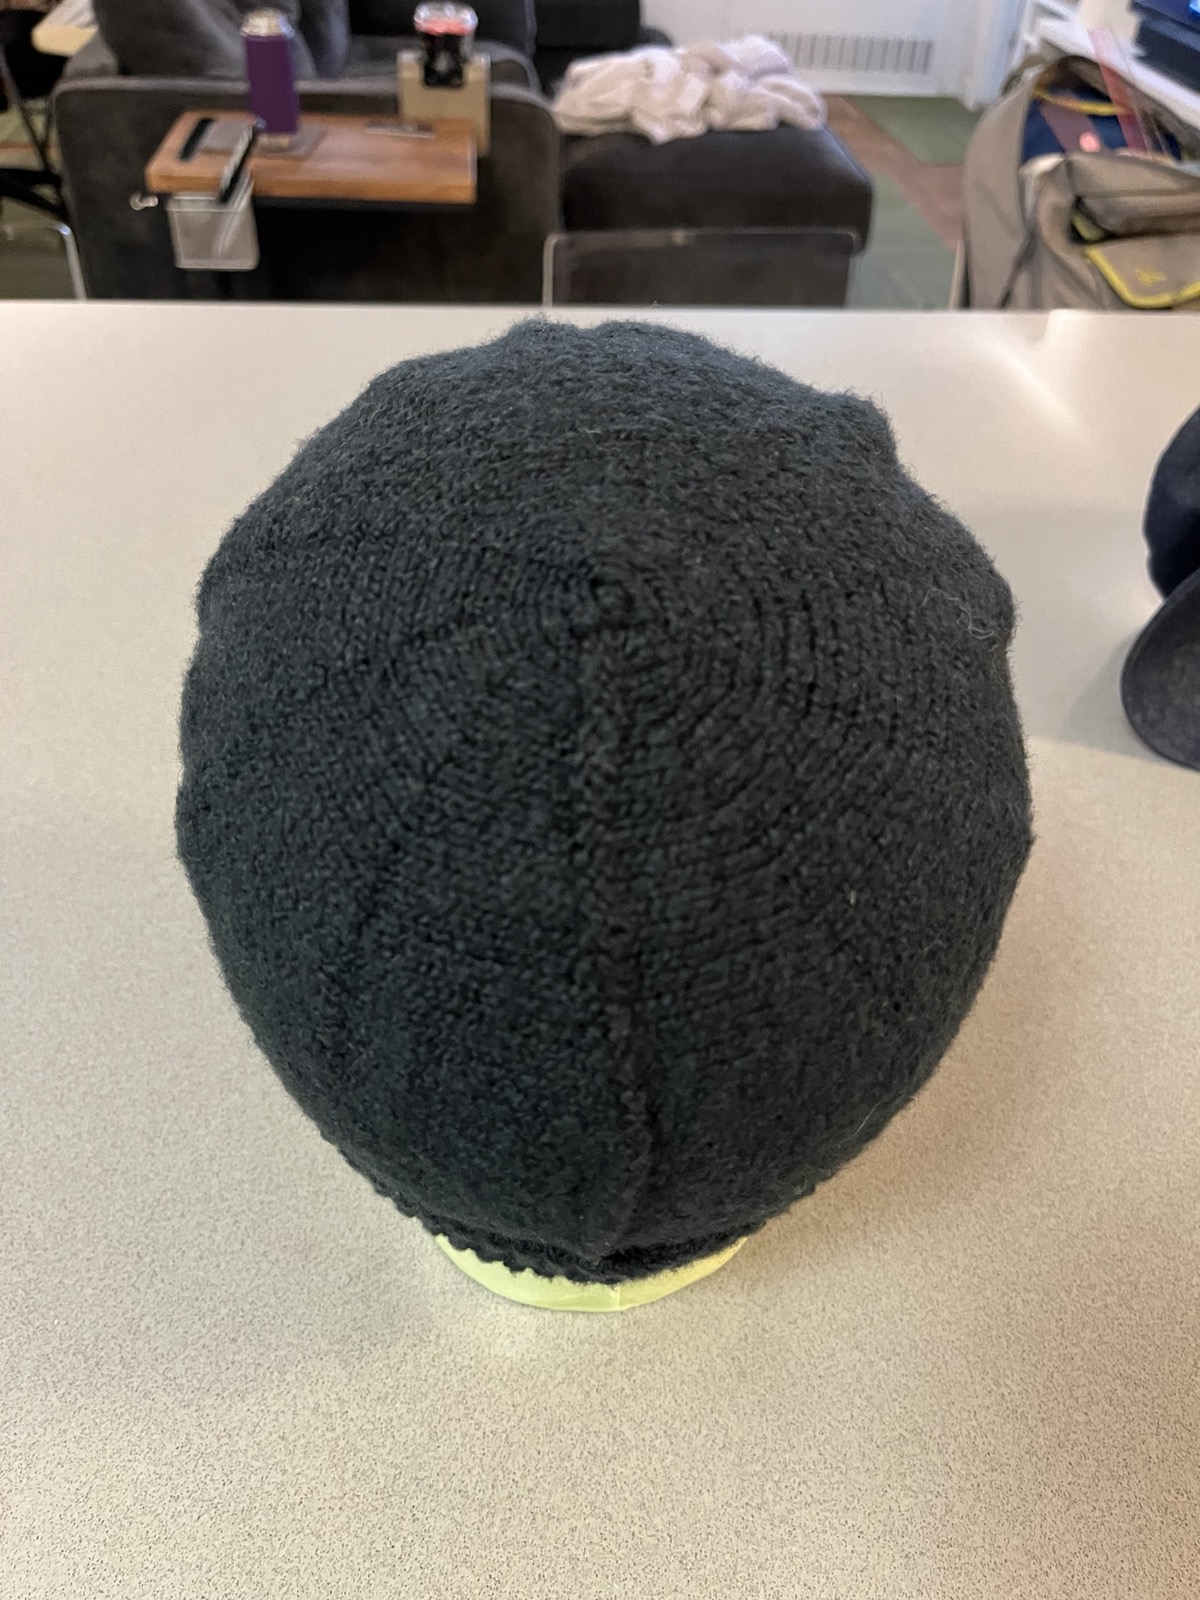
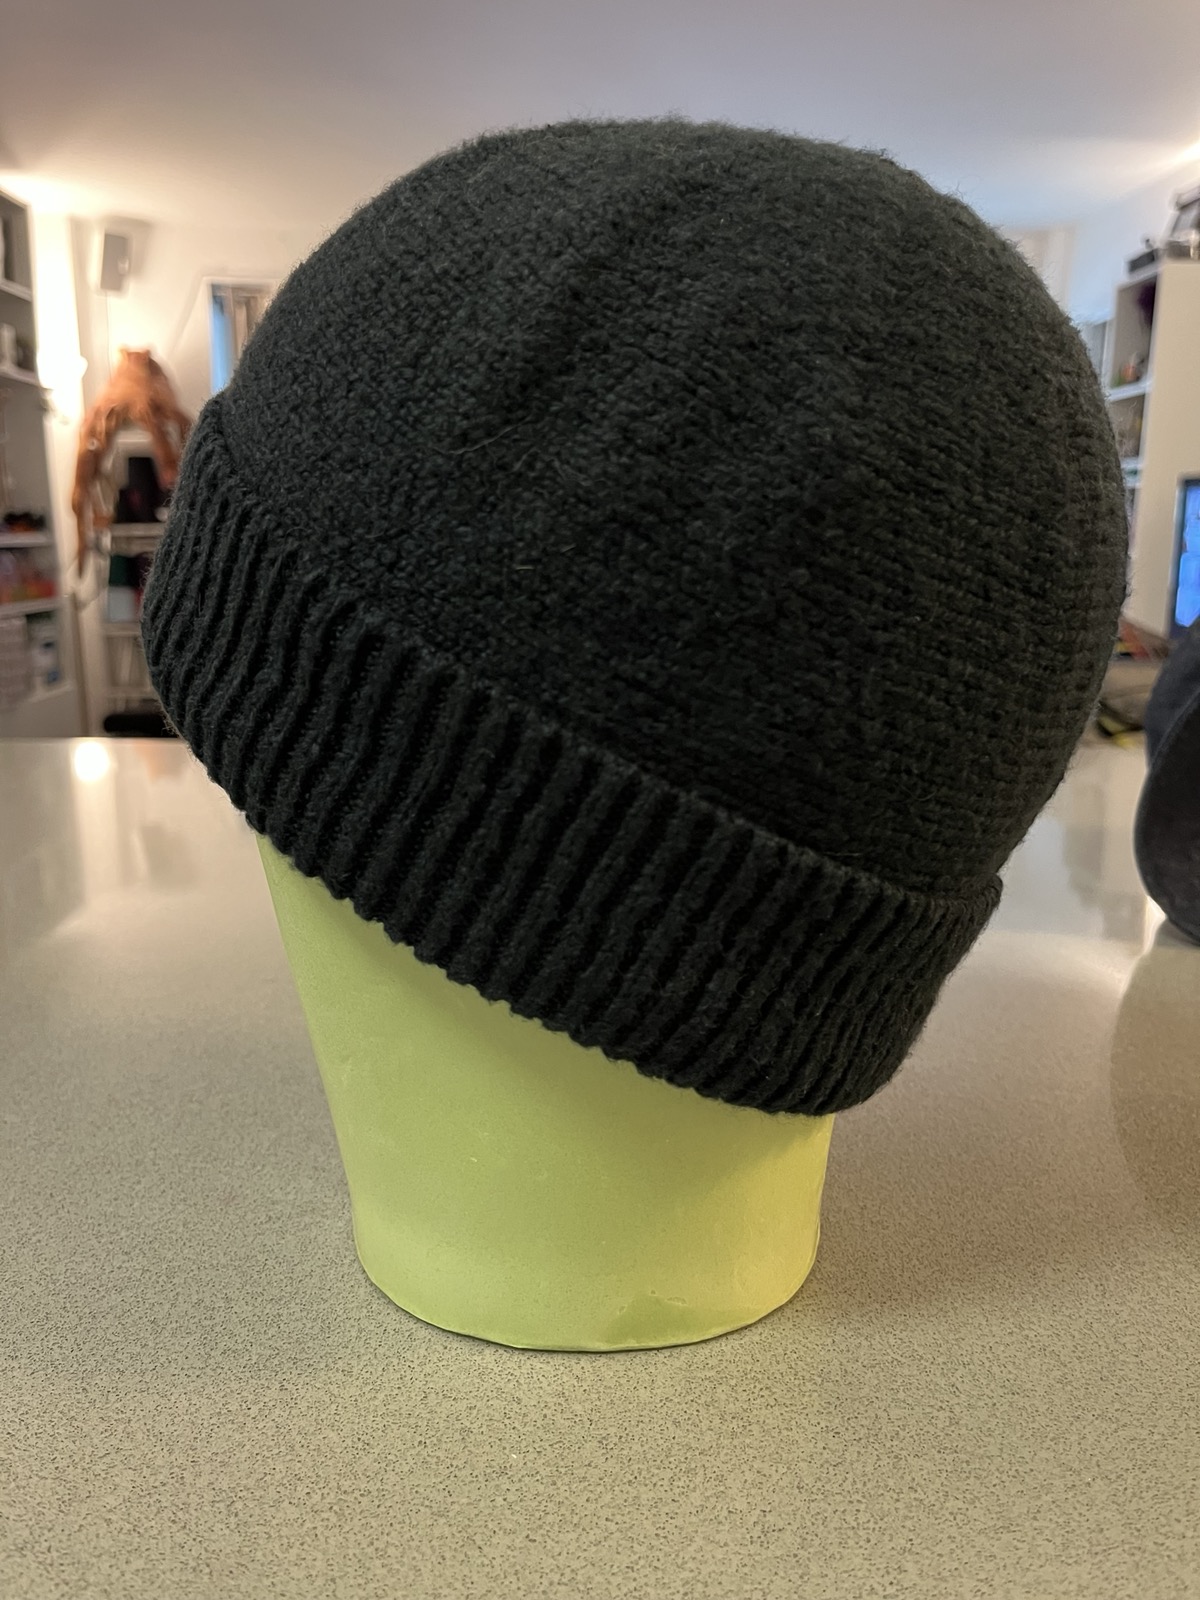
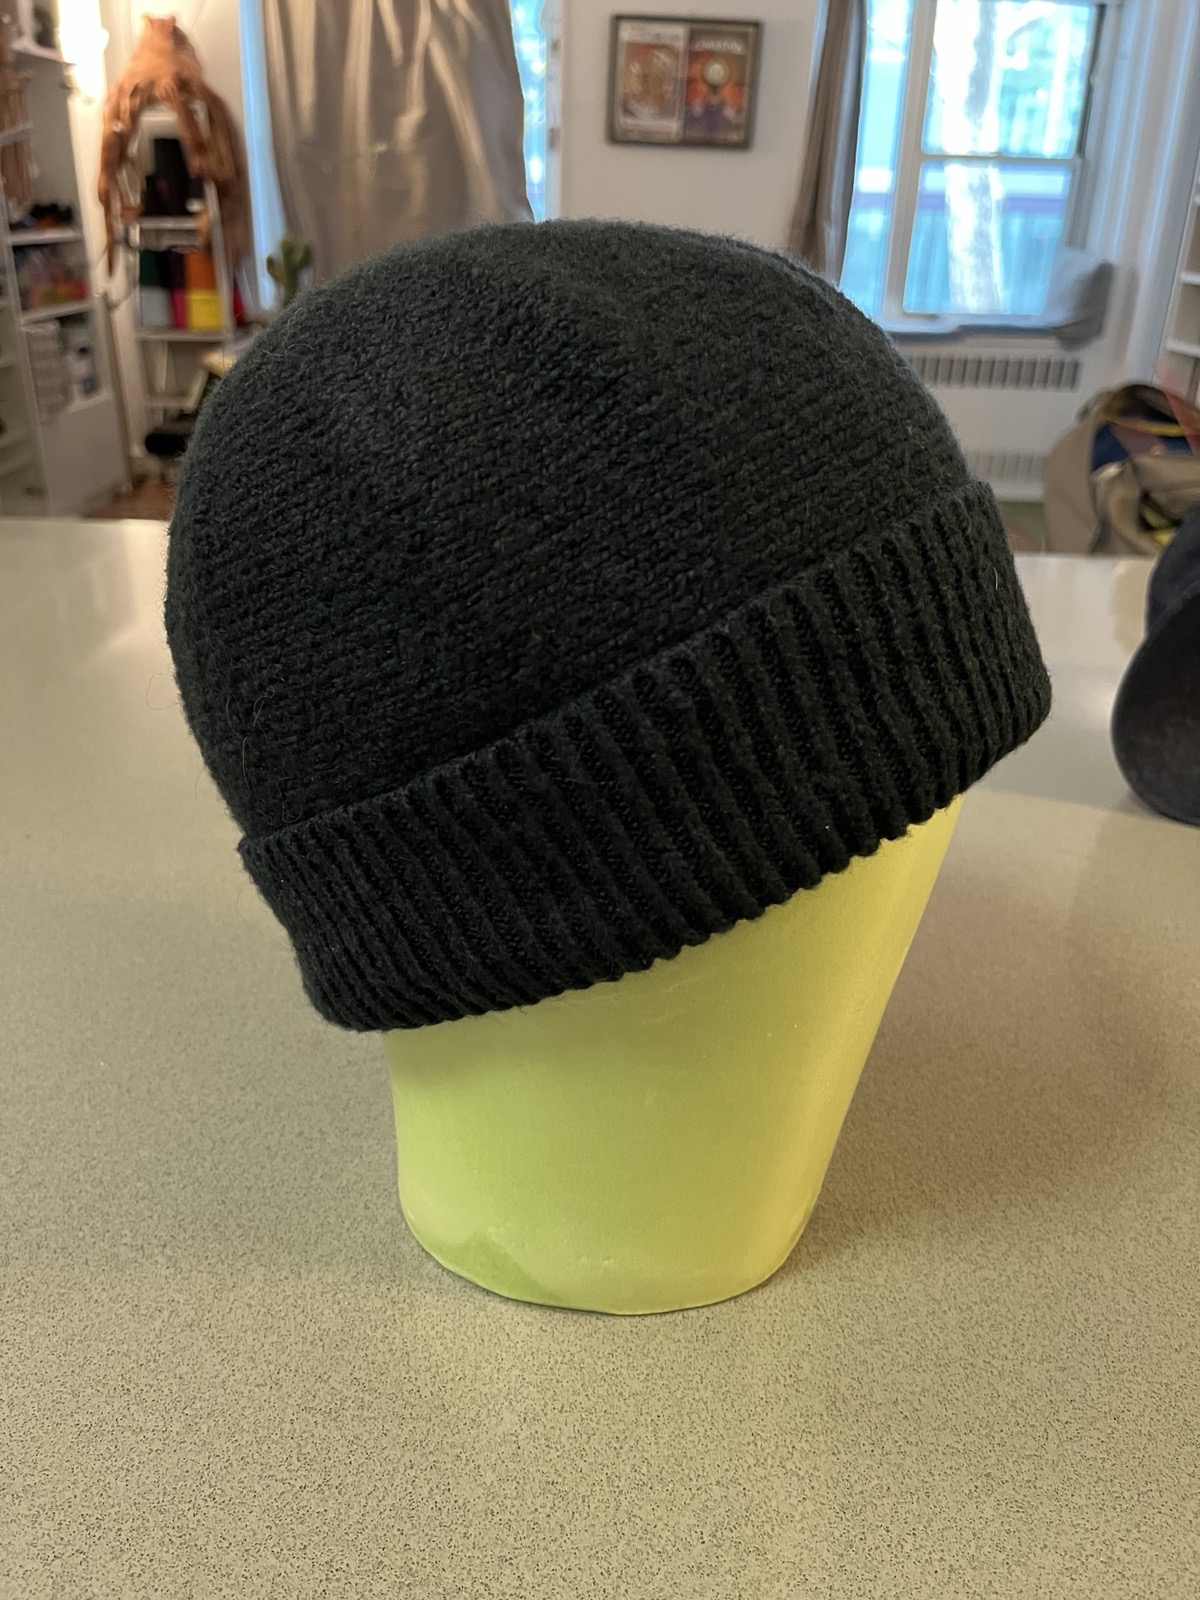
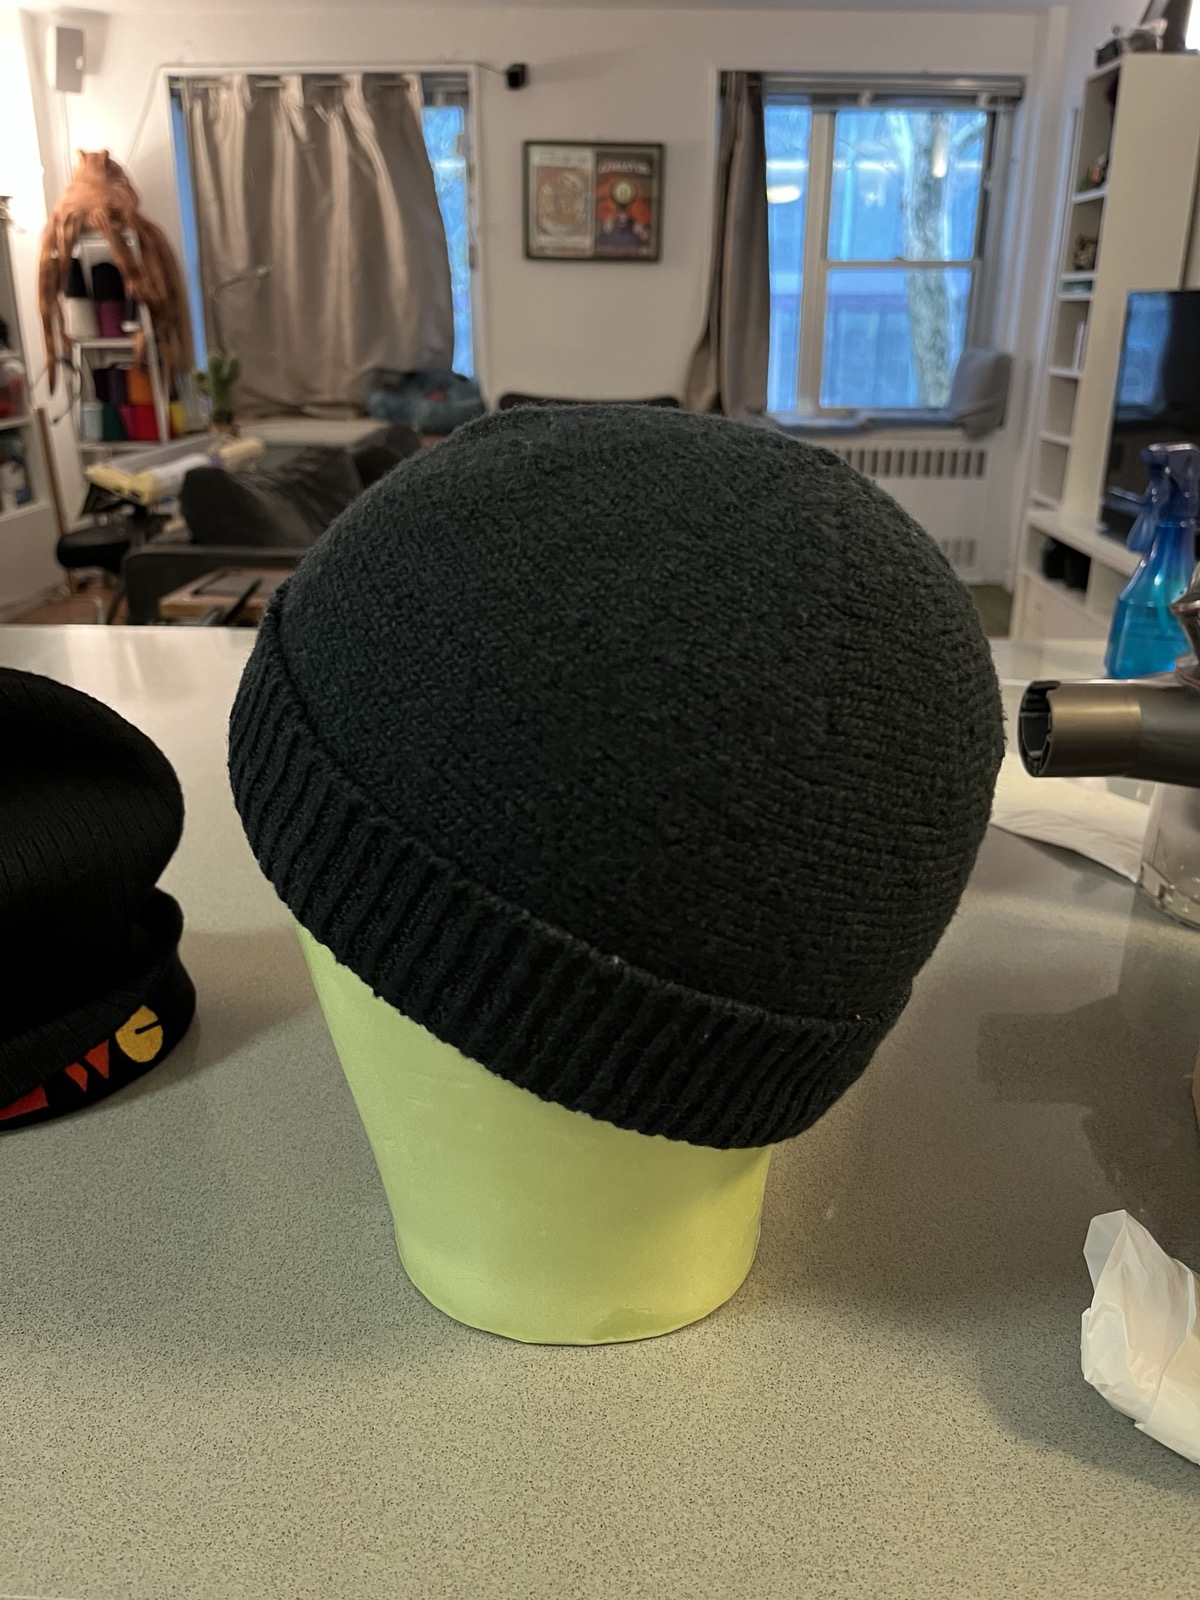
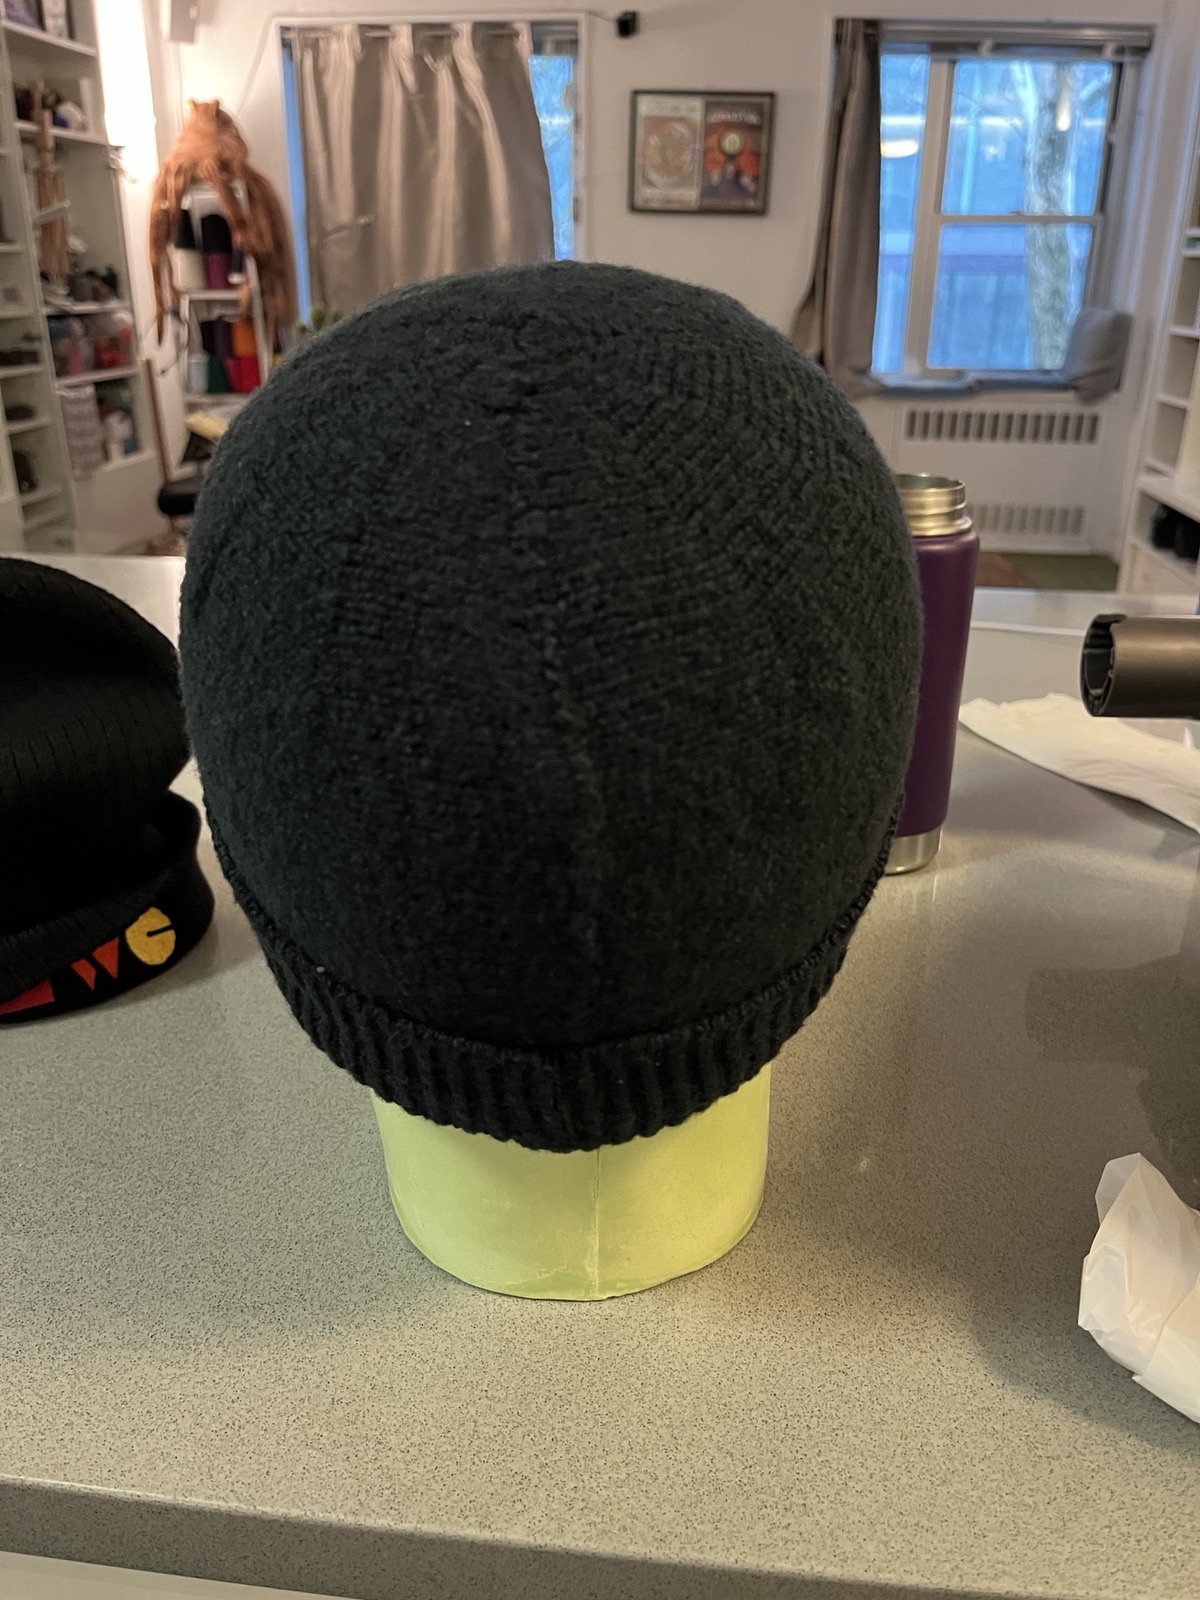
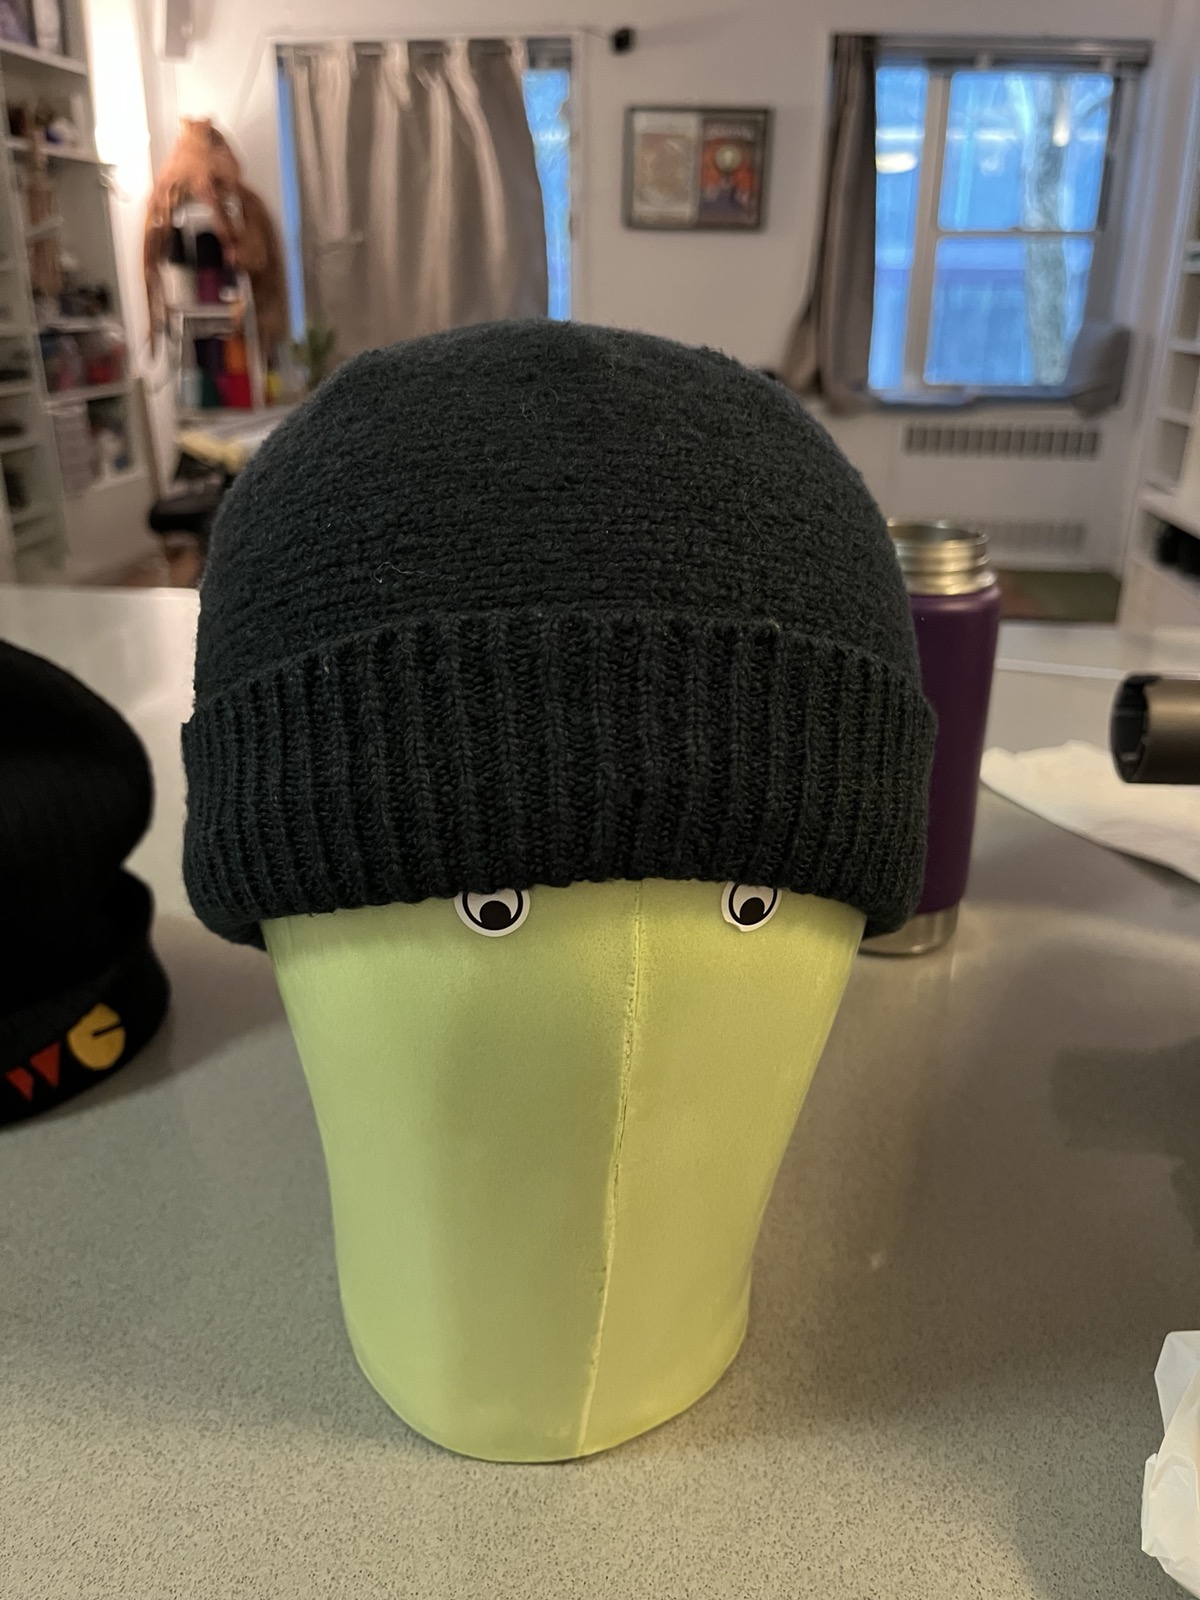
Thanks for reading! As bonus content, here are some photos of the finished
Chattie on the head form that Producer Amy bought for her own hat-making
purposes!
In 2025 the folks at machineknit.community did a 12 Months of Hats knitalong. I only joined at the end of the year, and am still getting my practice in with a lot of basics, so I was a bit too intimidated to jump into any of these in the actual year of 2025.
Based on an interesting hat design request from a friend, for my first knitting project of 2026 I chose Kurt Payne's "Chattie" design, which was the November 2025 knitalong.
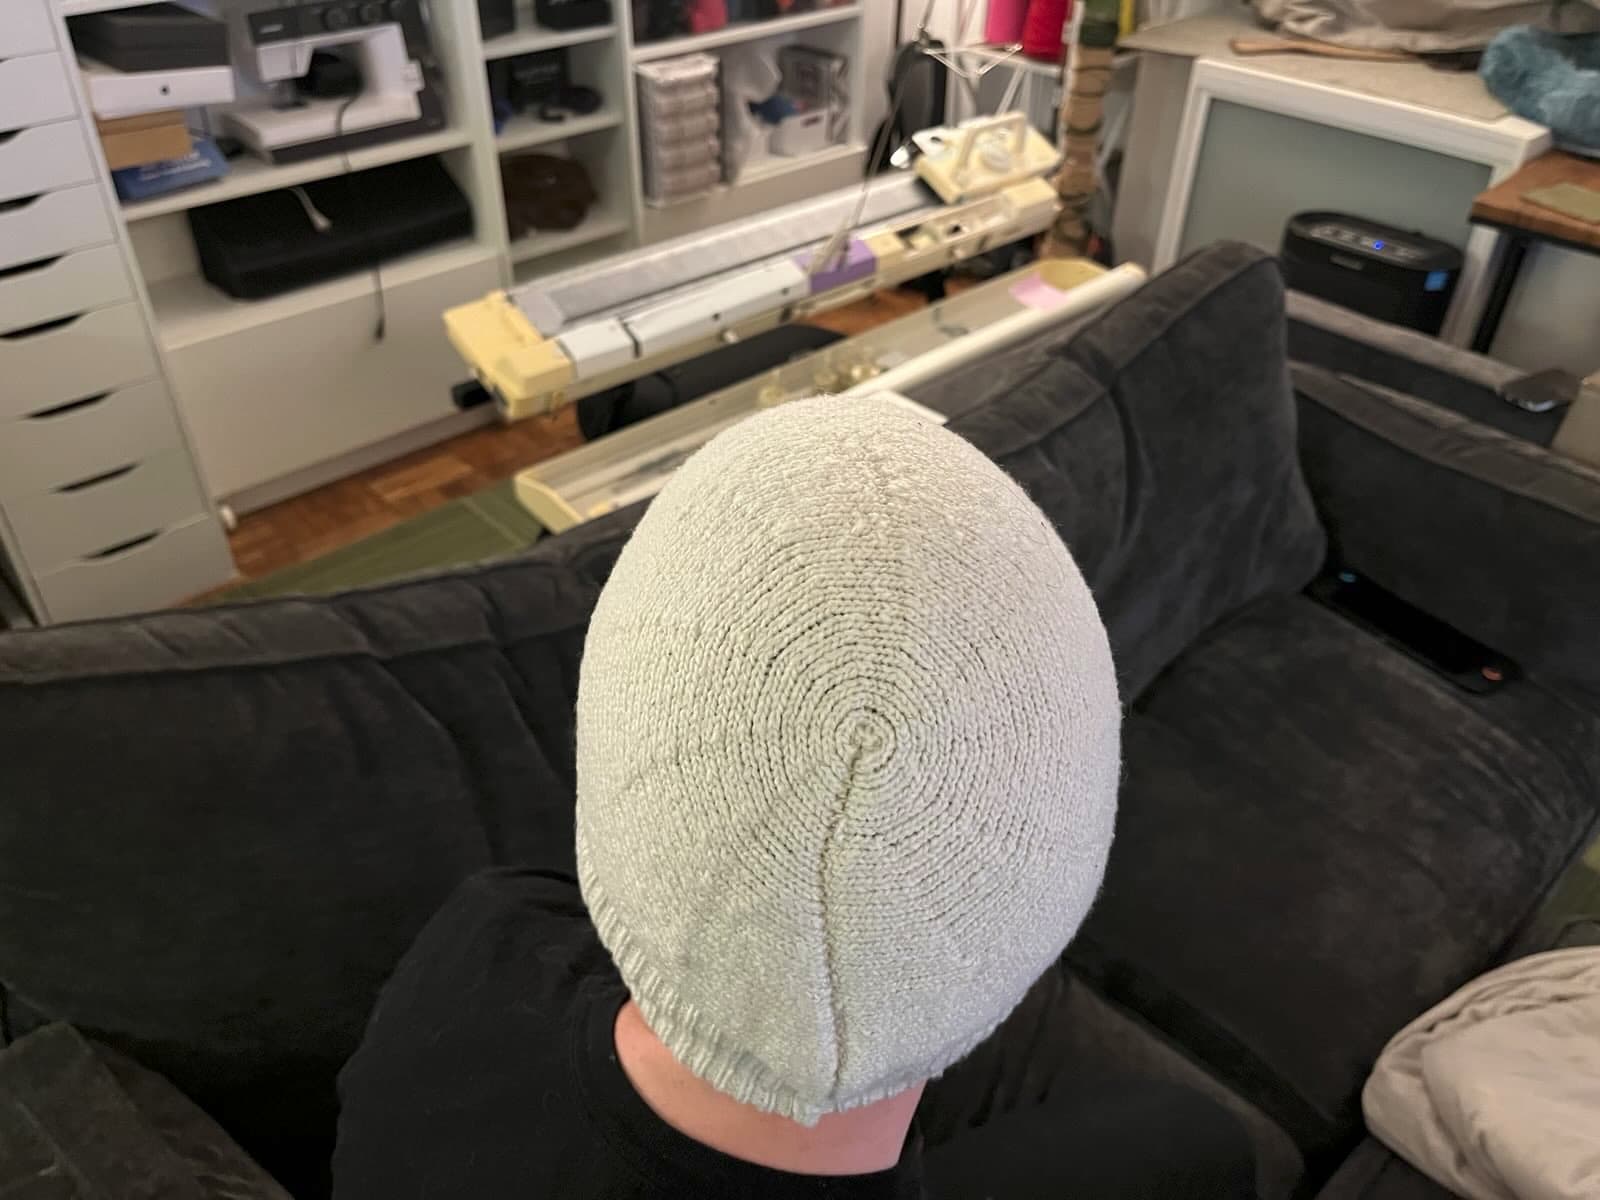
Unlike my first hats, which were basically rectangles sewn up and gathered at the top, the Chattie is knit sideways in 10 sections, using short rows on one side to form the rounded crown. This results in a neat sort of spiral look to the crown. Also unlike my first hats, the brim of the Chattie is added after-the-fact.
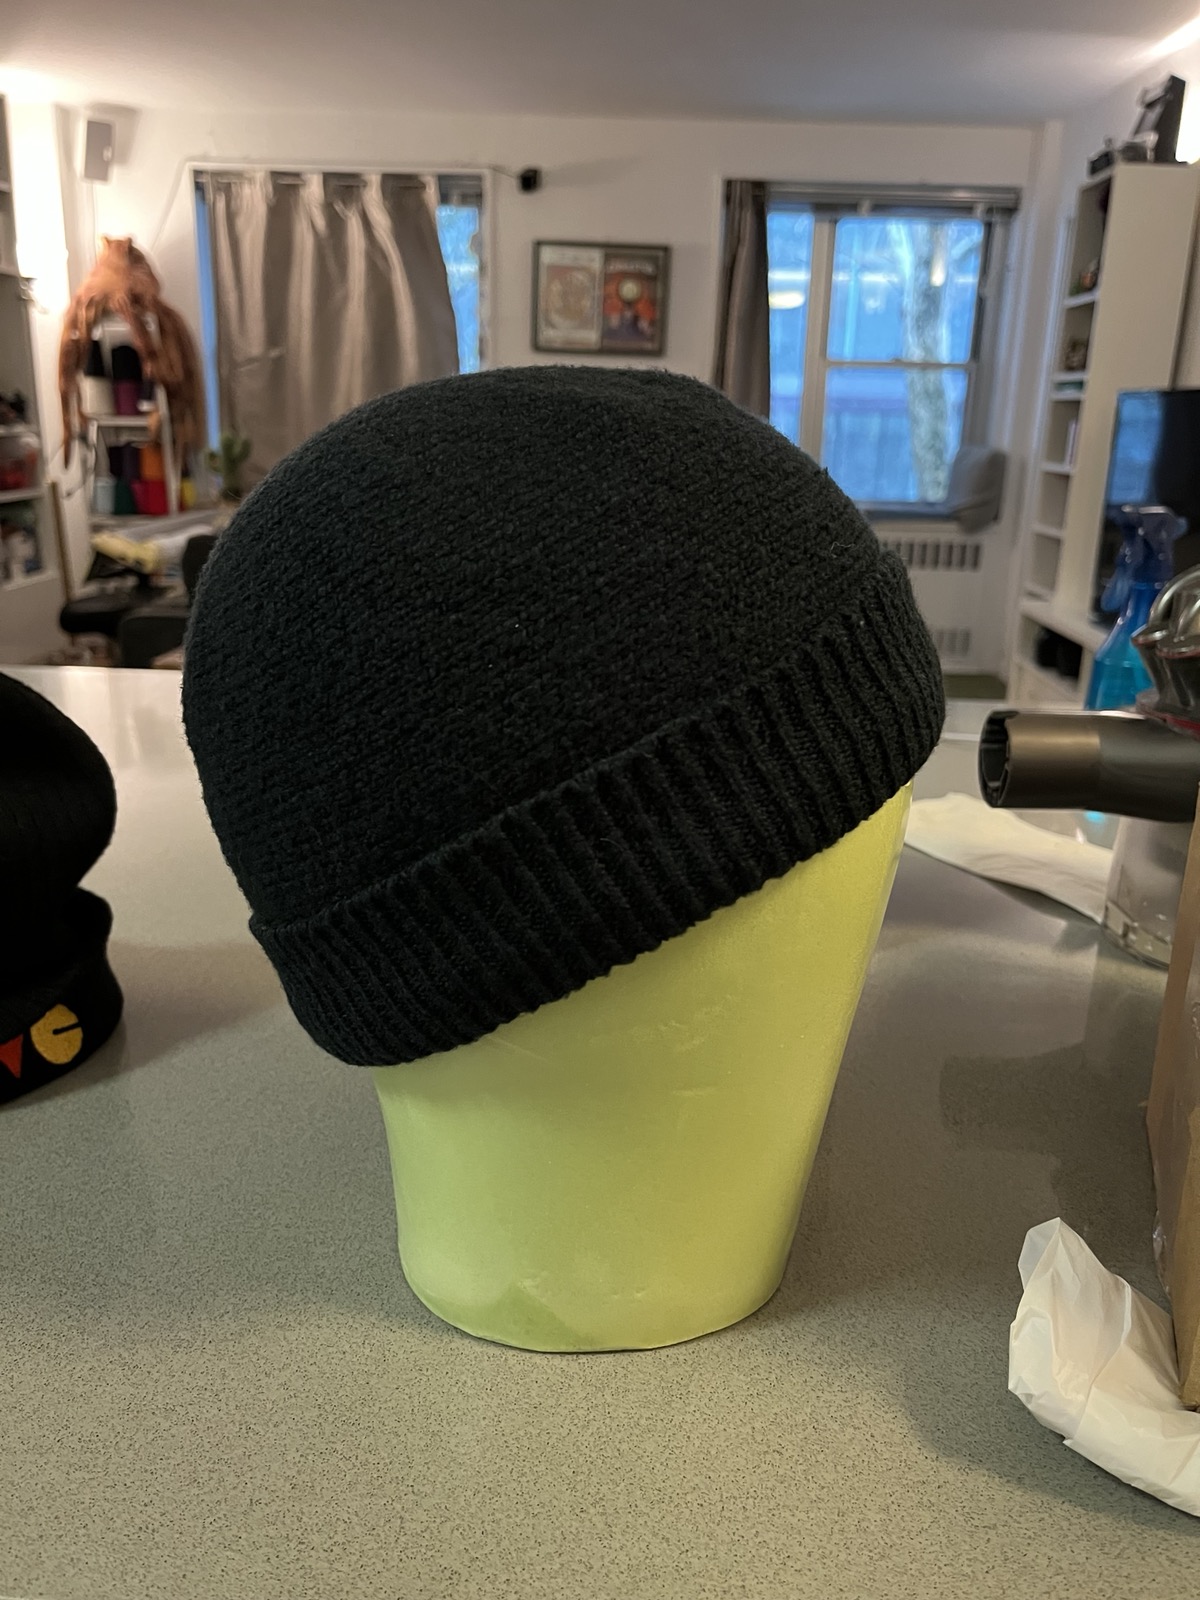
The Chattie is a very flexible design. However, before I get into any complexities like color work, I made this "quick" one out of plain white fuzzy cotton+polymer blend just to get practice with the techniques.
The good:
Kurt's instructions were great. He starts with gauge swatches before walking you through taking measurements and using a chart to convert measurements to stitches and rows. Instructions were also included for different brim variants. I chose a single band of 1x1 rib for this test.
The end result came out about the size I expected! At least, it sits snug on my head and just covers my ears when the brim is folded up.
I like the look and the feel of the 1x1 ribbed brim and the overall shape, I think.
I seamed the hat together on the machine and I think that went pretty well. There's a feeling of "certitude" I get when all the stitches to be joined can be counted and hung up on needles that I don't get when hand-seaming. I might be interested in getting a linker carriage for my machine to make this even faster.
I made some mistakes (see below) but decided to power through and finish. This was a test hat, so I didn't need a pristine result, just a finished object that tells me what I might want to change for a future design.
The oops:
My math worked out so the body sections had an odd number of rows, which was pretty chaotic when it came time to bring held needles back into work. I think in the future I will either make sure that I round that row count up or down to the next even number for all sections, or perhaps alternate round-ups and round-downs to end up with the same number of rows.
I dropped two stitches in the body of the hat. That's really not bad. I think this happened because of weight management, or possibly pulling multiple needles out of work in a single row because I got distracted with said weight management.
I decided to work the brim by re-hanging the hat body sideways on the machine, and I just couldn't seem to get the weights consistent. I had a lot of trouble with needles not knitting, or getting caught on the gate pegs and causing later rows to knit incompletely. This was a stressful, time-consuming mess. Surprisingly, the end result only had a couple of awful stretched out stitches, which I fixed up and pulled to the "inside" of the brim.
Unfortunately, to fit correctly, the "inside" of the brim gets flipped up to become the outside, so you can definitely see my mistakes and my seaming, haha.
I think I misremembered how to do a stretchy finish on 1x1 rib, or just plain pulled it too-tight as I went, resulting in the brim edge being too tight. This is just enough to be noticeable and annoying, but not quite fatal for the hat as a wearable object.
For the future:
I'm interested in doing color work on a design, but a great deal of the visible parts of the hat have short rows such that the number of stitches per row is constantly changing. Simple patterns in cool contrasting colors should tolerate that fine, but doing nice all-over patterning like I want may end up being tricky!
I'd like to skip sewing up 1x1 rib edges for a bit. I think for a future hat I will start the ribbing on the machine, the graft the live stitches onto the hat body directly, which should leave me with a nice stretchy edge without testing my still-poor hand finishing skills.
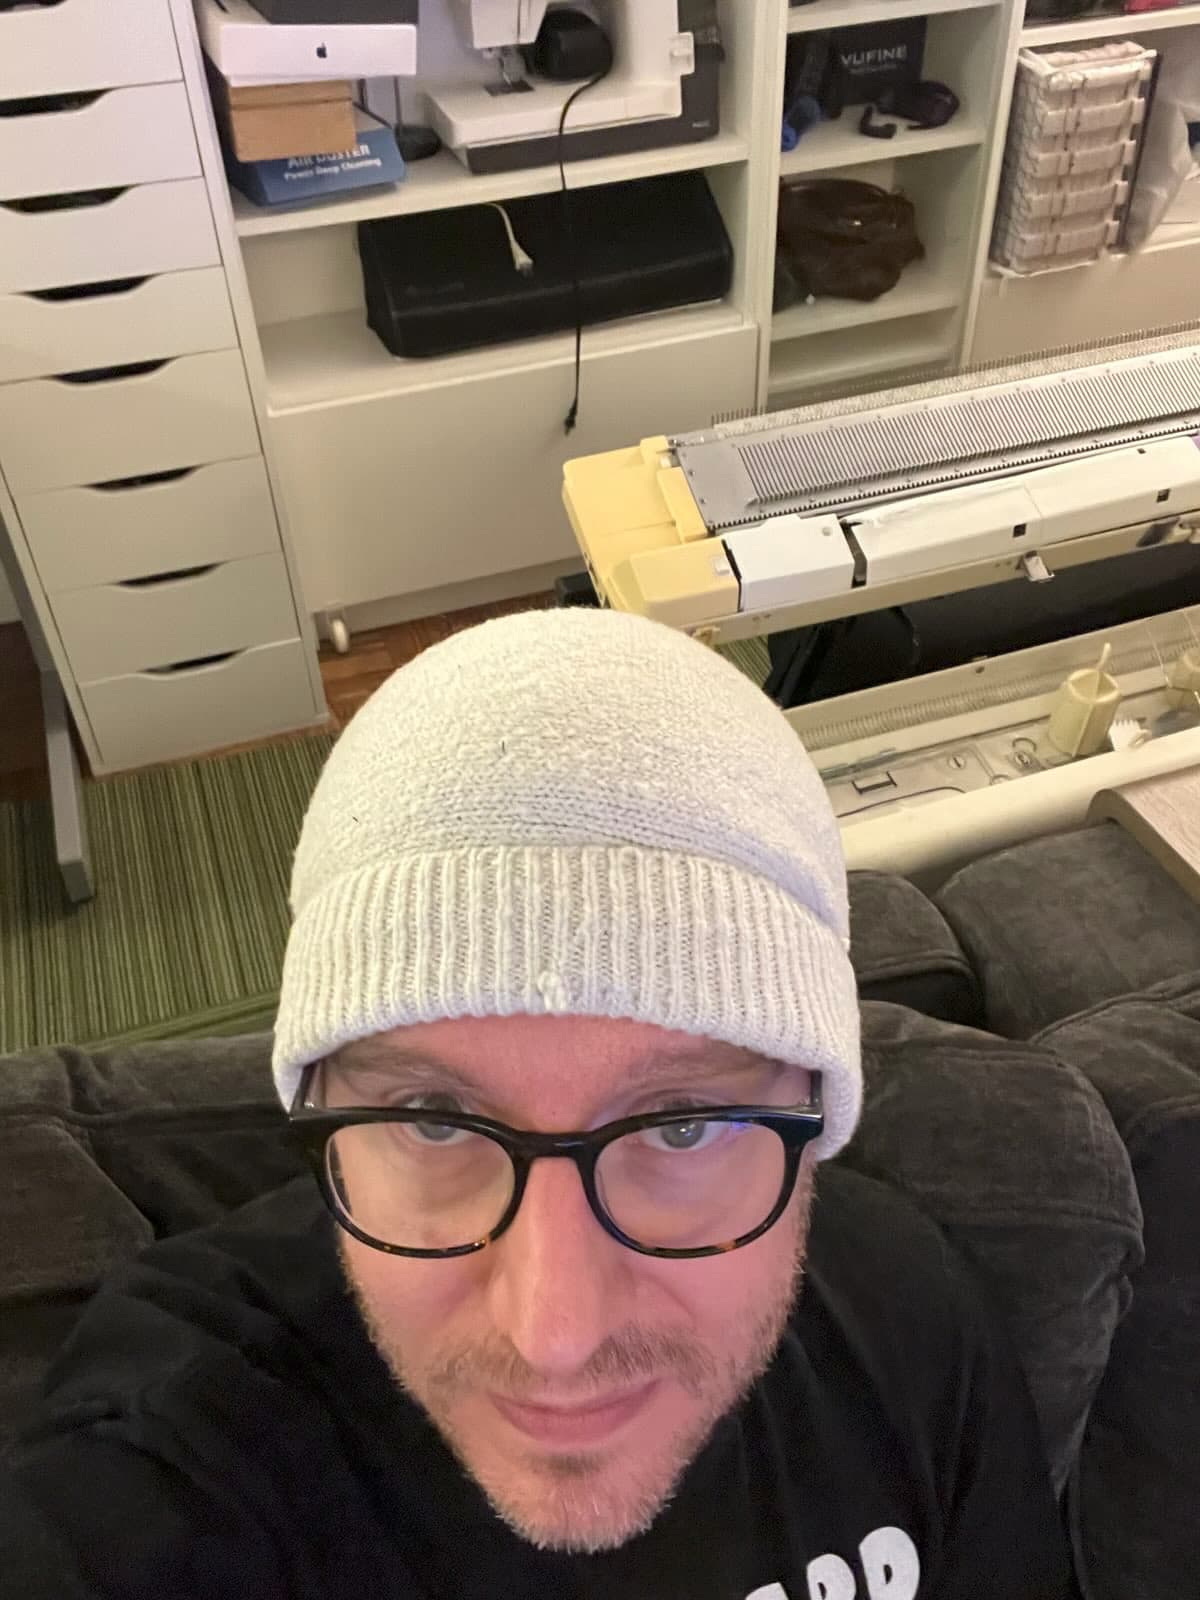
As mentioned in my first-hat and forbidden socks posts my Brother KH-930e knitting machine was unable to knit two-color Fair Isle patterning due to two cam buttons being stuck together.
I didn't really know where to start with figuring this out. I remember doing some semi-fruitless web searching, before finally deciding to learn how to disassemble the carriage enough to look at it and see if I could find something obvious.
I started by hunting down the service manual PDF for my machine and following the instructions there. Those instructions and diagrams helped me get the handle and the cover off, as well as most of the way to removing the cartridge-like structure that mounts the cam control buttons. I was scared off by the "remove these springs" steps, as I did not see a way to remove the small springs without bending them.
At the end of this process I was able to determine that the buttons themselves were not stuck together. It was the plates that each of these buttons controls. If I wanted to get inside to see what was going on, I would definitely have needed to get those springs out, and plan for some messier and more fiddly work.
Disappointed and anxious, I reassembled the carriage. Thankfully, it still worked, though still without Fair Isle support. Between the mess of old oil and grease, and my anxiety about getting the carriage apart and together again, I didn't even take photos of this part of the process.
That's when I found the videos that would have saved me all the trouble!
This Cleaning Brother Carriages from theanswerladyknits on YouTube has so much information about Brother (and other) knitting machines, in-depth disassembly and cleaning videos, lists of what to buy, and even explanations about common issues like the exact button-sticking problem I was facing. I cannot stress enough how relieving and exciting it was to find these videos.
I went a little overboard and bought their whole deep-clean-and-restore shopping list, which ended up being a little over $100 worth of oils and solvents and lubes and oil-soaking rags. I only planned to use 2 or 3 of these, in order to unstick the button cams, but wanted the other stuff on hand in case I needed to go further.
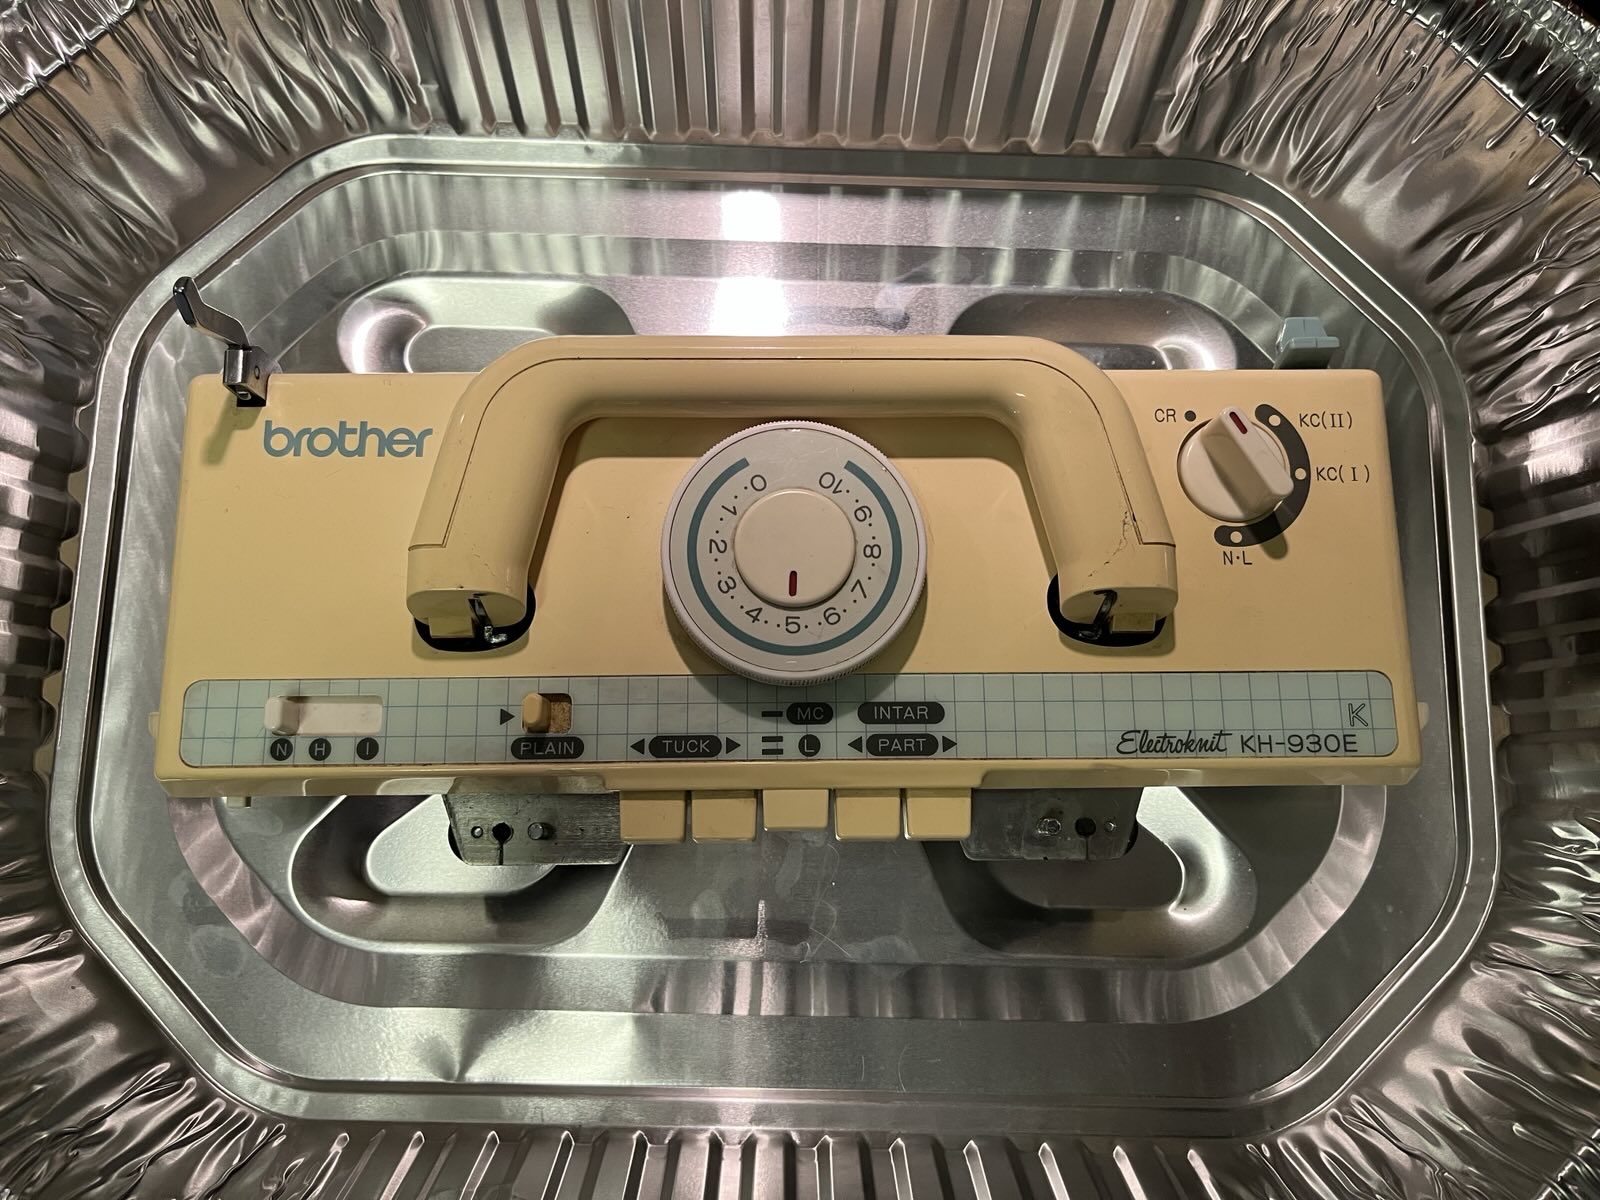
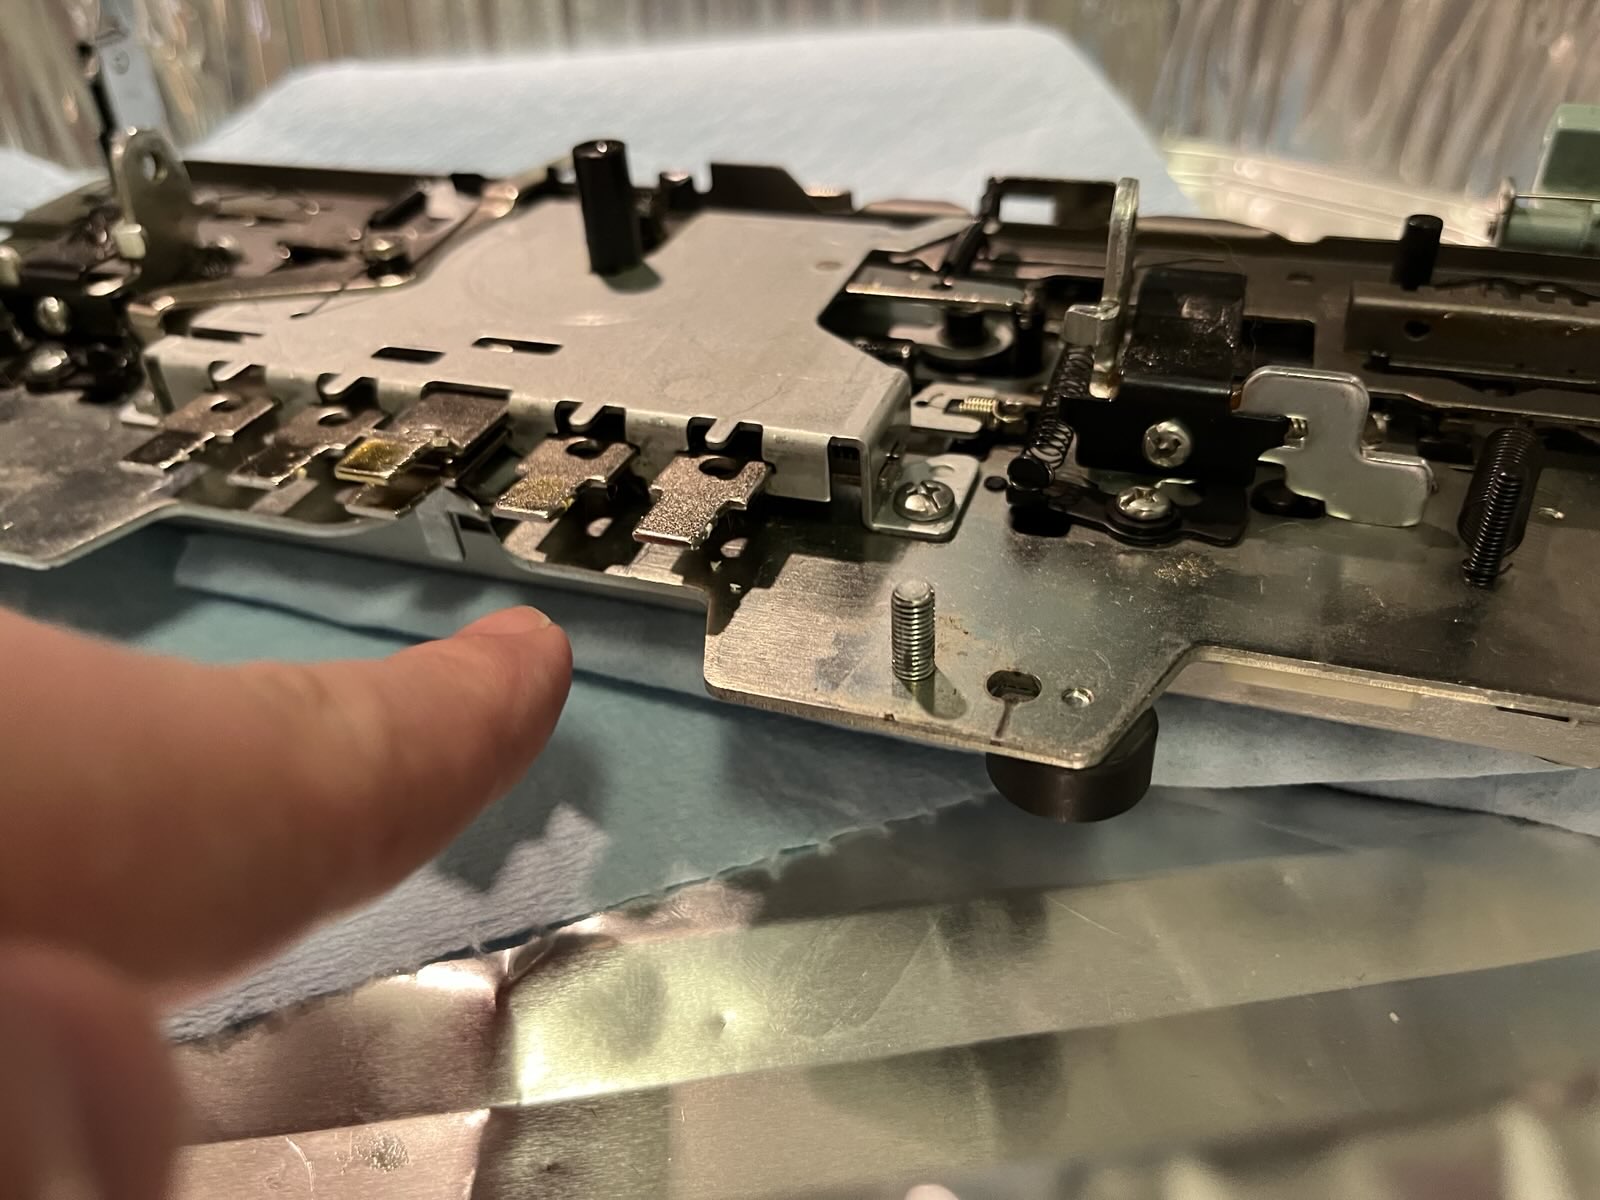
Once I had all the fluids, I picked up an aluminum turkey pan as a portable work tray. This served to keep all the oil and gunk away from the surfaces in our small apartment, let me spray next to a window for better ventilation, and store it out of the way as I let things soak.
Brother KH-930e carriage in a turkey pan. Let's... cook?Metal internals of the carriage with the top handle, tension dial, and plastic cover removed. Yellow-orange grease is visible around the tension dial.
Our carriage was pretty clean, overall, but with old yellow-orange grease pretty visible. According to the videos on theanswerladyknits channel, this is old lithium grease, likely from when the carriage was first assembled. That suggests our machine had not seen much use since its early days.
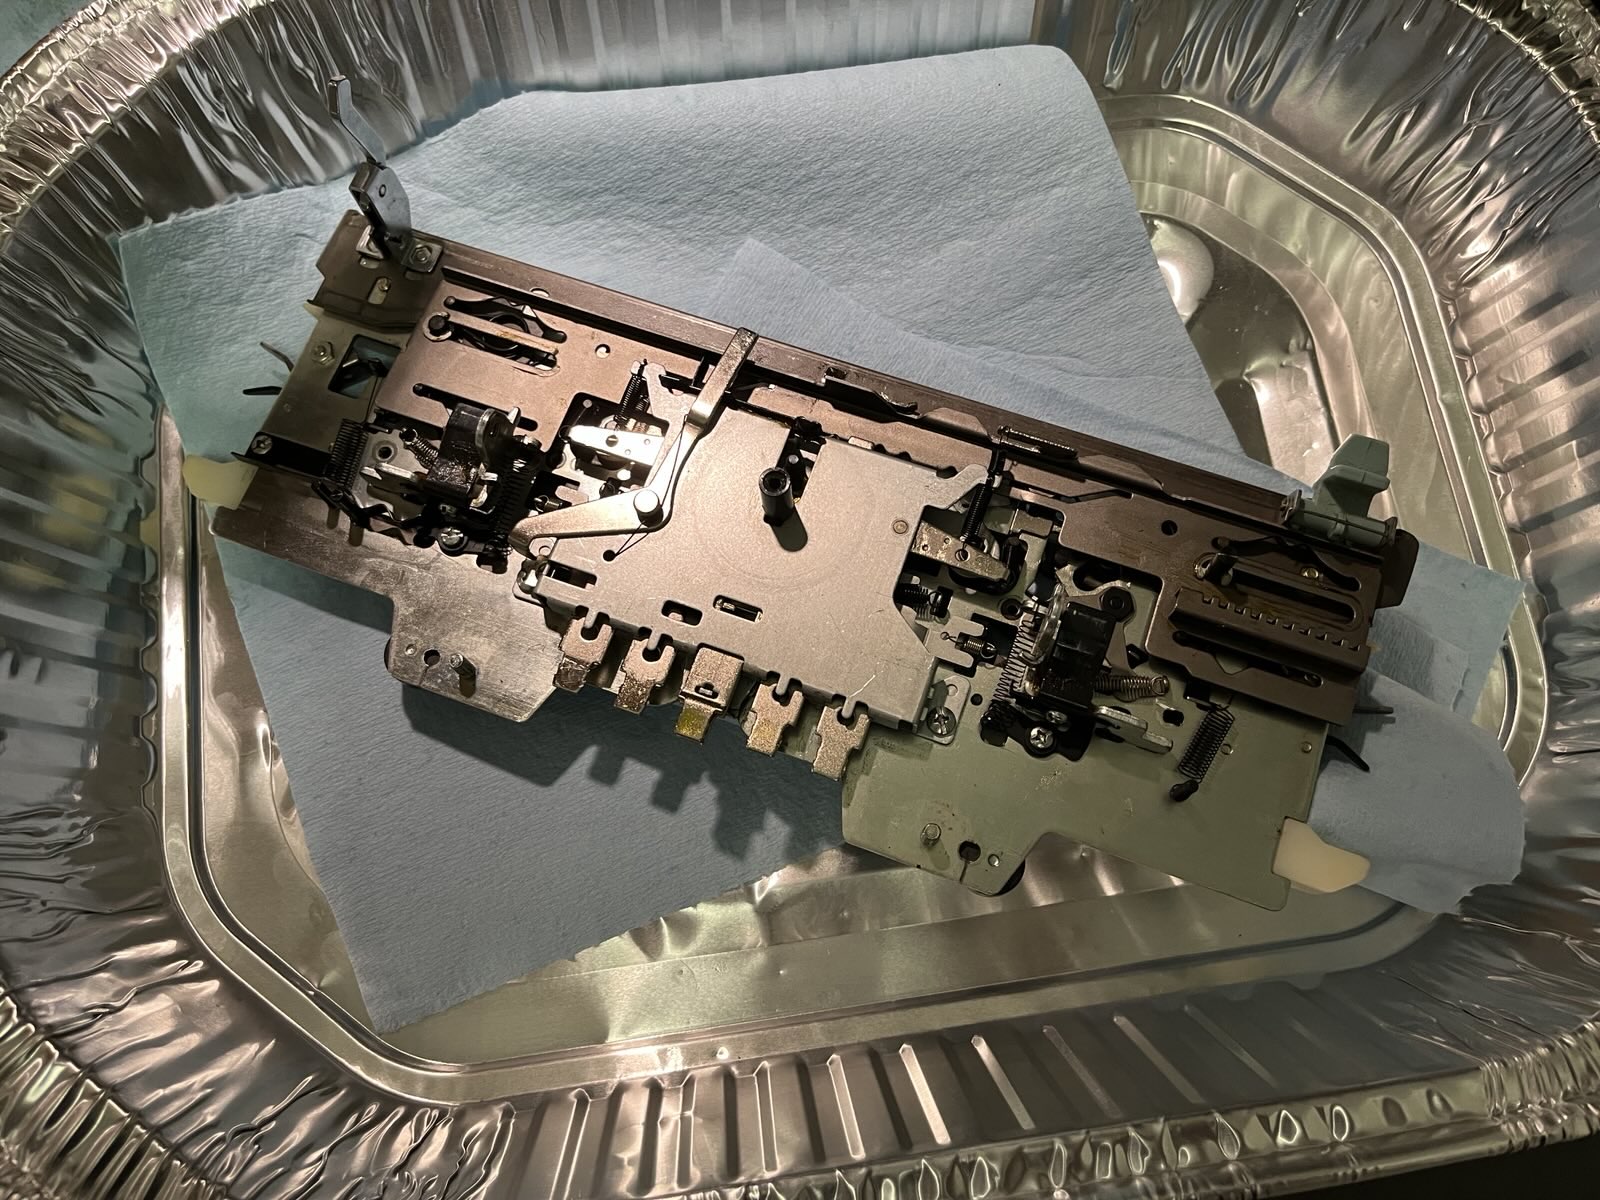
Carriage resting on blue shop towels with white plastic dial and button covers removed. Visible grease has been wiped away.Angled view to better show the cam button assembly. There are 6 metal tangs. Two pairs on either end are side-by-side, while the middle pair are stacked vertically.A finger indicates the space between the cam cartridge and the carriage bottom, where oil will be applied.
I removed the plastic parts for the buttons and knobs for hand-cleaning and wiped away the visible globs of grease that I could see, then sprayed "aero kroil" into the cam button assembly, especially focusing on the bottom area where the "tuck" "multicolor" cam plates need to slide past one another. Within minutes, the kroil had done its work and I was able to slide the two plates independently, hooray!
I let the kroil work overnight. As theanswerlady's husband "Ask Jack" tells it, kroil a "creeping oil" that works its way over and between metal parts, freeing them up, then also works its way out. However, he also says that we don't want to leave any hydrocarbon oils inside the machine.
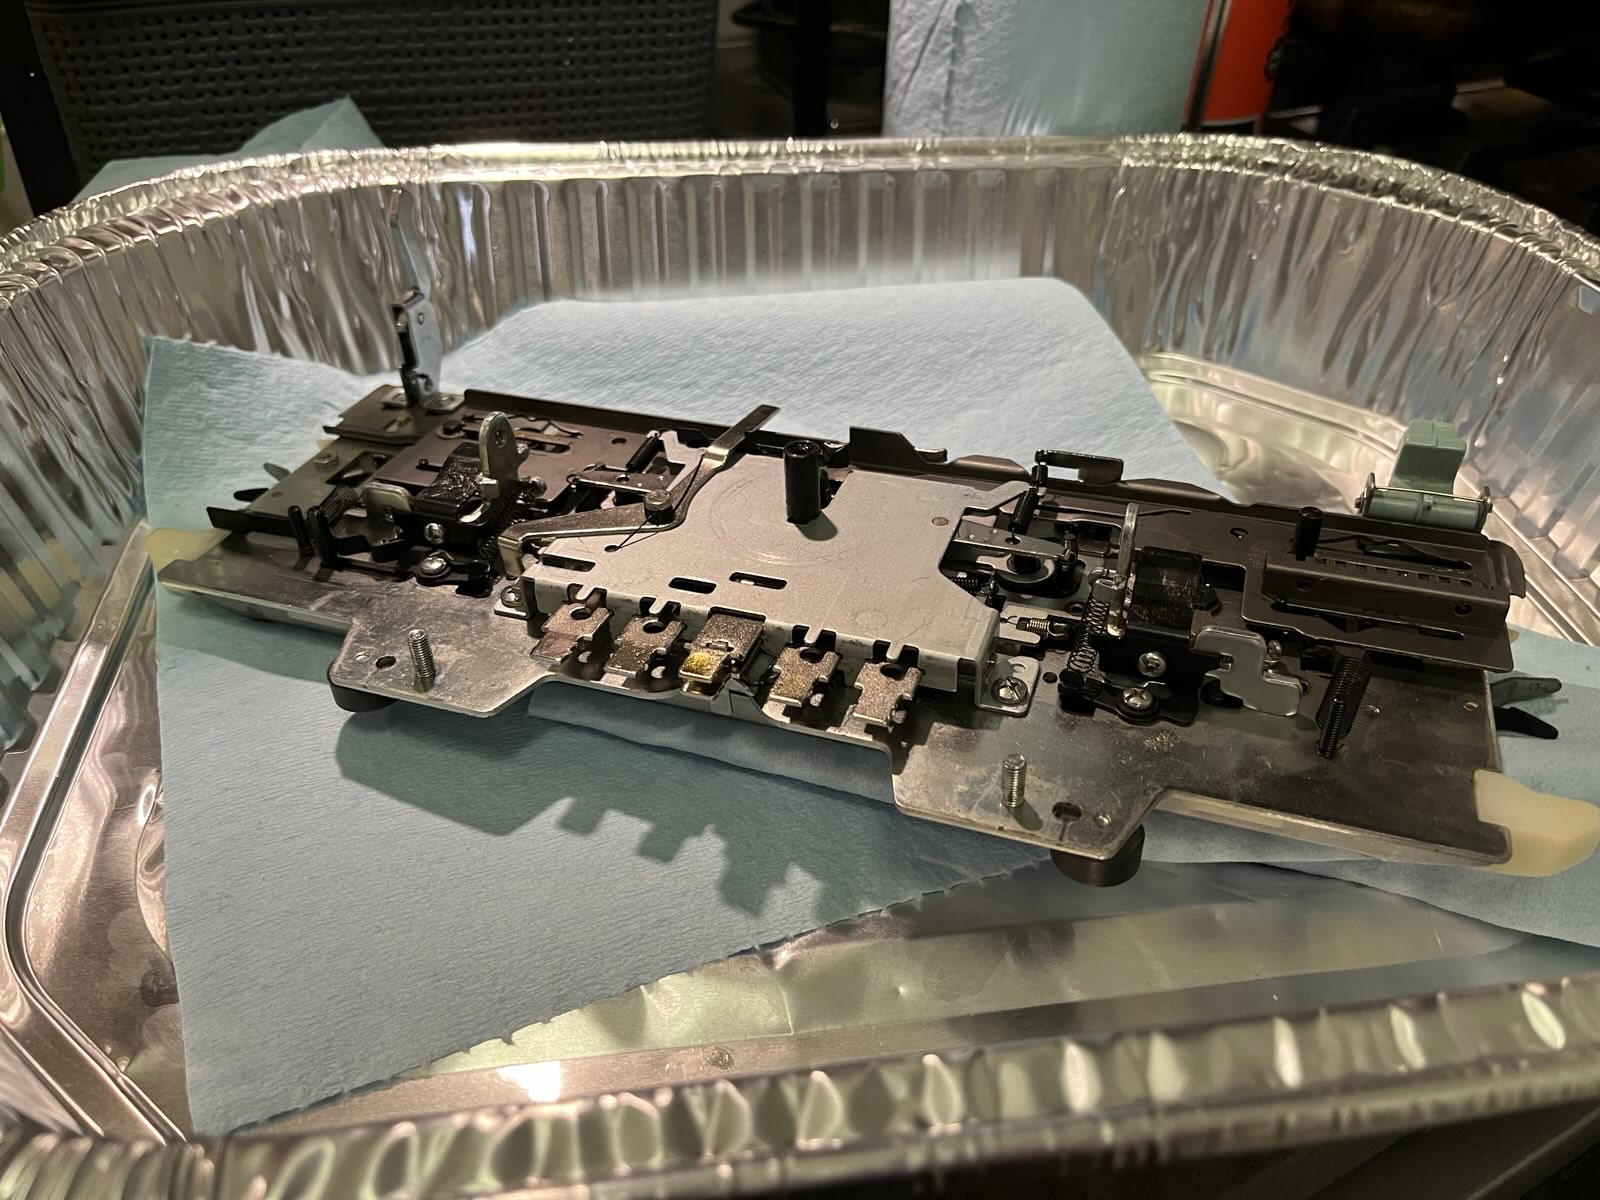
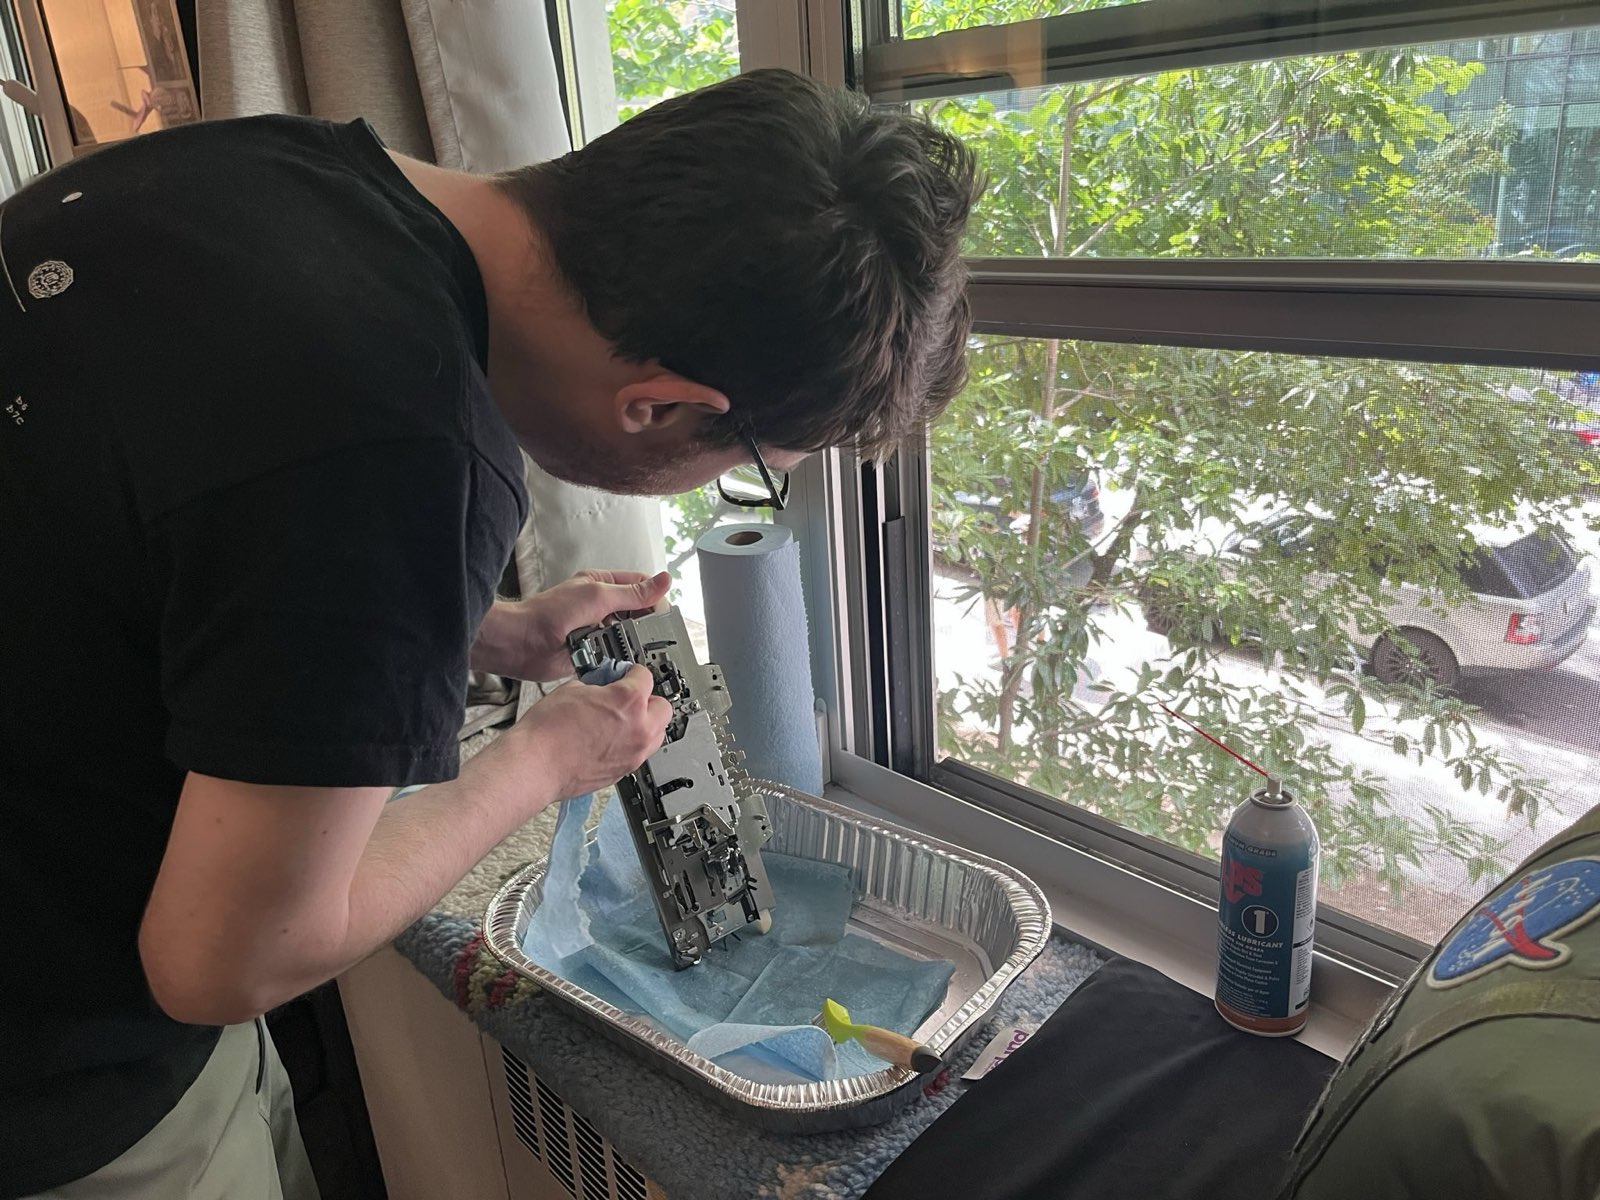
So the next day, it was time to chase out all the kroil, and as much of the old lithium grease and any other "crud" it had freed up. I used a can of LPS-1 to spray into and through all the nooks and crannies of the carriage that I could get to, using a stiff brush and blue towels to try and "mop out" all the gunk I could reach.
Me holding the carriage as I mop out some gunk with a blue towel. My turkey-pan work station is on a window sill by an open window. Blue towels soaked in oil and silicone lubricant line the pan. A small brush, roll of blue shop towels, and spray can of LPS 1 are visible.
After the scrubbing I propped up the carriage for an hour or so to let the LPS 1 drip out before flipping it over to let it drip some more. I bagged and tossed the soaked shop towels and used some fresh ones to lightly blot away obvious pools and drips as I re-assembled the carriage.
Before testing things out, I sprayed the underside of the carriage, as well as the machine's needle bed, with "ask Jack"'s recommended "LPS FG" food-grade dry silicone lube, and gave everything a good wipe down.
After a couple of false starts I got things going and everything moved much more smoothly than before. I set up some waste cotton yarn across all 200 needles and knit a long swatch at varying tensions, working the mechanisms and soaking up any excess lube and junk that might come out.
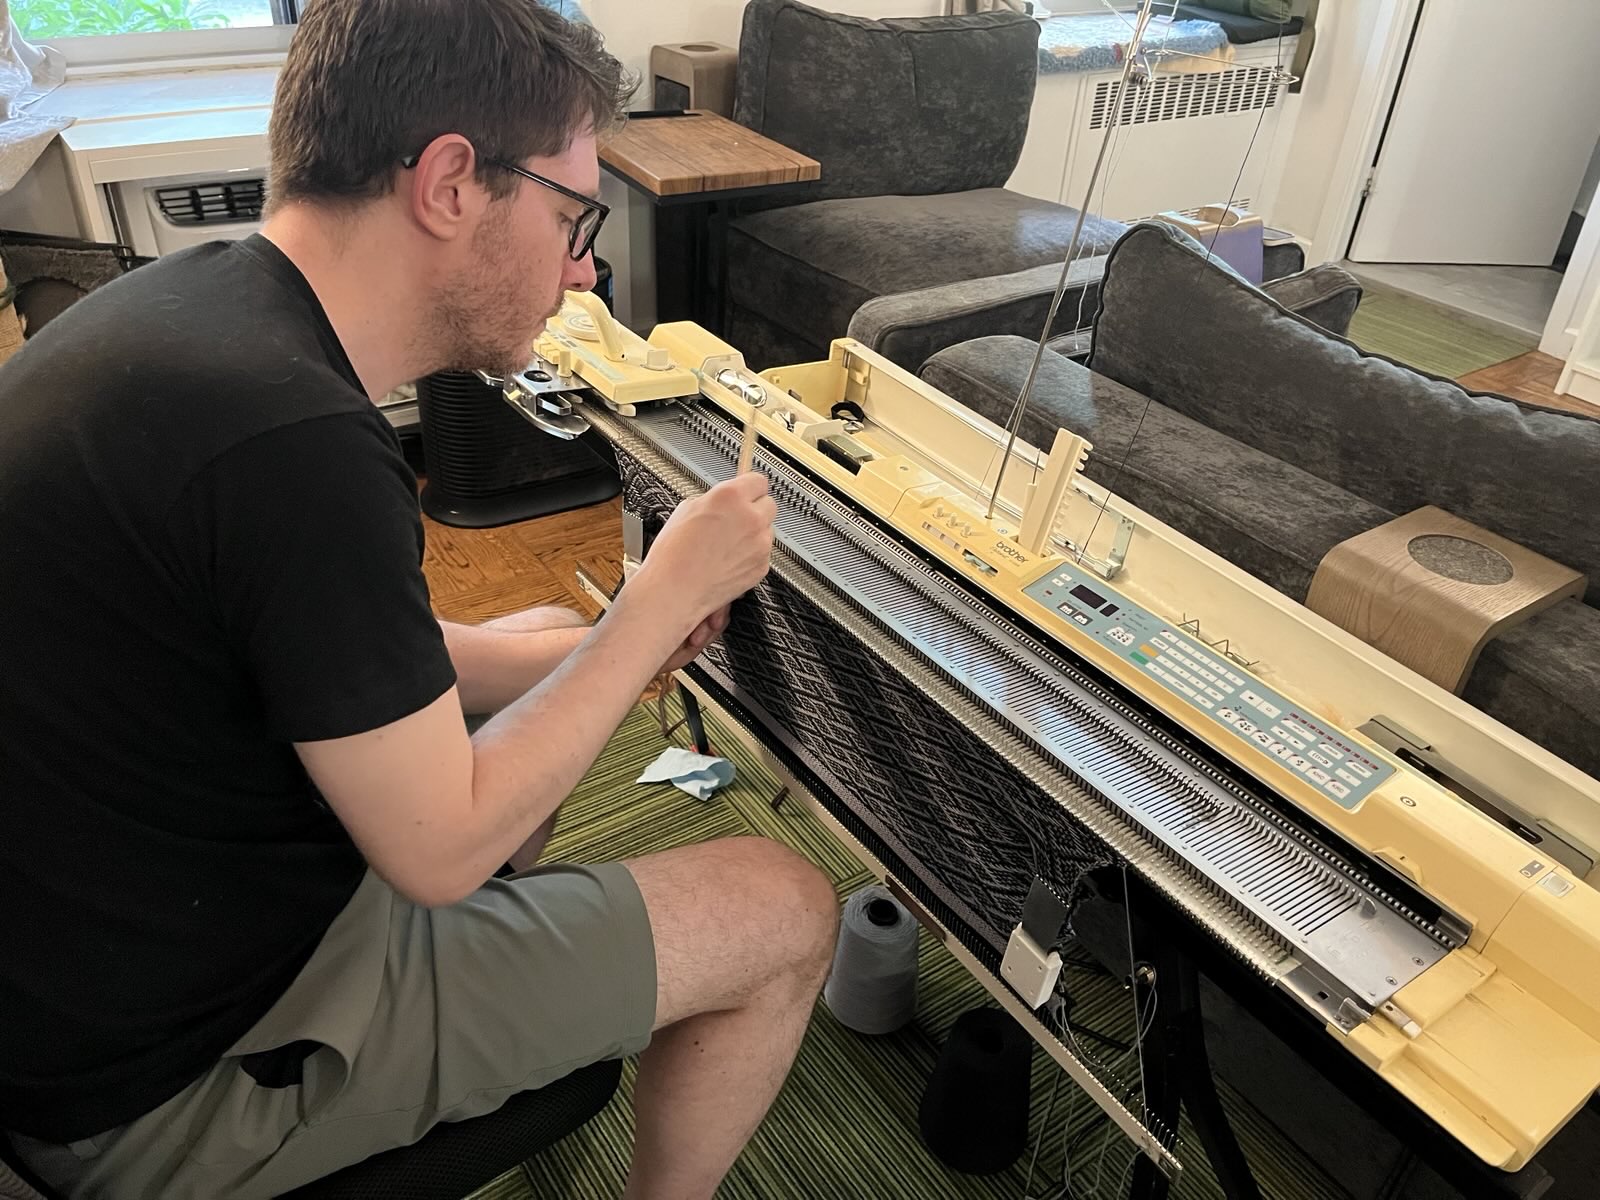
Finally, I pulled out the hat pattern I had worked out for Producer Amy a couple of weeks before, knit the hem, and engaged two-color Fair Isle pattern knitting...
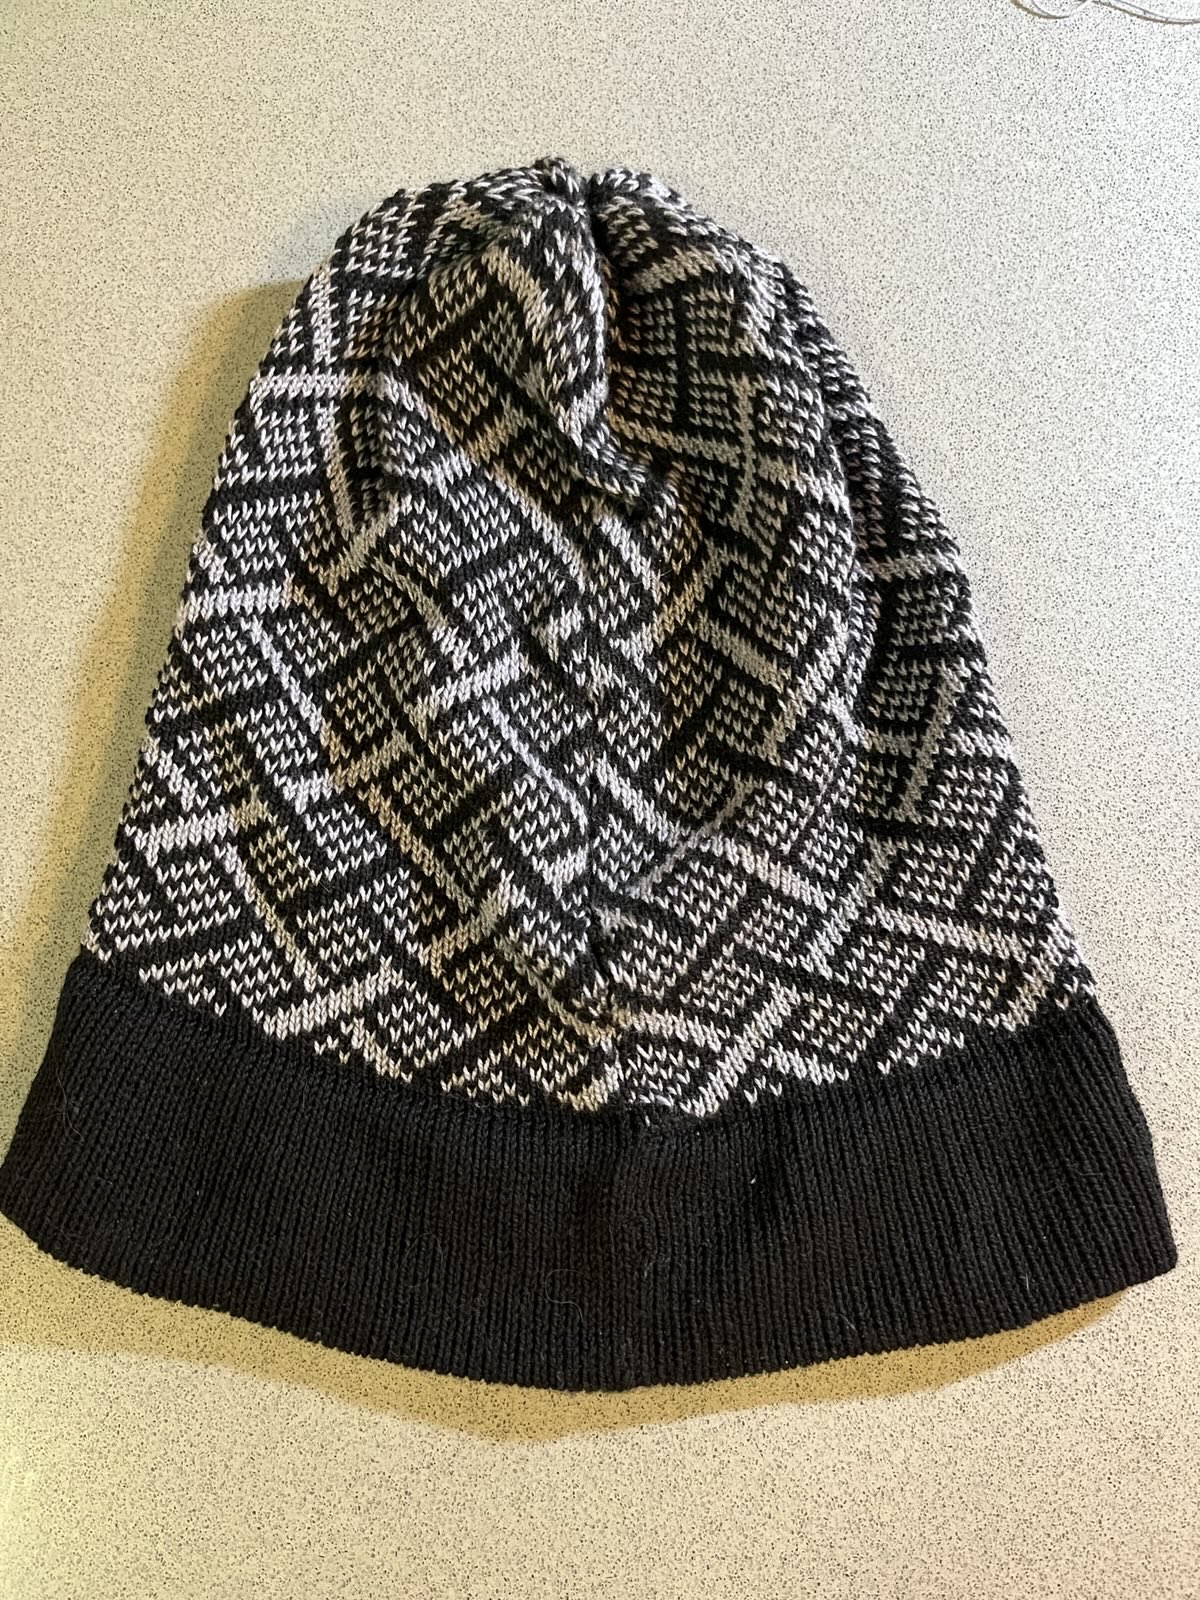
Me hunched over the machine, transfer tool in hand. A wide rectangle of black and gray knitting hangs from the needle bed.A black and gray beanie with a black brim. The main body of the hat has a clear pattern featuring a diagonal grid.
I think we're in business!!
Returning to my original "curriculum":
✅ Do some swatching
✅ Make a single-color hat
✅ Make a two-color hat with a Fair Isle pattern
🔜 AYAB time
Looks like I have "no excuses" left not to disassemble the on-board electronics to replace them with AYAB. 😳
In truth, I would like a bit more practice with Fair Isle using the "vanilla" machine. Specifically, the hat above is done with an overall repeating pattern, but there are different techniques if you want to do a "motif" that is constrained to just one part of the knitting. I want to make some swatches with isolated patterns and end-needle selection, practice managing floats, get used to the way pattern knitting row counts feel "off by one", see how Fair Isle affects the finished gauge of the fabric, etc.
Meanwhile, I've started a basic sweater with hilarious results. Stay tuned, like and subscribe, etc. etc. etc. 😎
One of my main goals with learning machine knitting is to replace the electronics on my Brother KH-930e with AYAB (All Yarns Are Beautiful) to create multi-color patterned knits of whatever sicko stuff comes to mind. But home knitting machines aren't a fire-and-forget type of machine. They require a lot of manual effort - from fine stitch work to good core strength - a lot of which requires practice for technique and feel.
First up: I ordered some pre-coned yarn (I'll cake later, when I know my machine works well), got the ol' machine out of storage and confirmed it all still moved and grooved, made some gauge swatches. And then... needed a project!
I decided to make a hat, following a combination of techniques from these KnitFactoryImpl videos:
That last one is for a very different machine from mine, but more clearly shows the steps and techniques.
Anyway, I made a hat!
Brother KH-930 knitting machine mounted to a gray countertop and surrounded by accessories. A large piece of knitting takes up almost the entire bed. The piece is in the process of being gathered up onto a long tail to be sewn up.
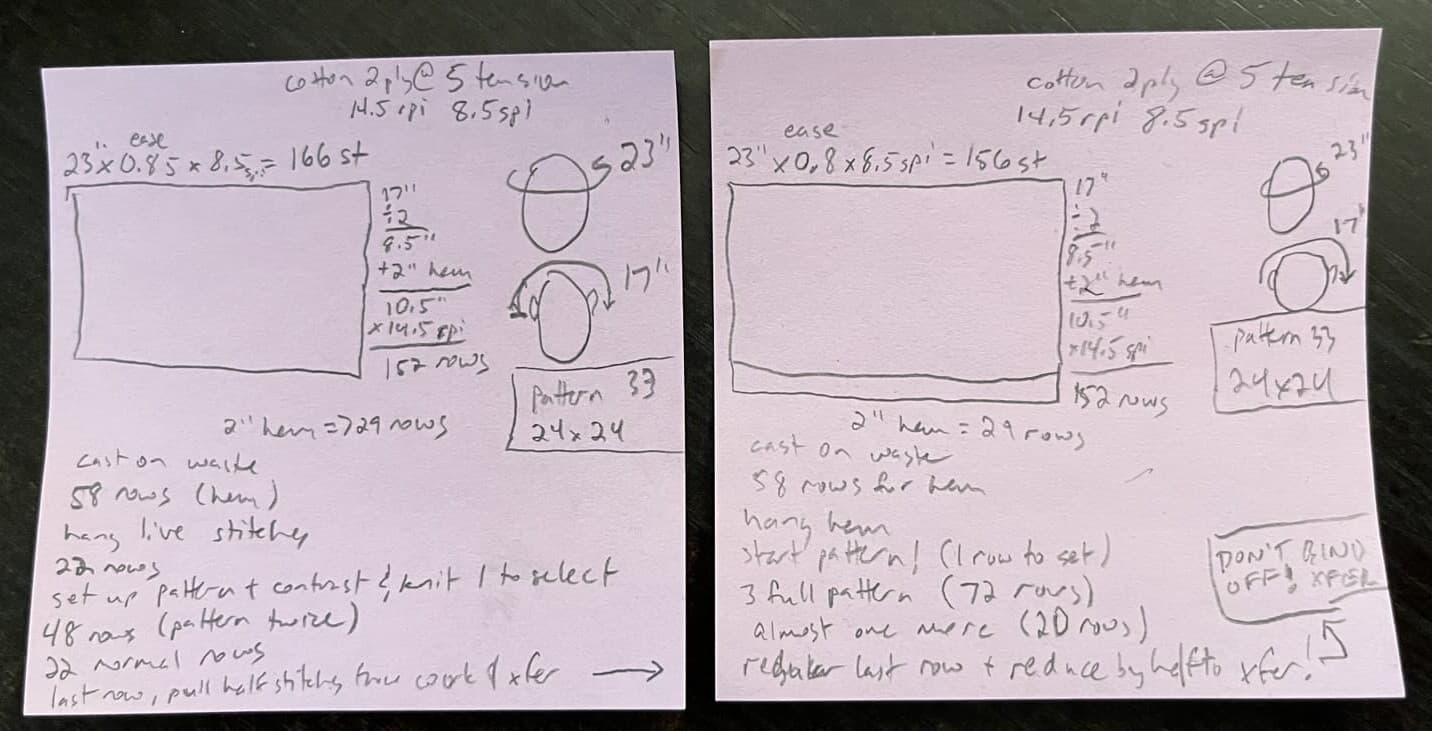
It was fun learning to do some of the pre-planning work, like measuring for a pattern, calculating stitches and rows, and writing out a pattern.
A hat starts off as a rectangle as wide as your head circumference and half as tall as the measurement over your head from the bottom of one ear to the other. The pattern on the left was calculated for a tighter tension and says 'NOPE' because it added up to 211 stitches, while the knitting machine only supports 200. The pattern on the right says 'Yep', along with some notes about the final fit.
When actually working the pattern on the machine, I also practiced hanging a hem, gathering up onto a long tail to make the pinched hat top, and mattress stitching the seam. Practices in patience, eyesight, and fine motor skills.
Me making a face while wearing my new pink hat, after make-up but before washing and blocking.Me with the hat pulled entirely over my face.Post-wash - it fits! Me in the pink hat, giving the camera a "would you look at that, it works" look.
I ran it through a load of laundry and it came out much better!
The fit seemed a little loose, but I feel like it sits on my head the way the Carson's sits on her head at the end of her video. I'm taking that as a success for process!
From here I thought a good level up would be to make a new hat with some design tweaks and, because I want to rush to get AYAB working some Fair Isle patterning using the Brother's built-in patterns. Consulting with Producer Amy, I decided to double the length of the brim without lengthening the hat overall. Amy picked a pattern, and I decided to try creating a stripe of it between the brim and the top of the hat.
On the left is the pattern I made from Amy's measurements that resulted in the hat below. On the right is the revised pattern for some time in the future, based on fit test and Amy's requests.
Something was not quite right with the knitting carriage. The "MC" button used for two-color Fair Isle knitting was stuck to the "T" button below it, which engages tuck stitching. The result is that the pattern came out all wrong and also this whole paragraph is foreshadowing for some later posts.
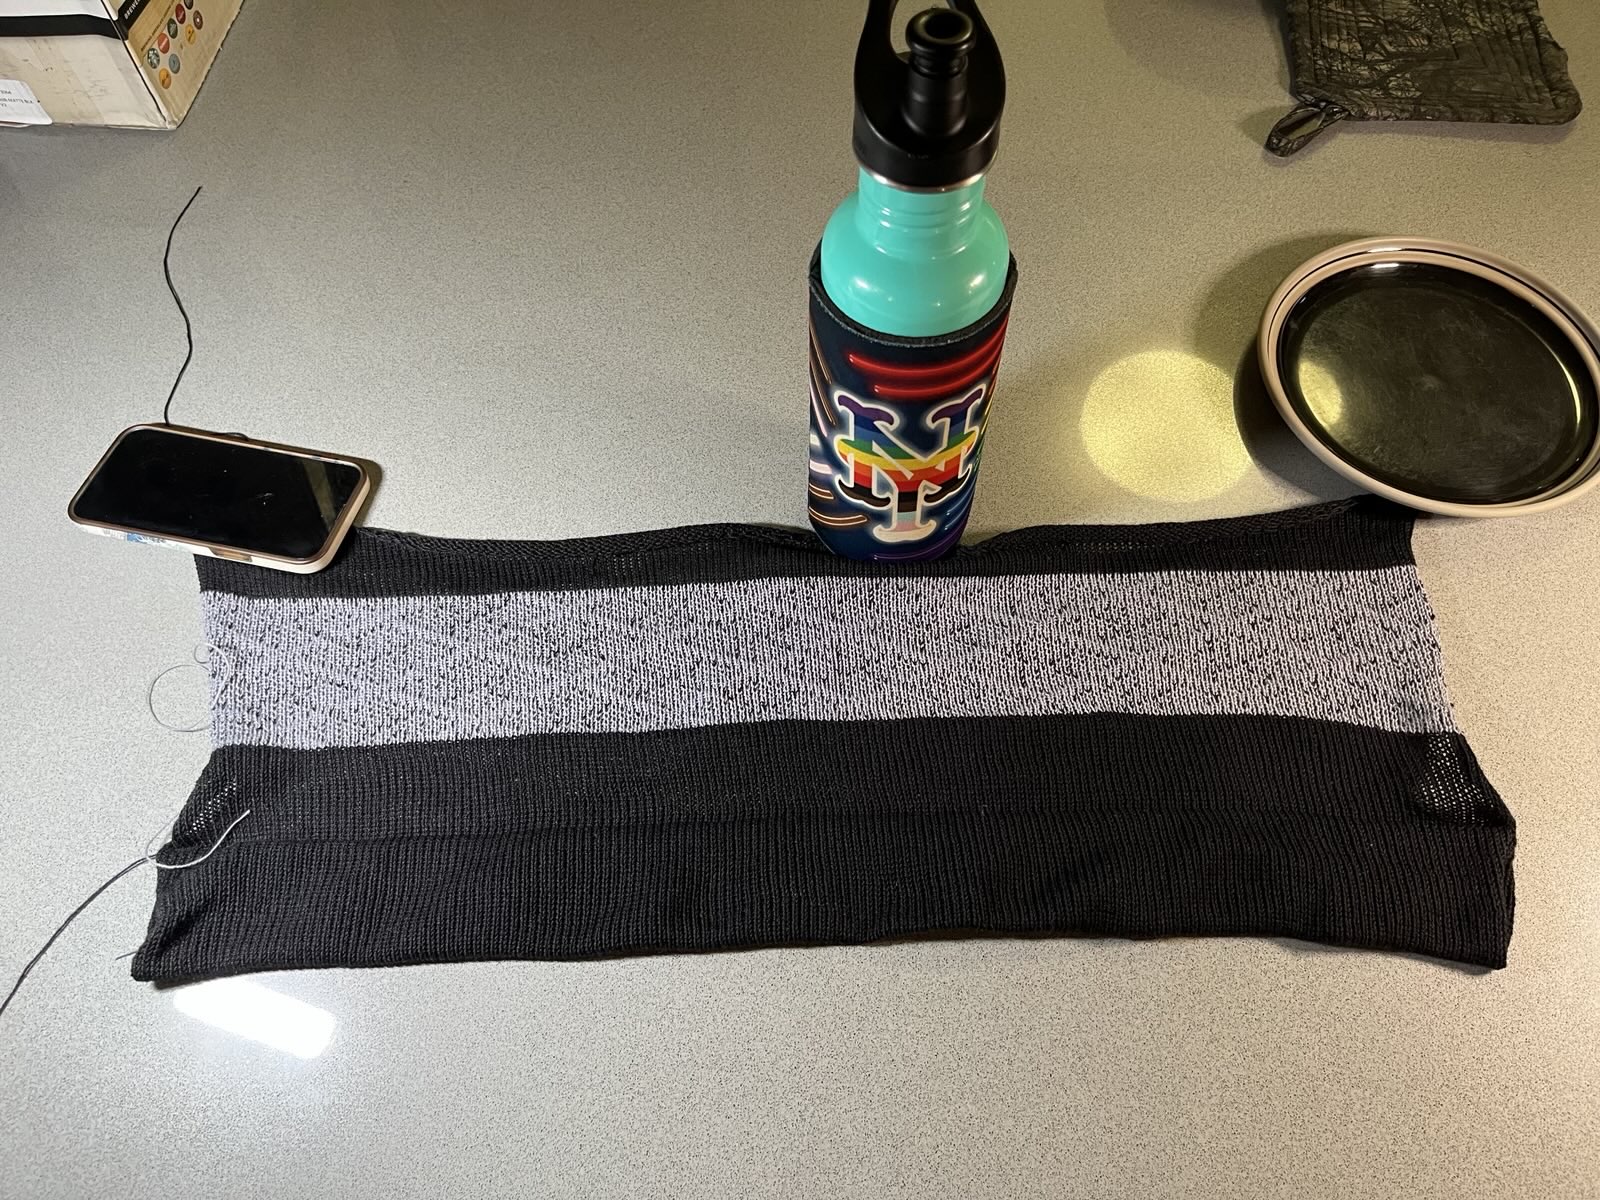
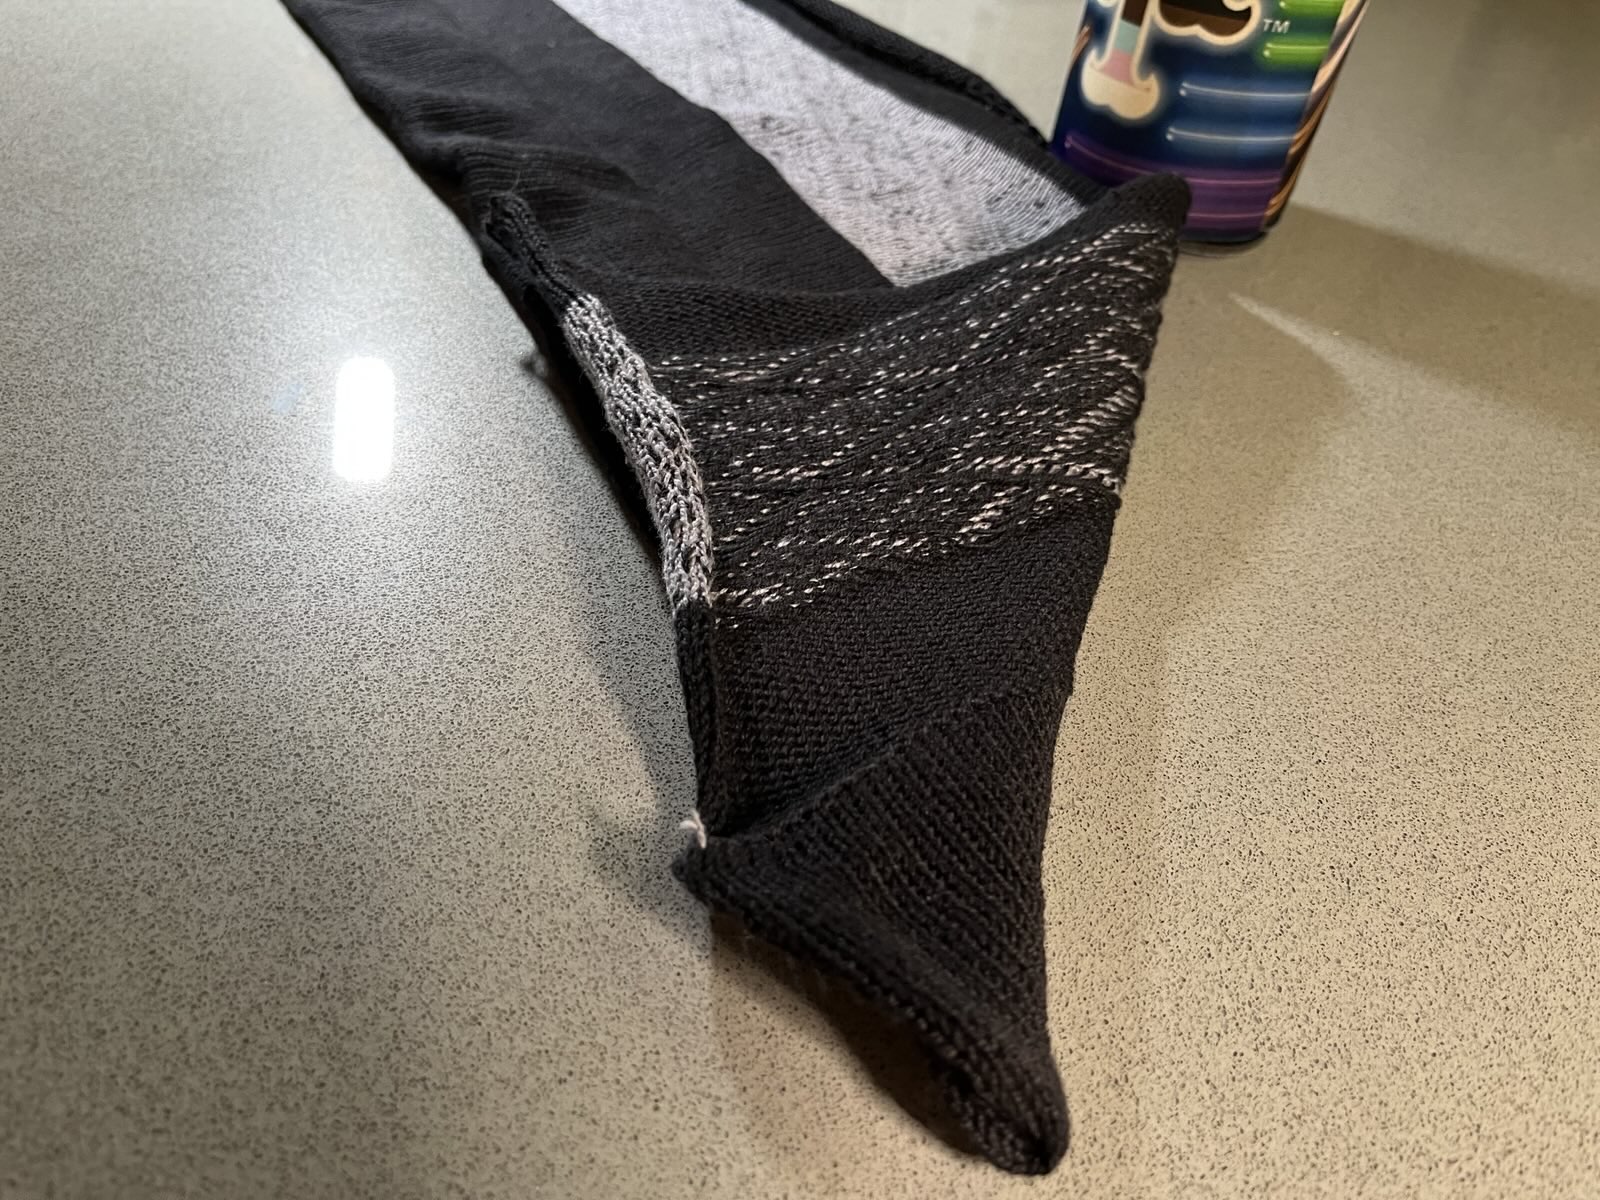
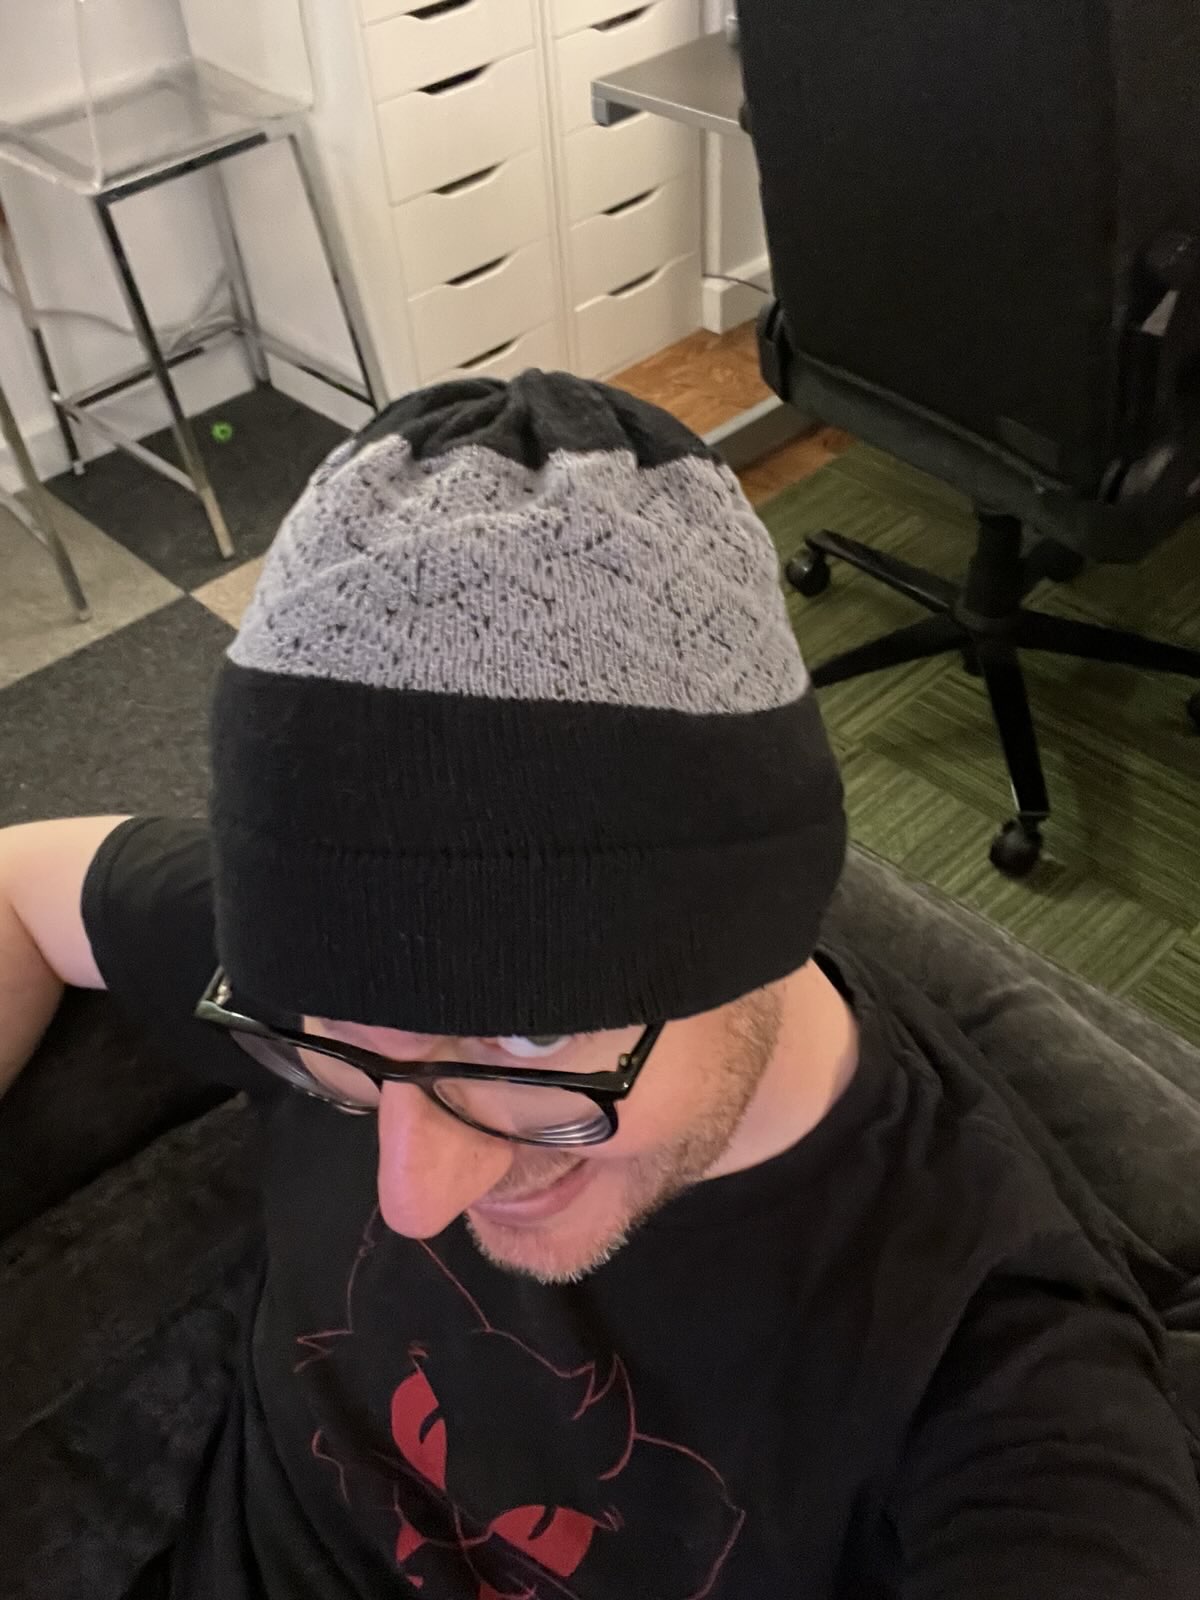
The hat rectangle fresh off the machine. It really wants to curl up so I'm using random objects from the kitchen counter to hold it flat.Flipped over part of the rectangle to show the reverse side of the pattern.Me wearing the finished and washed hat. The fit is good!
The pattern should be gray contrast on black to match the rest of the hat, but instead is mostly-gray with some black peeking through, as well as some interesting texturing from the machine treating the pattern as a tuck stitch.
Despite the patterning issue, I am pleased with how this came out. It's made of cotton rather than wool, so it stretches out a bit as it is worn, but it's still pretty cozy! Producer Amy requested that the next version have patterning from the brim to the top. I look forward to trying that again soon... when I am able! (That's still foreshadowing.)