Machine Knitting: The Secret Sweater
Hello from the future. This has been retro-posted. You're welcome!
Okay, this title is probably a bit misleading since, if you knew me around the time I was making it, I couldn't shut up about it.
After a couple of successful hats and a pair of failed socks, I was looking to check another major type of garment off my list. I wanted to have made a sweater.
The internet is, blessedly and cursedly (blursedly), haunted with sweater designs and patterns for machine knitters. I eagerly watched videos and scrolled instructions, letting my perfectionist brain absorb an understanding of the big choices to make, the major sections of the project, the techniques I'd need to skill-up in, and more. I even started to ponder what I might want in a sweater, despite thinking of myself as a person who wears hoodies, not sweaters.
All that ruminating came to an end when I came upon this bonkers deal on Craftsy-dot-com: Renée Callahan's Machine Knitting: Sweater Basics (DVD + Streaming), a $49.99 value, discounted 92% to $4 USD. An entire how-to videos series (available to stream whenever I want), with worksheets, and they mailed me a DVD, for way less than a recurring Craftsy membership, or even "buying" just the streaming content.
In fact, most of Craftsy's DVD courses are deeply discounted in this way. I don't know why they do this! Possibly they're losing money warehousing all the DVDs?
Think of the savings!
How is sweater formed?
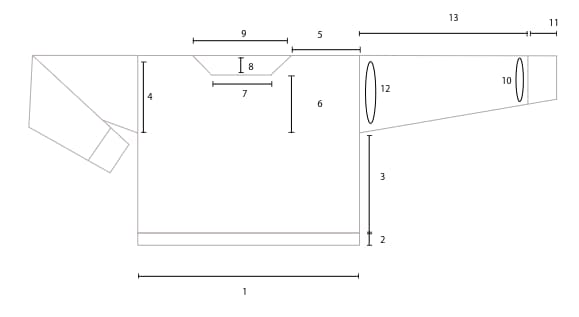
Renée's design for this class is a drop shoulder jumper, featuring front and back body panels (knit from the bottom up, with hem options), sleeves with simple increases (knit from the wrist up, also with hem options), and a neckline with several options (knit by re-hanging the body panels to the machine).
Renée breaks the class up into six sessions: understanding your machine and choosing yarn, basics of casting on and binding off and making a gauge swatch, using your gauge and body measurements to customize the pattern into specific instructions with stitch and row counts, details on the back panel, the front panel, a sleeve, and sewing it all up.
I was familiar with my machine and with making and blocking a gauge swatch, so the first really meaty part of the course for me was the worksheet. Renée actually provides several worksheets, each the same sweater in a different size. I printed out the design that was closest to my chest measurement without going under, got out my computer's calculator app, and worked through the calculations along with the video.
When shaping a garment on a knitting machine, it's pretty common to make, approximately, trapezoids. You start with a certain number of stitches, and end with a different number of stitches (more, or fewer, depending on what you're shaping). This is often represented with instructions like "decrease one stitch each side every 2 rows until 162 stitches remain". I find these reasonable, conceptually, but I prefer turn-by-turn directions. I rely heavily on my machine's row counter to know where I am in a pattern and where I should be going, so I embellished my worksheet with row numbers for each increase, decrease, etc.
On the importance of checking your measurements
Keen-eyed readers may have raised an eyebrow earlier when I mentioned that I selected "the design that was closest to my chest measurement without going under" and, if you are among them, congratulations your sweater would have turned out better than mine.
What I did not do, but should have, was checked the other measurements of the sweater, either against my person or against an existing garment.
I ignored a strong hint from the relative lengths in the diagram in the sweater. I also ignored a strong hint from Renée herself, when she said "if you want to make a tunic-length sweater, add a few inches to the body."
"Wow," I thought, "tunic-length would be pretty long."

Make the sweater already
Okay, okay!
I made the back panel according to the pattern instructions. Which wasn't hard, because it's just a rectangle in this design. I did think something was weird about the proportions, but I distinctly remember thinking "wow, I guess that will shape up when I block the sweater."
Then I worked the front panel. It's mostly a rectangle, with some shaping for the neckline which involved putting some stitches in hold, some decreases, and casting everything off on waste yarn.
Finally, I could hold the two pieces together and get a sense of the final shape!
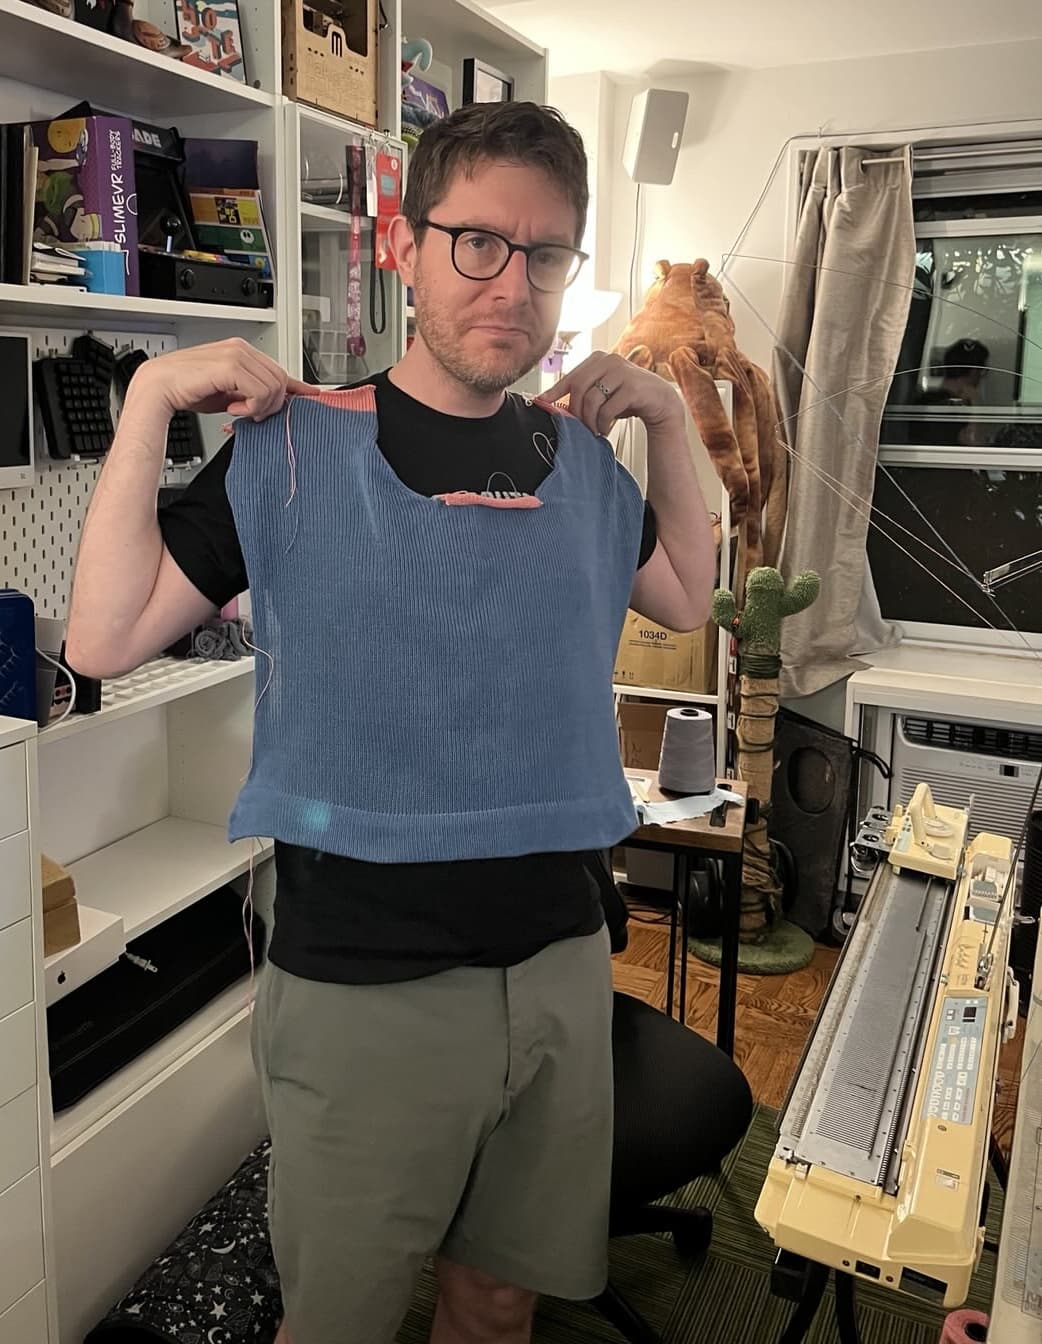
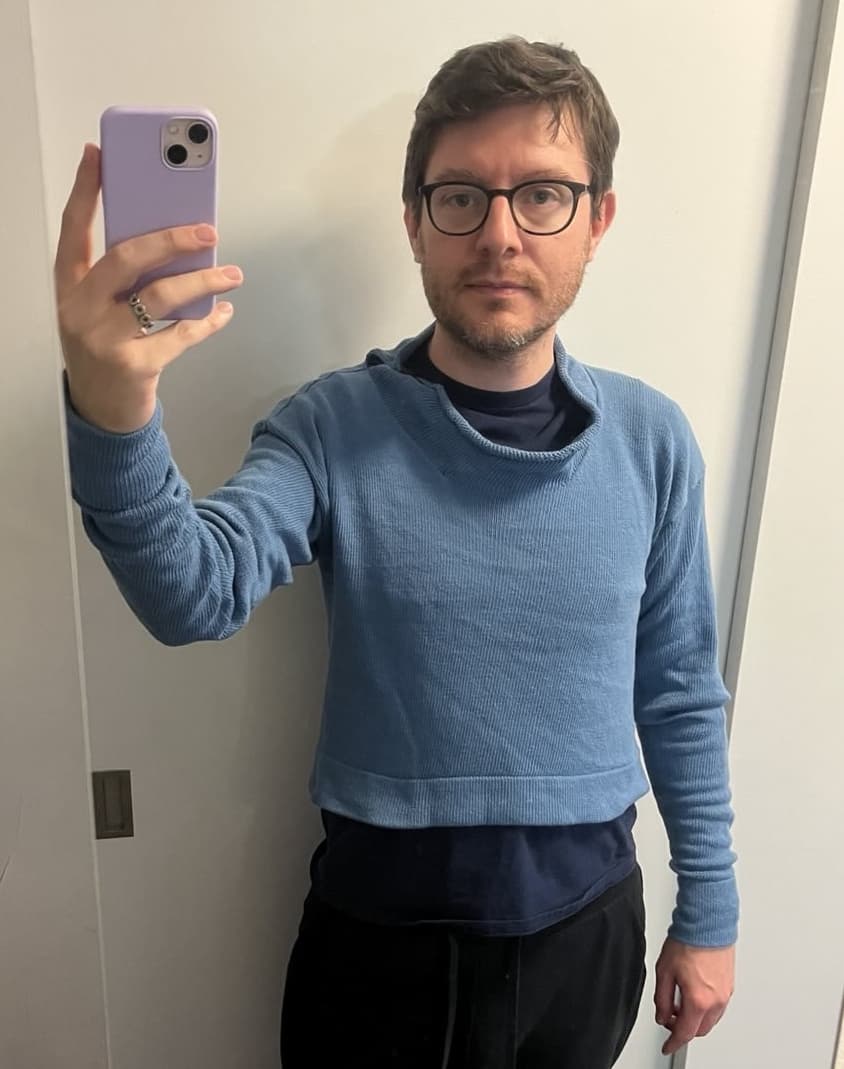
Okay, so it's a cropped length sweater. It'll be, uh, the first of many cropped-length things I own, maybe. I'm a person who wears cropped toppes, now! That's the ticket.
Anyway, I made my next bad decision by making the neckline only about half as long as the pattern called for.
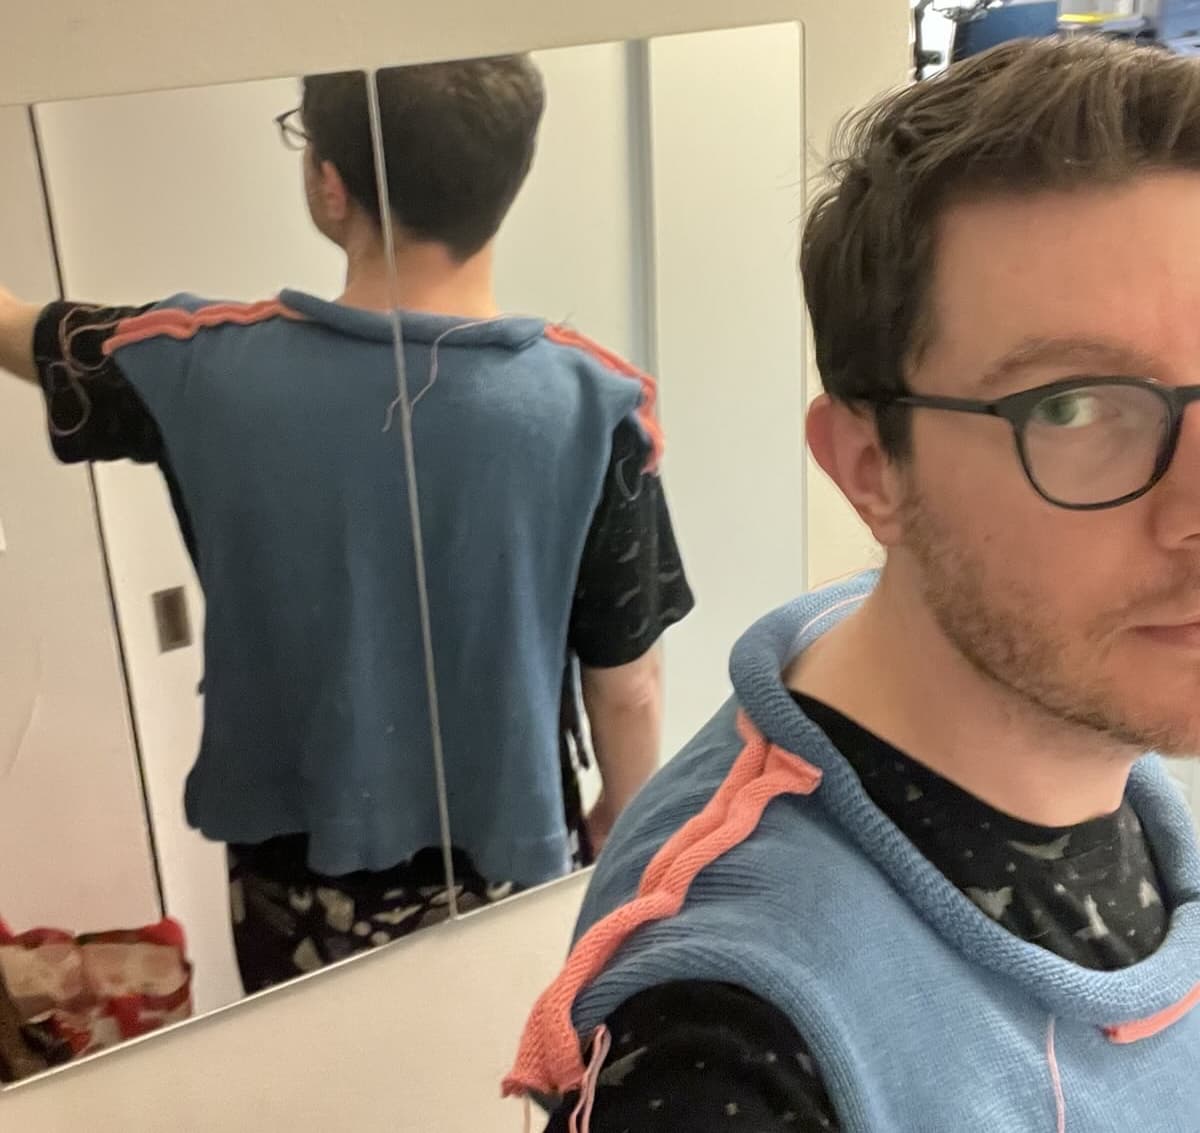
The finished collar probably won't roll like this. 😅
With two major regrets committed to cotton, I decided I should actually measure for the sleeves, so I didn't end up with a sweater that only came down to my forearms, or with cuffs too narrow for my hands. This was a good idea and even almost worked out correctly!
The sleeves required the most manual work per row, with several increases and decreases. I got through this mostly successfully, with just one eyelet left where I failed to pick up a purl bump to fill a gap during an increase. I consider that to be pretty good.
With the pieces all knit, I promptly put the project in a box because I was afraid to finish it.
Some Time Later...
I wanted to be a person who had finished a sweater, dang it, so it was time to finish it.
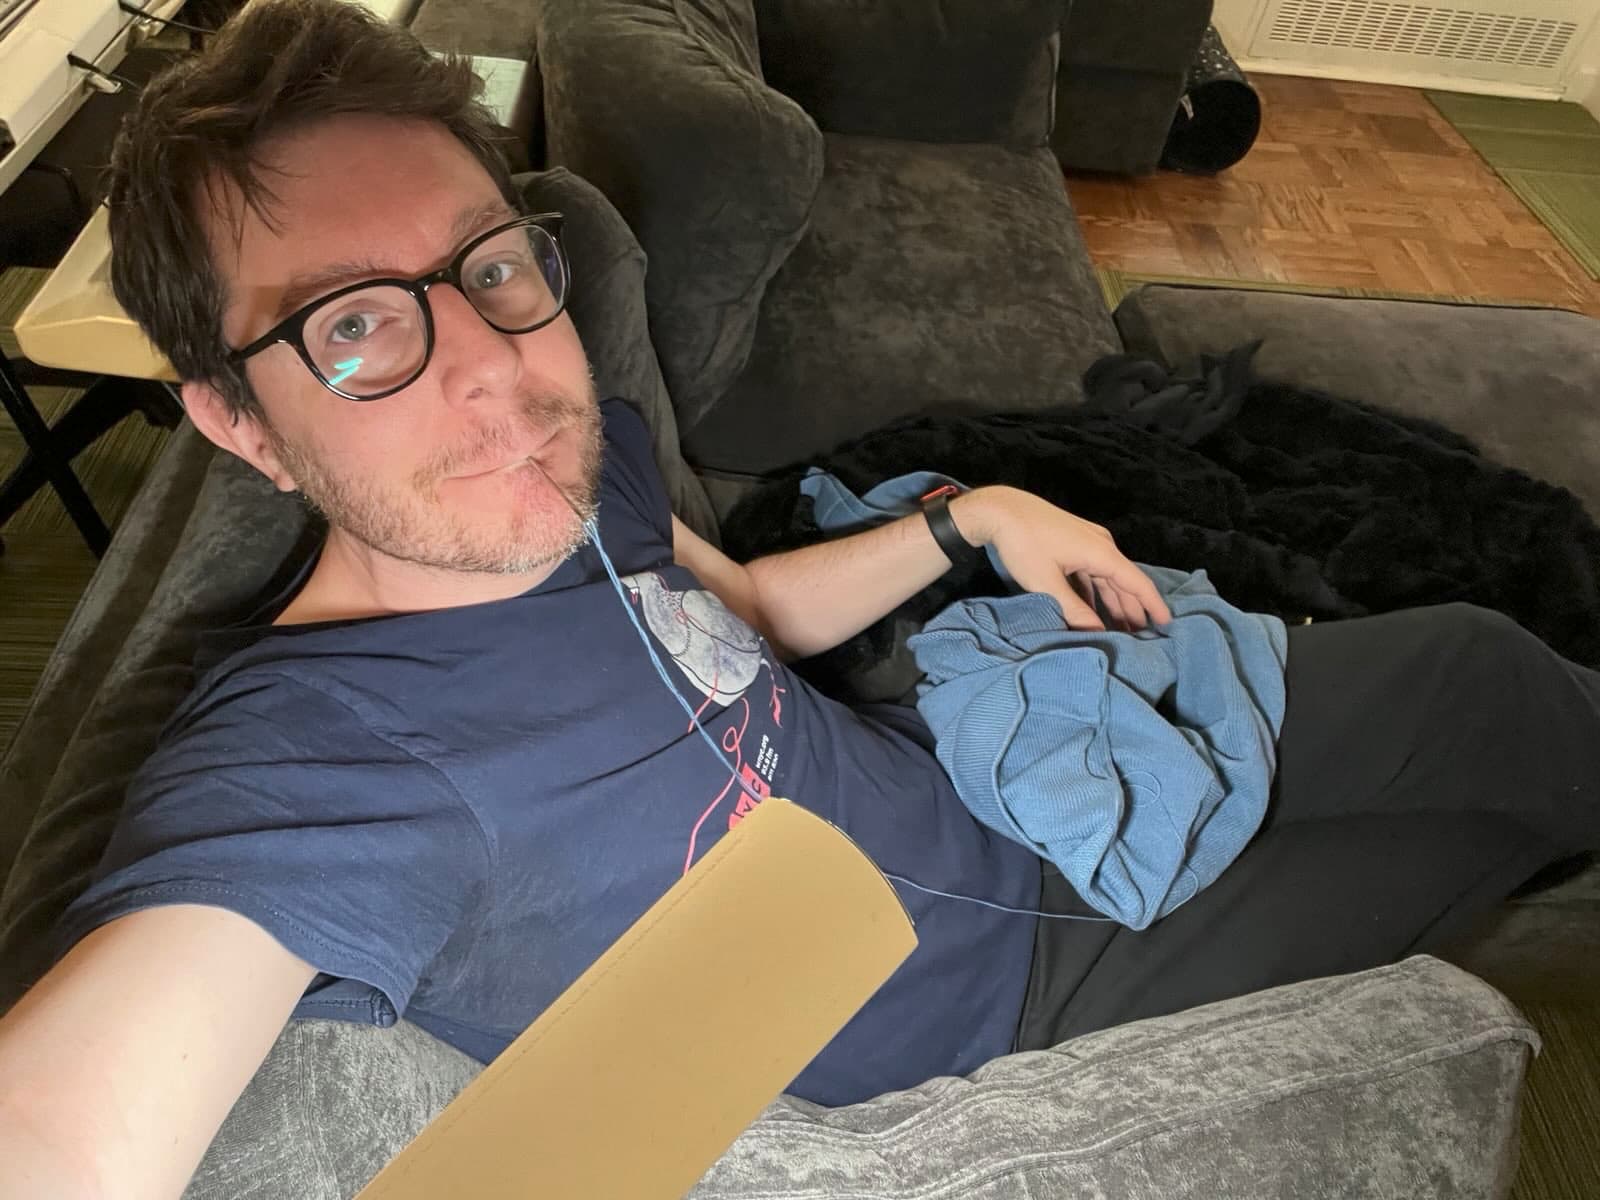
Stitching up all the seams was really time consuming, wowee wow. It was made a little more difficult, I think, because I made the stitches really tight. I wanted the fabric to be nice and wooly and hide the stitches, but, it's cotton. You can definitely see the stitches and it was hard to work with! I was so concerned with pulling everything tight that I popped the seaming yarn a couple of times. Once during the seaming-up process, and once later when trying it on.
I got a lot of practice with mattress stitching. And some with mending the popped seam stitches! But the thing I practiced the most? Was my patience. 💪
Here is is before washing and blocking. But it's a sweater!
is this fashion? 💁🏻🦋
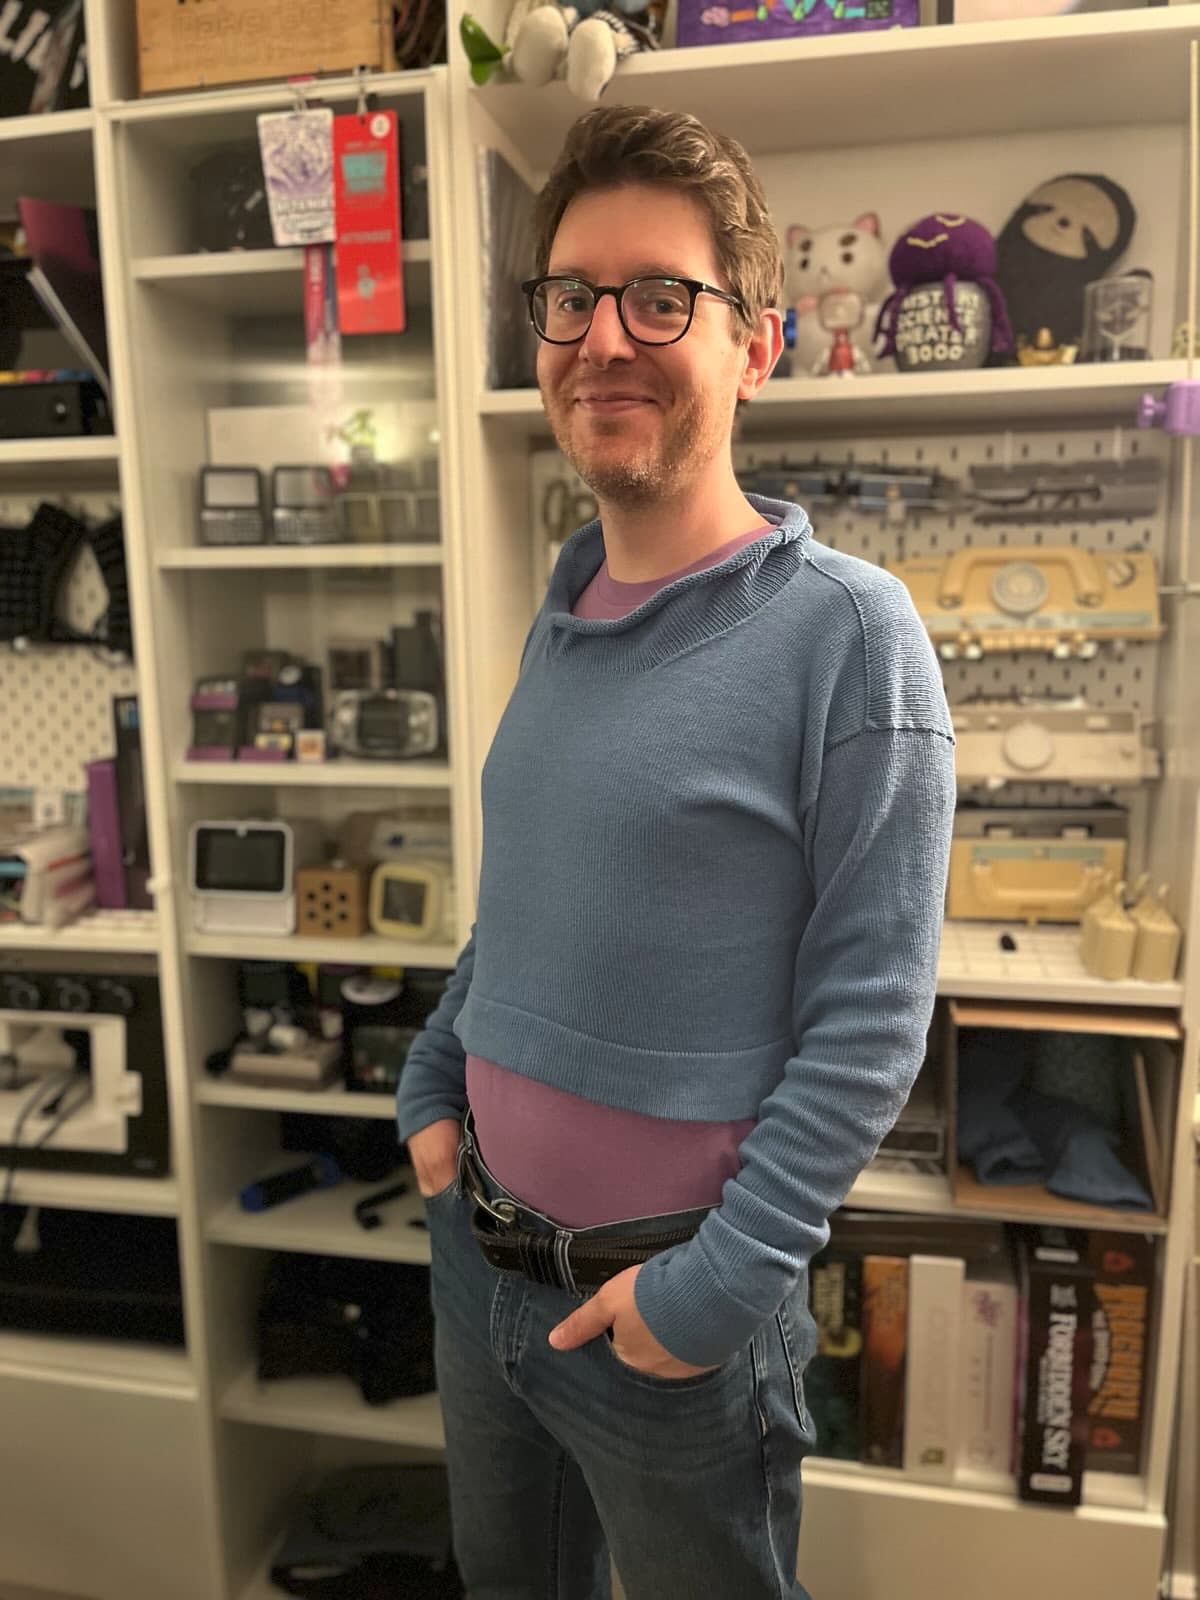
Here it is after washing. And some coming-to-terms. You can actually see in this photo that I did the top seam of a shoulder inside-out. And that the sleeves are too long because I forgot that the design is drop-sleeve and measured from the top of my shoulder. And man, that collar is weird.
I am, of course, fixated on the mistakes in this sweater. We learn from mistakes! But I feel pretty good being a person who has made a sweater. It's actually pretty cozy, and the sleeve length is just about perfect if I flip the cuff inside out.
Thanks for reading!
It's really rewarding taking on projects, learning a bunch, making mistakes, but in the end having a thing that I made. I am glad to be able to share these things here.
Will this sweater return? Well, I don't think I'll be wearing it out and about, but we'll see. For now, producer Amy has adopted it as an occasional around-the-house cosy layer. Which is a lovely result!
Okay, that's it for now. See you next time!