Machine Knittin': Some mittens
I took another (unsuccessful) run at the previously-failed neckline for the knitalong sweater this weekend. I have learned that I have much to learn about taking off ribbing with circular knitting but also I don't want to talk about it.
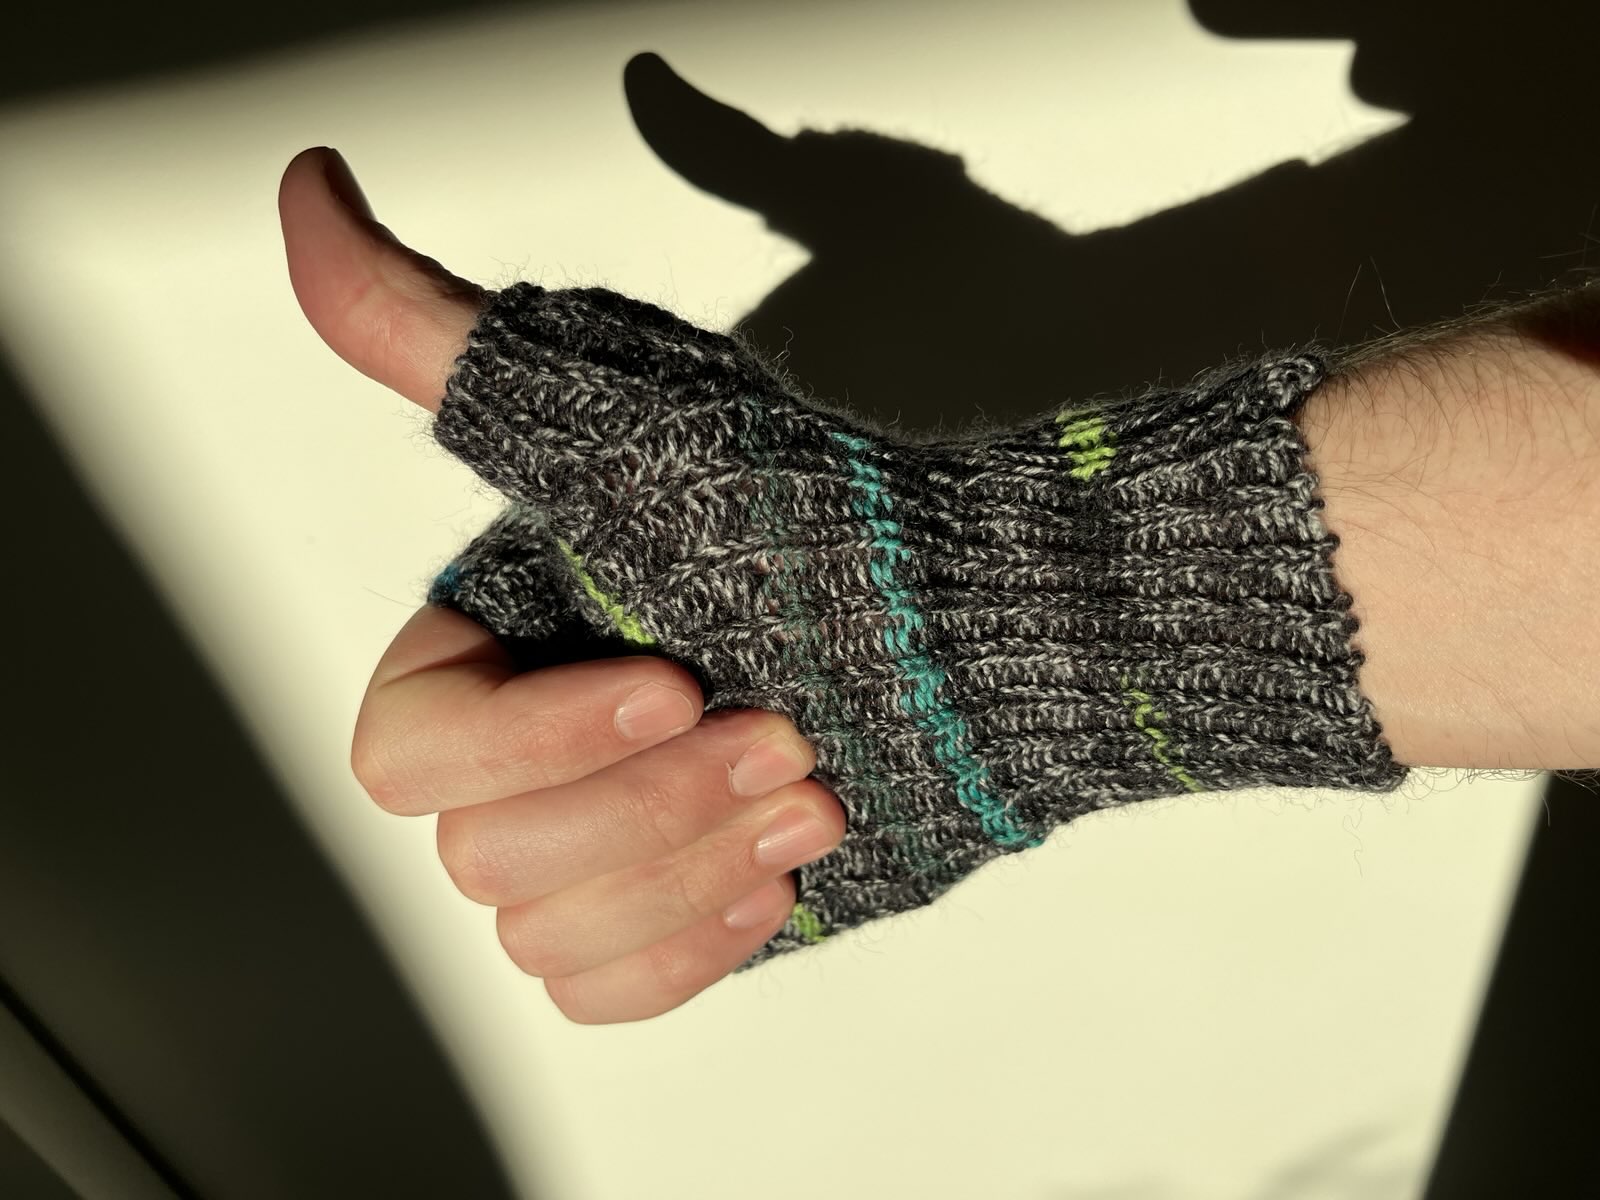
Instead let's talk about these!

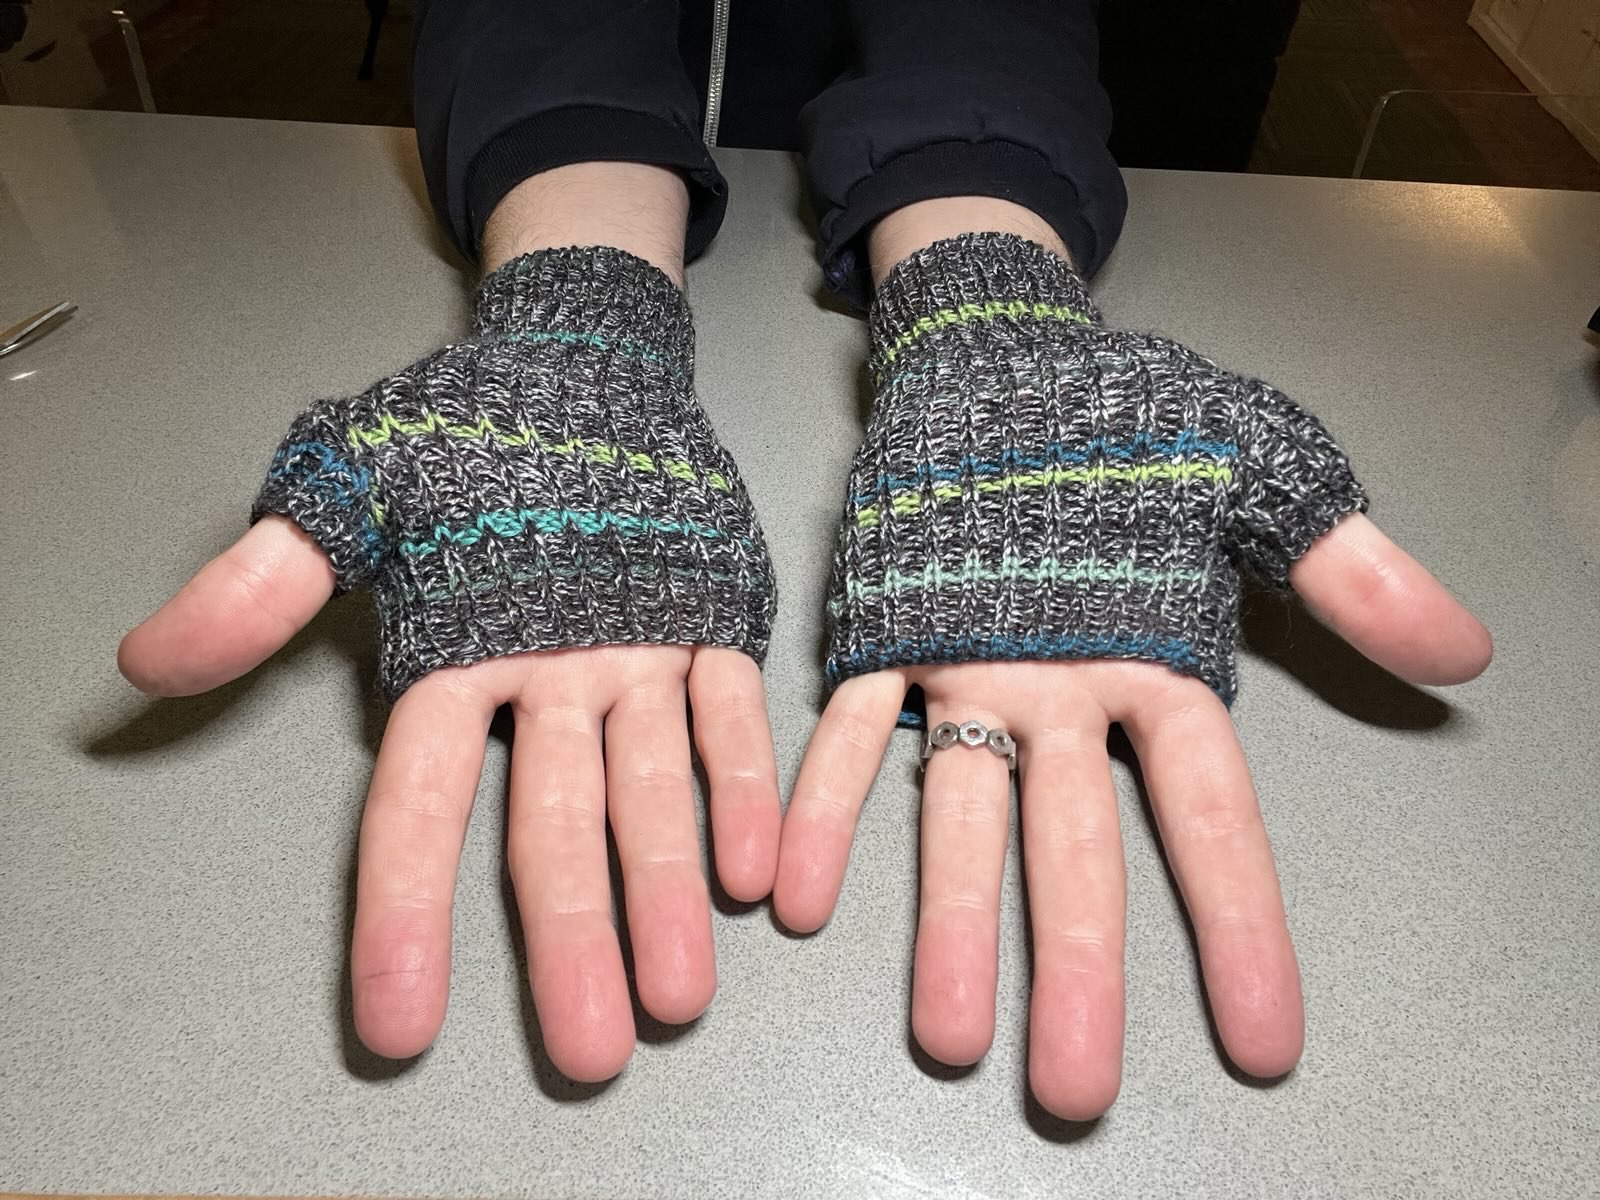
I made these based on the Fingerless Mitt to Knit by Diana Sullivan (from Austin, TX). Diana doesn't give gauge or final measurements, or discuss blocking, so I made them almost exactly according to pattern.
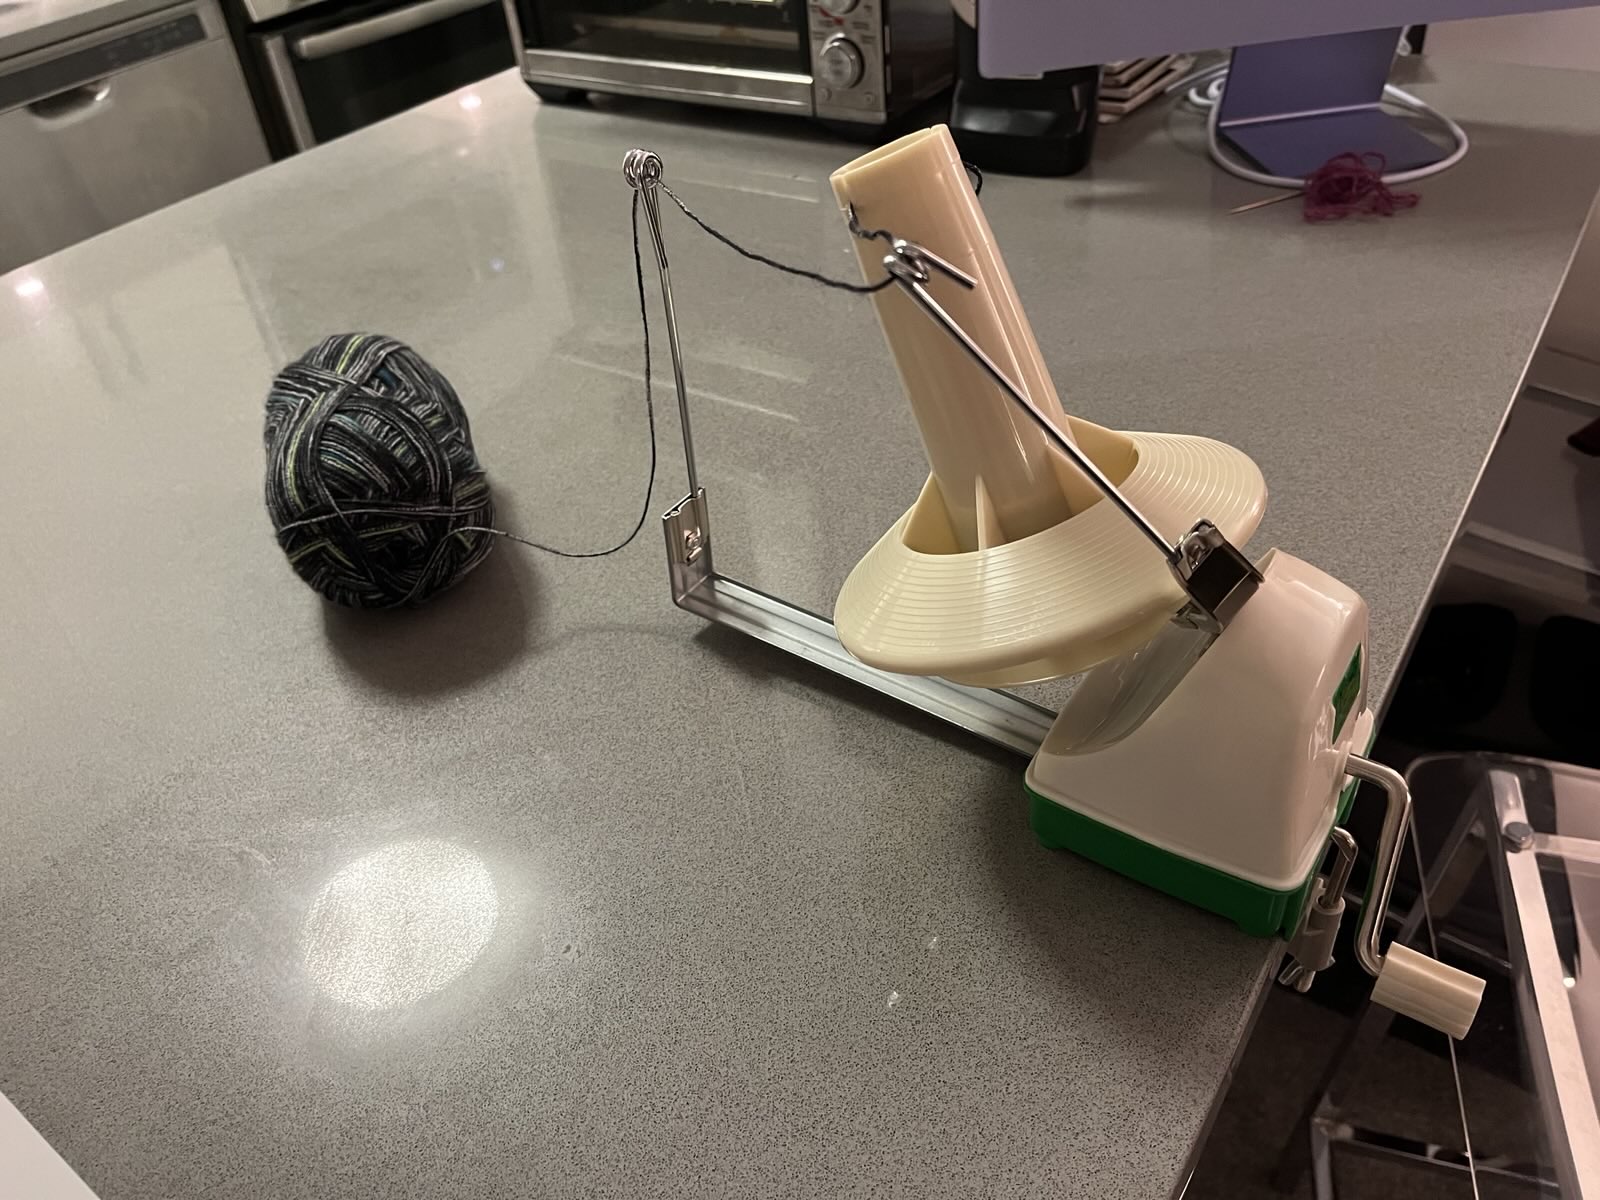
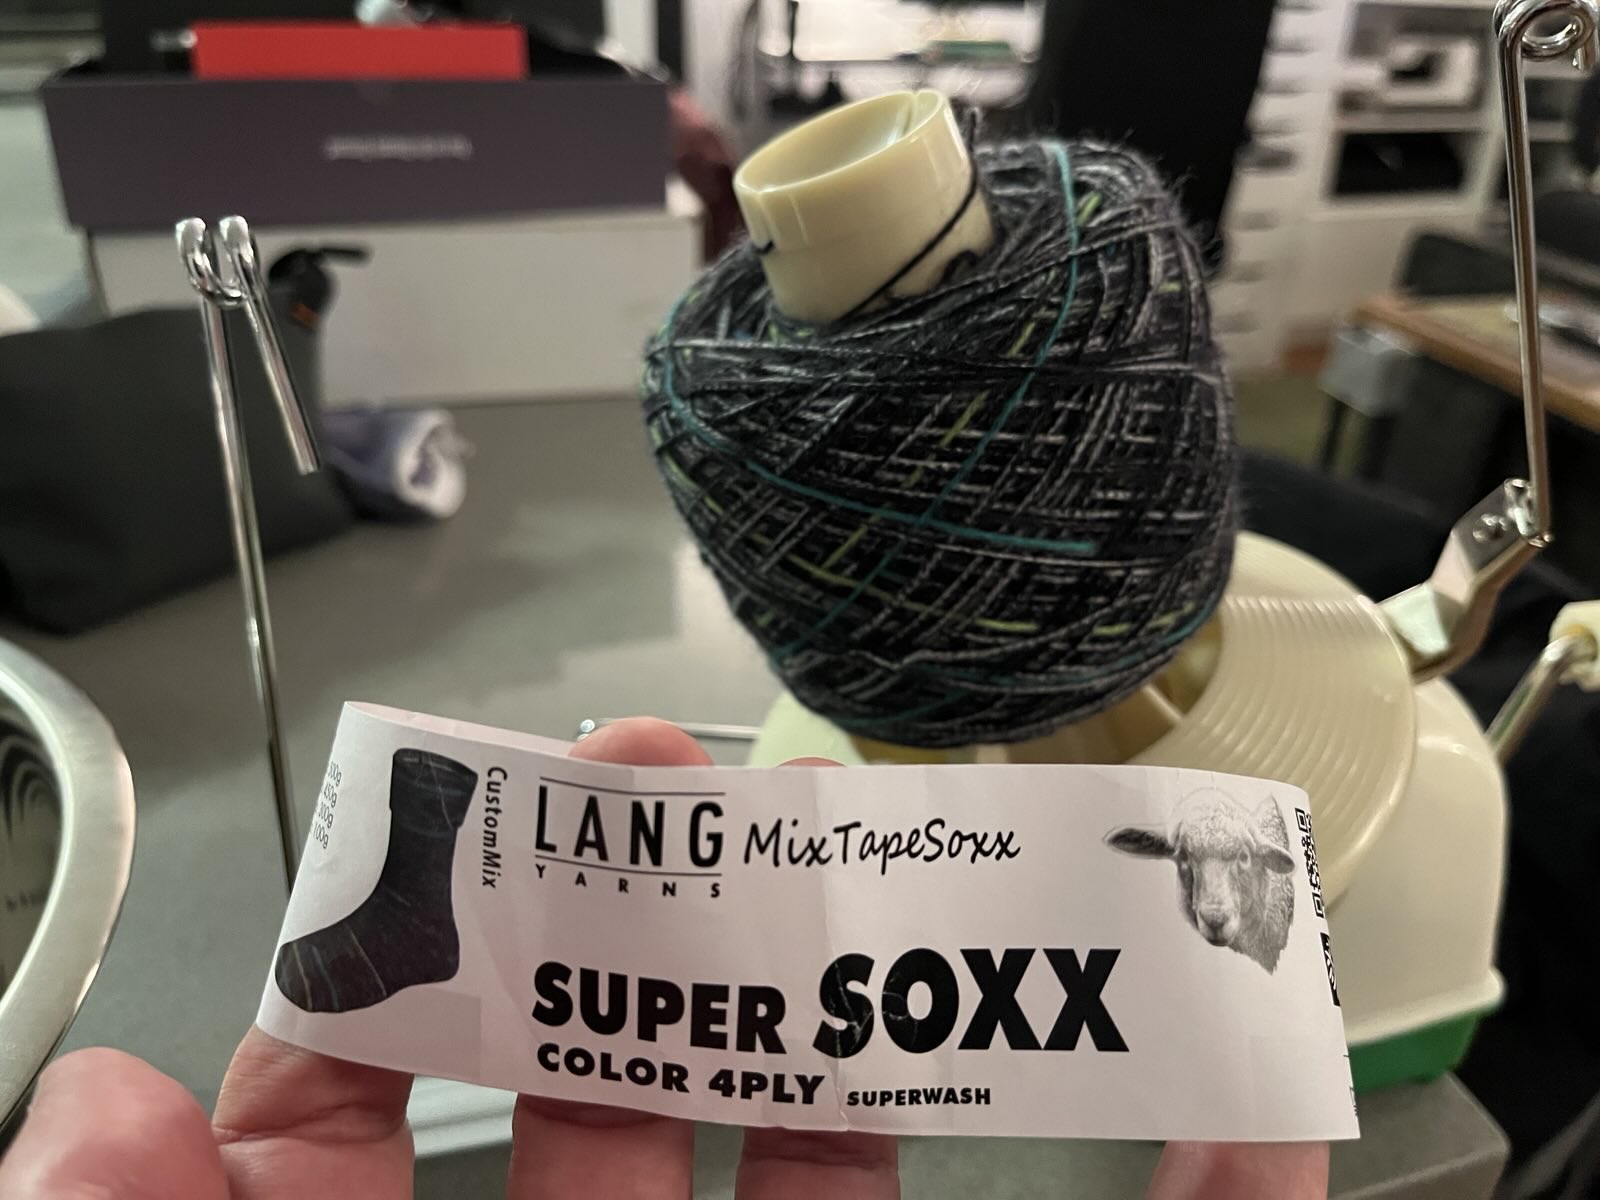
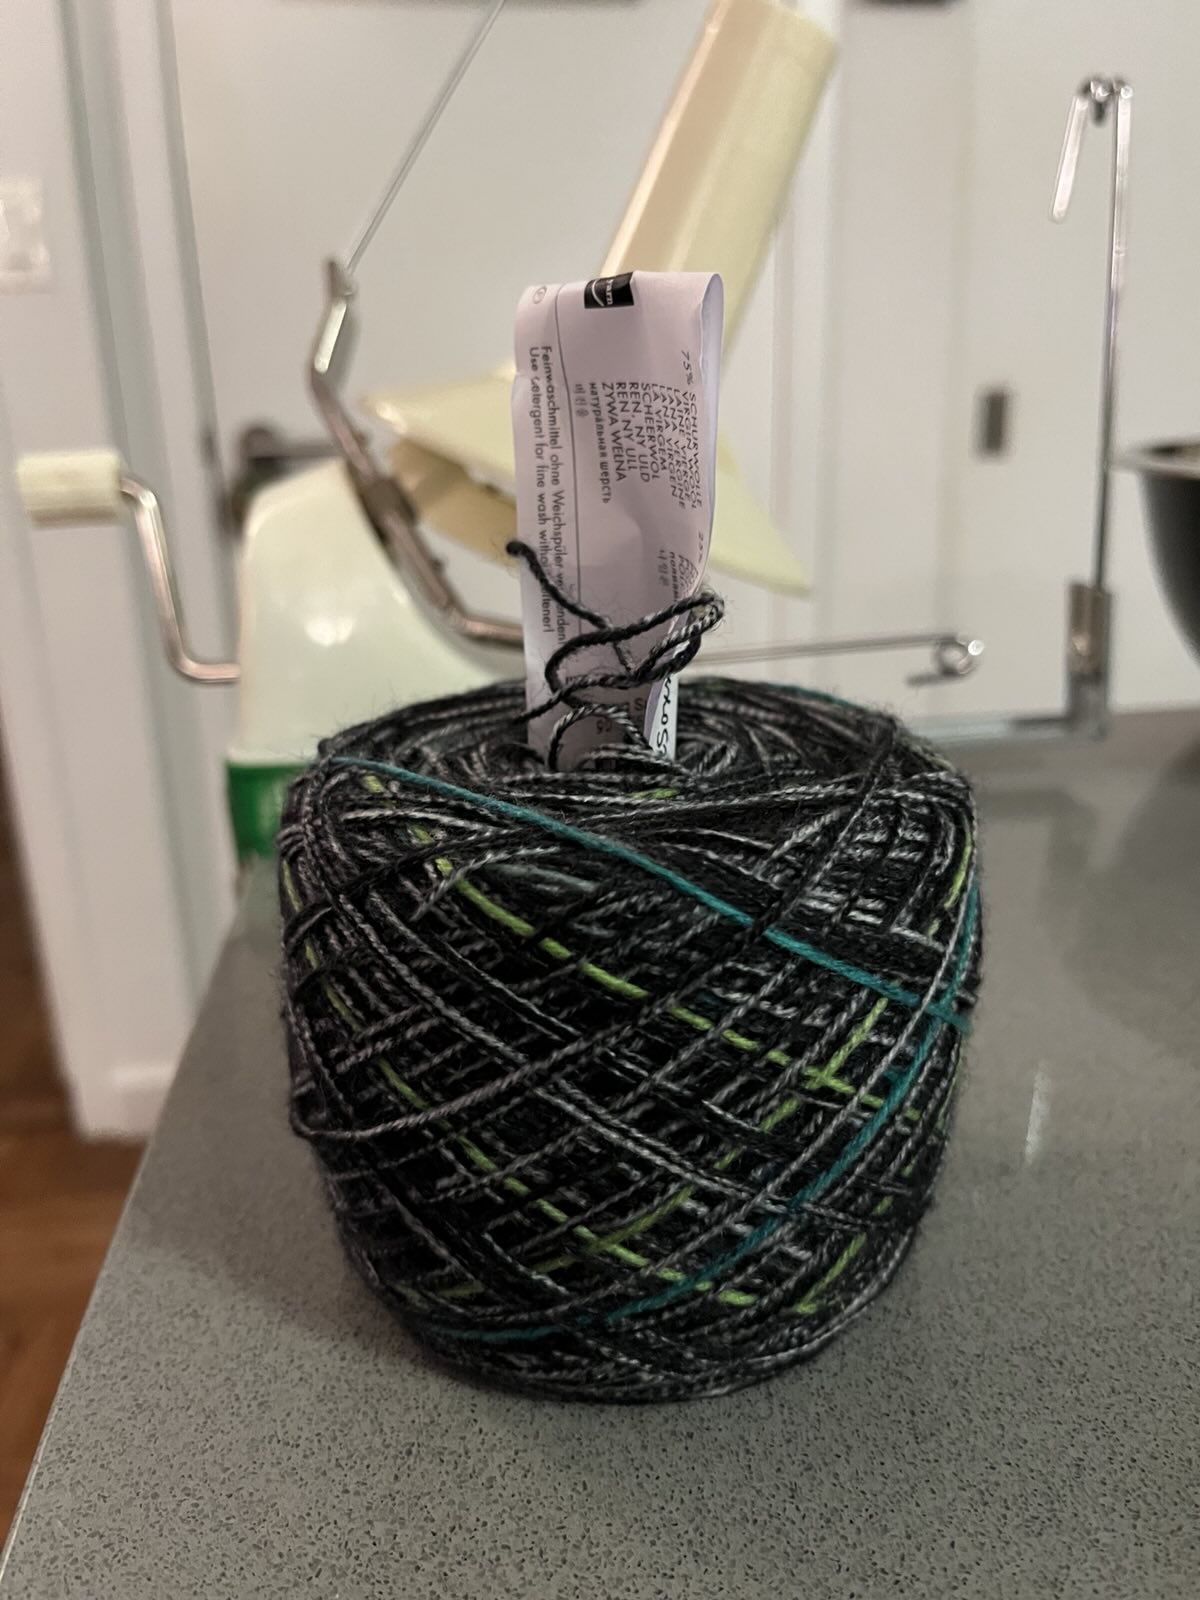
Diana calls for superwash sock yarn, so I picked up a skein from Knitty City while I was out on some errands. I finally got to try out my fancy new yarn winder, which was pretty fun.
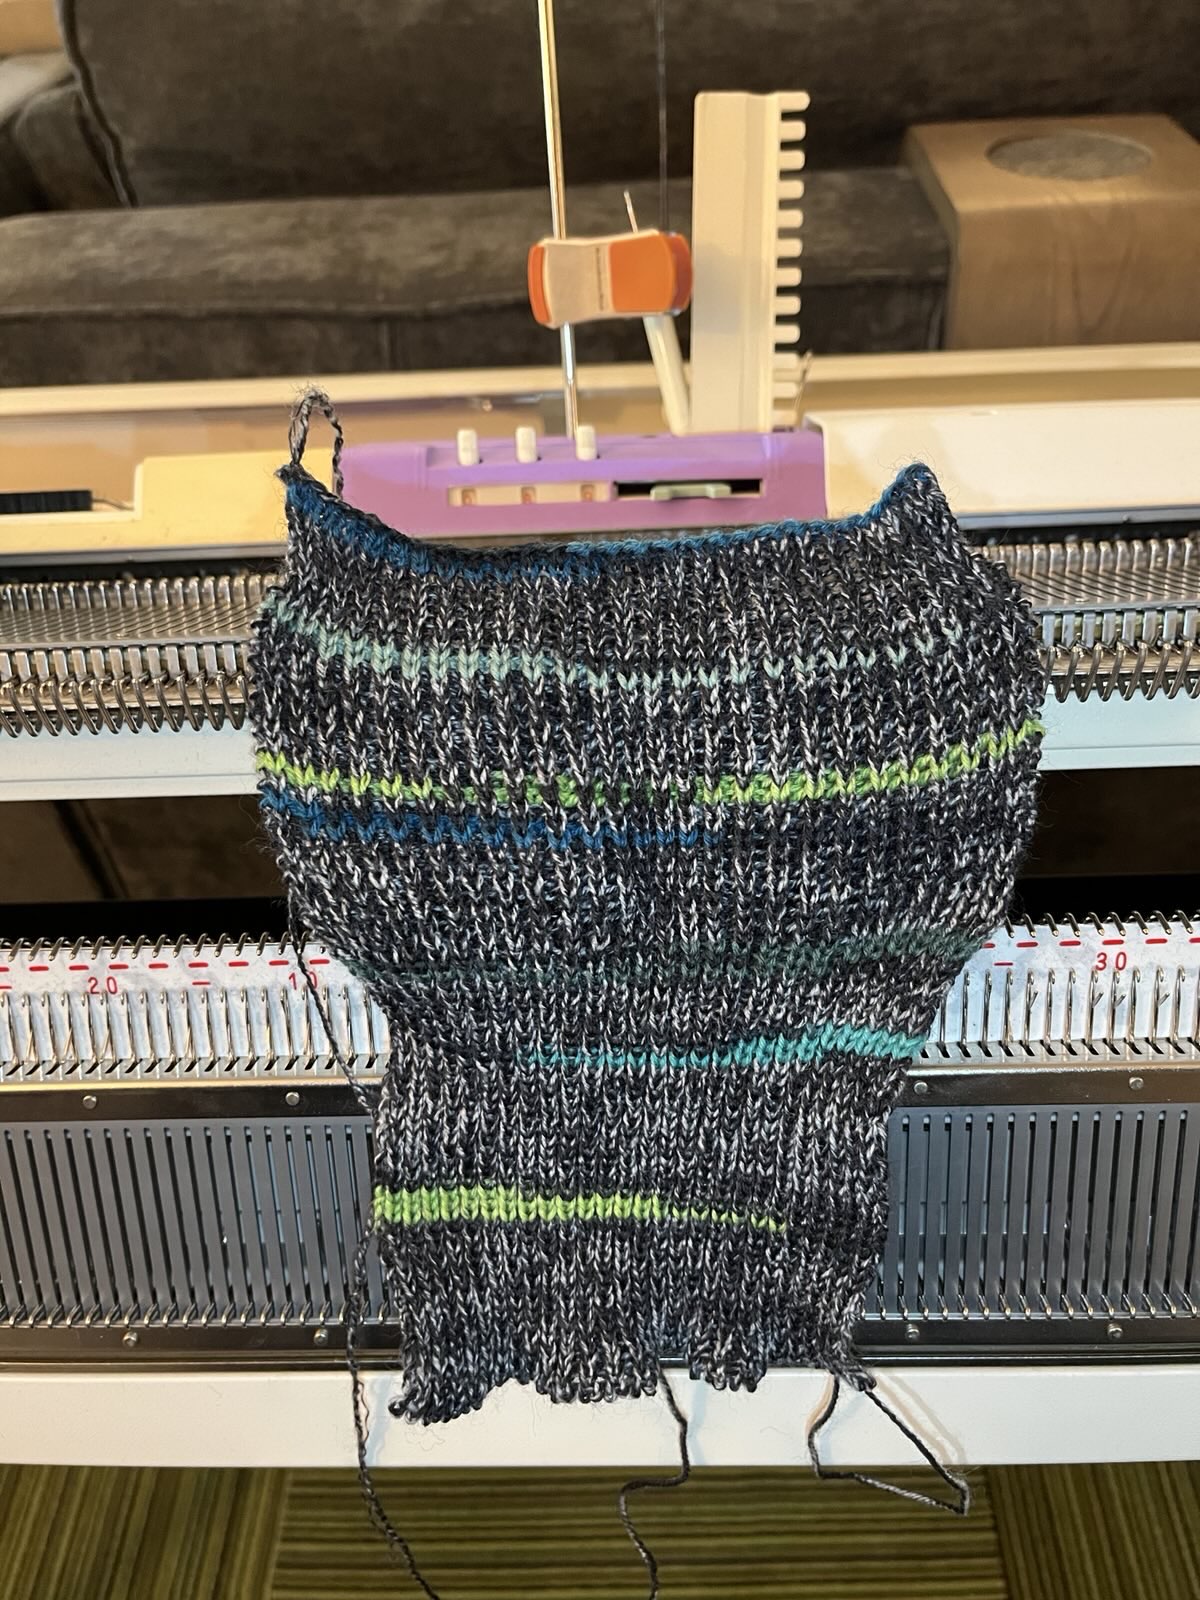
Each mitt is knit in two parts:
- The main body is knit from the wrist-up. 51 stitches set up for 1x1 rib (I used 53). Do 40 rows of the 1x1 rib. Then switch to English rib by setting the ribber carriage to tuck to the left and do another 40 rows. Back to 1x1 rib for 8 rows for the top of the mitt. Finally, transfer all stitches to the main bed, knit one row at the loosest tension, and do a loose loop-through-loop bind-off.
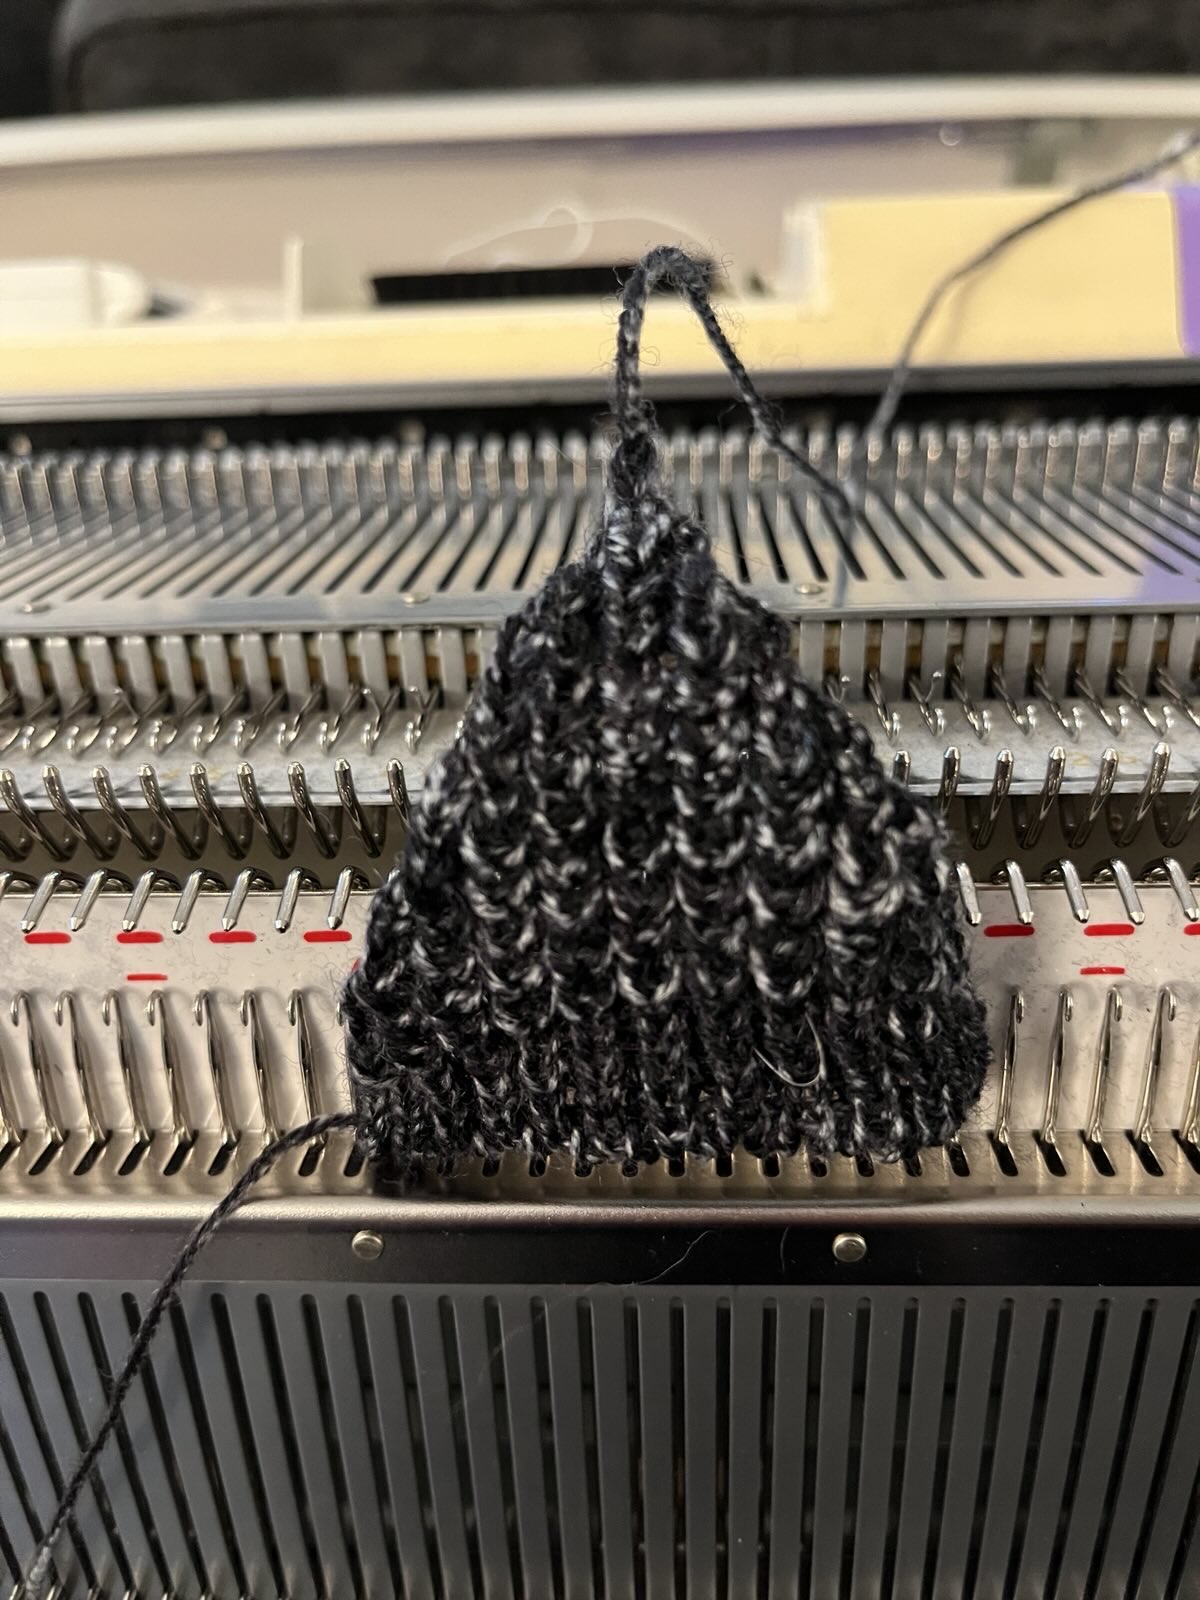
- The thumb portion is knit as a triangle, starting from the tip of the thumb. 25 stitches in 1x1 rib for 4 rows. Switch to English rib and decrease by 1 stitch on each bed on each side (so, 4 stitches total). Repeat until you're down to 1 stitch, knit twice on that one needle, and you're done.
I'm still pretty new to sewing-up knits, so I ended up doing the first one in stops-and-starts. It begins by attaching the thumb piece to one side of the body by lining up the tiny triangle end of the thumb to the first row of English rib on the body.
I did my best approximation of a mattress stitch here, making the mistake of trying to also "match up" the English rib sections of both pieces, even though the body had a lot more stitches of rib to work with.
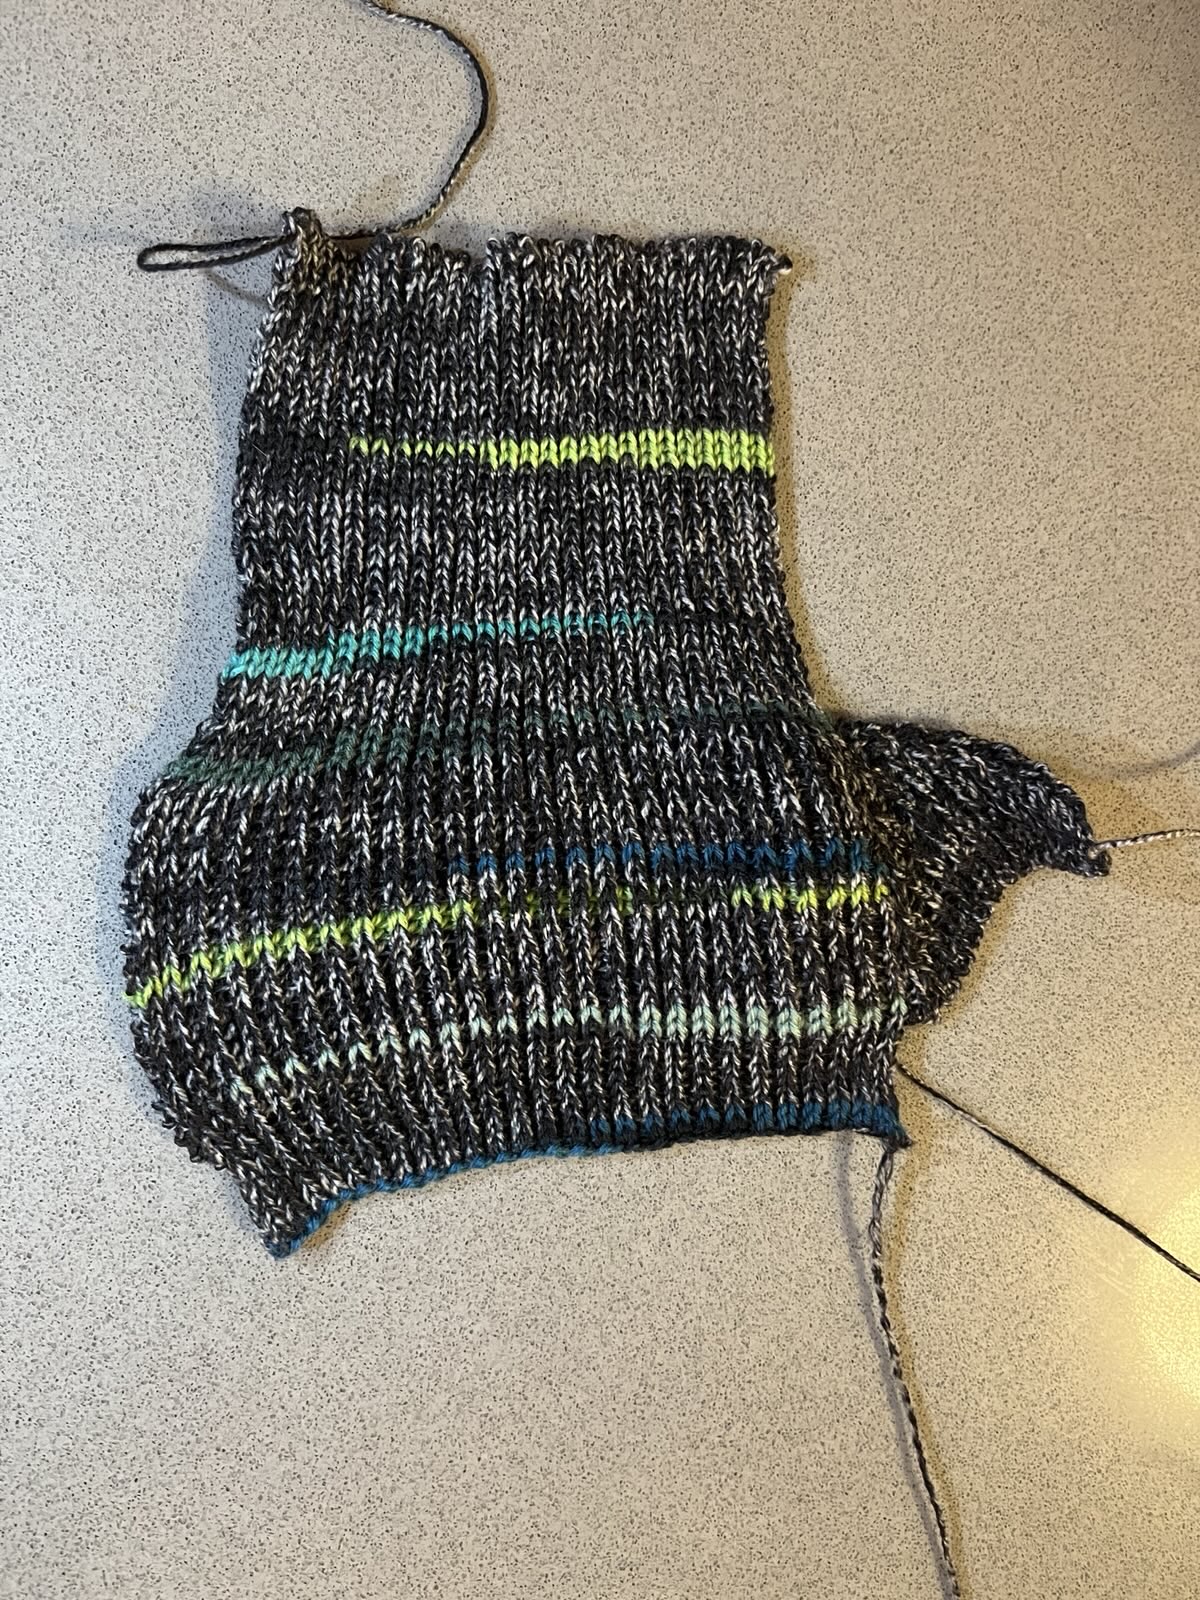
Thankfully it was easy to unravel my mistake. I made things a bit easier for myself on the second one. It paid to go slow and simply count stitches, stopping when I ran out of English rib stitches to sew from the thumb.


With the thumb attached to one side, you then sew up the wrist, joining the other side to the thumb. Stitch markers helped me identify the 1x1 to English rib transition points.
To close it up, I ended up sewing from two directions - from the top of the palm towards the thumb crease, and from the top of the thumb towards the same. I ended up with all the long ends coming together in the thumb crease, which made a nice place to tie a couple of knots to secure them and snip the ends.
These were fun and fast to make, machine-wise. I have a lot of work to do to build my sewing-up skills and speed.
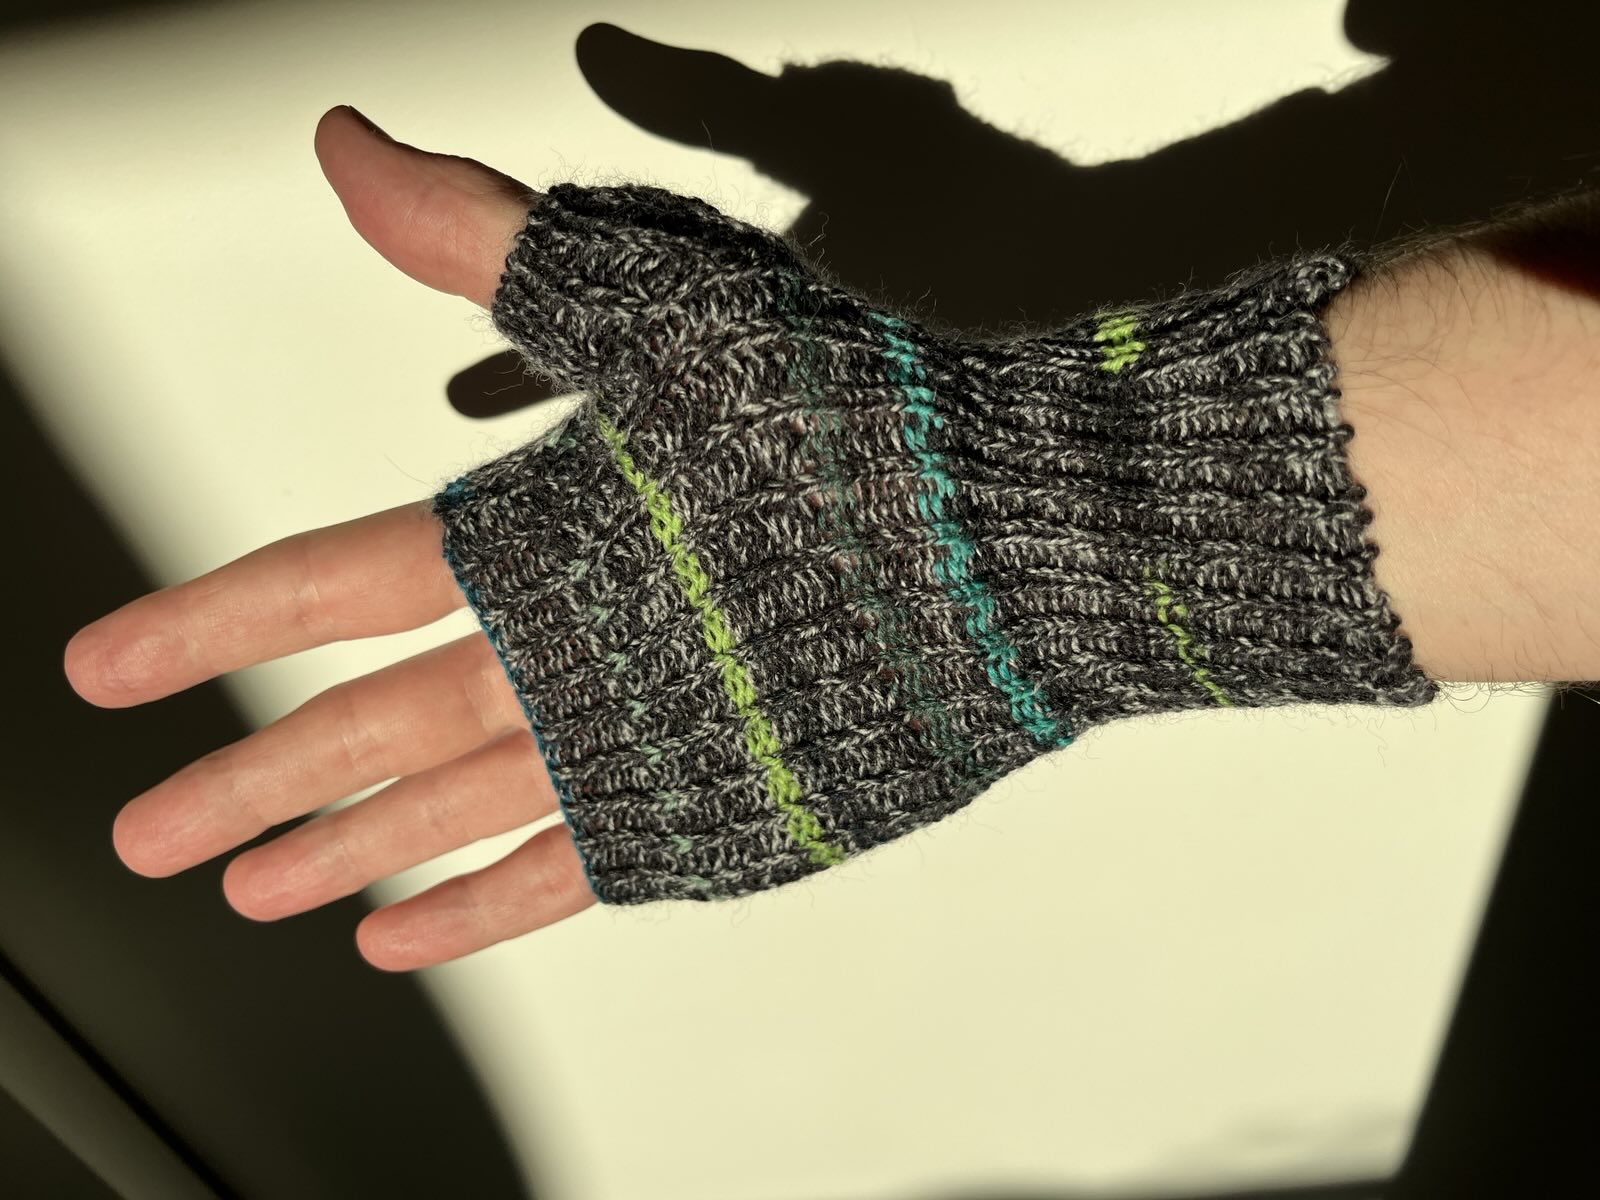
I was surprised to find that they even mostly fit my larger-than-Diana's hands! The ribbing is super stretchy. The only place they bind is at the top of the palm, where I probably did a too-tight bind-off.
👍
I've worn these around the house for a couple of days and could happily continue to do so. However, I want to try a slightly larger size, probably another 4 stitches wide and with another 8 rows of English rib for the body. I'm hoping that this pair fits producer Amy so they can get some good use!
Mentions
 Marty McGuire
at
said:
Marty McGuire
at
said:
This is a retro-post. Jump scare! I sure have read a lot of 2025-in-review posts recently! I am impressed by all that you have accomplished. Here's my 2025 wrapped (in yarn), in 20 photos about my machine knitting this year! Descriptions and links below.1, 2, and 3: my machine and samples from my first workshop at the Brooklyn Textile Arts Center (TAC). Workshop day 1. Workshop day 2. 4 and 5: my first hats. 6: a Fair Isle patterned hat, made after disassembling and cleaning my machine carriage. …
I am pleased to report that producer Amy approved of the mittens I posted a couple of weeks ago, which were a bit too small for me. "Sooo cozy!" was the text accompanying this photo of Amy's hand with pearlescent nail polish and a woollen knit mitt."How nice," I thought, "to have made something functional and enjoyable. Now to make a new pair for me. I'll use this different sock yarn, that Amy bought me in Berlin, so we can easily tell them apart. This should be nice and straightforward!" Ha ha …