Refurbished a Game Boy
I'm trying to do things that get me out of the house and reduce the amount of time I look at torture rectangles (aka screens with internet). This Refurbish a Game Boy workshop from Craftsman Ave. felt like a perfect opportunity. Not only would I get some quality time in a (quality!) makerspace and get my hands dirty doing some tinkering (with expert guidance and few opportunities to truly mess up), but I'd also get to bring home a joy rectangle to improve the joy-to-despair ratio of rectangles in my life.
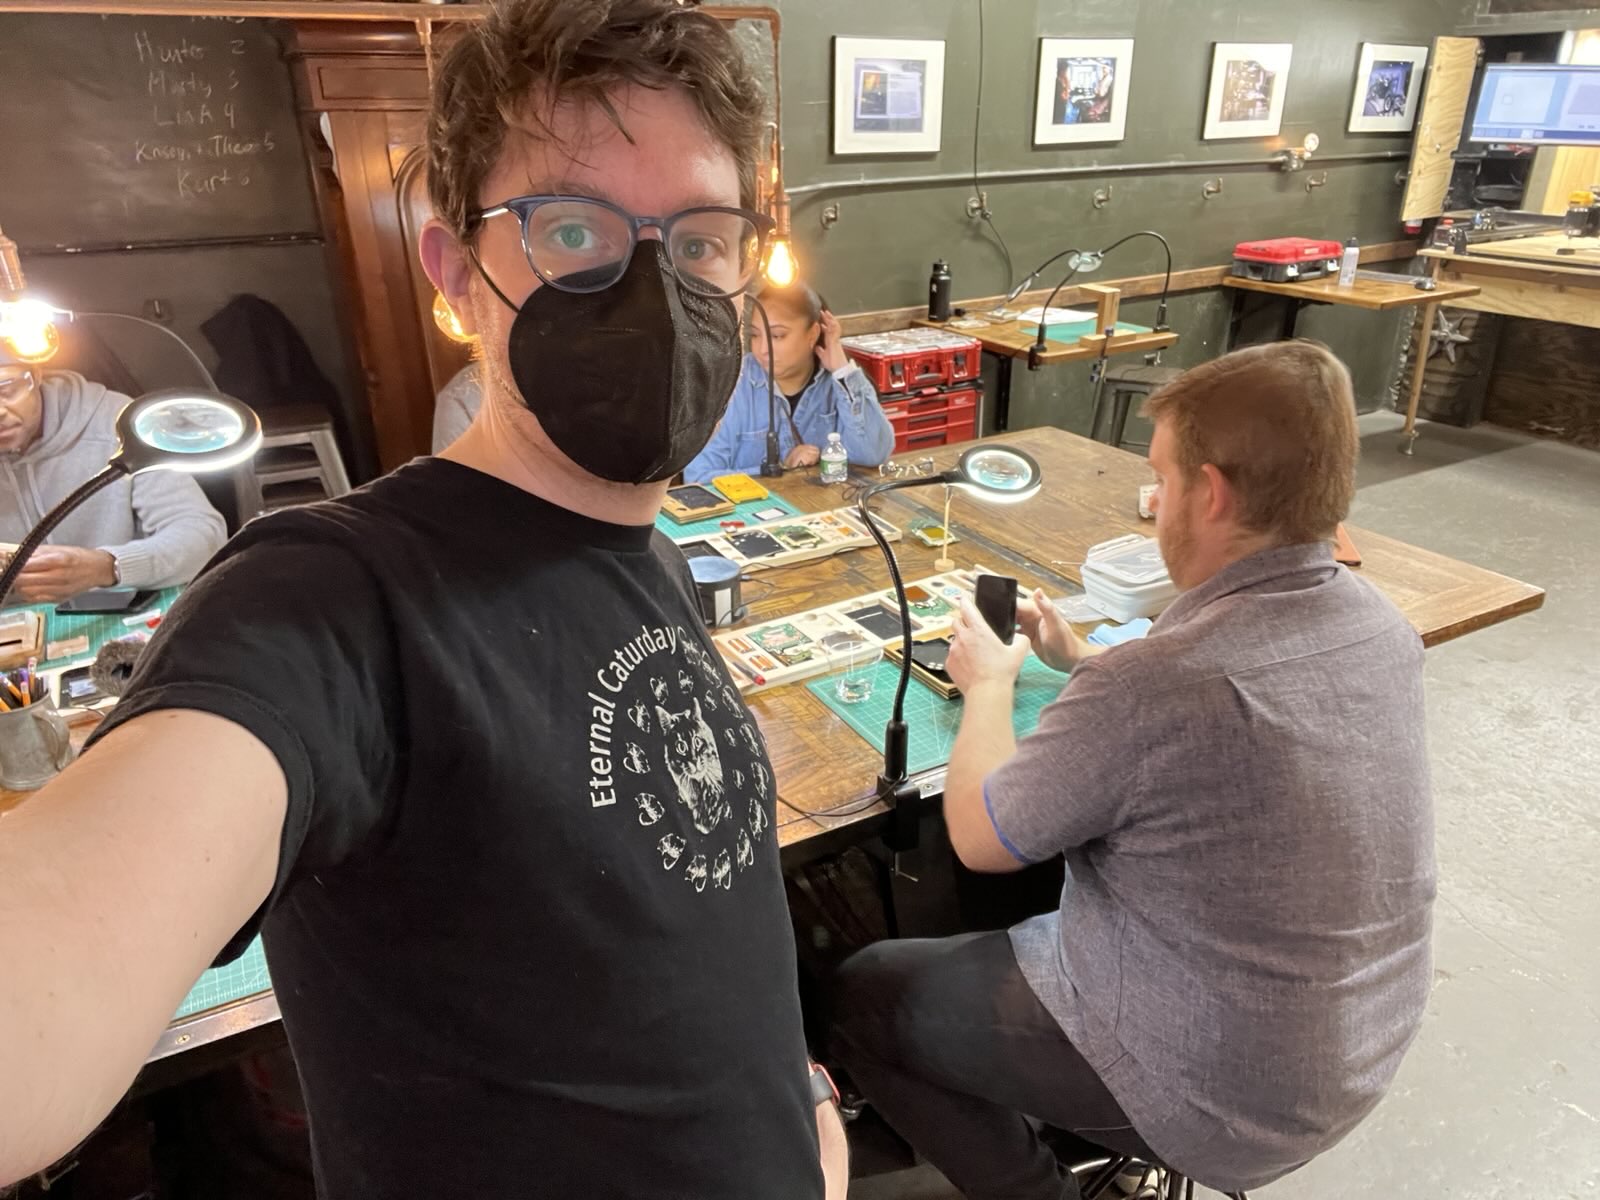
There were a lot of things to like about the workshop. The Craftsman Ave space itself combines super functional with ✨aesthetic✨. Or, to paraphrase how they put it, "we foster the illusion that beautiful things are made in beautiful places, when we know better." Workshop instructor Zach was super prepared, knowledgeable, and patient. Helping out was Chris who was so nice and humble, but did so much so smoothly behind the scenes, it felt like we were all his guests.
Did I mention prepared? Here come a bunch of photos about how prepared!
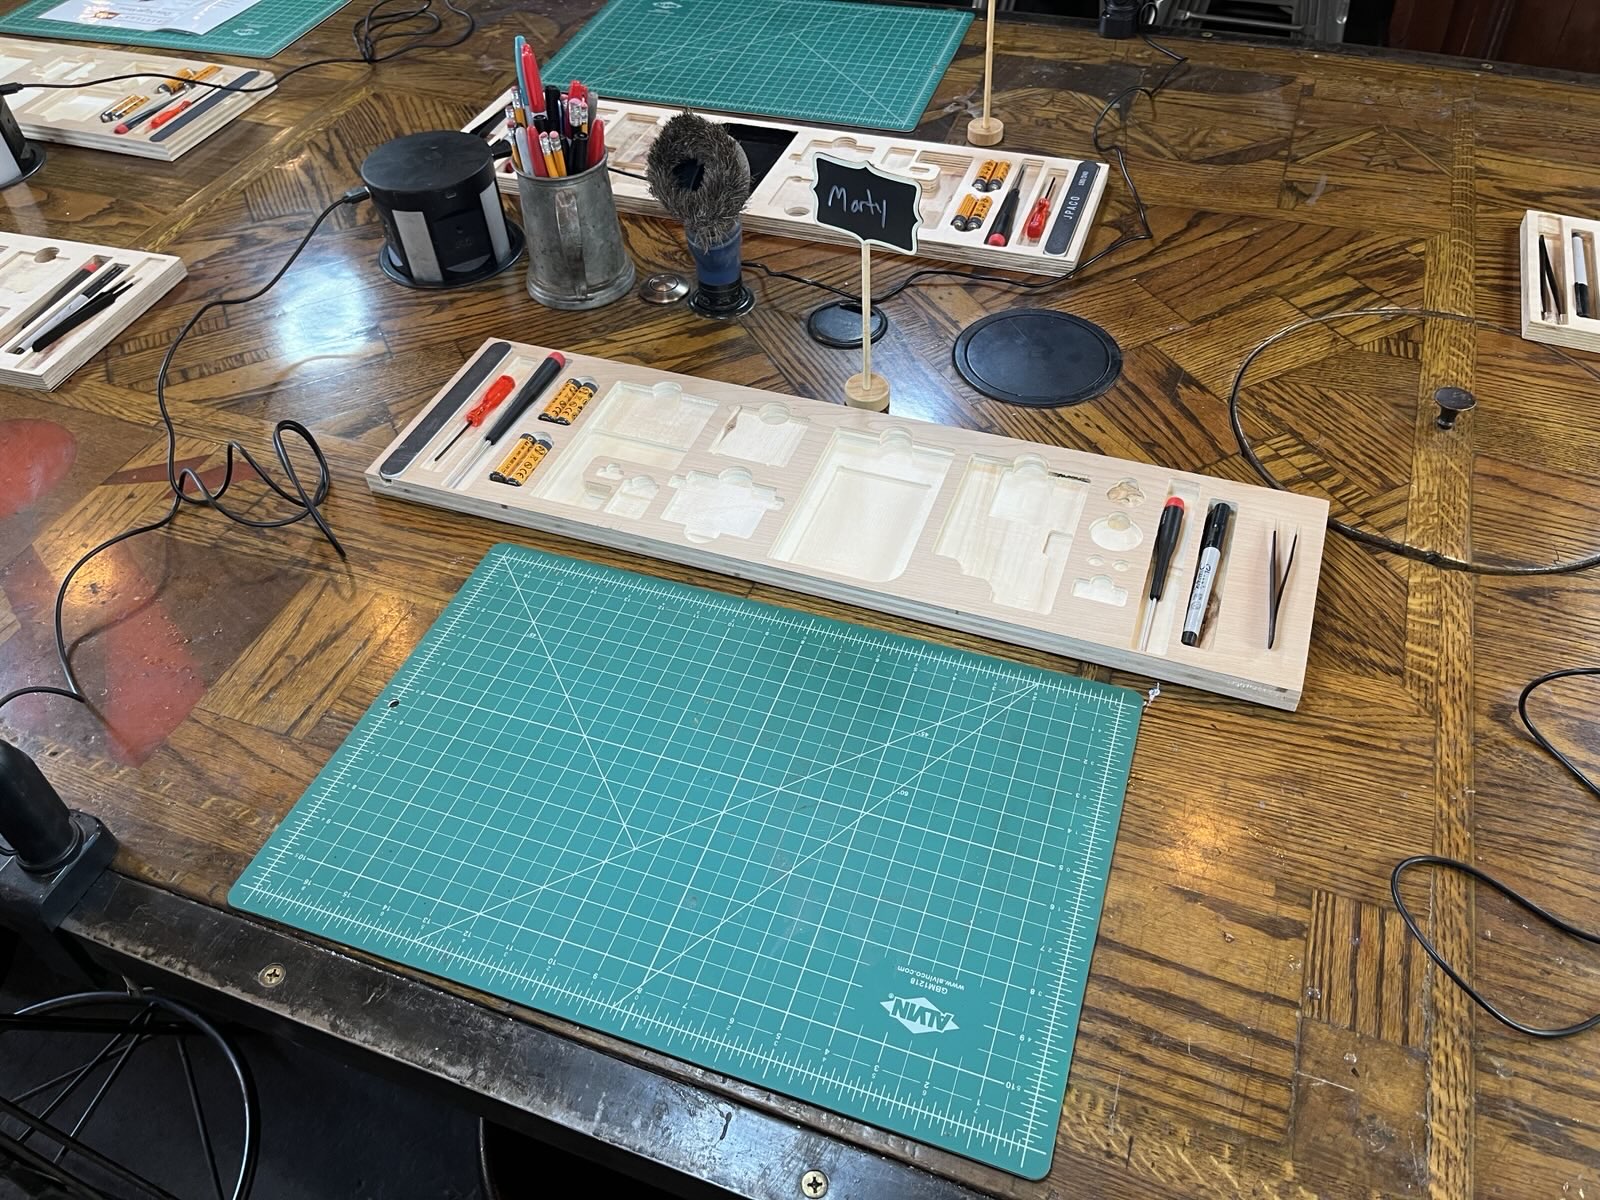
The workshop accommodates up to 6 units being refurbished, either on your own or with a partner. We drew lots to determine the picking order from the set of available Game Boy units. (I keep writing "Game Boys", disliking it as a term, and replacing it with "Game Boy units". What is language?)
Anyway, here were the pickings for the evening!

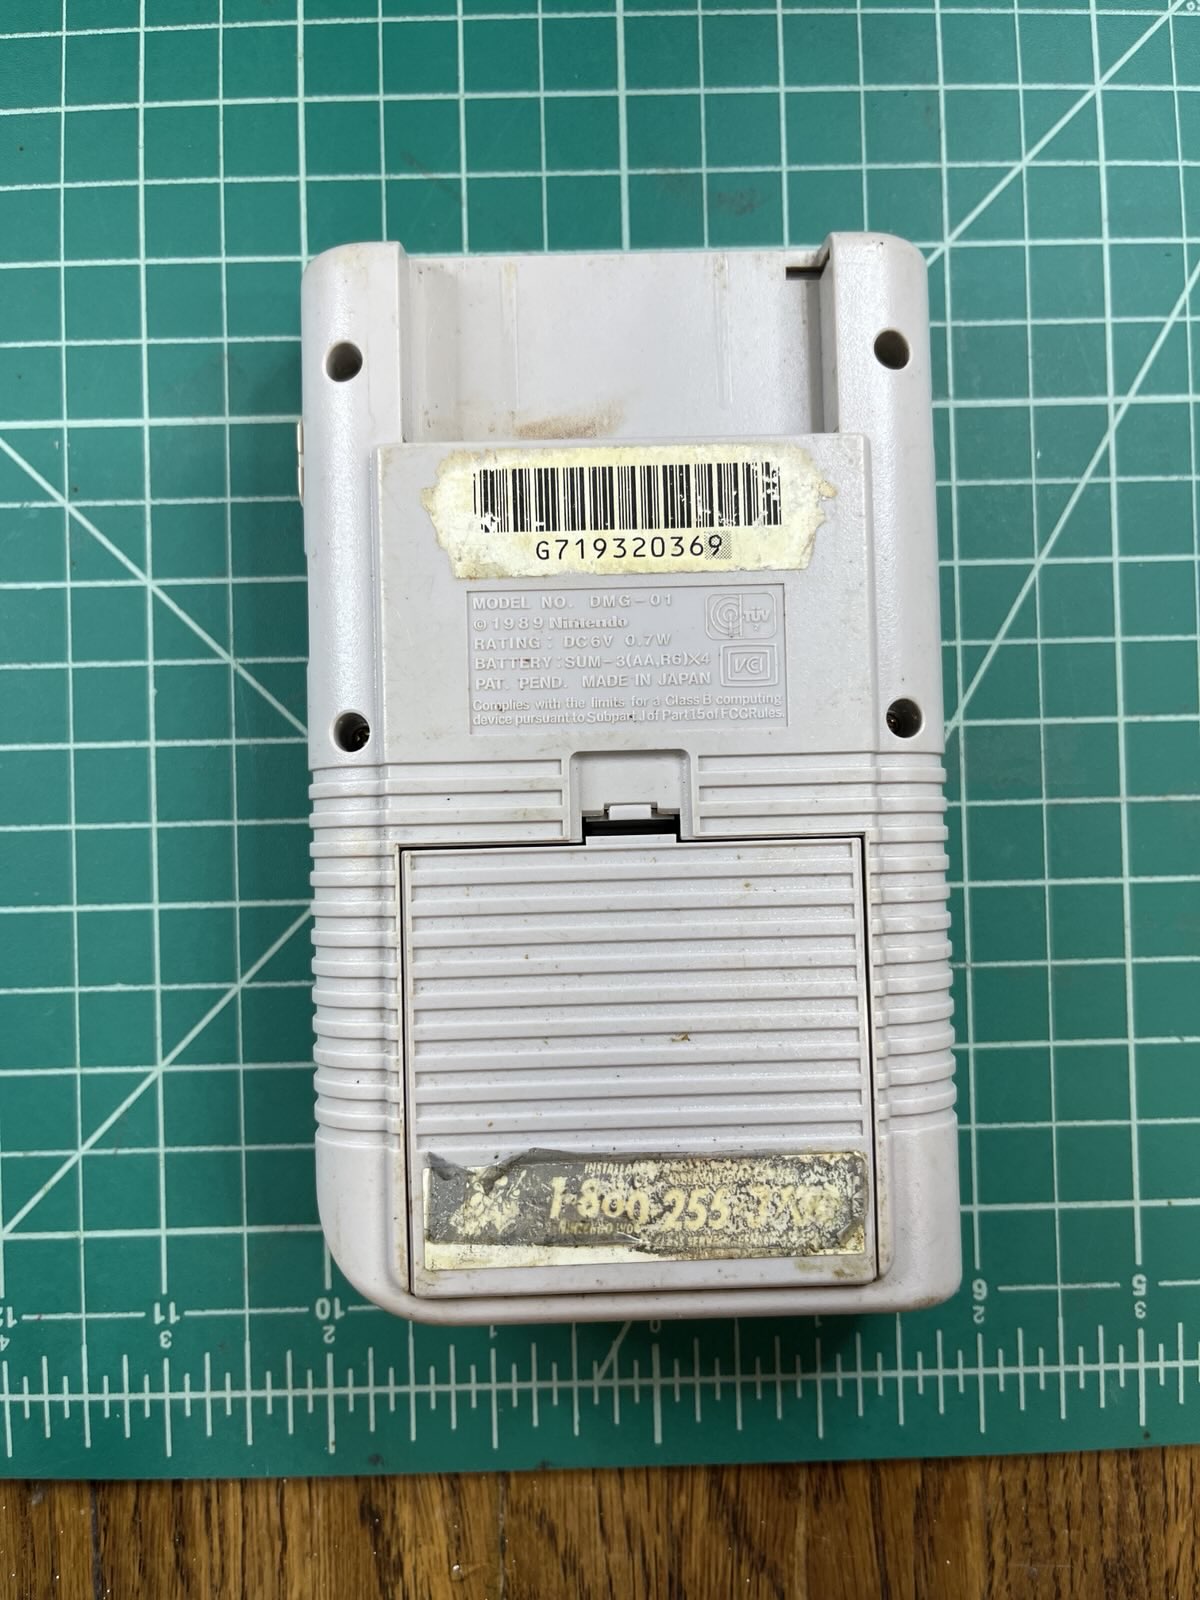
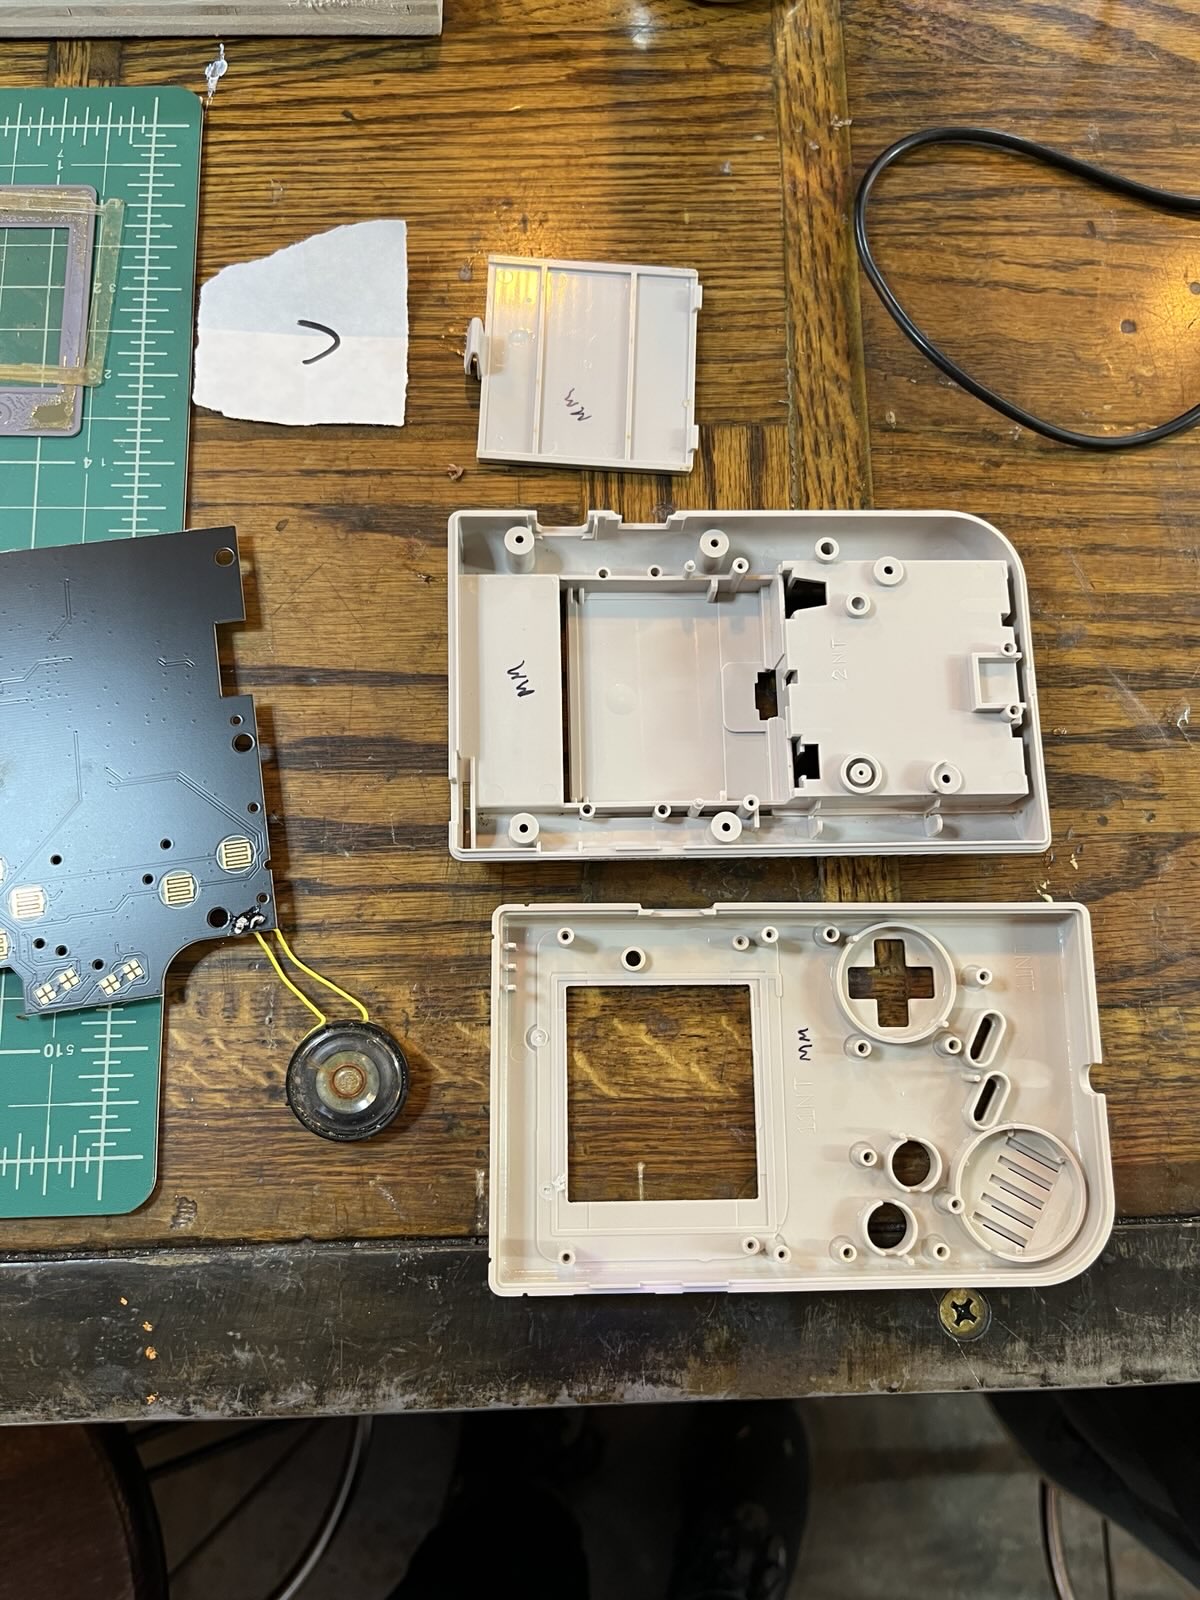
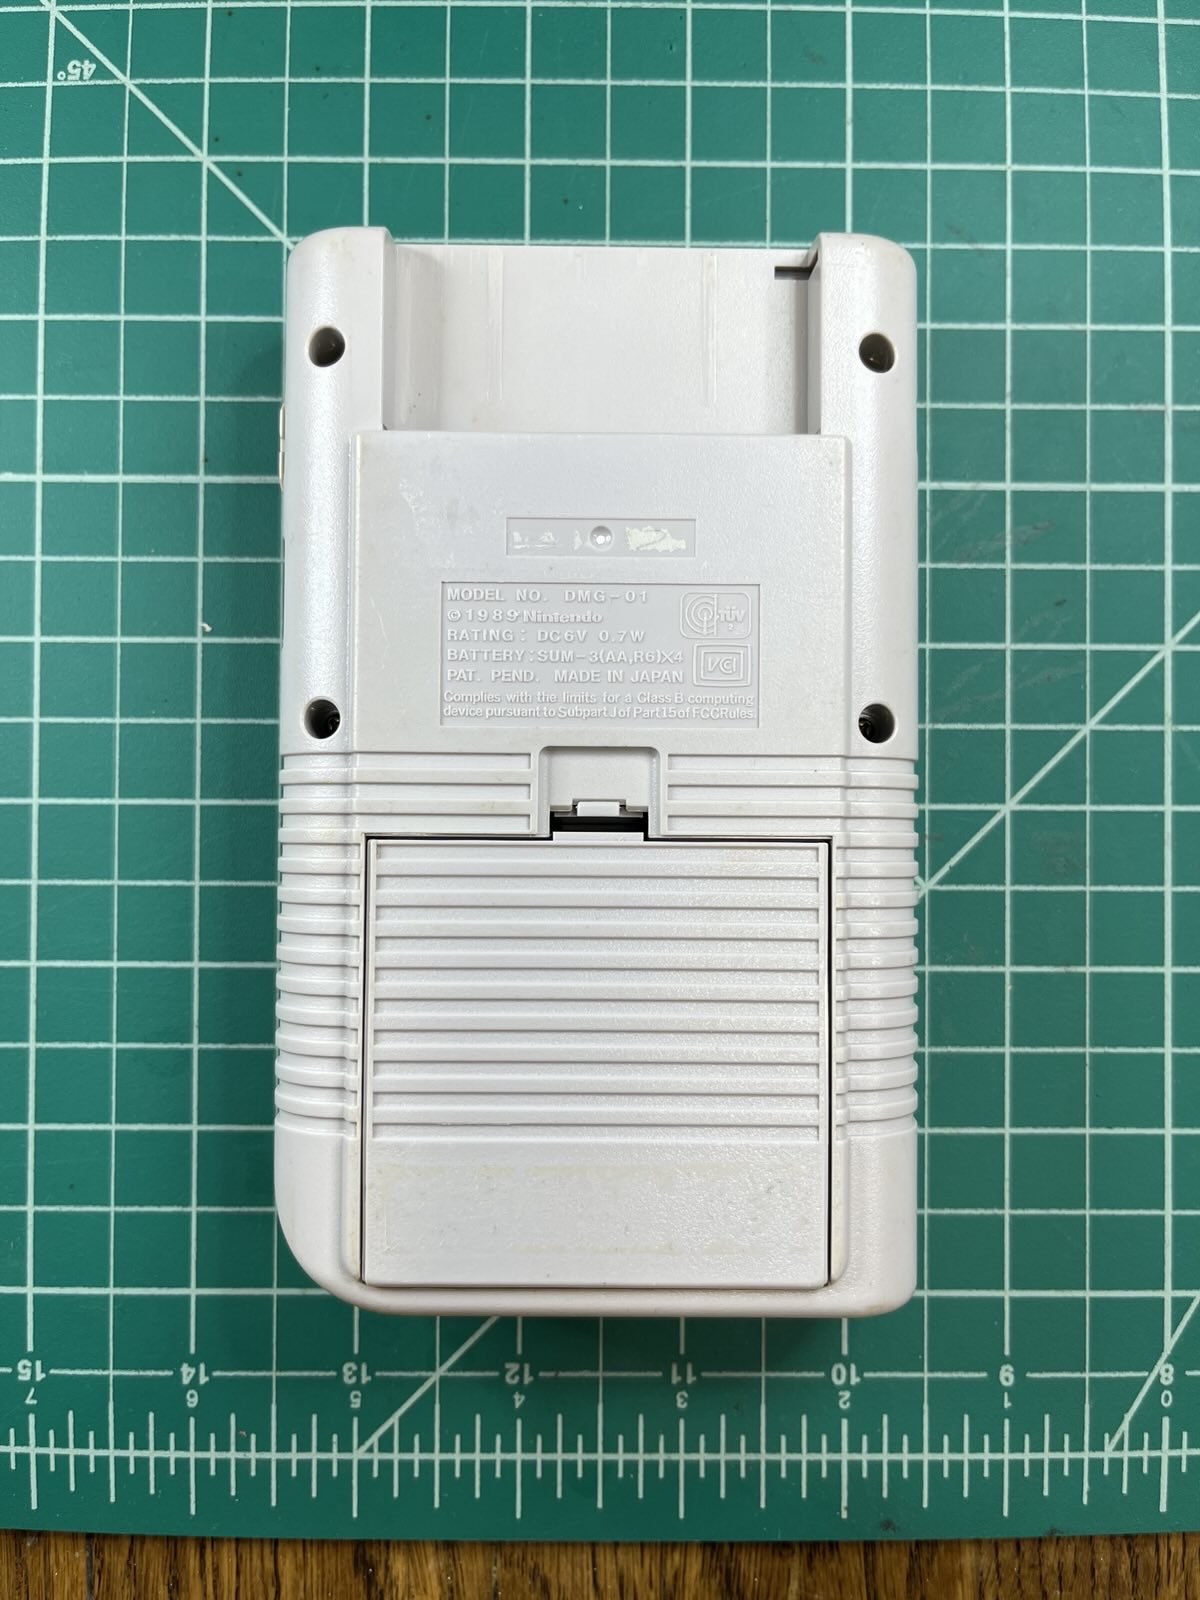
I chose this sad boy which had very little sign of aging plastic but a lot of signs that it had probably been through a flood, with grit on the surfaces and in the holes, major signs of water damage on the screen, and all that was obvious before looking inside.

Looking inside gave me some bad feelings...

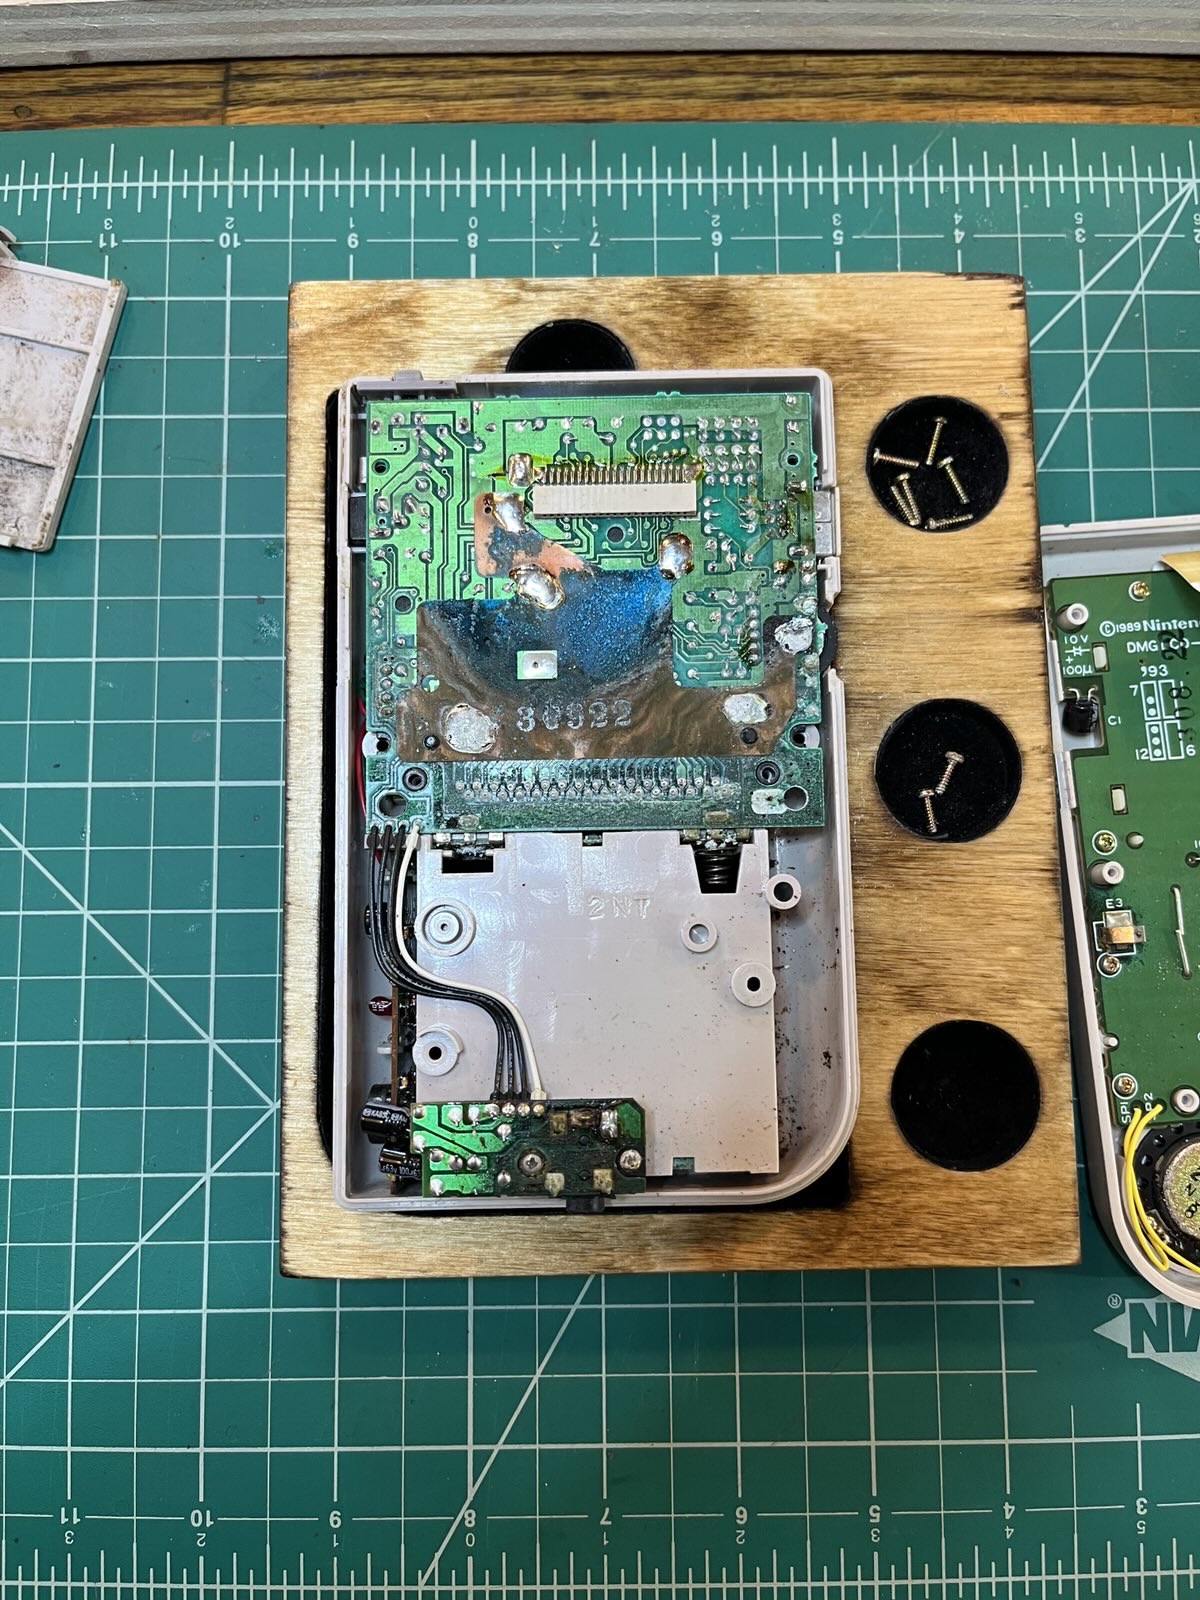
Zach had us examine the media daughter boards of our units, which indicate when it was manufactured.
We used tri-wing and Phillips screwdrivers to separate all the electronic parts from all the plastic parts, then put our initials on the plastic bits in Sharpie before giving them a soap bath and scrub-down to remove grit and grime.
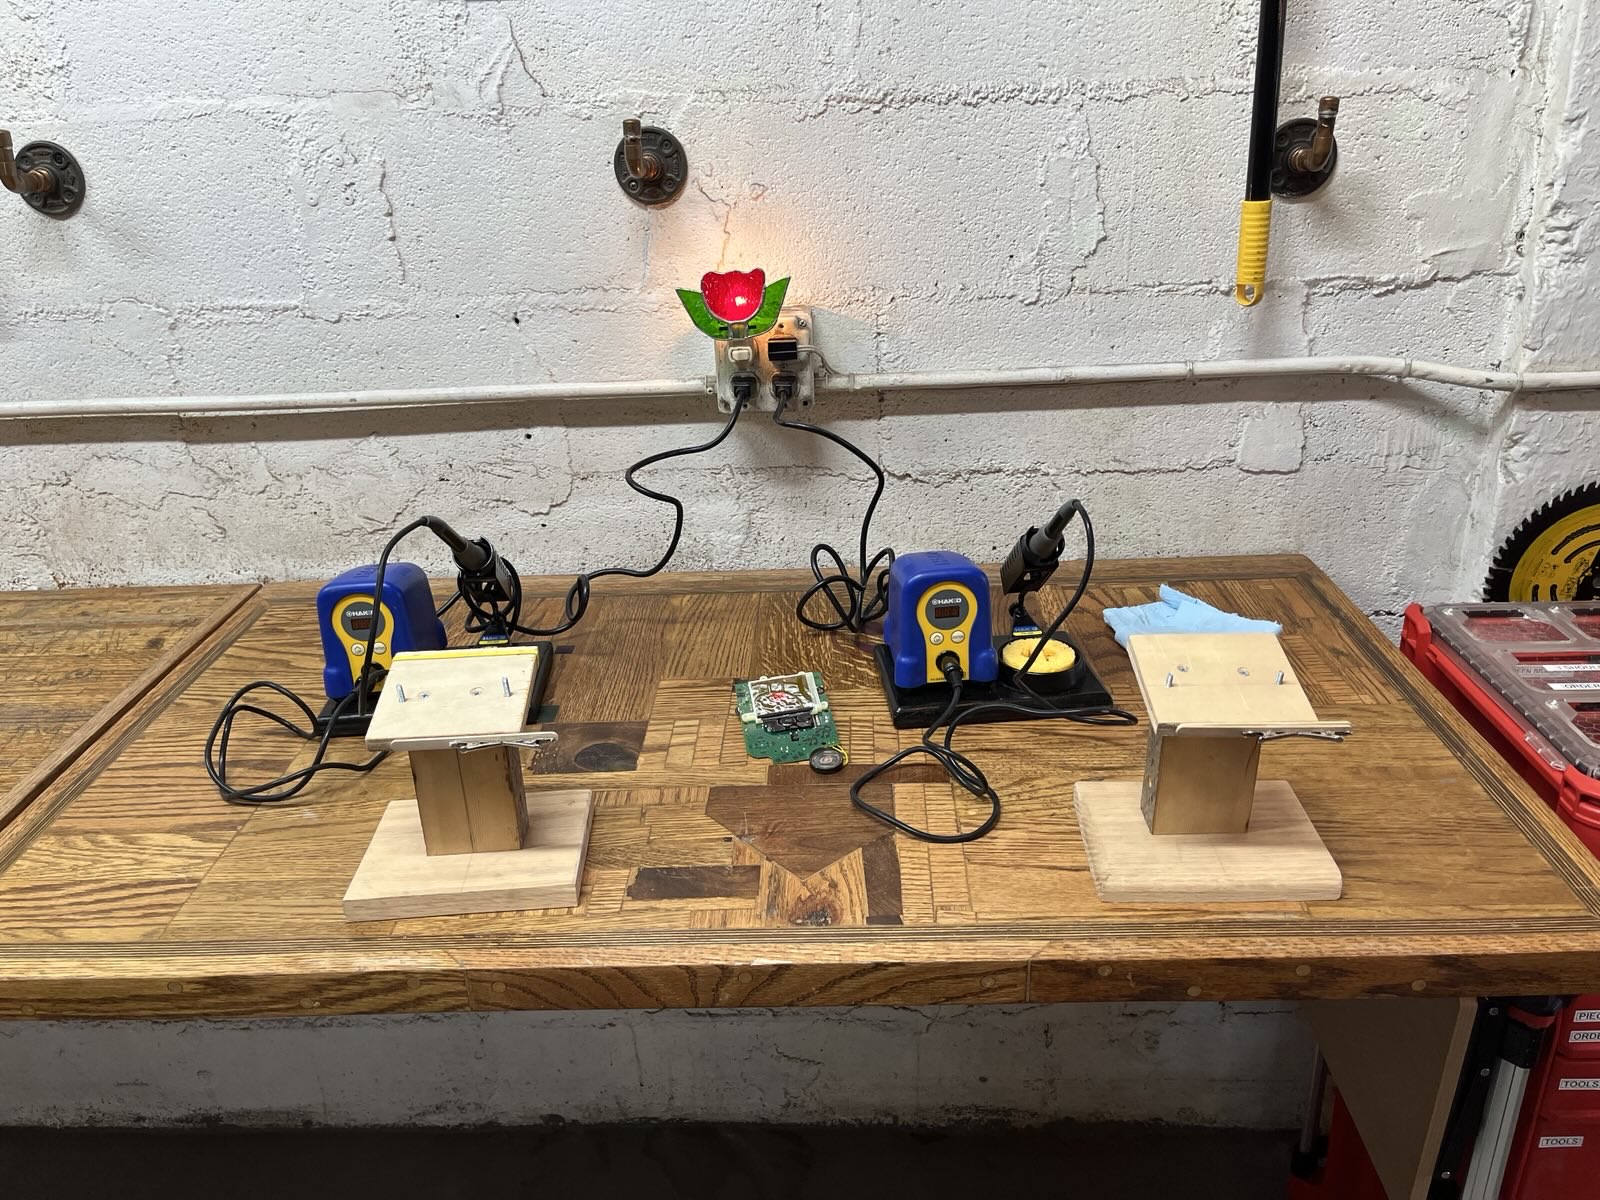
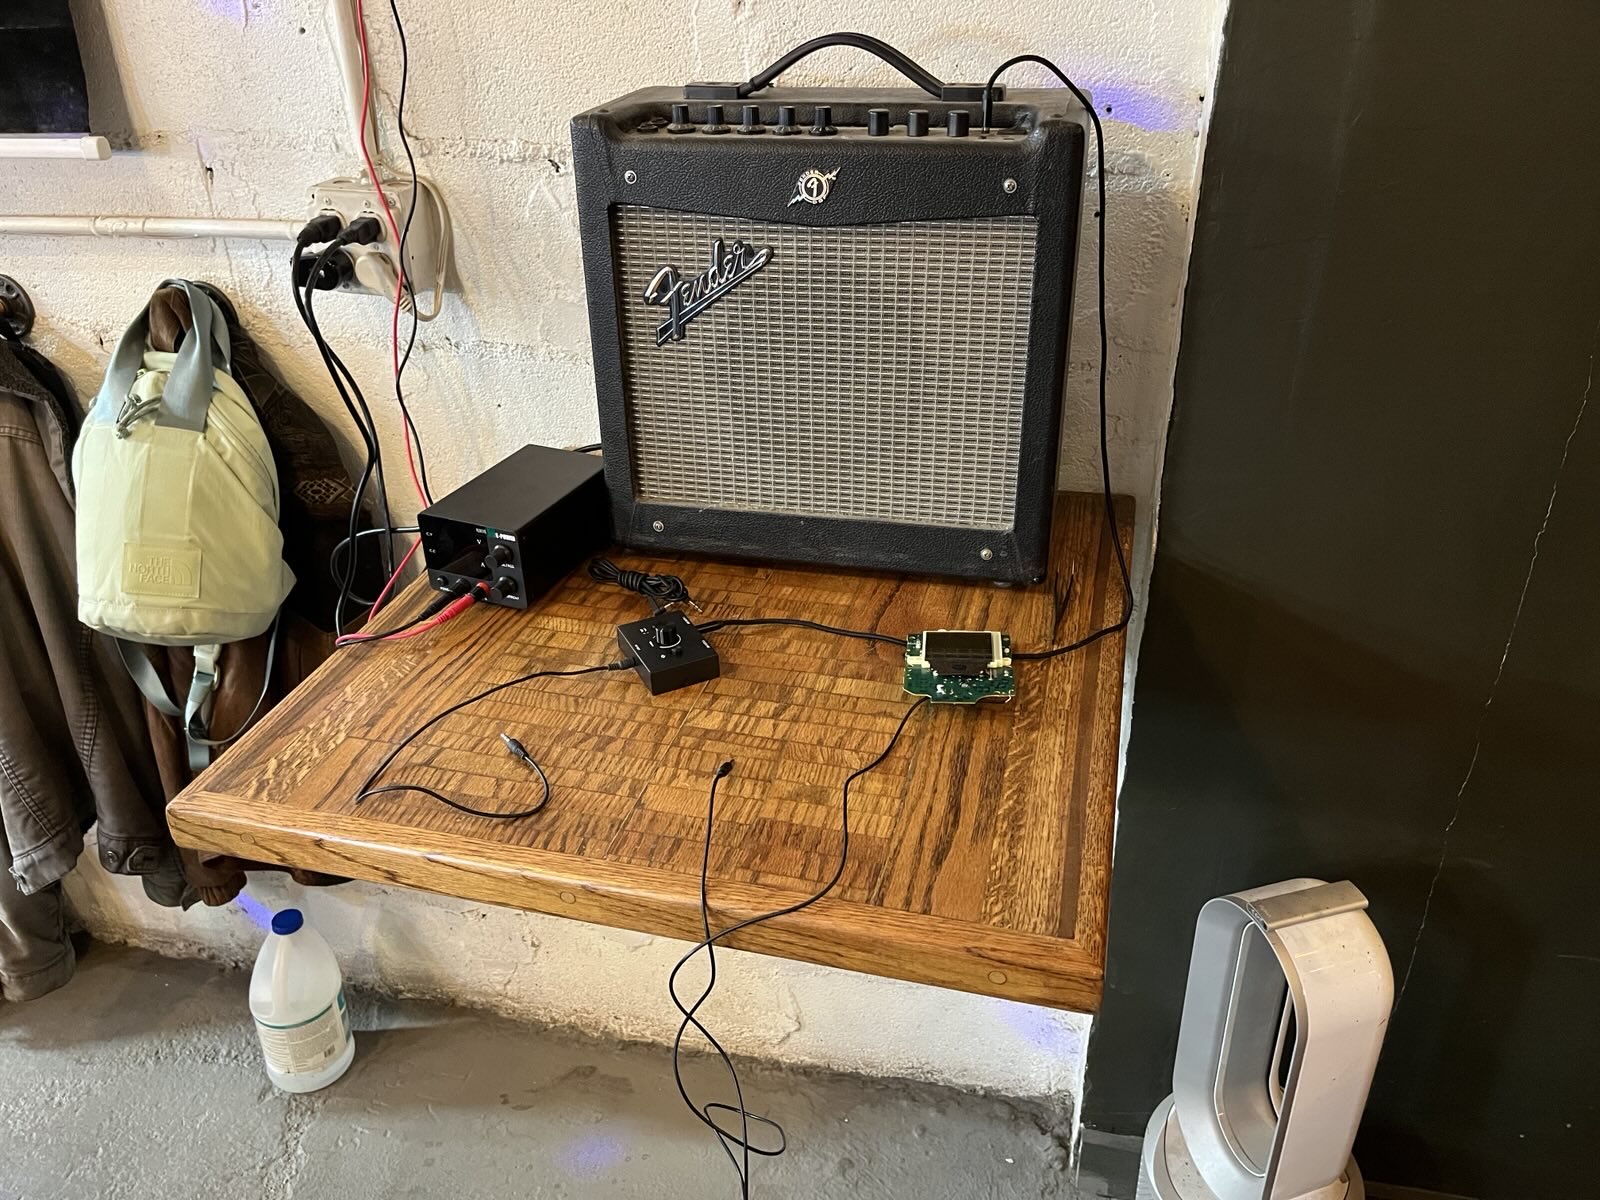
With the electronics disassembled, we took turns using the Fender amp to test whether our Game Boy motherboard worked, using a 6-volt power supply and alligator clips to the power terminals. Mine, unfortunately (but not unexpectedly) did not produce the signature "bling!" sound indicating a successful boot. So, it was taken away (for recycling or a viking funeral, I don't know) and I received a known-good working one.
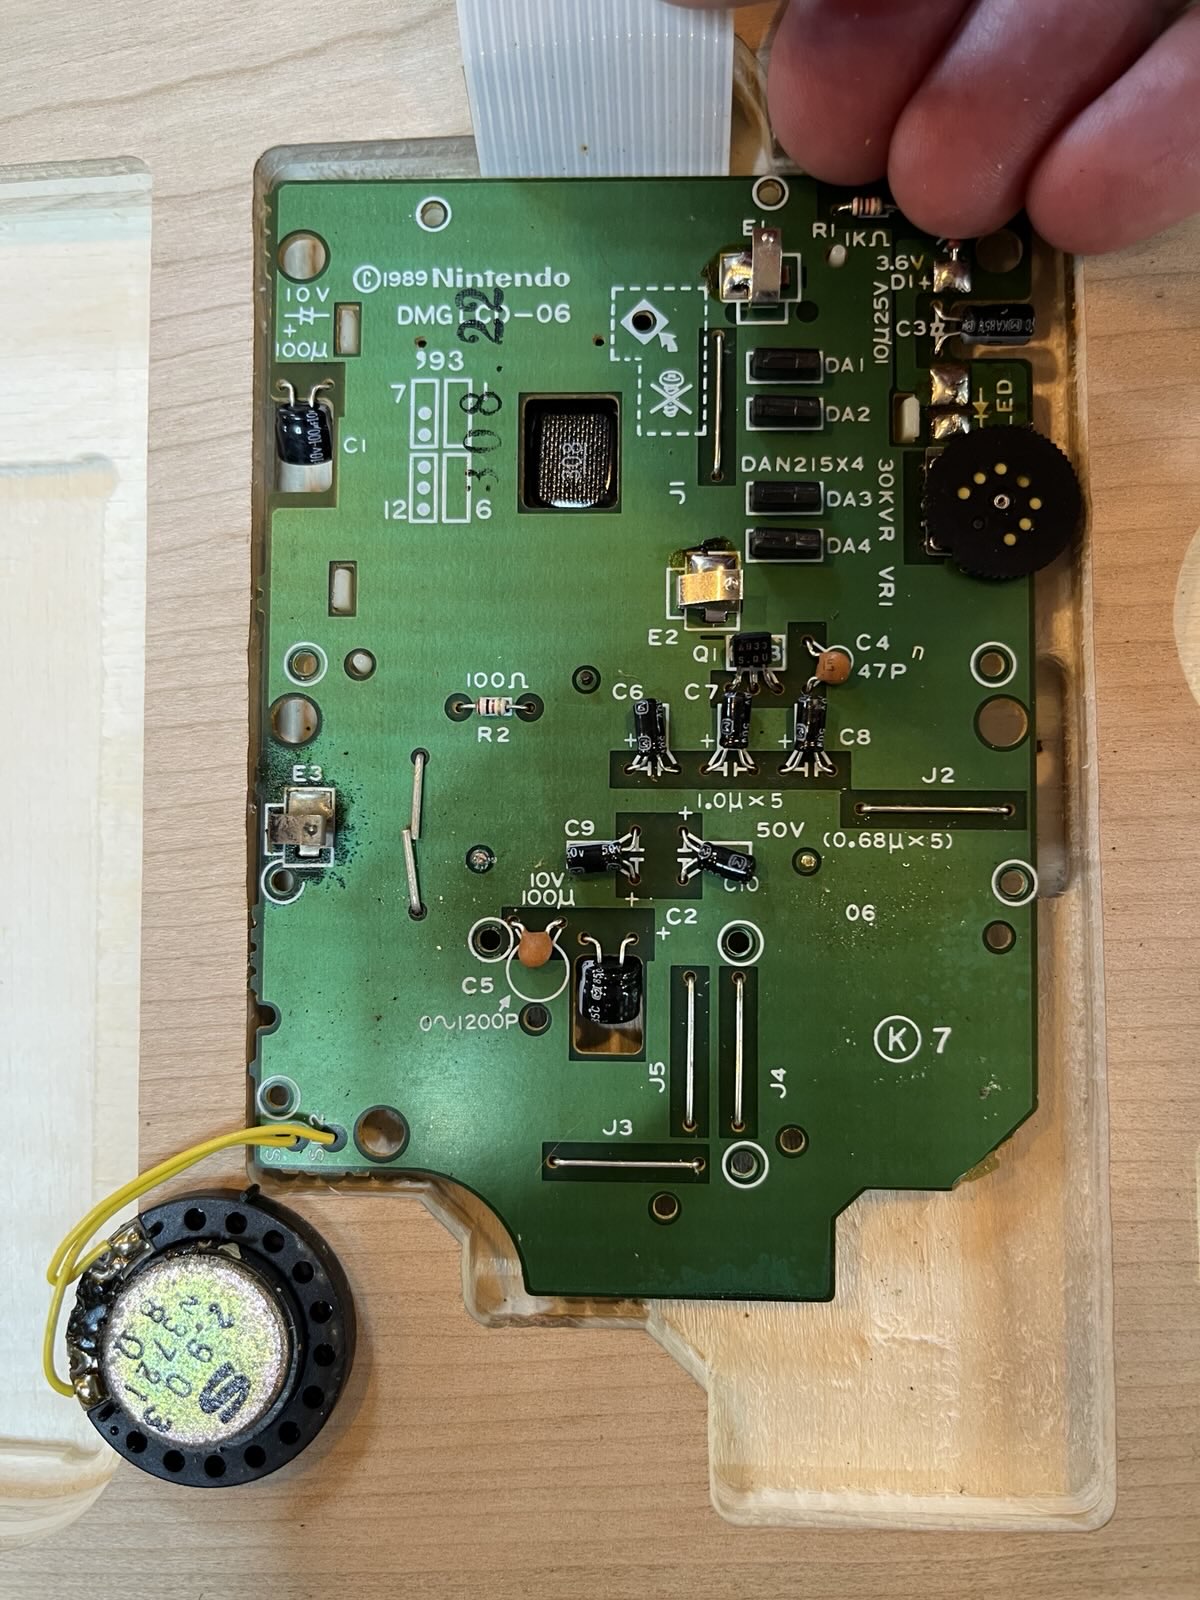
After motherboard testing, we took turns at the soldering stations, removing the little mono speakers from the original media boards and attaching them to the new boards. Comparing the new sleek black PCB to the old crusty speaker had me pretty convinced the speaker wouldn't work.
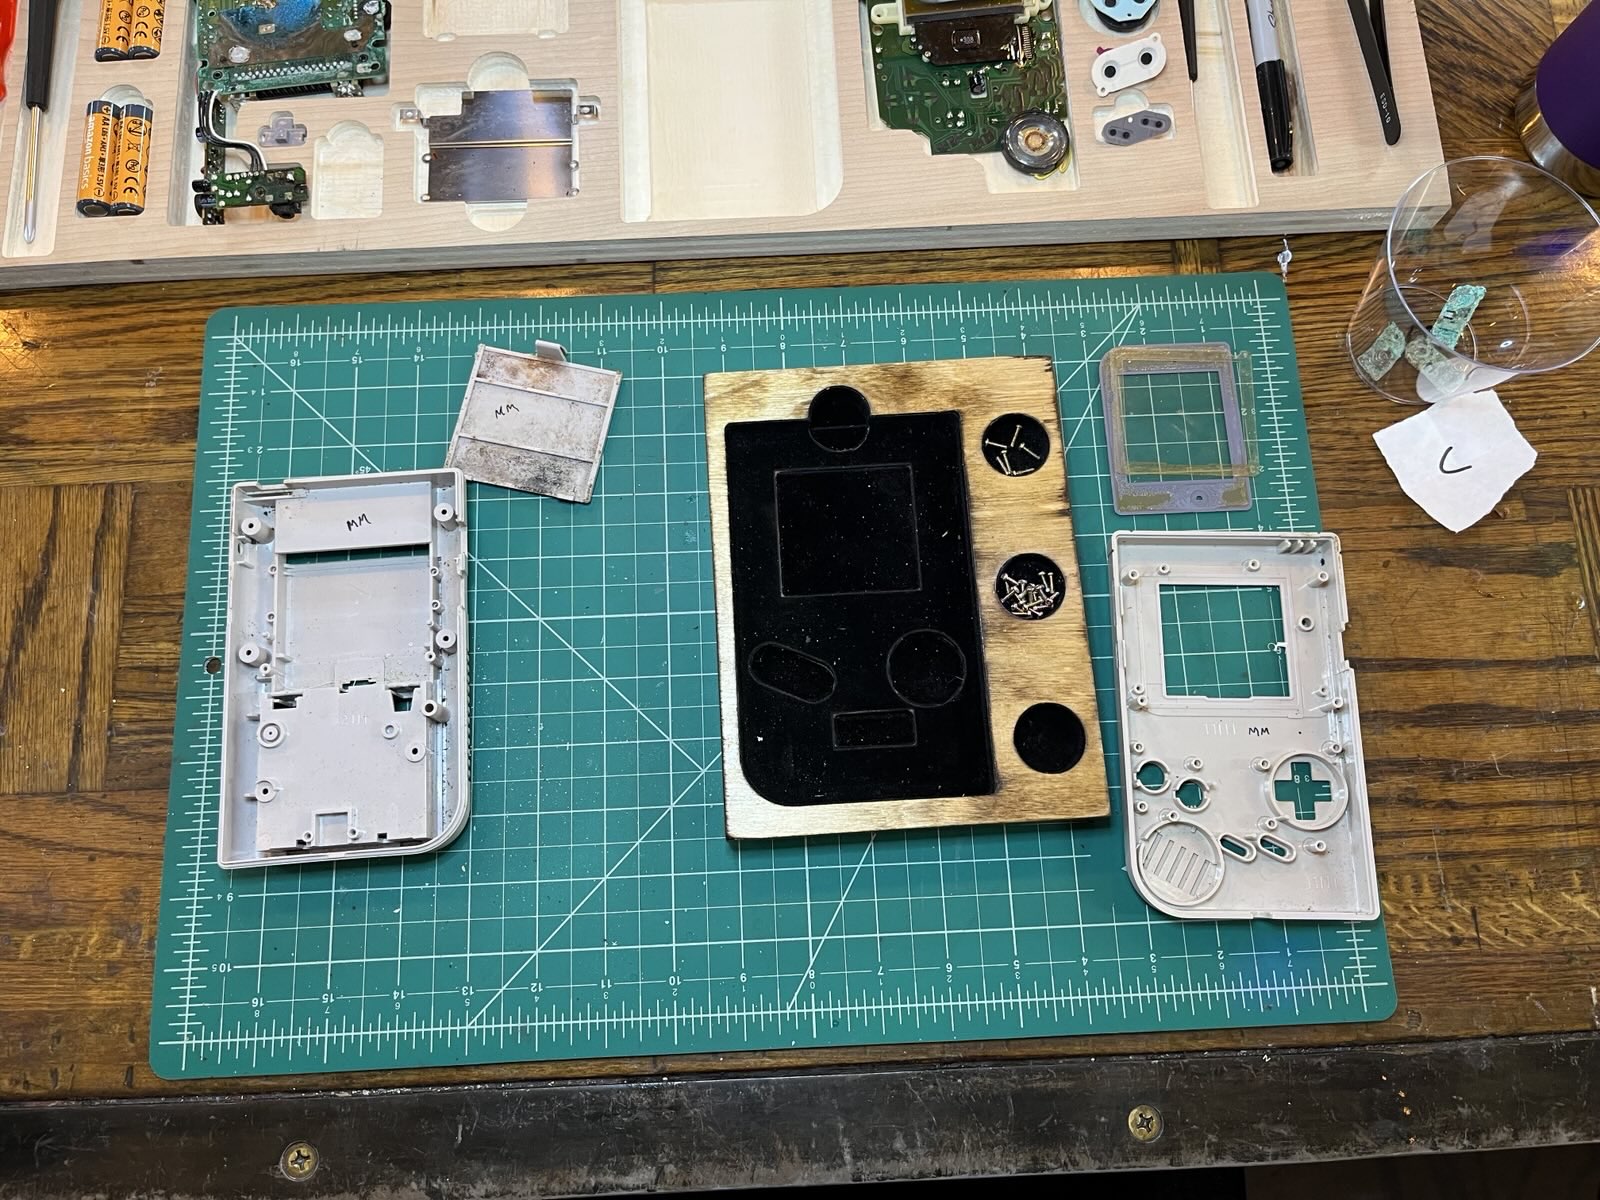
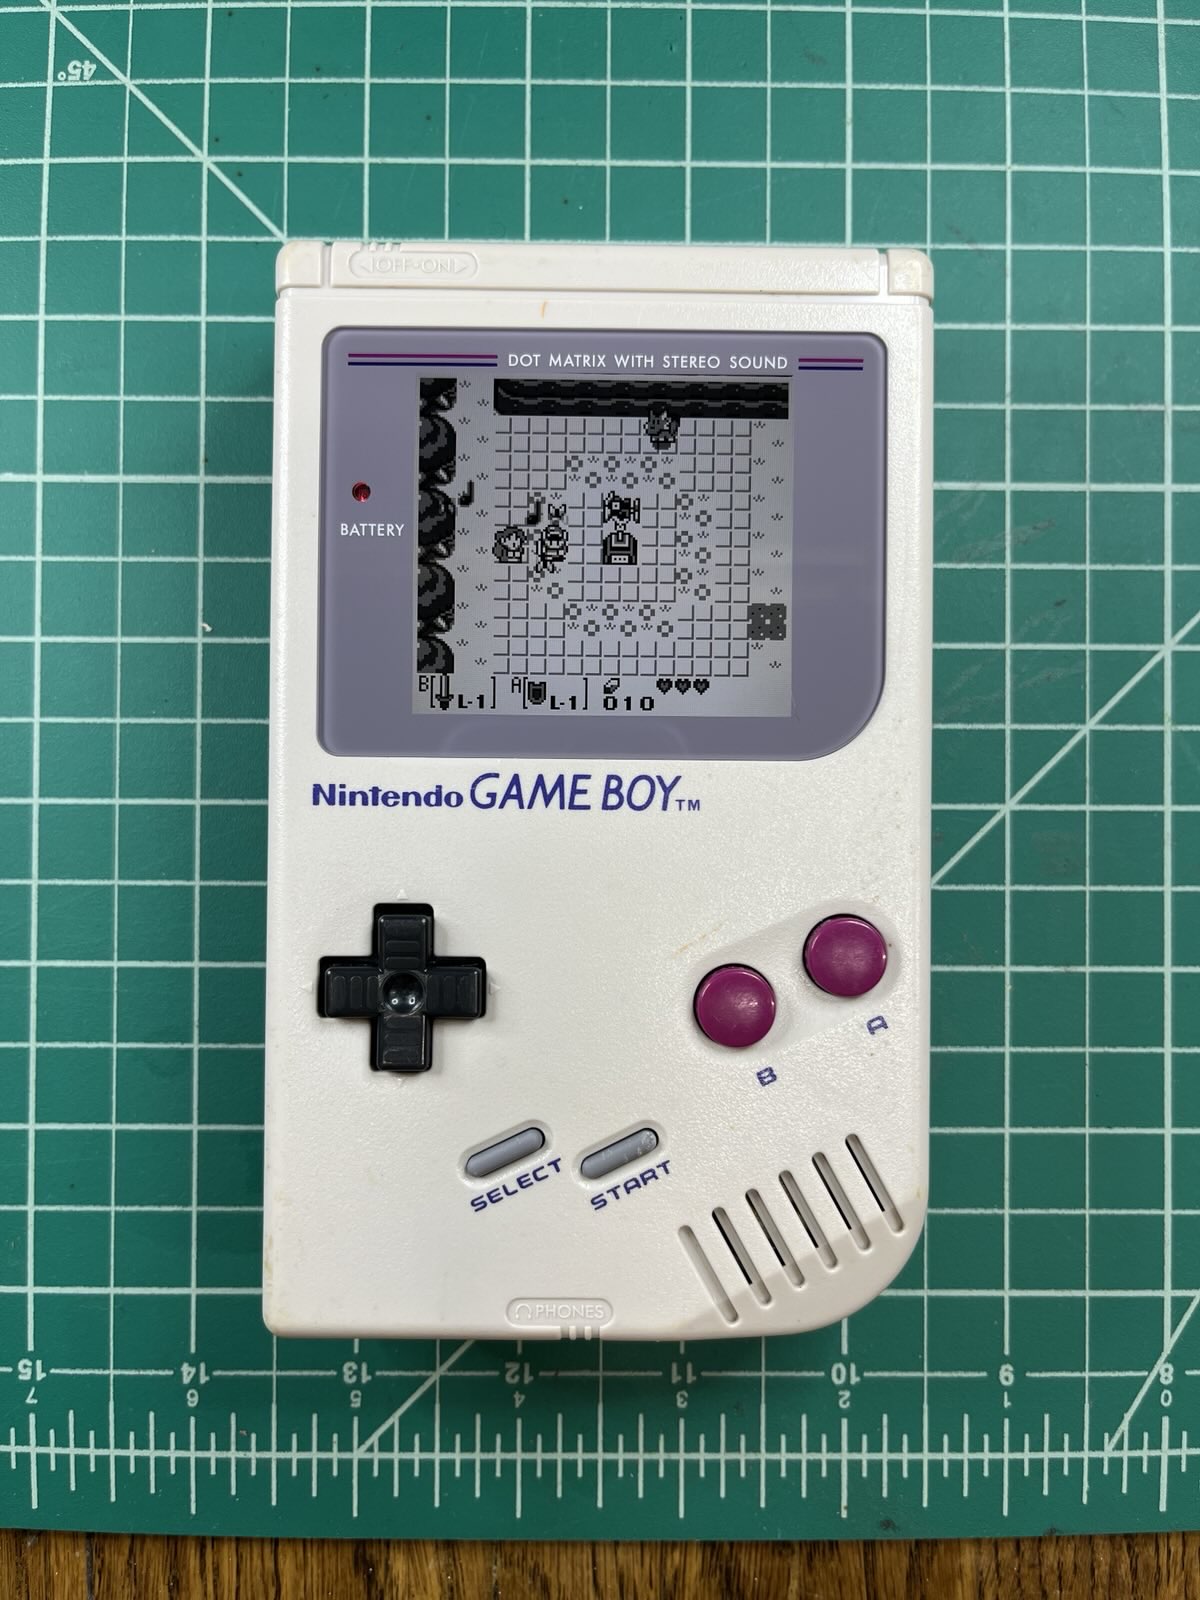
There were even more things happening in parallel. Our new media boards were part of a full screen replacement, upgrading these units to crisp, backlit IPS displays, with brightness controls and many more features. Critically, the new screens are bigger than the originals, requiring some alterations to the case.
This is where Craftsman Ave's X-Carve machine comes into play. A custom jig holds the front of the Game Boy case in place, while a router bit removes two screw support posts, some space on the side for the new LCD's control toggle, and carves back the edges of the screen.
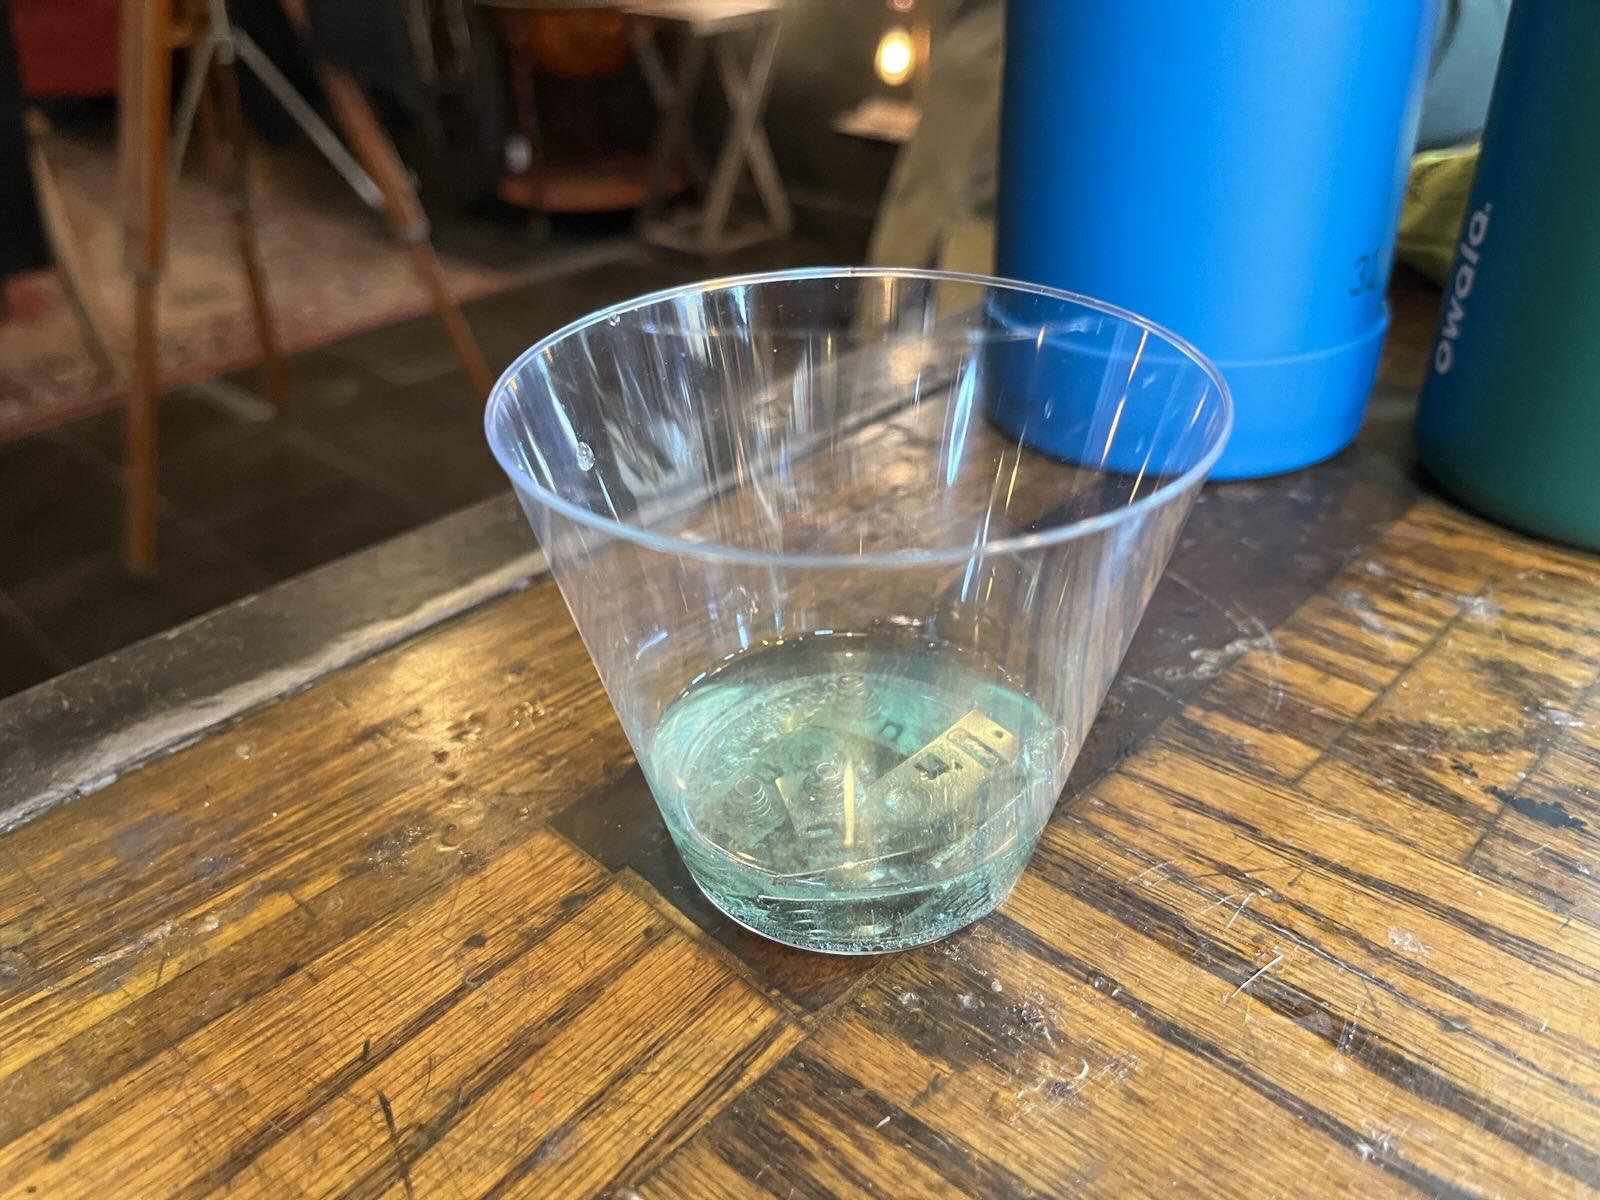
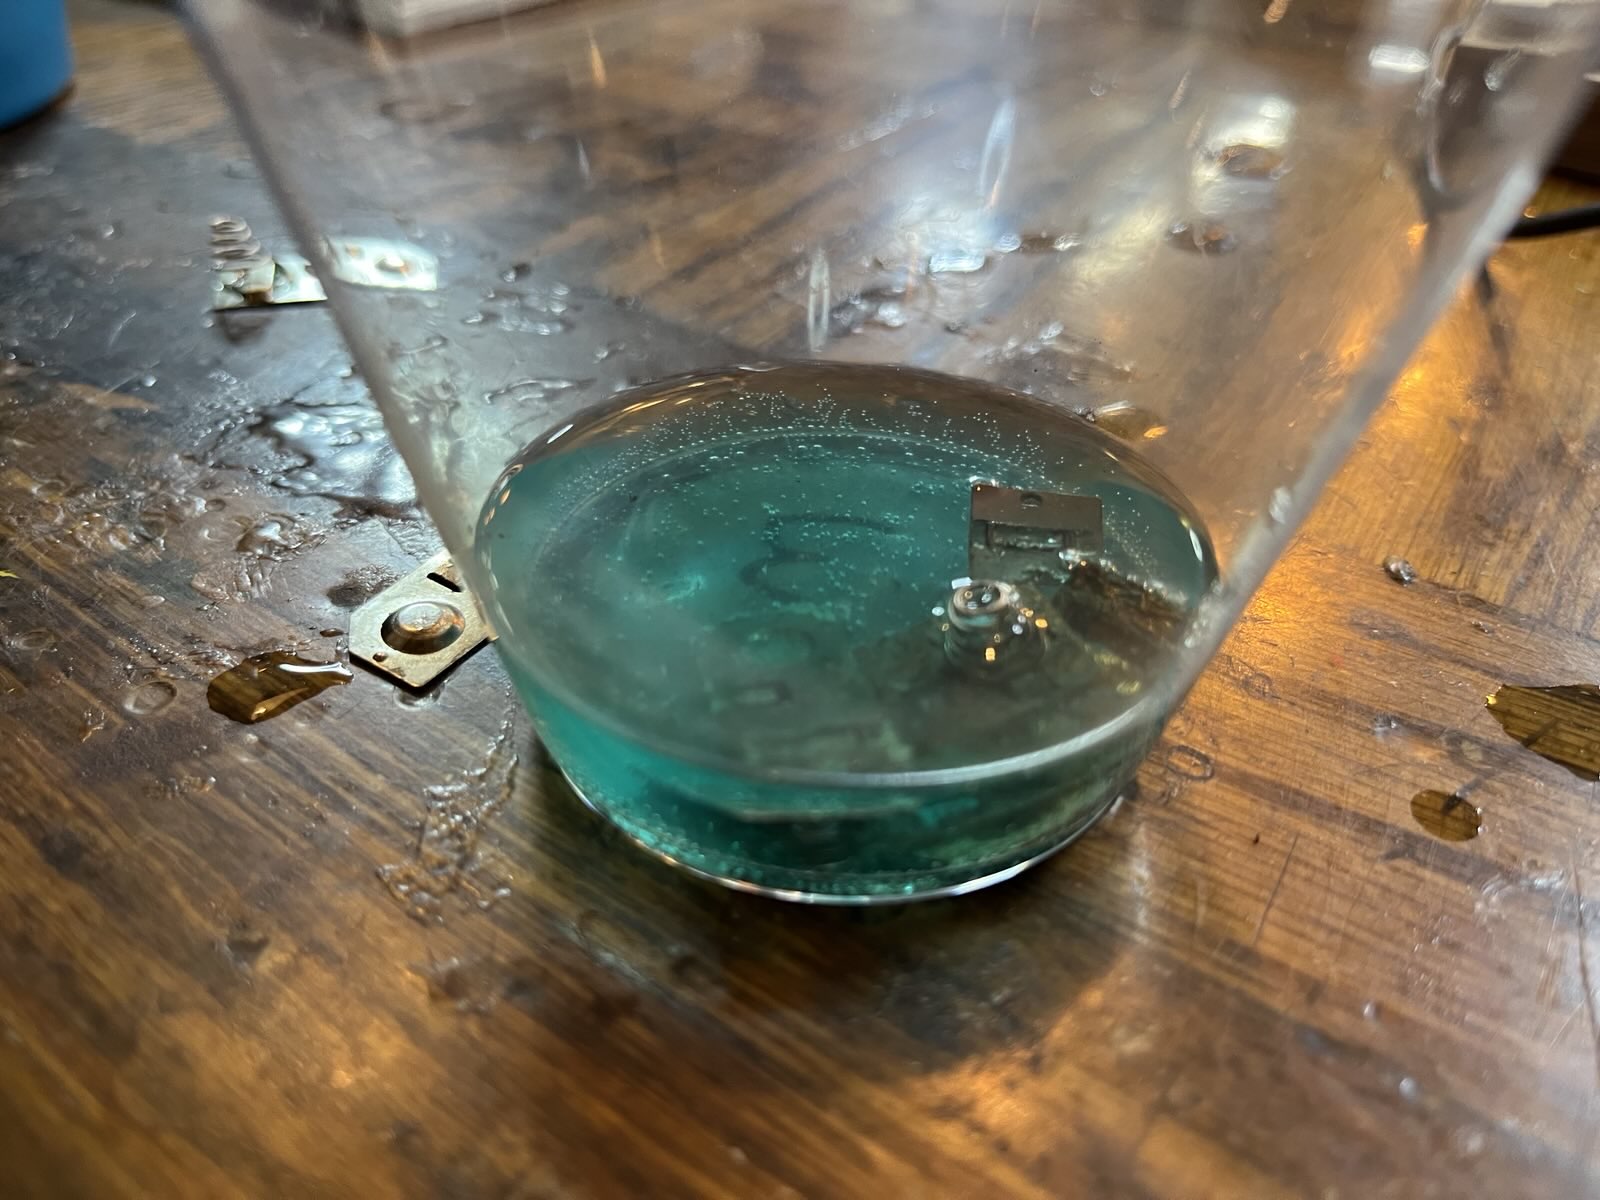
At some point, Zach gave us a little demo of removing corrosion from the battery terminals using vinegar. The acid eats away at the corroded bits in a bubbly reaction. These parts were too far gone to use, but Zach had plenty of spares.
I didn't take many photos of the actual process. Re-assembly went pretty quickly, with a few key pointers from Zach about tricky placements and order-of-operations. I appreciate the care taken to make sure our new front "glass" and screens were installed free of dust and fingerprints!
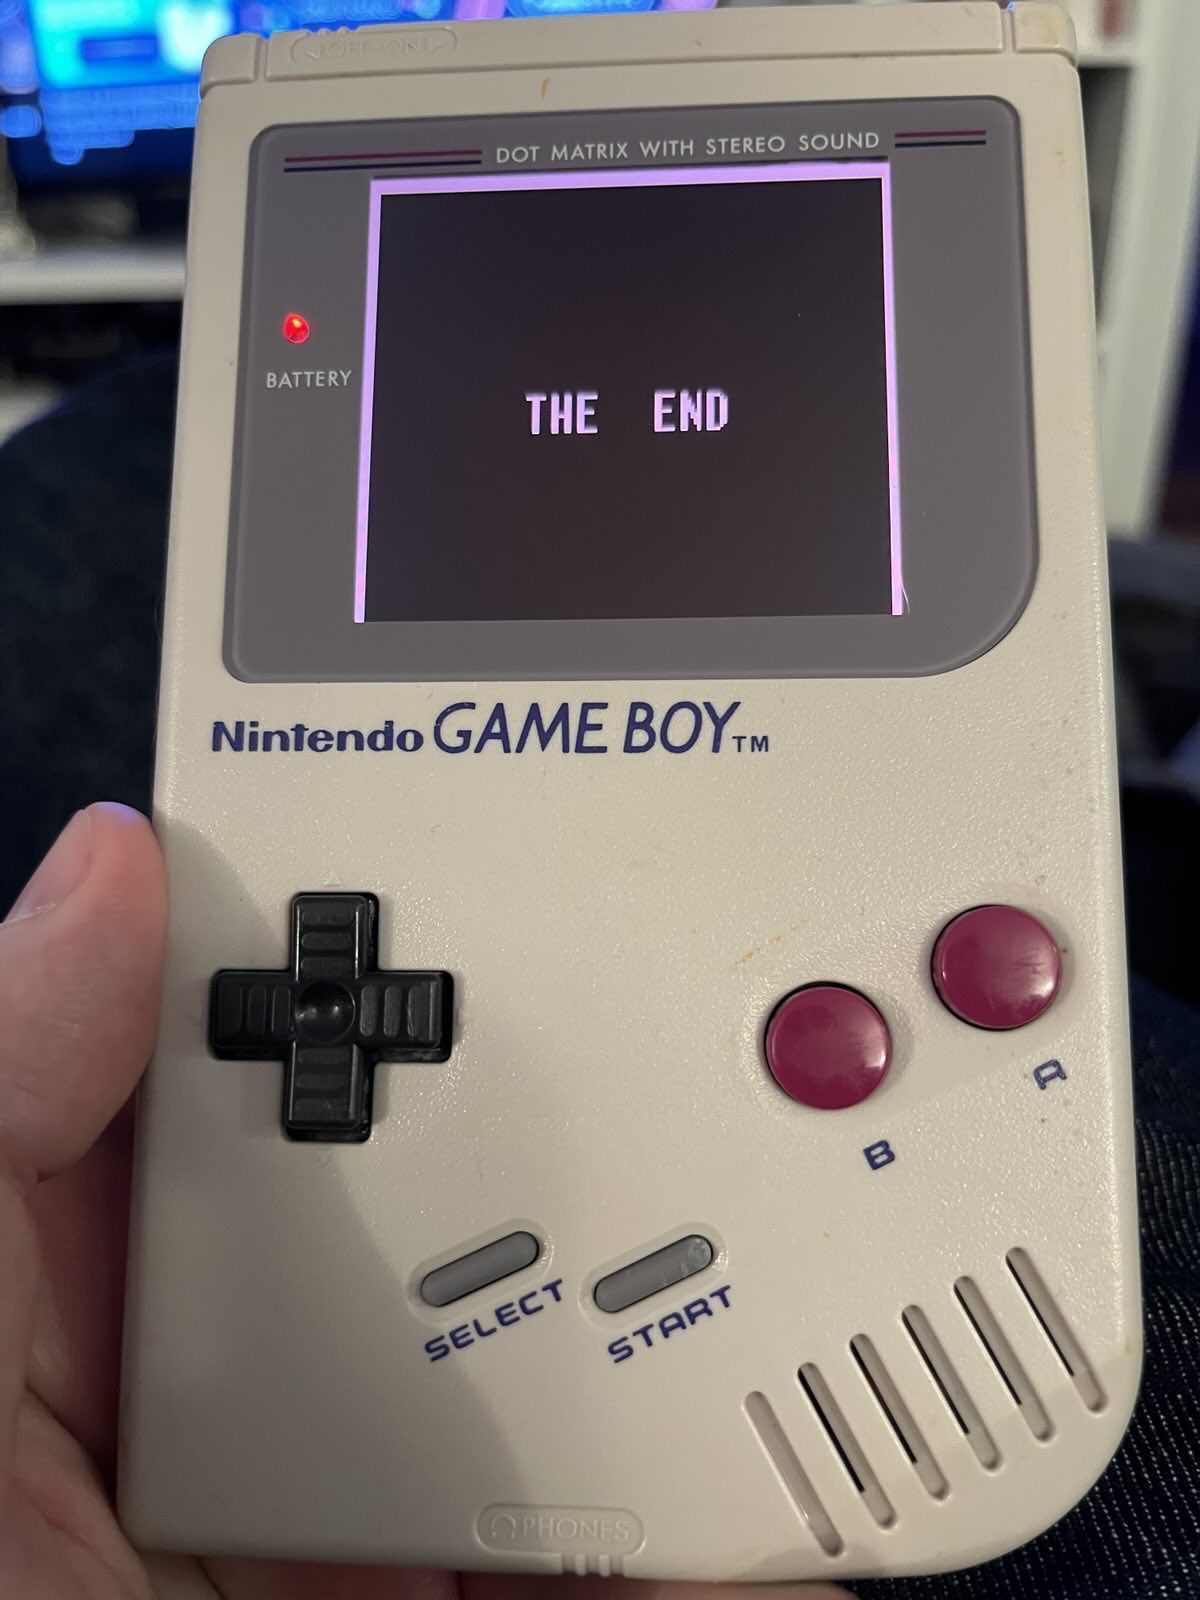
Finally, it was time to put in the batteries and put in a test game. While Zach had a lovely collection, I had made sure to bring my own.
There's definitely more I could say about the workshop, the people, the space. All were excellent! But for now, I'll leave you with an abrupt:
Likes

